
Related Manuals for ESAB Rustler EM 280C PRO


Summary of Contents for ESAB Rustler EM 280C PRO
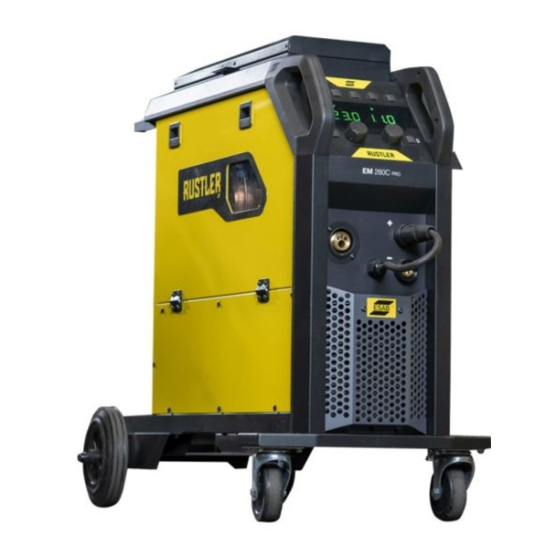
- Page 1 Rustler EM 280C PRO, EM 350C PRO, EM 350C PRO SYNERGIC Instruction manual Valid for: GC236-, GC237-, GC238-, OP250-XX XXXX 0463 930 001 GB 20230113...
-
Page 4: Table Of Contents
Inspection, cleaning and replacement .......................... ERROR CODES ....................Error code descriptions ........................ TROUBLESHOOTING ..................... CALIBRATION AND VALIDATION ..............10.1 Measurement methods and tolerances ............10.2 Requirements specifications and standards ....................... ORDERING SPARE PARTS 0463 930 001 - 4 - © ESAB AB 2023... - Page 5 TABLE OF CONTENTS ..........................WIRING DIAGRAM ......................... ORDERING NUMBERS ............................WEAR PARTS ............................. ACCESSORIES 0463 930 001 - 5 - © ESAB AB 2023...
-
Page 6: Safety
(SDSs). Safety precautions Users of ESAB equipment have the ultimate responsibility for ensuring that anyone who works on or near the equipment observes all the relevant safety precautions. Safety precautions must meet the requirements that apply to this type of equipment. The following recommendations should be observed in addition to the standard regulations that apply to the workplace. - Page 7 If equipped with ESAB cooler Use ESAB approved coolant only. Non-approved coolant might damage the equipment and jeopardize product safety. In case of such damage, all warranty undertakings from ESAB cease to apply. For ordering information, see the "ACCESSORIES" chapter in the instruction manual.
- Page 8 For further information contact the nearest ESAB dealer. ESAB has an assortment of welding accessories and personal protection equipment for purchase. For ordering information contact your local ESAB dealer or visit us on our website. 0463 930 001 - 8 -...
-
Page 9: Introduction
• Superb arc characteristic, optimized for most common based materials • MMA welding mode ESAB accessories for the product can be found in the "ACCESSORIES" chapter of this manual. Equipment The power source is supplied with: • 4 m black rubber gas hose •... -
Page 10: Technical Data
The duty cycle refers to the time as a percentage of a ten-minute period that you can weld or cut at a certain load without overloading. The duty cycle is valid for 40 °C / 104 °F, or below. 0463 930 001 - 10 - © ESAB AB 2023... -
Page 11: Eco Design Information
3B. Revision level (last digit of year and week number) 3C. Year & week produced (last two digits of year and week number) 3D. Sequential number system (each week starts with 0001) 0463 930 001 - 11 - © ESAB AB 2023... -
Page 12: Installation
Position the power source so that cooling air inlets and outlets are not obstructed. WARNING! Electric shock! Do not touch the workpiece or the welding head during operation! Move instructions (No lifting) Mechanical lifting must be done with both outer handles. 0463 930 001 - 12 - © ESAB AB 2023... -
Page 13: Mains Supply
13 A 13 A 1eff Fuse 20 A 30 A 30 A anti-surge type C MCB 20 A 30 A 30 A Maximum recommended 100 m/330 ft. 100 m/330 ft. 100 m/330 ft. extension cord length Minimum recommended 4×2.5 mm 4×2.5 mm 4×2.5 mm extension cord size 0463 930 001 - 13 - © ESAB AB 2023... -
Page 14: Operation
4. Negative welding terminal: Return 10. Wire inlet adapter to use with Marathon Pac™ (optional) 5. Positive welding terminal: Welding cable 11. Wire feeding mechanism 6. Connection for shielding gas 12. Internal control panel 0463 930 001 - 14 - © ESAB AB 2023... -
Page 15: Recommended Maximum Current Values For Connection Cables Set
Check the recommended polarity for the welding wire you want to use. The polarity can be changed by moving the polarity changeover cable to suit the applicable welding process. 0463 930 001 - 15 - © ESAB AB 2023... -
Page 16: Turning The Mains Power On/Off
3) Insert a new wire spool into the unit and straighten out the new welding wire 10–20 cm. File away burrs and sharp edges from the end of the wire before inserting it into the feeder mechanism. 0463 930 001 - 16 - © ESAB AB 2023... -
Page 17: Changing Feed Rollers
When changing to a different type of wire, the wire guides may have to be changed to match the new type of wire. For information about the correct wire guides depending on wire diameter and type, see the WEAR PARTS appendix. 0463 930 001 - 17 - © ESAB AB 2023... -
Page 18: Inlet Wire Guides
2) Remove the middle wire guide (see Section 5.9.2 "Middle wire guide", page 18). 3) Unlock the outlet wire guide quick lock (A) by folding it out. 4) Remove the outlet wire guide (B). 0463 930 001 - 18 - © ESAB AB 2023... -
Page 19: Roller Pressure
When you hold the welding torch approx. 5 mm from the piece of wood (figure A) the feed rollers should slip. If you hold the welding torch approx. 50 mm from the piece of wood, the wire should be fed out and bend (figure B). 0463 930 001 - 19 - © ESAB AB 2023... -
Page 20: Control Panel
ON. The left display shows the letter IND and the right display shows the value. The knob (4) is used to change the value of the selected function. 0463 930 001 - 20 - © ESAB AB 2023... -
Page 21: Led Indicators Description
A process with synergic voltage and inductance, in relation to wire feed speed using predetermined synergic line programs providing stable arc performance. The process operates through short circuit, globular and spray droplet transfer mode. 0463 930 001 - 21 - © ESAB AB 2023... - Page 22 This function is applicable only in MIG/MAG Synergic. Time Selected time in the display for the spot and rest time in seconds. This function is applicable only in MIG/MAG Spot. 0463 930 001 - 22 - © ESAB AB 2023...
- Page 23 The overheating protection resets automatically when the temperature has fallen with in its normal working temperature. 2-stroke mode (welding without ending arc) 0463 930 001 - 23 - © ESAB AB 2023...
- Page 24 6 CONTROL PANEL 4-stroke mode (welding without ending arc) 0463 930 001 - 24 - © ESAB AB 2023...
-
Page 25: Internal Control Panel
This function is active in MIG applications only. Gas selection button This is used to select the proper gas type that is currently connected to the equipment in the internal control panel. 0463 930 001 - 25 - © ESAB AB 2023... -
Page 26: Menu Selection
Left diplay letter Function Default Right display settings Display value druing WFS/AMP welding Workpoint in synergic WFS/THI Unit (metric or imperial) MPM/IPM Trigger job select ON/OFF 0463 930 001 - 26 - © ESAB AB 2023... -
Page 27: Mig Spot
Spot time is a time when the arc will be enabled after pressing the trigger. Rest time (DWE) Rest time is used to define time without arc between spot welds. 0463 930 001 - 27 - © ESAB AB 2023... -
Page 28: Hidden Functions For Mig Spot
The arc force function determines how the current changes in response to variations in arc length during welding. Use a low value of arc force to get a calm arc with little spatter and use a high value to get a hot and digging arc. 0463 930 001 - 28 - © ESAB AB 2023... -
Page 29: Hidden Functions For Mma
This function enables viewing the software versions of the connected system. Reset (RES) This function resets to the factory default settings. All saved jobs will be deleted as a result of the reset. 0463 930 001 - 29 - © ESAB AB 2023... -
Page 30: Maintenance
Area to maintain Every 3 months Clean or replace Clean weld terminals. Check or replace weld unreadable labels. cables. Every 6 months Clean inside equipment. Use dry compressed air with reduced pressure. 0463 930 001 - 30 - © ESAB AB 2023... -
Page 31: Power Source
Blow the wire guide clean regularly and clean the contact tip. After cleaning and perform testing according to IEC 60974-4. Follow the procedure in section “After repair, inspection and test” in the Service manual. 0463 930 001 - 31 - © ESAB AB 2023... -
Page 32: Error Codes
"Err" followed by the error code number shown in the display. Screens Error code descriptions Error codes that the user can handle are listed below. If any other error code appears, contact an authorised ESAB service technician. Error code Description Err 002... - Page 33 2. Check the wire pressure setting and adjust if needed. 3. Check the drive rolls for wear and replace if needed. 4. Make sure the filler metal spool can rotate without much resistance. Adjust the brake hub if needed. 0463 930 001 - 33 - © ESAB AB 2023...
-
Page 34: Troubleshooting
Clean the liners and other mechanical parts of the wire feed mechanism, through the wire feed using pressurized air. mechanism Clean and adjust the roller pressure as per the table on the decal on the left side door. 0463 930 001 - 34 - © ESAB AB 2023... -
Page 35: Calibration And Validation
(TRMS, RMS or rectified arithmetic mean), significantly larger deviations are to be expected! The ESAB Rustler EM PRO welding power source presents the measured value in rectified arithmetic mean and should therefore not show any significant differences compared to other ESAB welding equipment, due to the measurement method. -
Page 36: Ordering Spare Parts
Spare parts and wear parts can be ordered through your nearest ESAB dealer, see esab.com. When ordering, please state product type, serial number, designation and spare part number in accordance with the spare parts list. -
Page 37: Wiring Diagram
APPENDIX APPENDIX WIRING DIAGRAM EM 280 PRO 0463 930 001 - 37 - © ESAB AB 2023... - Page 38 APPENDIX EM 350 PRO 0463 930 001 - 38 - © ESAB AB 2023...
-
Page 39: Ordering Numbers
* here. Make sure to use a manual with a serial number or software version that corresponds with the product, see the front page of the manual. Technical documentation is available on the Internet at: www.esab.com 0463 930 001 - 39 - © ESAB AB 2023... -
Page 40: Wear Parts
0446 080 882 0.9–1.6 mm (2 mm) 0445 830 881 (Euro) 0445 830 884 (Tweco) Wire diameter 0.070–3/32 in. 0445 822 002 0446 080 883 1.8–2.4 mm (3 mm) 0445 830 882 (Euro) 0463 930 001 - 40 - © ESAB AB 2023... - Page 41 0445 850 051 0445 850 052 Inlet wire guide Middle wire guide Outlet wire guide 0445 830 886 (Tweco) 0445 822 001 0446 080 881 (2 mm) 0445 830 885 (Euro) 0463 930 001 - 41 - © ESAB AB 2023...
-
Page 42: Accessories
User Interface protective cover 0700 401 024 heater kit 0700 006 902 Electrode holder kit, Handy 300, OKC 50, 3 m 0700 006 888 Electrode holder kit, Handy 300, OKC 50, 5 m 0463 930 001 - 42 - © ESAB AB 2023... - Page 43 APPENDIX 0463 930 001 - 43 - © ESAB AB 2023...
- Page 44 For contact information visit http://esab.com ESAB AB, Lindholmsallén 9, Box 8004, 402 77 Gothenburg, Sweden, Phone +46 (0) 31 50 90 00 http://manuals.esab.com...
Need help?
Do you have a question about the Rustler EM 280C PRO and is the answer not in the manual?
Questions and answers