
Related Manuals for Owon DGE2000 Series


Summary of Contents for Owon DGE2000 Series
- Page 1 DGE2000 Series Dual-Channel Arbitrary Waveform Generator User Manual For product support, visit:www.owon.com.hk/download...
- Page 2 LILLIPUT Company. Fujian LILLIPUT Optoelectronics Technology Co., Ltd. No. 19, Heming Road Lantian Industrial Zone, Zhangzhou 363005 P.R. China Tel: +86-596-2130430 Fax: +86-596-2109272 Web: www.owon.com E-mail: info@owon.com.cn...
- Page 3 General Warranty We warrant that the product will be free from defects in materials and workmanship for a period of 3 years from the date of purchase of the product by the original purchaser from our company. The warranty period for accessories such as probes, battery is 12 months.
-
Page 4: Table Of Contents
Table of Contents 1.General Safety Requirement ............1 2.Safety Terms and Symbols ............... 2 3.General Inspection ................3 4.Quick Start ..................4 Front Panel Overview ........................4 Rear Panel Overview ........................5 Power On ............................. 6 User Interface ..........................6 5.Panel Operation ................. - Page 5 FSK (Frequency Shift Keying) ..................31 Utility Function Setting ......................32 Display Settings ......................32 Brightness Control ....................32 Screen Saver ......................32 Separator ......................... 33 CH1/2 Settings ........................ 33 System Settings ......................34 Language ......................... 34 Beeper ........................34 USB Device Type ....................
-
Page 6: General Safety Requirement
1.General Safety Requirement 1. General Safety Requirement Before any operations, please read the following safety precautions to avoid any possible bodily injury and prevent this product or any other products connected from damage. In order to avoid any contingent danger, this product is only used within the range specified. -
Page 7: Safety Terms And Symbols
2.Safety Terms and Symbols 2. Safety Terms and Symbols Safety Terms Terms in this Manual. The following terms may appear in this manual: Warning: Warning indicates the conditions or practices that could result in injury or loss of life. Caution: Caution indicates the conditions or practices that could result in damage to this product or other property. -
Page 8: General Inspection
3.General Inspection 3. General Inspection After you get a new generator, it is recommended that you should make a check on the instrument according to the following steps: 1. Check whether there is any damage caused by transportation. If it is found that the packaging carton or the foamed plastic protection cushion has suffered serious damage, do not throw it away first till the complete device and its accessories succeed in the electrical and mechanical property tests. -
Page 9: Quick Start
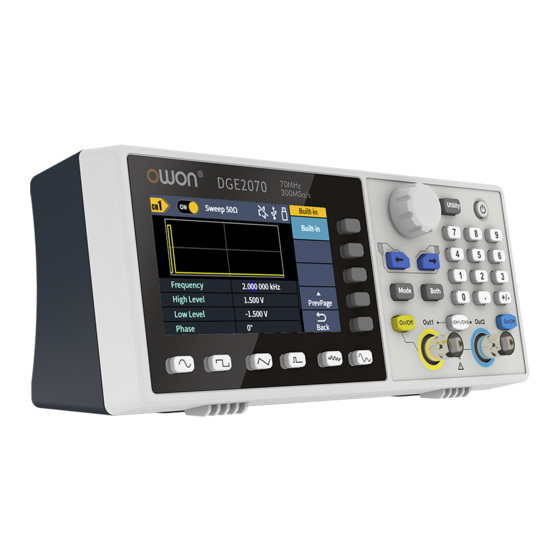
4.Quick Start 4. Quick Start Front Panel Overview Figure 4-1: Front Panel Overview Display the user interface Menu Includes 5 keys to activate the corresponding menu selection keys Operation Mode:output the modulated waveform keys Both:Display the editable parameters of both channels. Knob Change the currently selected value, also used to select the arbitrary waveform types and arb data file name. -
Page 10: Rear Panel Overview
4.Quick Start On/Off button Turns the output of the CH2 channel on or off. When the output is turned on, the backlight of the button lights up. 10 Out 2 Output CH2 signal 11 CH1/CH2 Switch channel displayed on the screen between CH1 and 12 Out 1 Output CH1 signal 13 On/Off button Turns the output of the CH1 channel on or off. -
Page 11: Power On
4.Quick Start Power On (1) Connect the instrument to an DC power source using the power cord supplied with the accessory. Warning: To prevent electric shock, make sure the instrument is properly grounded. (2) Press the power button on the front panel. The startup screen will display. User Interface Figure 4-3: User Interface Display channel name... -
Page 12: Panel Operation
5.Panel Operation 11 Amplitude / high level, depending on the right highlighted menu item Frequency/Period, depending on the highlighted menu item on the right 13 Display current waveform 5. Panel Operation Channel Setting Select the channel for configuration Before configuring waveform parameters, you must first select the channel you want to configure. -
Page 13: Turn On/Off Channel Output
5.Panel Operation Turn on/off channel output Press CH1 On/Off or CH2 On/Off on the front panel to turn on/off the corresponding channel output. The backlight of the button will light up when it is set to output. Waveform Setting Sine, square, ramp, pulse, noise or arbitrary waves can be set and output. Press the waveform selection button on the front panel: sine , square , ramp... -
Page 14: Set The Frequency/Period
5.Panel Operation Set the frequency/period ⚫ Press CH1/CH2 , Select Display CH1 channel. ⚫ Press the On/Off button on the CH1,enable channel CH1. ⚫ Press the Frequency/Period softkey, the selected menu item is highlighted in white, and a cursor will display on the corresponding parameter item in Parameter 1. -
Page 15: Set The High Level
5.Panel Operation offset. Turn the knob to change the value directly, or use the numeric keypad to input the desired value and choose the unit. Set the high level Press the Amplitude/High Level softkey to confirm whether the High Level menu item is highlighted;... -
Page 16: Output Ramp Wave
5.Panel Operation Output Channel Load switch Current signal Period High low - level Setting menu of Square signal Square Parameter 1 Parameter 2 Parameter 3 Parameter 4 Figure 5-4: Square wave user interface Output Ramp Wave Press , the screen displays the user interface of the ramp wave. The Ramp waveform parameters can be set by operating the Ramp setting menu on the right. -
Page 17: Set The Symmetry
5.Panel Operation Parameter 5 Figure 5-5: Ramp wave user interface Set the symmetry Press the Symmetry softkey, the Symmetry menu item is highlighted. In Parameter 5 of Figure 5-5, a blinking cursor appears in the parameter value of symmetry. Turn the knob to change the value directly, or use the numeric keypad to input the desired value and choose the unit. -
Page 18: Set The Pulse Width/Duty Cycle
5.Panel Operation Offset/Low Level, Phase, Pulse Width/Duty Cycle, Rising Time/Falling Time. To set the Frequency/Period, Amplitude/High Level, Offset/Low Level, Phase, please refer to Output Sine Wave on page 8. Output Channel Load switch Current signal Period High low - level Setting menu of Pulse signal Pulse... - Page 19 5.Panel Operation Figure 5-8: Set the pulse width...
- Page 20 5.Panel Operation Glossary Pulse Width PW is an abbreviation for pulse width and is divided into positive pulse width and negative pulse width. The positive pulse width is the time interval from 50% of the rising edge to 50% of the adjacent falling edge. The negative pulse width is the time interval from 50% of the falling edge to 50% of the adjacent rising edge.
-
Page 21: Set The Rising/Falling Time
5.Panel Operation Set the rising/falling time Press the Rising/Falling softkey, the chosen menu item is highlighted. Press the Rising/Falling softkey to switch between Rising Time and Falling Time. In Parameter 6 of Figure 5-7, a blinking cursor appears in the parameter value. Turn the knob to change the value directly, or use the numeric keypad to input the desired value and choose the unit. -
Page 22: Select Build-In Wave (Including Dc)
5.Panel Operation Output Channel Load switch Current signal Period High low - level Setting menu of Arbitrary signal Arbitrary Parameter 1 Parameter 2 Parameter 3 Parameter 4 Figure 5-10: Arbitrary wave user interface Select build-in wave (including DC) There are 152 types of waveforms built in the generator, the number of waveform points is 8192 points, and the highest upper limit frequency is 15MHz. - Page 23 5.Panel Operation Name Description Common Direct current Absolute sine AbsSine Absolute half-sine AbsSineHalf AmpALT Gain oscillation curve AttALT Attenuation oscillation curve GaussPulse Gauss pulse NegRamp Negative ramp NPulse Negative pluse PPulse Positive pluse SineTra Sine-Tra wave SineVer Sine-Ver wave StairDn Stair downward StairUD Stair upward/downward...
- Page 24 5.Panel Operation Bessely Type II Bessel function Cauchy Cauchy distribution Cubic function Error function Erfc Remnant error function ErfcInv Anti-complement error function ErfInv Inverse error function Dirichlet Dirichlet function ExpFall Exponential decline function ExpRise Exponential rise function Laguerre Four Laguerre polynomials Laplace Laplace distribution Legend...
- Page 25 5.Panel Operation SecH Hyperbolic secant Sinc Sinc function SinH Hyperbolic sine Sqrt Square root function Tangent function TanH Hyperbolic tangent ACos Inverse cosine function ACosH Inverse hyperbolic cosine function ACot Anti-cotangent function ACotCon Inverse cotangent function ACotPro Raised inverse cotangent function ACotH Inverse hyperbolic cotangent function ACotHCon...
- Page 26 5.Panel Operation Triang Triangle window, also call Fejer window TukeyWin Tukey window Engineering Window Butterworth Butterworth filter Combin Combined function CPulse C-Pulse signal CWPulse CW pulse signal RoundHalf Half-round wave BandLimited Band limited signal BlaseiWave Blasting vibration "time-vibration speed" curve Chebyshev1 Type I Chebyshev filter Chebyshev2...
-
Page 27: File Sore Syetem
5.Panel Operation File Sore Syetem Supports communication with a computer via a USB port. Using the Waveform Editor software installed on the computer, the signal generator can be operated on the computer to control the output and write the file to the signal generator. - Page 28 5.Panel Operation Write and Recall waveform We can use the Line Draw, Hand Draw and Point Edit mode in the Waveform Editor to edit the required waveform, and save and display it on the instrument by writing. (1) Under Waveform Editor software interface, Click "Write waveform lcon "...
-
Page 29: Generate Sweep (Sweep)
5.Panel Operation Generate Sweep (Sweep) In sweep mode, the generator varies its output from the start frequency to the stop frequency within the specified sweep time. Sweep can be generated by Sine, Square, Ramp or Arbitrary wave (except DC). Type Load Sweep time Sweep... -
Page 30: Generate Burst (Burst)
5.Panel Operation sweep for which the frequency changes from the start frequency to stop frequency. The range is from 1ms to 500s. (5) Start frequency and stop frequency are the upper and lower limits of the frequency for frequency sweep. The generator sweeps from the start frequency to the stop frequency and then returns back to the start frequency. - Page 31 5.Panel Operation Type Load Burst time Burst signal Parameter 1 Parameter 2 Figure 5-12: N-Cycle burst user interface (1) When the output signal is Sine, Square, Ramp, Pulse or Arbitrary wave (except DC), press the front panel Mode function key ,then press the Burst to enter the burst mode.
-
Page 32: Output The Modulated Waves
5.Panel Operation (4) Burst trigger source could be internal, external or manual. The generator will generate a burst output when a trigger signal is received and then wait for the next trigger. Press the Trigger to select the source. Internal means using the internal trigger source. The generator can only output N-cycle burst and the burst frequency is determined by the burst period. - Page 33 5.Panel Operation Type Load Carrier wave Modulating wave Parameter 1 Parameter 2 Parameter 3 Figure 5-13: AM user interface How to set the parameters of AM (1) Press the Mode function key, then press the AM softkey to enter the AM user interface.
-
Page 34: Fm (Frequency Modulation)
5.Panel Operation Glossary AM frequency The frequency of the modulating waveform. Modulation Depth The amplitude range of modulating waveform. In 0% modulation, the output amplitude is half of the specified value. In 100% modulation, the output amplitude is equal to the specified value. For an external source, the depth of AM is controlled by the voltage level of the signal connected to the Mod/FSK/Trig connector at the rear panel. -
Page 35: Pm (Phase Modulation)
5.Panel Operation parameters of the carrier wave. Press Mode to return to the modulation mode interface. (4) Select modulating wave shape: Press the Shape softkey, then press the Sine, Square, Ramp, Noise, or Arb softkey to select the modulating wave. (5) Set modulating wave frequency: Press the Frequency softkey to set the modulating wave frequency. -
Page 36: Fsk (Frequency Shift Keying)
5.Panel Operation The carrier wave can be Sine, Square, Ramp, or Arbitrary wave (except DC). Press , or to select a desired carrier wave shap. (3) Set carrier wave parameters: Press the wave shap key of the selected carrier wave to display the waveform and parameters of the carrier wave. -
Page 37: Utility Function Setting
5.Panel Operation (1) Press the Mode function key, press the NexePage softkey,then press the PM softkey to enter FSK user interface. (2) Select carrier wave shape: The carrier wave can be Sine, Square, Ramp, or Arbitrary wave (except DC). Press , or to select a desired carrier wave shap. -
Page 38: Separator
5.Panel Operation (1) Press the front panel Utility function key, press the Display softkey. (2) Press the ScrSaver softkey to select On or Off. (3) At On status, you can set the screen saver time. Turn the knob to adjust the value on the current cursor, use the direction key to move cursor left or right, or use the numeric keypad to enter the parameter and... -
Page 39: System Settings
5.Panel Operation of two channel signals. System Settings Language (1) Press the front panel Utility function key, press the System softkey. (2) Press the Language softkey to switch the display language. Beeper When the beeper is turned on, the beeper sounds when users operate the front panel or when an error occurs. - Page 40 5.Panel Operation Amplitude/Offset 1 Vpp / 0 Vdc Basic Waveform Factory Setting Frequency 1 kHz Period 1 ms Amplitude 1 Vpp Offset High Level 500 mV Low Level -500 mV Phase 0° Ramp Wave Symmetry Pulse Width 200 us Pulse Duty Cycle Pulse Rising Time 1.953125 us Pulse Falling Time...
-
Page 41: Firmware Update
5.Panel Operation Sweep Type Linear Start Frequency 100. Hz Stop Frequency 1 kHz Center Frequency 550 Hz Frequency Span 900 Hz Burst Factory Setting Burst Period Number of Cycles Trigger Source Internal Utility Factory Setting Backlight Screen Saver Screen Saver Time 30 Minute Thousand Separator Space... -
Page 42: Troubleshooting
6.Troubleshooting displayed. 5. After finished the upgrade, the instrument will shut down automatically. Press the button to power on the instrument(Press Utility to check whether the version is the desired target version) 6. Troubleshooting 1. The screen is still black and there is no display after you press the power switch, please follow the steps below: ⚫... -
Page 43: Specification
7.Specification 7. Specification All technical specifications are guaranteed when the following conditions are met, unless otherwise stated. ⚫ The signal generator must be operated continuously for more than 30 minutes at the specified operating temperature (20° C to 30° C) to meet these specifications;... -
Page 44: Amplitude Characteristics
7.Specification Frequency stability ± 30 ppm at 0± 40℃ Frequency aging ± 30 ppm per year rate Amplitude Characteristics Amplitude Characteristics (not specifically labeled, the load defaults to 50Ω) 2mVpp ~ 20Vpp(≤ 10MHz)High Z 2mVpp ~ 10Vpp(≤ 35MHz)High Z DGE2035 1mVpp ~ 10Vpp(≤... -
Page 45: Modulation Characteristics
7.Specification Typical (0dBm, 10kHz offset) Phase noise 10MHz: ≤-110dBc/Hz Square Rise/fall time < 20ns Jitter (rms), typical (1Vpp, 200ps + 30ppm 50Ω) Overshoot < 5% Ramp < 1% of peak output Linearity (typical 1 kHz, 1 Vpp, symmetry 50%) Symmetry 0% to 100% Pulse DGE2035 67 ns to 500 s... -
Page 46: Sweep Characteristics
7.Specification Carrier Sine wave, square wave, ramp wave, arbitrary wave (except Modulated signal Internal source Internal modulation Sine wave, square wave, ramp wave, white noise waveform Internal modulation 2 mHz to 100 kHz frequency 2 mHz ≤ offset < carrier frequency Frequency offset Carrier Sine wave, square wave, ramp wave, arbitrary wave (except... -
Page 47: Burst Characteristics
7.Specification Burst Characteristics Burst Characteristics Sine wave, square wave, ramp wave, pulse wave and arbitrary Waveform wave (Except DC) Types N-cycle N-cycle trigger Internal, manual source 2 mHz ≤ Offset ≤ Maximum frequency of corresponding carrier /2 Carrier frequency 58 ns ~ 500 s(Min = Cycles * Period) DGE2035 N-cycle trigger cycle 29 ns ~... -
Page 48: Appendix
8.Appendix 8. Appendix Appendix A: Accessories ⚫ 1 ×DC power adapter ⚫ 1 × USB power cable ⚫ 1 × Quick Guide ⚫ 1 × BNC/Q9 cable ⚫ 1 × BNC to alligator cable ⚫ 1 × USB communication cable Appendix B: General Care and Cleaning General Maintenance Do not store or leave the instrument where the liquid crystal display will be exposed to...
Need help?
Do you have a question about the DGE2000 Series and is the answer not in the manual?
Questions and answers
how to chage laguage
To change the language on the Owon DGE2000 Series:
1. Press the front panel Utility function key.
2. Press the System softkey.
3. Press the Language softkey to switch the display language.
This answer is automatically generated