Table of Contents
Advertisement
Quick Links
Advertisement
Table of Contents

Related Manuals for Grundig GSBSPDM4FVX


Summary of Contents for Grundig GSBSPDM4FVX
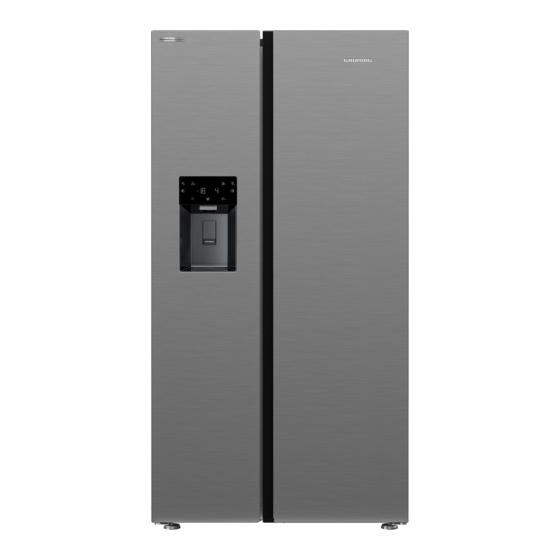
- Page 1 Refrigerator User Manual GSBSPDM4FVX 58 7660 0000/AA...
- Page 3 Dear Customer, Please read this manual before using the product. Thank you for choosing this product. We would like you to achieve the optimal efficiency from this high quality product which has been manufactured with state of the art technology. To do this, carefully read this manual and any other documentation provided before using the product and keep it as a reference.
-
Page 4: Table Of Contents
1 Safety Instructions 6.2 Indicator panel ......23 1.1 Purpose of usage ....3 6.3Deodoriser Module ....26 1.2 Safety of children, vulnerable 6.4 Humidity controlled persons and pets ......3 crisper(FreSHelf) ......26 1.3 Electrical safety ....4 (This feature is optional) ....26 1.4 Handling Safety ....4 6.5 Blue light/VitaminCare 1.5 Installation Safety .....4 Technology ........27... -
Page 5: Safety Instructions
Safety Instructions • This section includes the safety - In hostels, or similar environments, instructions necessary to prevent - In catering services and similar non- the risk of personal injury or material retail applications. damage. This product shall not be used in open •... -
Page 6: Electrical Safety
Safety instructions • When unplugging the appliance, don’t Store the product so that it shall not be hold the power cord, but the plug. tipped over. • When positioning the appliance, Do not allow children to play with the ensure the supply cord is not scrapped product. -
Page 7: Operational Safety
Safety instructions fuse with a rating of 10 A – 16 A. Our floor covers under the product. This company shall not be responsible for may cause risk of fire as a result of the damages that shall be incurred inadequate ventilation! as a result of operating the product •... - Page 8 Safety instructions • Do not place a source of flame (e.g. • Do not store explosive materials such as candles, cigarettes, etc.) on the product aerosol cans with flammable materials or in the vicinity of it. inside the product. • Do not place cans containing fluids over •...
-
Page 9: Maintenance And Cleaning Safety
Safety instructions • The cooling system in your product 1.7 Maintenance and contains R600a refrigerant. The cleaning safety refrigerant type used in the product is • Do not pull by the door handle if you specified in the the type label. This gas shall move the product for cleaning is flammable. -
Page 10: Environmental Instructions
Environmental instructions 2.1 Compliance with the WEEE 2.3 Package information Directive and Disposing Packaging materials of the of the Waste Product: product are manufactured from recyclable materials in This product complies with EU WEEE accordance with our National Directive (2012/19/EU). This product Environment Regulations. -
Page 11: Your Refrigerator
Your Refrigerator Freezer compartment Glass shelves Cooler compartment Cooler compartment door shelves Frozen food storing compart- Egg Holder ments Bottle shelf Freezer compartment glass Adjustable stands shelf Crispers Icematic The dairy (cold storage) bin Ice storage box Bottle shelf Ice-maker decorative lid Freezer compartment door shel- May not be available in all models *Optional: Figures in this user guide are schematic and may not be... -
Page 12: Installation
Installation 4.1 The right place for installation WARNING: : If the door span is too narrow for the Read the “Safety product to pass, remove the Instructions” section first! door and turn the product sideways; if this does not work, contact the authorized Your product requires adequate air service. -
Page 13: Adjustment Of The Feet
Installation 4.3 Adjustment of the feet If the product is not in balanced position, adjust the front adjustable stands by rotating right or left. Attach 2 plastic wedges on the Fixing nut ventilation cover as shown in the figure. Fixing screw Refrigerator / User Guide 11 / 52EN... - Page 14 Installation In order to adjust the doors vertically, •Loosen the fixing nut at the bottom •Screw adjusting nut (CW/CCW) according to the position of the door •Tighten the fixing nut for the final position In order to adjust the doors horizontally, •...
-
Page 15: Electrical Connection
Installation 4.5 Water connection 4.4 Electrical connection (Optional) WARNING: Do not WARNING: use extension or multi Unplug the pro- sockets in power duct and the water pump (if connection. available) during connection. The product’s water mains, filter and WARNING: Damaged carboy connections must be rendered power cable must be by authorizer service. -
Page 16: Connecting Water Hose To The Product
Installation Water filter (1 piece *Optional): Used to connect the mains water to the product. Water filter is not required if carboy connection is available. 4.6 Connecting water hose to the product To connect the water hose to the pro- duct, follow the instructions below. -
Page 17: For Products Using Water Carboy
Installation Connect the faucet adaptor to the To avoid damaging, shifting or ac- water mains valve. cidentally disconnecting the hose, use the clips provided to fix the water hose appropriately. WARNING: After turning Attach the connector around the the faucet on, make sure water hose. -
Page 18: Water Filter
Installation 4.9.1.Fixing external filter Connect the other end of the wa- ter hose to the water pump by on the wall (Optional) pushing the hose into the pump’s hose inlet. WARNING: Do not fix the filter on the product. Check to see the following parts are supplied with your product’s model: Place and fasten the pump hose inside the carboy. -
Page 19: Internal Filter
Installation Attach the filter in upright position After the connection is established, it on the filter connecting apparatus, should look like the figure below. as indicated on the label. (6) Attach the water hose extending from the top of the filter to the product’s water connection adap- tor, (see 4.6.) 4.9.2.Internal filter... - Page 20 Installation Water line: Remove the vegetable bin to ac- cess the water filter. Remove the water filter by-pass cover by pulling. Carboy line: “Ice Off” indicator must be active while installing the filter. Switch the ON-OFF indicator using the “Ice” button on the screen. Refrigerator / User Guide 18 /52EN...
- Page 21 Installation A few drops of water may flow out after removing the cover; this is normal. Place the water filter cover into the mechanism and push to lock in place. Push the “Ice” button on the scre- en again to cancel the “Ice Off” mode.
-
Page 22: Preparation
Preparation Read the “Safety Instructions” section first! 5.1 What to do for energy saving Connecting the product to electronic energy-saving systems is harmful, as it may damage the product. • Do not keep the refrigerator doors open for long periods. •... -
Page 23: First Operation
Preparation 5.2 First operation Before using your refrigerator, make sure the necessary preparations are made in line with the instructions in "Safety and environment instructions" and "Installation" sections. • Keep the product running without placing any food inside for 12 hours and do not open the door, unless absolutely necessary. -
Page 24: Operating The Product
Operating the Product Read the “Safety Instructions” section first! • Do not use any mechanical tools or any other tools than the recommendations of the manufacturer to speed up the thawing operation. • Do not use parts of your refrigerator such as the door or drawers as a support or a step. -
Page 25: Operation Of The Product
Operation of the Product Read the “Safety Instructions” section first! 6.2 Indicator panel Indicator panels may vary depending on the model of your product. Audial and visual functions of the indicator panel will assist in using the refrigerator. Quick Freeze Key Ice Maker On/Off Button Fault Condition Indicator Cooling Compartment OFF (Vacation) Function Key... - Page 26 Using the product 1. Quick Freezing Key The vacation mode will be activated When the quick freeze key is pressed, and the LED on the button will be lit. the LED on the key ( ) is illuminated “- -” shall be displayed on the Cooling and the quick freeze function shall Compartment temperature indicator be activated.
- Page 27 Using the product expired. After replacing the filter, press App is offered through App Store for and hold the key ( ) for 3 seconds to IOS devices, and through Play Store for turn off the filter replacement warning Android devices. LED.
-
Page 28: Deodoriser Module
Using the product 6.4 Humidity controlled 6.3Deodoriser Module crisper(FreSHelf) (OdourFresh +) *May not be available in all models (This feature is optional) The deodoriser module quickly eliminates the bad smells in your Thanks to the humidity controlled crisper, refrigerator before they permeate vegetables and fruits may be stored for a the surfaces. -
Page 29: Blue Light/Vitamincare
Using the product 6.5 Blue light/VitaminCare Technology *May not be available in all models For the blue light, Fruits and vegetables stored in the crispers that are illuminated with a blue light continue their photosynthesis by means of the wavelength effect of blue light and thus preserve their vitamin content. -
Page 30: Using The Water Fountain
Using the product 6.6 Using the water fountain 2. Release the arm after filling your glass with water as you desire. (This feature is optional) The first few glasses of water taken from the fountain will normally be warm. If the water fountain is not used for a long time, dispose of the first few glasses of water to get clean water. -
Page 31: Cleaning The Water Tank
Using the product Hold both sides of the water tank and remove at 45° angle. Remove and clean the water tank lid. Do not fill the water tank with fruit juice, fizzy beverages, alcoholic beverages or any other liquids incompatible for use in the water fountain. -
Page 32: Dairy (Cold Storage) Bin
Using the product Components of the water tank and water dispenser should not be washed in dishwasher. 6.9 Dairy (cold storage) bin *May not be available in all models “The dairy (cold storage) bin ” provides lower temperature within the refrigerator compartment. -
Page 33: Taking Ice / Water
Using the product 6.13 Taking ice / water WARNING: The product’s water system should be (Optional) connected to cold water To take water ( ) / ice cube ( ) / line only. Do not connect to fragmented ice ( ), use the display hot water line. -
Page 34: Drip Tray
Using the product 6.14 Drip tray pin is mounted properly. (Figure 2) Push downwards firmly, until there is (optional) no space left between the reservoir The water dripping from the water and the door plastic. (Figure 2) fountain accumulates on the drip tray; no water drainage is available. - Page 35 Using the product When using your refrigerator for the first time or when not using it for an extended period of time Ice cubes may be small due to air in the pipe af- ter connection, any air will be purged during normal use.
- Page 36 Using the product The water is filled with water over time in the lower zone of the water dispenser. It is recommended to clean the water within this zone periodi- cally. While the ice falls from the ice stora- ge reservoir, the sound is normal and does not indicate that the product is problematic.
-
Page 37: Freezing Fresh Food
Using the product • 6.16 Freezing fresh food Mark each food pack by writing the date on the package before freezing. • To preserve food quality, the This will allow you to determine the food items placed in the freezer freshness of each pack every time the compartment must be frozen as freezer is opened. -
Page 38: Recommendations For Storing Frozen Foods
Using the product Freezer Cooler Compartment Compartment Descriptions Setting Setting This is the default, recommended -18°C 4°C setting. These settings are recommended -20,-22 or -24°C 4°C for ambient temperatures exceeding 30°C. Press Rapid Freeze function 24 hours before placing the food, Rapid Freeze 4°C the product will reset to previous... -
Page 39: Placing The Food
Using the product 6.19 Placing the food 6.21 Illumination lamp Interior light uses a LED type lamp. Various frozen Contact the authorized service for any Freezer goods including problems with this lamp. compartment meat, fish, Lamp(s) used in this appliance cannot shelves ice cream, be used for house lighting. -
Page 40: Maintenance And Cleaning
Maintenance and cleaning surface and chrome-coated parts WARNING: Read the “Safety of the product. Chlorine will cause Instructions” section first! rust on such metallic surfaces. • Do not use sharp and abrasive WARNING: Unplug the tools, soap, house cleaning ma- refrigerator before cleaning terials, detergents, gas, gasoline,... -
Page 41: Cleaning Of The Products With Glass Doors
Maintenance and cleaning glasses against impacts and the surface with a micro-fiber cloth breakage. dampened with water and use dry As an additional safety precaution, polishing chamois. Always follow the a safety film has been applied to veins of the stainless steel. the rear surface of these glasses to prevent harm to the environment in 7.2 Cleaning of the Products... -
Page 42: Troubleshooting
Troubleshooting • The door is opened too frequently Check this list before contacting the service. >>> Take care not to open the Doing so will save you time and money. product's door too frequently. This list includes frequent complaints that are not related to faulty workmanship or •... - Page 43 Troubleshooting The refrigerator's operating noise is • The new product may be larger increasing while in use. than the previous one. Larger products will run for longer • The product's operating periods. performance may vary depending • The room temperature may on the ambient temperature be high.
- Page 44 Troubleshooting The freezer temperature is very • The cooler compartment low, but the cooler temperature is temperature is set to a very high adequate. degree. >>> Temperature setting of the cooler compartment has • The freezer compartment an effect on the temperature in temperature is set to a very the freezer compartment.
- Page 45 Troubleshooting • The product is not cleaned • The product's operating principles regularly. >>> Clean the interior involve liquid and gas flows. regularly using sponge, warm >>> This is normal and not a water and carbonated water. malfunction. • Certain holders and packaging There is sound of wind blowing materials may cause odour.
- Page 46 Troubleshooting • Fan may continue to operate when the the freezer door is open. WARNING: If the problem persists after following the instructions in this section, contact your vendor or an Authorized Service. Do not try to repair the product. Refrigerator / User Guide 44 /52EN...
- Page 47 Repairs to the product required as a result of faulty materials, defecti- ve components or manufacturing defects. • Functional replacement parts to repair a product. • The costs of a Grundig Approved Engineer to carry out the repair. What is not covered? • Transit and delivery damage. •...
- Page 48 Repairs necessary as a direct or indirect result of: -Accidental damage, misuse or abuse of a product. -An attempted repair of a product by anyone other than a Grundig Approved Engineer (the “Engineer”). -Installation or use of a product where such installation or use fails to meet the requirements contained in this guarantee or the User Instructions Booklet.
- Page 49 Optional extras, where available (i.e. extendable feet) are supplied on a chargeable basis only. Does Grundig offer replacements? This is a repair-only guarantee. On occasion, the Manufacturer may at its sole discretion, replace your product with a new product instead of carr- ying out a repair.
- Page 50 Please take a few moments to complete the details below, as you will need this information when you call us, or to use our online services. When you call us you may be required to input your serial number into your telephone keypad. For help please visit grundig.co.uk/support/mo- del-finder •...
- Page 51 Model number Serial number Purchased from Date of purchase For service under guarantee or for product advice please call our Contact centre Before requesting service please check the troubleshooting guide in the Operating Instructions booklet, as a charge may be levied where no fault is found, and even though your product may still be under guarantee.
- Page 52 Contact Us and choose a product support topic from the list of options. Complete the required details and click send message. Product registrations For UK and Republic of Ireland product registrations please visit grundig. co.uk/register. Refrigerator / User Guide 50 /52EN...
- Page 53 Grundig, and will void the warranty of the product. Refrigerator / User Guide...
- Page 54 Therefore, it is highly recommended that end-users refrain from the attempt to carry out repairs falling outside the mentioned list of spare parts, contacting in such cases authorized professional repairers or registered professional repairers. On the contrary, such attempts by end-users may cause safety issues and damage the product and sub- sequently cause fire, flood, electrocution and serious personal injury to occur.
- Page 55 Notes ......................................................................................................................................................................................................................................................................................................................................................................................................................................................................................................................................................................................................................................................................................................................................................................................................................................................................................................................................................................................................................................................................................................................................................................................................................................................................................................
- Page 56 Notes ......................................................................................................................................................................................................................................................................................................................................................................................................................................................................................................................................................................................................................................................................................................................................................................................................................................................................................................................................................................................................................................................................................................................................................................................................................................................................................................
Need help?
Do you have a question about the GSBSPDM4FVX and is the answer not in the manual?
Questions and answers