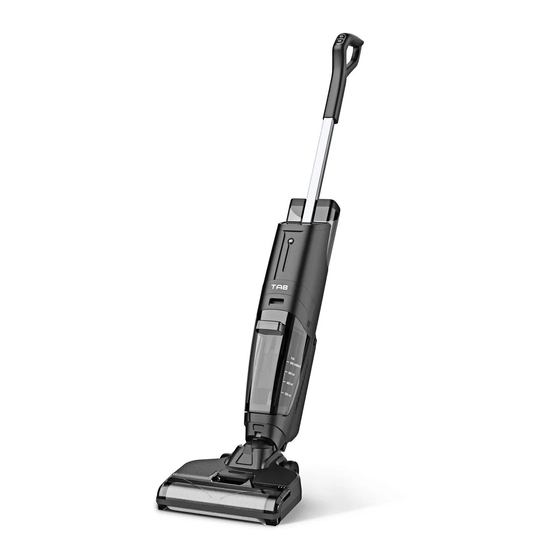
Summary of Contents for Tab T6-Pro
- Page 1 Product User Manual Model: T6-Pro Smart Cordless Wet Dry Vacuum Cleaner and Mop (Note: Please read this instruction carefully before operation to avoid danger or damage to the product.)
-
Page 2: Table Of Contents
Contents 1. Safety Instruction 2. Packing List 3. Packing Icon 4. Product Assembly 5. How to Use 6. Instructions for Icon of Host Screen 7. Product Care and Maintenance 8. Failure Recovery 9. Product Specifications... -
Page 3: Safety Instruction
Safety Instruction Safety Instructions Please read the following safety instructions. Make sure all conditions are compliant with the conventional safety precautions before operating the product. Please keep the instructions properly in case of temporary or urgent need. Any inappropriate operation beyond the instructions may cause damage to the product. Safety precautions related with host and accessories Cautions: 01. - Page 4 Safety Instruction Safety precautions related to rechargeable battery Danger! 01. Operating with special battery adapter is highly appreciated. Otherwise, there will be a risk of leakage, heating or cracking. 02. Causing circuit to battery or disassembling the battery is strictly prohibited. Otherwise, there will be a risk of leakage, heating or cracking.
-
Page 5: Packing List
Packing List Host Handle components Clean water tank Charging stand Power adapter Accessories storage box Roller brush Cleaning tools HEPA filter hex key There might be some differences in the attached accessories, which shall be subject to actual product received. -
Page 6: Packing Icon
Packing Icon Part name Switch key Self-cleaning key Handle components Clean water tank Screen Voice switch Battery Dirty water tank Machine body components Roller cover Tractor components Roller brush Adapter Charging stand... -
Page 7: Product Assembly
Packing Icon Tractor components Roller brush Scraper Caster Rear wheel Product Assembly 1.Assembly of Body and Handle Components As instructed in the Figure, insert the handle component in the top position corresponding to the machine body until you hear a “snap” sound. When removing, insert the hex key into the snaphole of the body until it reaches the bottom. - Page 8 Product Assembly 2.Installation of clean water tank components Please rotate counterclockwise to open the cover of the clean water tank and add an appropriate amount of clean water, and then rotate clockwise to tighten the cover. Please plug it in the corresponding position of the body in the direction shown in the figure. There is a snap positioning inside.
- Page 9 Product Assembly 3.Installation of dirty water tank components Please plug dirty water tank components into the corresponding position of the body in the direction shown in the figure. There is a snap positioning inside of dirty water tank components. The installation shall be completed once you hear the sound of “Click” after plugging in.
-
Page 10: How To Use
Product Assembly 5.Installation of roller brush cover Please plug the roller brush cover into corresponding buckle holes at the bottom of both sides of the floor brush components in the direction shown in the figure. The installation shall be completed once you hear the sound of “Click” after plugging in. buckle hole buckle hole How to Use... - Page 11 How to Use Note: ·Please do not add non-designated cleanser or disinfectant to avoid corrosion of the machine. ·Please add special cleanser according to the specified proportion, and do not add too much. ·Please do not add hot water over 60℃ to avoid deformation of the clean-water tank. 2.Start using 2.1 Step on the upper cover of the floor brush, tilt the machine body to a suitable angle.
- Page 12 How to Use 5.Dump the dirty-water tank 5.1 Hold down the button for disassembling the dirty-water tank and remove the dirty-water tank. (as shown in Figure 1) 5.2 Hold the handle of the dirty-water tank with one hand, and gently pull out the dirty-water tank cover with the other hand.
-
Page 13: Instructions For Icon Of Host Screen
How to Use 7.Voice closing/opening Press the voice button briefly to turn off/on the voice reminding function. voice switch Instructions for Icon of Host Screen Icon of battery power: The power is displayed in range of “0” to “100”, where “0”... -
Page 14: Product Care And Maintenance
Instructions for Icon of Host Screen Icon of water shortage of clean water tank: In case the clean water tank is short of water, the icon of “Water shortage” will flash on the machine interface, and there will a voice prompt “water shortage”. When refilling with water and restarting cleaning, the icon of “water shortage”... - Page 15 Product Care and Maintenance 3.Cleaning of dirty-water tank and filter screen 3.1 Remove the dirty-water tank, pull out the dirty-water tank cover, and take out the filter frame inside of dirty water tank slowly and clean up the solid waste inside of filter frame. 3.2 Brush the dirt on the dirty-water tank, dirty-water tank cover, filter, and filter frame with the attached cleaning tools, and rinse it with cold water.
-
Page 16: Failure Recovery
Failure Recovery Common failure Possible reason Solution Please reinstall to ensure that it is in Handle not installed in place place before use The main unit has no power or insufficient Please fully charge the main unit power before using it The rolling brush is not installed in place/the Main unit does not work rolling brush is entangled with hair and stops...


Need help?
Do you have a question about the T6-Pro and is the answer not in the manual?
Questions and answers