Table of Contents
Advertisement
Available languages
Available languages
Quick Links
Advertisement
Table of Contents

Related Manuals for Sabiana MB-CFP-ECM-B20


Summary of Contents for Sabiana MB-CFP-ECM-B20
- Page 1 KIT scheda MB-CFP-ECM-B20 MB-CFP-ECM-B20 board kit Ventilconvettore a Pavimento Trench Convector Floor CFP–ECM CSP-ECM IT – ISTRUZIONI DI MONTAGGIO E FUNZIONAMENTO EN – MOUNTING INSTRUCTIONS AND OPERATING LOGIC 03/2022 Cod. 4051465...
-
Page 2: Caratteristiche Tecniche
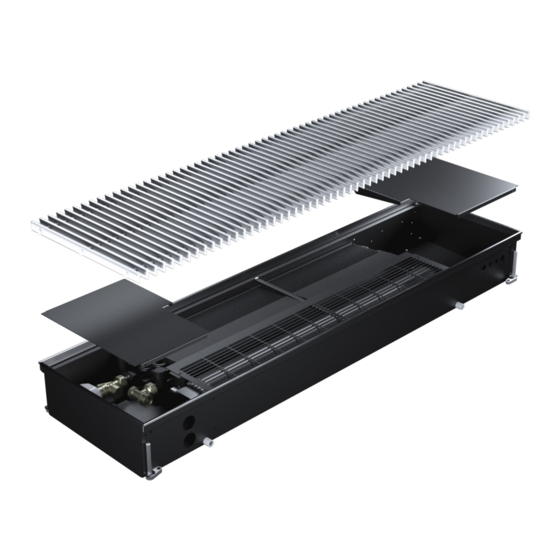
CARATTERISTICHE TECNICHE Comando motore per CFP-ECM Comando valvole on/off , tensione 230Vac Selezione impianto 2 tubi o 4 tubi con jumper MC1 Selezione con dip sw n1 , ventilazione continua o termostatata Gestione della sonda aria, con T-MB o a bordo fan coil Gestione della sonda di minima acqua caldo/ freddo Gestione dell’ingresso finestra Possibilità... - Page 3 COMPOSIZIONE DEL KIT MB-CFP 1 = Scatola di comando MB 7 = Sonda temperatura Aria in ripresa (T1) 2 = Fascette 8 = Sonda temperatura Acqua (T3) 3 = Manuale istruzioni 9 = Passacavi 4 = Scheda di comando CFP-ECM MB 10 = Cavo alimentazione 230 Vac 5 = Scheda interfaccia Modbus 11 = Cavo segnale 0÷10 Vdc...
-
Page 4: Scheda Elettronica
SCHEDA ELETTRONICA 0/10V RS485 MASTER/SLAVE 0-10V 10 - 0V DIP 1 ON T-MB WALL CONTROL RS485 CALDA (E1) FREDDA (E2) LEGENDA D1 = Dip Switch di configurazione RS485 = Morsetti 0/D-/D+ per il collegamento seriale RS485/Master-Slave E1 = Elettrovalvola acqua CALDA M9 = Connettore Comando T-MB E2 = Elettrovalvola acqua FREDDA CF = F2-F2 Contatto pulito finestra aperta /... - Page 5 IMPOSTAZIONE DIP DI CONFIGURAZIONE Posizione DEFAULT Termostatazione sulla valvola Termostatazione contemporanea e ventilazione continua Slave Master IMPOSTAZIONE JUMPER DI CONFIGURAZIONE JUMPER MC1 Selezione impianto 2 tubi o 4 tubi con CLOSED OPEN 2 PIPE 4 PIPE JUMPER MC1. INSTALLATION INSTALLATION Impianto 2 tubi = CHIUSO Impianto 4 tubi = APERTO JUMPER...
- Page 6 Gruppo di oltre 1000 2000 dimensioni fino a 1000 2000 4000 SCOSTAMENTI ± 0.5 ± 1 ± 1.5 ± 2 TOLLERANZA La SABIANA S.p.a. si riserva a termine di legge la proprietà del presente disegno con divieto di riprodurlo o comunicarlo...
- Page 7 SCHEMA ELETTRICO MB-CFP...
- Page 8 DETTAGLI COLLEGAMENTI Collegamento cavi di alimentazione Inserimento ferrite (fornita a corredo del 230V e segnale 0÷10 Vdc ventilatore in ventilconvettore) sul cavo di segnale 0÷10 morsettiera presente sullo sportello del Vdc (necessario doppio avvolgimento). ventilconvettore. Posizionamento sonda aria T1 Posizionamento sonda acqua T3 in batteria Collegamento bus RS485 Collegamento T-MB morsetti n°...
-
Page 9: Funzionamento Master-Slave
FUNZIONAMENTO MASTER-SLAVE Gestione di più apparecchi, in collegamento seriale, con il comando T–MB È possibile collegare più apparecchi fra loro e controllarli simultaneamente trasmettendo le impostazioni dal comando T–MB ad un’unica unità MASTER. Tutte le altre unità vengono definite SLAVE. Il funzionamento di ogni singolo apparecchio dipenderà, invece, dalle condizioni rilevate da ciascuno di essi in base alla temperatura rilevata. -
Page 10: Note Di Installazione
Collegamento con Master all’interno della rete CFP-ECM CFP-ECM CFP-ECM CFP-ECM CFP-ECM DIP 2 OFF DIP 2 ON DIP 2 ON DIP 2 ON DIP 2 ON °C AUTO Jumper Jumper T-MB Master Slave Slave Slave Slave D+ D- D+ D- D+ D- D+ D- D+ D-... - Page 11 con altri cavi di potenza o potenzialmente pericolosi quali i cavi dell’impianto di illumina- zione; - non posare i cavi di alimentazione a 12 Volt e di comunicazione vicino a barre di potenza, lampade di illuminazione, antenne, trasformatori, o tubazioni ad acqua calda o vapore;...
-
Page 12: Note Generali
9066331E 9066331E COMANDO A PARETE T–MB . 9066331e – NOTE GENERALI – Con il comando è possibile (Fig. 1): Fig. 1 1) accendere e spegnere l’apparecchio 2) impostare la velocità del ventilatore 3) impostare il Set di temperatura desiderato 4) impostare la modalità di funzionamento desiderata Segnalazioni del Comando (Fig. - Page 13 INSTALLAZIONE COMANDO Separare la parte frontale del comando dalla piastra posteriore premendo, con un cacciavite, la lin- guetta di bloccaggio posta sulla parte superiore del comando. Posizionare il pannello posteriore sul muro e segnare i punti di fissaggio. Predisporre i fori, posizionare i tas- selli nel muro e bloccare il pannello con viti.
- Page 14 COLLEGAMENTI ELETTRICI DEL COMANDO Il pannello comandi deve essere col- Main Board legato elettricamente alla scheda di potenza posta all’interno dell’appa- recchiatura elettrica dell’unità Fancoil rispettando la corrispondenza della numerazione comune ad entrambe T-MB le schede. P0 P0 10 0V Utilizzare 3 conduttori con sezione 0,5 mm NOTA: La lunghezza del cavo di...
- Page 15 UTILIZZO DEL COMANDO On/Off (Fig. “A”): Fig. “A” / Abb. “A” • Premendo il tasto ON/OFF il comando viene acceso. • Premendo nuovamente il tasto ON/OFF il comando viene spento. • L’indicazione dello stato “ON” o “OFF” viene visualizzata sul display.
- Page 16 IMPOSTAZIONE OROLOGIO (Fig. “E”) Fig. “E” • Premere il tasto “M”: il simbolo della modalità inizierà a lampeggiare. • Premere i tasti (+) o (-), fino alla selezione del simbolo orologio “ ”; Confermare con il tasto “M”. • Premendo nuovamente il tasto “+”...
- Page 17 TIMER Fig. “F” 1) Attivazione / Disattivazione (Fig. “F”): • Premere il tasto “M”; il simbolo della modalità di funzionamento inizierà a lampeggiare. • Premere il tasto (+) o (-) fino alla selezione del simbolo orologio “ ”; confermare con il tasto “M”. •...
- Page 18 2) Programmazione (Fig. “G”): • Premere il tasto “M”; Fig. “G” / il simbolo della modalità di funzionamento inizierà a lampeggiare. • Premere il tasto (+) o (-) fino alla selezione del simbolo orologio “ ”; confermare con il tasto “M”. •...
-
Page 19: Risparmio Energetico
RISPARMIO ENERGETICO La funzione energy saving viene attivata / disattivata attraverso la funzione “Energ” presente nel menù modalità di funzionamento. •Premere il pulsante “M”; la modalità di funzionamento lampeggia; • Utilizzare il tasto “ - ” fino a sele- zionare sul display la funzione “ Energ ”. - Page 20 FUNZIONI PER IL SERVICE Con questo menù è possibile verificare alcuni dei parametri del comando (valore delle sonde, stato del contatto fine- stra, eventuali allarmi). Premere i tasti “+” e “-” contemporanea- mente per 3 secondi con il comando in “OFF”. >...
- Page 21 FUNZIONI PER IL SERVICE Questo menù consente di modificare i parametri di funzionamento del termostato, del motore elettro- nico, della versione +/- 3 e di altri vari parametri (ciclo pompa, RESET). Con il comando in “OFF” premere i tasti M e Fan contemporaneamente per 3 secondi.
-
Page 22: Technical Characteristics
TECHNICAL CHARACTERISTICS Motor control for CFP-ECM ON/OFF valve control, power supply 230Vac Selection of 2 pipe or 4 pipe installation with MC1 jumper Selection with dip sw n1 , continious ventilation or termostatic control Management of the air probe, with T-MB or mounted on the fan coil unit Management of the hot/cold water low temperature cut-out thermostat Management of the imput circuit Possibility to create master/slave networks, MAX 20 fan coils... - Page 23 MB-CFP COMPOSITION KIT 1 = MB control box 7 = Return air probe (T1) 2 = Cable ties 8 = Water probe (T3) 3 = Instruction manual 9 = Plastic protections 4 = CFP-ECM MB control board 10 = Power supply 230 Vac 5 = Modbus Interface Board 11 = Signal cable 0÷10 Vdc 6 = T-MB Interface Board...
-
Page 24: Electronic Board
ELECTRONIC BOARD 0/10V RS485 MASTER/SLAVE 0-10V 10 - 0V DIP 1 ON T-MB WALL CONTROL RS485 CALDA (E1) FREDDA (E2) LEGEND D1 = Configuration Dip Switch RS485 = Clamps 0/D-/D+ for RS485 Master-Slave serial connection E1 = HOT water valve actuator (230V) Connector for T-MB control M9 = E2 = COLD water valve actuator (230V) -
Page 25: Setting Dip Switches
SETTING DIP SWITCHES Position DEFAULT Thermostatic control on the valve Simultaneous thermostatic control and continuous ventilation Slave Master SETTING CONFIGURATION JUMPER JUMPER MC1 Selection of 2-pipe or 4-pipe CLOSED OPEN 2 PIPE 4 PIPE installation with JUMPER MC1. INSTALLATION INSTALLATION 2 pipe installation = CLOSED 4 pipe installation = OPEN JUMPER... - Page 26 Gruppo di oltre 1000 2000 dimensioni fino a 1000 2000 4000 SCOSTAMENTI ± 0.5 ± 1 ± 1.5 ± 2 TOLLERANZA La SABIANA S.p.a. si riserva a termine di legge la proprietà del presente disegno con divieto di riprodurlo o comunicarlo...
- Page 27 MB-CFP ELECTRIC WIRING...
-
Page 28: Connection Details
CONNECTION DETAILS Power supply cables 230 Vac connection Ferrite insertion (supplied with the fan and ventilation signal 0÷10 Vdc in terminal coil) on the signal cable 0÷10 Vdc (double board fitted on the fan coil opening wiring mandatory) Setting of the air probe T1 Setting of the water probe T3 into the coil Bus RS485 connection T-MB clamps n °... -
Page 29: Master/Slave Operation
MASTER-SLAVE OPERATION Managing a group of appliances, via serial con- nection, with the T–MB control It is possible to connect multiple devices a n d t o c o n t r o l t h e m s i m u l t a n e o u s l y b y transmitting the settings from the T–MB con- trol of the MASTER unit to all other units defi- ned as SLAVE. -
Page 30: Installation Notes
Connection with the Master inside the network CFP-ECM CFP-ECM CFP-ECM CFP-ECM CFP-ECM DIP 2 OFF DIP 2 ON DIP 2 ON DIP 2 ON DIP 2 ON °C AUTO Jumper Jumper T-MB Master Slave Slave Slave Slave D+ D- D+ D- D+ D- D+ D- D+ D-... - Page 31 - do not lay the 12 volt power cables and communication cables near power devices, lights, antennae, transformers or hot water or steam pipes; - never position the communication cables in any conduits, pipes, junction boxes or other containers together with the power cables or the lighting system cables; - always ensure there is adequate separation between the communication cables and all other electrical cables;...
-
Page 32: General Notes
9066331E 9066331E T–MB WALL-MOUNTED CONTROLLER . 9066331e – GENERAL NOTES – Fig. 1 The controller features the following functions (Fig. 1): 1) switch the appliance on and off 2) set the fan speed 3) temperature set AUT O 4) setting the operating mode Control panel symbol (Fig. -
Page 33: Control Installation
CONTROL INSTALLATION Separate the front of the controller from the rear plate by using a screwdriver to press the locking tongue on the top of the controller. Place the rear plate on the wall and mark the mounting holes. Drill the holes, insert the screw plugs in the wall and fasten the plate with screws. -
Page 34: Control Wiring Connections
CONTROL WIRING CONNECTIONS The control panel must be wired to Main Board the power board located inside the electrical compartment of the Fancoil unit, complying with the correspon- dence of the common numbering to both boards. T-MB U s e 3 c o n d u c t o r s w i t h 0 . 5 P0 P0 10 0V s e c t i o n . -
Page 35: Using The Control
USING THE CONTROL Fig. “A” / Abb. “A” On/Off (Fig. “A”): • Press the ON/OFF button to acti- vate the thermostat. • Press the ON/OFF button to deactivate the thermostat. • The word “ON” or “OFF” will appear in the display. Fig. - Page 36 SETTING THE CLOCK (Fig. “E”) Fig. “E” • By pressing the “M” button: the mode symbol starts flashing. • Press buttons (+) or (-), until selecting the watch symbol “ ”; Confirm using the “M” button. • Press button “+” again to position on CLOC mode and confirm using the “M”...
- Page 37 TIMER Fig. “F” 1) Activation / Deactivation (Fig. “F”): • Press the “M” button; the operation mode symbol will start flashing. • Press button (+) or (-), until selecting the watch symbol “ ”; confirm using the “M” button. • Press the “M” button to access to the activation/ deactivation.
- Page 38 Fig. “G” / 2) Programming (Fig. “G”): • Press the “M” button; the operation mode symbol will start flashing. • Press button (+) or (-), until selecting the watch symbol “ ”; confirm using the “M” button. • Press button “+” twice; the abbrevia- tion “Prd”...
-
Page 39: Energy Saving Mode
ENERGY SAVING MODE The energy saving function is acti- vated / deactivate by the “Energ” function within the operating mode menu. •Press the “M” button; the operating mode blinks; • Press the “ - ” button until “ Energ ” function is selected on the display .•... - Page 40 FEATURES FOR FACTORY This menu allows modifying the operation parameters of the thermostat (probe values, view of the window con- tact, propable alarms). With the control set on “OFF”, press the “+” and “-” but- tons simultaneously for 3 seconds. Select the desired parameter to be modified, pressing button “+”...
- Page 41 FEATURES FOR FACTORY This menu allows modifying the operation parameters of of the +/- 3 version and the thermostat, electronic motor, and many other parameters (pump cycle, RESET). With the control set on “OFF”, press the M and Fan buttons simultaneously for 3 seconds.
Need help?
Do you have a question about the MB-CFP-ECM-B20 and is the answer not in the manual?
Questions and answers