Advertisement
Package Contents

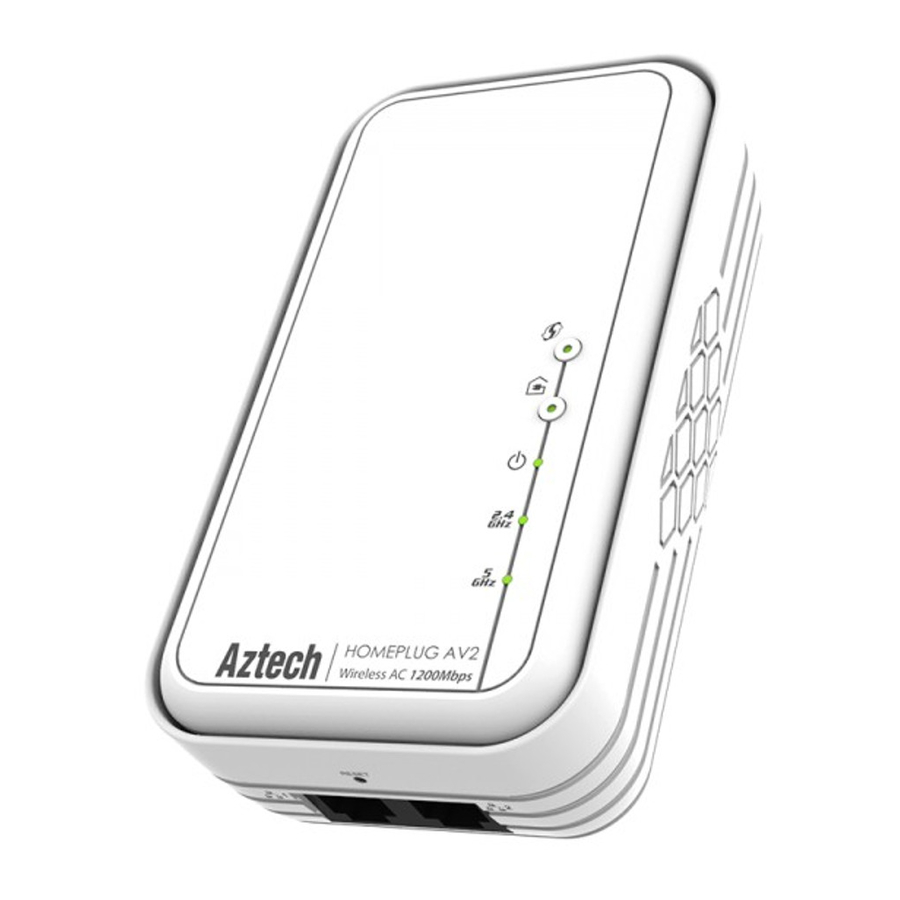
Device Overview

Setup for New Network Connection
Ensure to follow the connection set up below.

- In Room A, plug in your HomePlug AV device into a power outlet and connect it to your router's ethernet port using an Ethernet cable.
Make sure that your router's internet connection is up to allow you to access the internet. - In Room B, plug in your HL129EW device into a power outlet. You may connect any device (e.g. computer / notebook) to its available ethernet ports and you may also connect any of your wireless devices to your HL129EW's WiFi (SSID and Password is printed at the label sticker located at the top surface of your device).
- Confirm that the connection was established on both HomePlug AVs. Successful connection is indicated by Green light on both Power and Power Line Activity LEDs. Your HomePlug AV is now ready to use and may now access the internet.
Configuring Wireless Settings (Optional)
Ensure to follow the connection set up below.
 - Step 1")
- Connect an ethernet cable from the PC to any of the available Ethernet Ports of your HL129EW.
- On your computer, turn OFF any Wireless Adapter (if applicable).
- Open and Launch a web browser. Type in 10.0.10.254 on the web browser's url link then hit enter key.
- Enter admin for Username and Password.
- Click the Network menu and select the Wireless Setting (2.4GHz / 5.0GHz) that you want to configure.
- After changing the preferred settings, click Apply to save and apply settings.
 - Step 2")
 - Step 2")
Setup for an Existing Network Connection
- If you want to add your HL129EW device to your existing network, simply plug in the device to any wall socket; by default it will pair up with your HomePlug AV devices. Once paired, your device is now ready to use.
- However, just in case you have changed the Private Network Name of your existing network, you may use the Simple Connect button of your HL129EW and the old devices as indicated below:
- Press the Simple Connect Button of your HL129EW for 10 seconds until the Power and Power Line Activity LED turn OFF and turn ON.

- Press the Simple Connect Button of your HL129EW for 10 seconds until the Power and Power Line Activity LED turn OFF and turn ON.

- Press the Simple Connect Button of your old device for two seconds. The Power LED will start blinking.
- On your HL129EW, press the Simple Connect button for two seconds. The Power LED will start blinking and the Power Line Activity LED will be on steady green, indicating a succesful pairing with the old devices.


Enabling the WPS Function (Optional)
- Ensure that you have the proper set up as indicated in Section D (Configuring Wireless Settings). Follow steps 3, 4, and 5 respectively of Section D.
- Go to the Wireless > Security section, then on the WPS section, tick Enable then click Apply.
 - Step 1")
- On your HL129EW, press the WPS button for 2 seconds. The Wireless LED will start to blink slowly.
 - Step 2")
- Enable/Press the WPS button on the device that you wish to connect to HL129EW. Complete the steps 3 and 4 of this section within two minutes to ensure a succesful connection.
 - Step 1")
 - Step 2")
Determining Connection Rate

GREEN Connection rate is more than 120 Mbps
AMBER Connection rate is between 30 to 120 Mbps
RED Connection rate is less than 30 Mbps
Note to Red LED: It is recommended to plug the device to main wall-socket plug or a plug with the least electrical interference.
Each LED color of the Powerline Activity LED represents a connection rating. The connection rating can only be calculated when the device is part of an existing network. The exact connection rate value can also be viewed using the HomePlug AV Web User Interface.
Device Reset
To perform RESET to factory defaults, press the Reset button for 2 to 4 SECONDS. The LEDs will turn OFF and turn ON to indicate device reset.

* The Easy Start Guide is designed to get you up and running with your Aztech HL129EW HomePlug. This Easy Start Guide including the User Manual which provides a more advanced guide to this product, can be from the Aztech Support Website (www.aztech.com/support).

VideosHow to Pair HL129EP and HL129EW Homeplug Video
Documents / ResourcesDownload manual
Here you can download full pdf version of manual, it may contain additional safety instructions, warranty information, FCC rules, etc.
Advertisement
Thank you! Your question has been received!


Need Assistance?
Do you have a question about the HL129EW that isn't answered in the manual? Leave your question here.