Advertisement
- 1 LOCATION AND DESCRIPTION OF CONTROLS
- 2 POWER SUPPLY
- 3 TURNING UNIT ON/ OFF
- 4 SELECTING FUNCTION
- 5 ADJUSTING VOLUME
- 6 SETTING THE TIME AND DATE
- 7 LISTENING TO FM RADIO
- 8 LISTENING TO DAB/DAB+ RADIO
- 9 PRESET STATIONS
- 10 LISTENING TO RADIO PRESETS
- 11 SETTING THE ALARM AND THE ALARM MODE
- 12 SLEEP FUNCTION
- 13 SETTING MENU
- 14 NOW PLAYING INFORMATION
- 15 ERROR MESSAGES
- 16 USING HEADPHONES / EARPHONES
- 17 TECHNICAL SPECIFICATIONS
- 18 IMPORTANT SAFETY INSTRUCTIONS
- 19 Documents / Resources
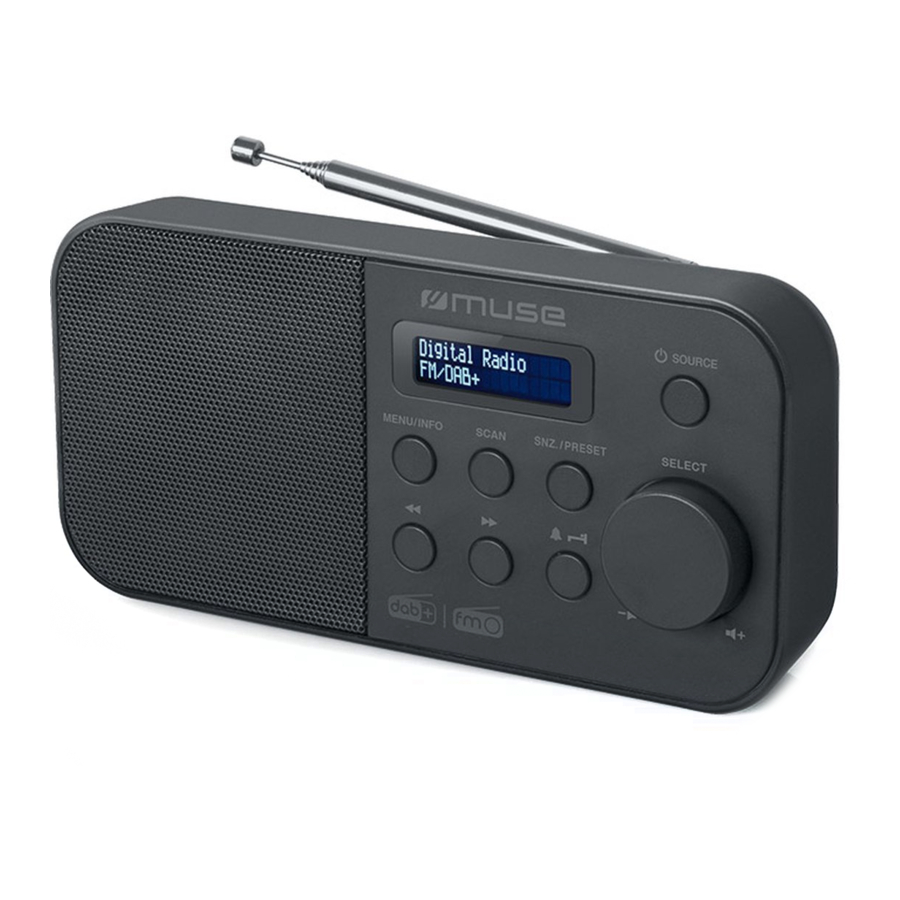
LOCATION AND DESCRIPTION OF CONTROLS

Please read the instruction carefully before operating the unit.
- LCD display
![]() SOURCE: To turn unit on/off; To select FM or DAB mode
SOURCE: To turn unit on/off; To select FM or DAB mode- MENU/ INFO: To access the main menu; To review the information transmitted by the radio station
- SNZ/ PRESET: Interval alarm repetition, Preset radio stations; Recall the preset stations
![]() : Search/ Tuning; setting up/ down
: Search/ Tuning; setting up/ down- SCAN: Auto scan & storage
![]() : To set the alarm; To fall asleep with the radio
: To set the alarm; To fall asleep with the radio- SELECT
![]() : To confirm the selection/ settings; To adjust volume
: To confirm the selection/ settings; To adjust volume - Speaker
- Swivel telescopic antenna
![]() Phones jack
Phones jack- DC IN jack (DC 5.9V)
- Battery compartment

 Phones jack
POWER SUPPLY
AC ADAPTOR
The supplied AC adaptor is suitable for use on AC main supplies of AC 100-240V ![]() 50/60Hz and should only be connected to a mains supply within these parameters.
50/60Hz and should only be connected to a mains supply within these parameters.

- The AC adaptor included with this unit is for its use only. Do not use it with other equipment.
- Turn off the unit before unplugging the AC adaptor from the unit so as to avoid the unit being damaged.
- When the unit is not going to be used for long time, disconnect the AC adaptor from the AC outlet.
- Be sure to use it near the wall outlet and easily accessible. If a malfunction occurs, disconnect the plug from the wall outlet at once.
- AC adaptor is used as the disconnect device. It shall remain readily operable and should not be obstructed during intended use. To be completely disconnected the apparatus from supply mains, the AC adaptor of the apparatus shall be disconnected from the mains socket outlet completely.
- Never use an AC adaptor that is damaged, route power lead in a safe manner and make sure it is not subjected to trapping or pinching. If the power lead is damaged refer to a qualified service agent.
- The AC adaptor must be unplugged from the DC jack for the unit to run on the batteries.
BATTERY OPERATION
- Remove the battery compartment door by applying thumb pressure to area indicated on battery door and then lift the door out and off the cabinet.
- Before inserting the batteries, observe the polarities (+ and -) of the battery, then relate the polarities to the engraved diagram inside the battery compartment, insert 4 x 1.5V, R6/UM-3/ "AA" batteries (not supplied) into the compartment.
- Replace the compartment door.
Before throwing any batteries away, consult your distributor who may be able to take them back for specific recycling.

NOTES:
- Never recharge the batteries, apply heat to them or take them apart.
- In order to avoid leakage, always remove the batteries when unit will not be used for a long period of time.
- For optimal performance, alkaline batteries are recommended. These batteries must be replaced every six months.
- The batteries need to be replaced when: The volume decreases, or sound is distorted during operation.
Danger of explosion if battery is incorrectly replaced. Replace only with the same or equivalent type.
TURNING UNIT ON/ OFF
In standby mode, press  once to turn on the unit. Press and hold to turn off the unit.
SELECTING FUNCTION
When the unit is on, repeatedly press SOURCE button to select desired mode: FM or DAB.
ADJUSTING VOLUME
Rotate SELECT  knob to adjust the volume level.
SETTING THE TIME AND DATE
The first time you listen to DAB/DAB+ radio, the time and date of your product will be synchronized automatically to that broadcast by the DAB/DAB+ service in 24 hour mode, which is in line with daylight saving, so there is no need to set the time and date manually.
If you do wish to set the time and date manually, turn on the radio and follow the steps as below:
- Press and hold MENU button to access <Time>, then press SELECT to confirm.
- Press
![]() button repeatedly to select "Set Time/ Date", press SELECT knob to enter into time setting menu.
button repeatedly to select "Set Time/ Date", press SELECT knob to enter into time setting menu. - Use
![]() button and SELECT knob to set the time (HH:MM) and date (DD-MM-YYYY). (Press
button and SELECT knob to set the time (HH:MM) and date (DD-MM-YYYY). (Press ![]() button to adjust the setting, press SELECT knob to confirm.)
button to adjust the setting, press SELECT knob to confirm.)
Once the date is confirmed, "Time saved" is displayed and returns to <Set Time/ Date> time setting menu. Press  button to select an option, and press SELECT knob to confirm.
** Set update:
Auto update: auto update the time from radio. No update: time is no update
** Set 12/24 hour: 12/ 24 hour clock display
** Set date format: DD-MM-YYYY or MM-DD-YYYY.
Note:
- When do the setting in the menu, press the MENU button to return back to previous step.
- In 12H clock format, be sure to observe the AM or PM indicator to set the hour correctly.
LISTENING TO FM RADIO
Repeatedly press SOURCE button to select FM mode. Press button to manual tuning, press and hold to automatic search. Note: For a better reception, extend the telescopic antenna.
LISTENING TO DAB/DAB+ RADIO
When the unit is on, repeatedly press SOURCE button to select DAB mode.
The first time you use the radio, or if the station list is empty, the radio automatically performs a full scan to see what stations are available. The display will change to "Scanning......". A progress bar will show the progress of the scan and the number of stations found during the scan will also be displayed.
You may also need to start a scan manually to update the list of stations for one of the following reasons:
- New stations may become available from time to time.
- Stations close or can no longer be received (In the station list, invalid stations are indicated with a question mark in front of their name).
- If reception was not good for the original scan (for example the antenna was not up), this may result in an empty or incomplete list of available stations.
- If you have poor reception of some stations causing the audio to break up, you may wish to list only stations with good signal strength.
To do a full scan, press SCAN button. (You can also select <Full scan> option in setting menu to do a full scan.)
When the unit is on, press and hold MENU button to access setting menu. Press button to select <Full scan> and press SELECT to confirm.
Once the scan is complete, the radio returns to play the previously selected station or first station on the station list. Select a station with button. There will be a short delay while your radio tunes to your selected station.
Note:
- If no broadcasts are found by DAB/DAB+ scan, "DAB No Service" appears in the display.
- For a better reception, extend the telescopic antenna or do the full scan again in another place.
- During the search operation, the sound level is automatically muted.
PRESET STATIONS
This unit can store 30 FM and 30 DAB/DAB+ stations.
Manual storage
- Repeatedly press SOURCE button to select FM or DAB mode.
- Select a radio station.
- Press and hold PRESET button to enter preset store mode.
- Use
![]() button to select a preset channel.
button to select a preset channel.
Note: If you choose a station that hasn't been allocated, "Empty" will be displayed.
If the station has been allocated before, the FM frequency or DAB station name will be showed. - Press SELECT button to save it. "Preset X stored" will be displayed for a few seconds. (X = preset channel nr)
- Repeat steps 2-5 to store other stations.
Automatic storage
Press SCAN button once (in FM mode only), the unit will automatically locate and save the strong stations. When you store on a channel already been preset, the previous station will automatically be cleared and replaced by the new station.
LISTENING TO RADIO PRESETS
- Press SOURCE button to select FM or DAB band.
- Press PRESET once. "Preset Recall" will be displayed, then press
![]() button repeatedly to select your desire station.
button repeatedly to select your desire station. - Press SELECT to confirm your selection.
SETTING THE ALARM AND THE ALARM MODE
In standby mode, press and hold  button to access alarm setting mode. Use button to select <Alarm 1> or <Alarm 2>, then press SELECT to confirm. Press
  and / or
  to select an option and/ or adjust the setting, then press SELECT to confirm. The corresponding alarm indicator will be displayed when the alarm setting is confirmed.
** Off/ On: to set the alarm on / off.
Noted: select alarm to "On" before marking following alarm settings.
** Wake Up Time: to set the alarm time
** Frequency:
- Daily: The alarm will sound every day.
- Weekdays: The alarm will sound on weekday only. (Monday to Friday)
- Weekends: The alarm will sound on weekend only. (Saturday and Sunday)
- Once: The alarm will sound one time only.
** Source: To set the wake-up source FM, Buzzer or DAB.
** Volume: To set the alarm volume
Note: Minimum alarm volume level is limited to 8.
Notes:
- Be sure connect the AC adaptor when using the alarms. Alarm function cannot be used when using the unit on batteries.
- The corresponding alarm indicator blinks when the alarm function is activated.
- When the wake-up source is FM or DAB, select your desire station in FM or DAB mode, then turn off the radio before alarm time reaches. Otherwise the alarm source will change to buzzer automatically if you are listening to the radio when the alarm time reaches. For the station selection, please refer to "LISTENING TO DAB/DAB+ RADIO" and "LISTENING TO FM RADIO".
- In 12H clock format, be sure to observe the AM or PM indicator to set the alarm time correctly.
Stopping the alarm
- Alarm repetition
Press SNOOZE to stop the alarm temporally. The display will show "SNOOZE" and the remaining snooze time. The snooze time is 9 minutes. - Alarm stop
Press![]() or
or ![]() to stop the alarm.
to stop the alarm. - When "Once" is set, the alarm will not sound again. The alarm indicator will light off.
- When "Weekdays" is set, the alarm will sound again on next weekday (Monday to Friday) at the same time.
- When "Weekends" is set, the alarm will sound again the following Saturday or Sunday at the same time.
- When "Daily" is set, the alarm will sound again the next day at the same time.
- Alarm Cancellation
Press and hold![]() access alarm setting mode. Press
access alarm setting mode. Press ![]() button repeatedly to select <Alarm 1> or <Alarm 2>, then press SELECT to confirm. Press
button repeatedly to select <Alarm 1> or <Alarm 2>, then press SELECT to confirm. Press ![]() button repeatedly to set Alarm to "OFF", press SELECT to confirm.
button repeatedly to set Alarm to "OFF", press SELECT to confirm.
SLEEP FUNCTION
When the unit is on, repeatedly press  to select 15-30-45-60-90 minutes of listening, then press SELECT to confirm. The display will show "S" and the remaining sleep time. The unit will automatically turn off after the specified time. To cancel the sleep function, repeatedly press button until "Sleep off" appears and press SELECT button to confirm.
SETTING MENU
- When the unit is on, press and hold MENU to access setting menu.
- Press
![]() or
or![]() button repeatedly to select an option and/ or adjust the setting, then press SELECT to confirm
button repeatedly to select an option and/ or adjust the setting, then press SELECT to confirm
Note:
- The "
![]() " will be displayed next to the current setting.
" will be displayed next to the current setting. - When do the setting in the menu, press the MENU button to return back to previous step.
 " will be displayed next to the current setting.
FM setting menu:
Scan setting
All stations: The automatic search locates at any available station.
Strong stations only: The automatic search only locates at strong stations.
System
- Time
Refer to the operations in section "SETTING THE TIME AND DATE". - Backlight
To select the background brightness level of display: High, Medium, Low - Language
To select the desired language of the unit's menu: English, German, Norwegian, Italian, French, Dutch. - Factory Reset
- No: system will not reset
- Yes: to restore to factory default settings
- S/W Version (software version)
To review the current software version.
DAB setting menu
Full Scan
This function allows you to perform a full scan.
Manual Tune
This function can be used to assist the positioning of antenna or the unit, to enhance specific channel or frequency reception ability.
Select "Manual Tune" in the setting menu and press SELECT to confirm. Press or to select your desired frequency and press SELECT to tune to the station for the selected frequency.
Prune
Remove stations that are listed but unavailable. This function can remove all invalid stations indicated in the station list with a "?" in front of the station name.
Press to select "Yes" and press SELECT to confirm.
System
Refer to operations in section "FM setting menu/ System".
NOW PLAYING INFORMATION
While a station is playing, the display shows its name and DLS (Dynamic Label Segment) information transmitted by the radio station such as program name, track title and contact details. Long DLS info, over 16 characters will scroll across the display. When you short press INFO each time, the next set of information is displayed, cycling through:
DAB mode:
Ensemble name/ channel number, frequency, bit rate, signal strength, Time, Date, DLS text, PTY (Program Type)
FM mode:
Radio Text, Program Type, Signal strength, Time, Date, frequency
ERROR MESSAGES
| 'Not available': | No DAB reception |
| 'Signal error': | The DAB signal has been interrupted. |
| 'DAB No Service': | The listed station cannot be found. |
| (No name): | The current station does not broadcast an identify name. |
| 'No stations found': | No DAB stations are available, check/move the antenna |
| 'No Radio Text': | No RDS text information is available on this station. |
| 'No PTY': | No RDS program type information is available. |
| 'No Name': | No RDS station name is being broadcast. |
USING HEADPHONES / EARPHONES
(NOT INCLUDED)
Maximum output voltage ≤ 150mV
HEADPHONE VOLUME WARNING
Connect earphones with the volume set low and increase it if required. Prolonged listening through some earphones at high volume settings can result in hearing damage. When headphones/earphones are connected, no sound will be emitted from the unit's speaker.
Avoid listening to sound at levels which may be harmful to your ears.
 To prevent possible hearing damage, do not listen at high volume levels for long periods.
TECHNICAL SPECIFICATIONS
POWER SUPPLY:
AC adaptor:
Input: 100-240V  50/60Hz 0.3A MAX
Output: DC 5.9V  1.0A
1.0A 
Batteries: 4X1.5V battery type R6/UM3/AA (not provided)
RADIO FREQUENCY:
FM: 87.5 -108 MHz
DAB/DAB+: 174.928-239.200 MHz
Design and specifications are subject to change without notice.
Hereby, NEW ONE S.A.S, declares that this MUSE M-109 DB / M-109 DBW is in compliance with the essential requirements and other relevant provisions of Directive 2014/53/EU. The declaration of conformity may be consulted at www.muse-europe.com
IMPORTANT SAFETY INSTRUCTIONS

To reduce the risk of electric shock, do not open the device, there is no party inside for the user. Refer all servicing to qualified personnel.

 The lightning with the arrow symbol in the triangle is a warning sign alerting the user to "dangerous voltage" inside the unit.
 The exclamation point in the triangle is a warning sign alerting the user of important instructions accompanying the product.
The Caution mark is located at the back of the device.
 TO PREVENT FIRE OR SHOCK HAZARD, DO NOT EXPOSE THIS APPLIANCE TO RAIN OR MOISTURE.

- The Marking plate is located at the back of the device.
- Make sure to have a minimum distance of 5 cm around the unit for sufficient ventilation.
- Ensure that the ventilation openings are not covered with items such as newspapers, tablecloths, curtains, etc.
- Do not place naked flame sources, such as lighted candles on the apparatus.
- Do not expose this appliance to dripping or splashing water.
- Do not place objects filled with liquids, such as glass, vase on the device.
- Use the apparatus only in moderate climates.
- Do not throw batteries into fire! Respect the environment when disposing of used batteries.
- Batteries should not be exposed to excessive heat such as sunshine, fire or other similar heat source.
- The AC adaptor is used as a disconnect device and must be easily accessible. To be completely disconnected from the power, the AC adaptor of the appliance should be disconnected completely. The socket must not be obstructed and should be easily accessible during intended use.
- Excessive sound pressure from earphones and headphones can cause hearing loss.
- Under the influence of fast transient and / or electrostatic electric phenomenon, the product may malfunction and the user must perform a power reset of the device.
If in the future, you need to get rid of this product, please note that Waste electrical products should not be disposed of with household waste. Recycling facilities exist. Check with your municipality or ask your dealer for advice. (Directive for Waste Electrical and Electronic Equipment)

NEW ONE S.A.S
10, Rue de la Mission, 25480 Ecole Valentin, France


Documents / Resources
References
Download manual
Here you can download full pdf version of manual, it may contain additional safety instructions, warranty information, FCC rules, etc.
Download Muse M-109 DB, M-109 DBW - DAB+/FM Portable Radio Manual
Advertisement


Need help?
Do you have a question about the M-109 DB and is the answer not in the manual?
Questions and answers