Table of Contents
Advertisement
Quick Links
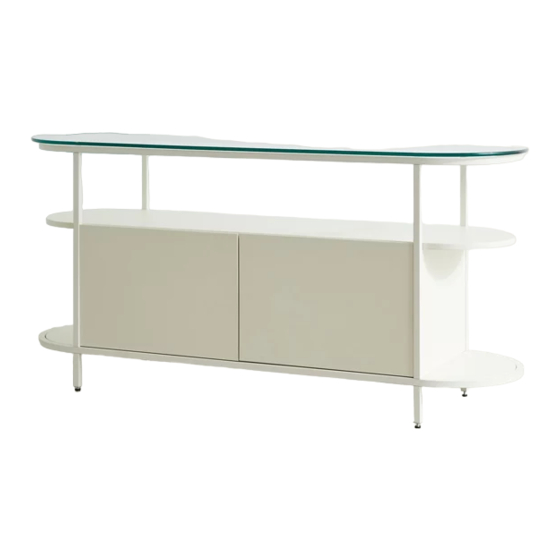
ELENA CONSOLE
Assembly Instructions
TOOLS REQUIRED BUT NOT INCLUDED:
Phillips head screwdriver
WARNINGS:
Do not throw away packing materials and carton until after assembly.
Assemble all parts on a clean smooth surface
CARE INSTRUCTIONS:
Avoid direct exposure to sunlight. Do not place overheat or air
conditioning vents. Adjust levelers so that the furniture sits flat on
uneven floors.
Blot spills do not rub, with a clean white cloth.
Do not use harsh chemicals.
Before cleaning any part test a small spot in a hidden area.
You may need to re-tighten all bolts after initial use.
Parts Included (CABINET ONLY)
A) Bottom panel x11
D-R) Right Side Panel x11
G) Cam Bolt x41
K)) Screws
[3x12mm] x24
EXCLUSIVE AND CONFIDENTIAL PROPERTY OF URBAN OUTFITTERS, INC.
© 2017 UO, Inc. All rights reserved, including all applicable copyright, design and patent
rights. Any unauthorized reproduction, adaptation, distribution or other infringement will be
prosecuted.
B) Top panel x11
D-L) Left Side Panel x11
H) Cam Lock x41
L) Long Screws
[4x40mm] x4
C-R))Door Panel x11
E) Back Panel x11
I) Dowel x8
M) M) Glue X1
C-L) Door Panel x11
F) Cabinet Door Stop x11
J) Hinges x44
Page 1 of 7
Advertisement
Table of Contents

Subscribe to Our Youtube Channel
Related Manuals for URBAN OUTFITTERS ELENA CONSOLE


Summary of Contents for URBAN OUTFITTERS ELENA CONSOLE
- Page 1 M) M) Glue X1 [3x12mm] x24 [4x40mm] x4 EXCLUSIVE AND CONFIDENTIAL PROPERTY OF URBAN OUTFITTERS, INC. © 2017 UO, Inc. All rights reserved, including all applicable copyright, design and patent Page 1 of 7 rights. Any unauthorized reproduction, adaptation, distribution or other infringement will be...
- Page 2 Place the Side panels (D-R) & (D-L) on the Dowels (G) in the Bottom wood panel (A). Insert Screws (L) through the Bottom panel (A) and tighten with a Phillips head screw driver not provided). EXCLUSIVE AND CONFIDENTIAL PROPERTY OF URBAN OUTFITTERS, INC. © 2017 UO, Inc. All rights reserved, including all applicable copyright, design and patent Page 2 of 7 rights.
- Page 3 Side panels (D-R) & (D-L).Use a Phillips head screw driver (not provided) to secure the Cam locks (H). EXCLUSIVE AND CONFIDENTIAL PROPERTY OF URBAN OUTFITTERS, INC. © 2017 UO, Inc. All rights reserved, including all applicable copyright, design and patent Page 3 of 7 rights.
- Page 4 Phillips head screwdriver. Open and close the door to make sure the hinges operate smoothly and are placed correctly. Loosen the screws to adjust the door height if needed, re-fasten after adjusting. EXCLUSIVE AND CONFIDENTIAL PROPERTY OF URBAN OUTFITTERS, INC. © 2017 UO, Inc. All rights reserved, including all applicable copyright, design and patent Page 4 of 7 rights.
- Page 5 [M6xL15mm] x4 I) Adjustable Levelers J) Hex Key EXCLUSIVE AND CONFIDENTIAL PROPERTY OF URBAN OUTFITTERS, INC. © 2017 UO, Inc. All rights reserved, including all applicable copyright, design and patent Page 5 of 7 rights. Any unauthorized reproduction, adaptation, distribution or other infringement will be...
- Page 6 Bottom base (A) into the Case (D) as shown. Partially tighten all of the screws (G) and then tighten completely. EXCLUSIVE AND CONFIDENTIAL PROPERTY OF URBAN OUTFITTERS, INC. © 2017 UO, Inc. All rights reserved, including all applicable copyright, design and patent Page 6 of 7 rights.
- Page 7 (F) on the top of the base, and then place the Glass top (E) to complete the assembly. EXCLUSIVE AND CONFIDENTIAL PROPERTY OF URBAN OUTFITTERS, INC. © 2017 UO, Inc. All rights reserved, including all applicable copyright, design and patent Page 7 of 7 rights.
Need help?
Do you have a question about the ELENA CONSOLE and is the answer not in the manual?
Questions and answers