Table of Contents
Advertisement
R
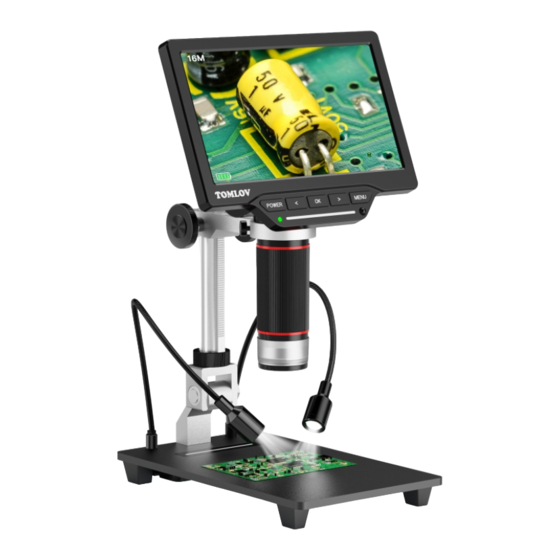
Digital LCD Microscope
MODEL: DM201
User Manual
Please read this user manual carefully and keep it for future reference.
Should you encounter any problem, please contact us by following e-mail.
Most technical questions can be answered through our knowledge base.
Customer service: support_eu@tomlov.com
Advertisement
Table of Contents

Subscribe to Our Youtube Channel
Related Manuals for TOMLOV DM201


Summary of Contents for TOMLOV DM201
- Page 1 Digital LCD Microscope MODEL: DM201 User Manual Please read this user manual carefully and keep it for future reference. Should you encounter any problem, please contact us by following e-mail. Most technical questions can be answered through our knowledge base.
-
Page 2: Table Of Contents
Contents Read Me First Packing List Installation Quick Start Parts Description Detailed Operation 1.Charge the Microscope Correctly 2.Install Anti-reflective Hood 3.Connect and Adjust Full Lights 4.Save Pictures/Videos with Micro SD Card See the total coin 5.See the total coin 6.Switch Different Modes 7.Pictures/Videos Playback and Files Management 8.HD Connection Connect TV with HDMI 9.PC Connection Connect PC... -
Page 3: Read Me First
5.TOMLOV offers one year manufacture warranty and life-long technical support for DM201 digital microscope. Please feel free to get in touch with us if you need any help. It is recommended to attach photos or videos showing the problems in the e-mail/message for quick solutions. -
Page 4: Packing List
Pa cking Lis t Stand Extension DM201 Microscope Base Plate Bracket Tube Please note: Accessories maybe updated without prior notice, please refer to the actual receipt of the items. E-mail: support_eu@tomlov.com... -
Page 5: Installation
(1) Position A It has been adjusted properly upon delivery. If not, please adjust it by the wrench. (2) Position B Step 1: Rotate the black ring clockwise one or two turns. Step 2: Screw the rod clockwise. E-mail: support_eu@tomlov.com... - Page 6 Step 3: Screw the black ring clockwise tightly. (3) Position C Insert the monitor and tighten the two little screws. (4) Position D Adjust the monitor up and down, then tighten this screw. E-mail: support_eu@tomlov.com...
-
Page 7: Quick Start
1.0x 16.0x 4,Adjust Focusing 5,Press Left/Right 6,Take Photo/Video. Press Menu button ,then enter Knob to get clear button for setting to switch among photo image. magnification. mode, video mode and freeze mode. E-mail: support_eu@tomlov.com... -
Page 8: Parts Description
Height Adjusting Screw Main Light Touch Bar Lens Holder Extra Fill Light Lens Focusing Knob Lens Cover UV Filter Base Light Touch Bar Aluminum Alloy Base Power Button POWER Up Button Enter Down Button Function Setting Key MENU E-mail: support_eu@tomlov.com... - Page 9 Left Button Press OK Button twice to enter menu. Press and O K B u t t o n hold OK Button to turn off the microscope. (The Right Button unit can't be turned on by remote control) E-mail: support_eu@tomlov.com...
-
Page 10: Detailed Operation
Please be free to contact us if you need any help.We have detailedvideos to solve your problems. 2.Install Anti-reflective Hood. The anti-reflective hood is used to reduce the reflection of light. Take off the lens protector and UV filter, then screw the hood on the lens. E-mail: support_eu@tomlov.com... -
Page 11: Connect And Adjust Full Lights
4.Save Pictures/Videos with Micro SD Card You can save pictures and videos on a Micro SD card to review later. Insert the Micro SD card into slot on back of the monitor. E-mail: support_eu@tomlov.com... -
Page 12: See The Total Coin
(1)Screw the extension tube on the base. (2) Screw and fix the holder on the extension tube. (3) Insert the monitor and tighten the srew. (4)Adjust the bracket to a suitable height to see the total coin. E-mail: support_eu@tomlov.com -10-... -
Page 13: Switch Different Modes
Press OK button again, then press Left/Right button to choose one mode, then press OK button to confirm it. Press Menu button to get ready to record videos/capture photos. You can choose 4M/16M for photo,1080P30/720P60 for video, full/left/ up/four for freeze image mode. E-mail: support_eu@tomlov.com -11-... - Page 14 Press OK button to start recording, press it again to stop recording. Serial number of the video is displayed at the top left corner of monitor. Duration of the recording time is displayed at the top right corner. 0000 00:00:16 E-mail: support_eu@tomlov.com -12-...
- Page 15 Up Image Freeze Four Image Freeze During those 4 modes, press OK button to freeze the image to make a comparison in the same monitor. Note: Photos or videos cannot be taken under the image freeze mode. E-mail: support_eu@tomlov.com -13-...
-
Page 16: Pictures/Videos Playback And Files Management
Press Left button for last video. Press Right button for next video. Press OK button to play/pause video. Press Menu button to enter playback menu. Choose to get back playback mode. Choose to get back microscope mode. E-mail: support_eu@tomlov.com -14-... - Page 17 Press OK button to confirm. Files locked can’t be deleted in the microscope. (Please note the locked filed still can be deleted when deleting files in computer.) Choose RETURN ,Press OK button to get back menu bar. E-mail: support_eu@tomlov.com -15-...
-
Page 18: Hd Connection Connect Tv With Hdmi
PC Camera (UVC): Can show the real time video in the computer. Please note, operation buttons (except Power button and OK button) on the monitor and remote control don’t work during connecting with computer. E-mail: support_eu@tomlov.com -16-... -
Page 19: Work With Windows
(1) Connect the microscope with computer by the USB cable and turn on the microscope. (2) Press OK button to switch UVC mode. (3) Run “Windows Camera”, it shows the image as below, camera 1.Record Videos 2.Capture Photos 3.Playback. E-mail: support_eu@tomlov.com -17-... -
Page 20: Work With Mac
“VMS4M33 (default)”on the menu bar. Please note no matter the microscope works with Windows or Mac/ iMac, Left button/Right button/Menu button on monitor and remote control can’t work. And photos/videos only can de saved in computer when connected with computer. E-mail: support_eu@tomlov.com -18-... -
Page 21: Menu Settings
Adjust white balance MANUAL---Adjust R/G/B value to set a custom white balance to meet different application. CAL—Calibrate white balance. Put a stand gray card under the lens, choose CAL to calibrate white balance to reach accurate white balance control. E-mail: support_eu@tomlov.com -19-... - Page 22 Tips: Reduce the brightness firstly, then turn on WDR. It can decrease reflection of highlight area effectively. CONTRAST Adjust contrast SATURATION Adjust saturation SHARPNESS Adjust sharpness H MIRROR Mirror the image in a horizontal direction V FLIP Flip the image in a vertical direction E-mail: support_eu@tomlov.com -20-...
-
Page 23: Setting
SHORT CUT Choose photo/video/freeze mode. PHOTO Choose photo size 4M/16M. VIDEO Choose video size 1080P/720P. FREEZE Choose full/left/up/four during freeze mode. LCD BRIGHT Adjust monitor brightness. AUTO OFF Set scheduled time to turn off the device automatically. E-mail: support_eu@tomlov.com -21-... - Page 24 LANGUAGE Select different language. DATE TIME Set date/time DEFAULT Reset all setting. FORMAT Form the micro SD card in the device. VERSION View current software version. RETURN Return menu bar. E-mail: support_eu@tomlov.com -22-...
-
Page 25: Marking
The microscope provides 8 reference lines ,each one can be turned on/off. Line type can be set to be horizontal /vertical. Line position/width/color can be set. Please note the lines can’t be marked on the pictures or videos. RETURN Return menu bar. E-mail: support_eu@tomlov.com -23-... -
Page 26: Specifications
Micro-SD card, 32GB(recommended) or 64GB PC View Supported HDMI View Supported Power Source USB 5V DC Light Source Two fill lights and Built-in LEDs IR Remote Max 5 meter Device Size 174mm(L)*129mm(W)*51cm(H) Certification CE/FCC/ROHS English/Chinese/Japanese/Russian/French/ Language Germany/Portuguese/Spanish Warranty 1 Year Warranty E-mail: support_eu@tomlov.com -24-... -
Page 27: Faq
If it still can’t work ,please connect the microscope with computer and format the Micro SD card in computer. 6,Why HDMI device can’t display image? Please make sure the microscope is turned on and the HDMI device is switched on HDMI input mode. E-mail: support_eu@tomlov.com -25-... - Page 28 9.How can I see the total coin? Please adjust the height slider to the highest point. Then screw up lens scope at the second red circle as the photo below, then you can see the total coin in the microscope. E-mail: support_eu@tomlov.com -26-...
-
Page 29: Get Support
However, content of this manual and/or product specifications are subject to change without prior notice and with no direct or indirect liability on TOMLOV Electronics’ part concerning such change. Copyright and registered trademark TOMLOV, Tomlov are registered trademarks.
Need help?
Do you have a question about the DM201 and is the answer not in the manual?
Questions and answers