Table of Contents
Advertisement
Quick Links
Advertisement
Table of Contents

Related Manuals for Ashton AK220


Summary of Contents for Ashton AK220
- Page 1 AK220.indd 1 29/2/08 10:52:29 AM...
- Page 2 AK220 USER MANUAL AK220.indd 2 29/2/08 10:52:34 AM...
- Page 3 AK220.indd 3 29/2/08 10:52:35 AM...
-
Page 4: Table Of Contents
START RECORDING, STOP RECORDING, PLAYBACK THE RECORDING FUNCTION MENU: MASTER TUNE, BEAT, SPLIT POINT MIDI CHANNEL, PORTAMENTO & MODULATION. PORTAMENTO TYPE DSP EFFECT: REVERB TYPE/LEVEL, CHORUS TYPE/LEVEL 14 - 15 MIXER DSP (DIGITAL SIGNAL PROCESSING) METRONOME PIANO DEMO SONG LESSON MODE: LESSON 1, LESSON 2, LESSON 3, LEFT & RIGHT LESSON FUNCTION 17 - 18 CHORD DICTIONARY CHORD DICTIONARY LIST MIDI FUNCTION APPENDIX: VOICE LIST 21 - 22 APPENDIX: STYLE LIST AK220.indd 4 29/2/08 10:52:36 AM... - Page 5 CONTENTS: APPENDIX: SONG LIST APPENDIX: DEMO LIST APPENDIX: CHORD LIST SAFETY INFORMATION AK220.indd 5 29/2/08 10:52:37 AM...
-
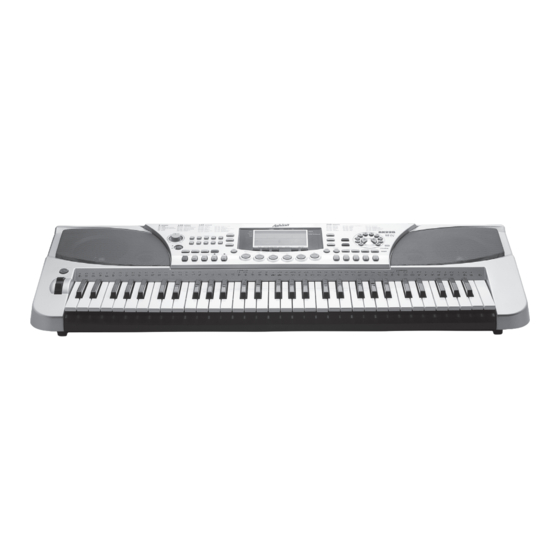
Page 6: Introduction
1 x Ashton “Learn To Play” DVD SPECIFICATIONS: • 61 keys with touch response • 310 voices • 160 styles • 120 songs • 5 demo songs • Polyphony: 64-note (max) • Accompaniment • Controls: start/stop, sync, intro/ending, fill-in A, fill-in B • O verall controls: mixer, fade, transpose, octave, dual, lower, touch, DSP, sustain, modulation, pitch bend • Other controls: record & playback • Connectors: 12V DC, headphones, aux-out, volume, USB • Lesson function & DVD • Chord dictionary function • Dimensions: 97.5cm x 35cm x 13.5cm • Optional adaptor: DC12V2.5A+ - Page 1 - AK220.indd 6 29/2/08 10:52:37 AM... -
Page 7: Setting Up
1. O pen the battery compartment cover on the underside of the unit. 2. I nsert 6 x alkaline “D” sized, R 20, SUM-1 or equivalent batteries. Read the polarity instructions (negative and positive guide). Close the battery compartment. SETTING UP: USING HEADPHONES Alternative to using the internal speakers or an amplifier, you may choose to play using headphones. To do this, simply connect a pair of headphones to the ¼” stereo phones jack located on the back panel of the unit. SETTING UP: AUX OUT The AUX OUT jack delivers the output of the keyboard to an external device or amplifier. Plug the device directly into this input and make sure the volume on both devices is turned to the minimum to mimimise any damage to speakers. SETTING UP: VOLUME INPUT An optional footswitch can be plugged into the VOLUME jack for volume control. Press/release to adjust volume. Attach the volume pedal as shown in the diagram on the right. - Page 2 - AK220.indd 7 29/2/08 10:52:40 AM... -
Page 8: Sustain Input, Usb Connection
SETTING UP: SUSTAIN INPUT An optional footswitch can be plugged into the SUSTAIN input for sustain control. The sustain pedal acts as a damper pedal (like on a piano). Press for sustain, release for normal sound. Attach the sustain pedal as shown in the diagram on the right. SETTING UP: USB CONNECTION Connect a PC or other USB host device that supports USB audio via the USB input. When you have installed the keyboard on the external device, choose USB Audio Device in the device menu of the keyboard to transfer midi data. - Page 3 - AK220.indd 8 29/2/08 10:52:42 AM... -
Page 9: Top/Rear/Lcd Panel Description
3. M IXER: RHYTHM, BASS, ACCOMP, 19. SONG LOWER, UPPER 20. METRONOME 4. TEMPO 21. PIANO 5. FADE 22. STORE 6. A.B.C. 23. MEMORY BANK 7. FUNCTION/BACK & FUNCTION/NEXT 24. TRANSPOSE 8. DEMO 25. OCTAVE 9. O.T.S 26. DUAL 10. A CCOMPANIMENT CONTROL: 27. LOWER START/STOP, SYNC, INTRO/ENDING, 28. TOUCH FILL-IN A, FILL-IN B 29. SUSTAIN 11. PANEL MEMORY (M1 - M6) 30. DSP 12. LESSON 31. NUMERIC KEYPAD 13. LEFT 32. LCD DISPLAY 14. RIGHT/CHORD DICTIONARY 15. RECORD - Page 4 - AK220.indd 9 29/2/08 10:52:49 AM... - Page 10 DESCRIPTION: REAR PANEL 1. USB CONNECTION 4. AUX OUT 2. SUSTAIN INPUT 5. PHONES INPUT 3. VOLUME INPUT 6. POWER DC IN DESCRIPTION: LCD DISPLAY 1. A.B.C FLAG INDICATOR 12. TOUCH FLAG INDICATOR 2. LOWER FLAG INDICATOR 13. SUSTAIN FLAG INDICATOR 3. DUAL FLAG INDICATOR 14. CHORD DICTIONARY FLAG INDICATOR 4. FADE FLAG INDICATOR 15. BASS CLEF NOTE KEY INDICATOR 5. VOICE, STYLE, SONG, ALBUM IND. 16. TREBLE CLEF NOTE KEY INDICATOR 6. CHORD INDICATOR 17. BEAT INDICATOR 7. TEMPO INDICATOR 18. FOLLOW INDICATOR 8. MEASURE INDICATOR 19. PERFORM INDICATOR 9. BEAT INDICATOR 20. LEFT INDICATOR 10. MEMORY INDICATOR 21. RIGHT INDICATOR 11. DSP INDICATOR 22. RECORD ON/OFF INDICATOR - Page 5 - AK220.indd 10 29/2/08 10:52:52 AM...
-
Page 11: Voices And Effects
- you may want to use the number pad to select it. DUAL VOICE FUNCTION (PLAYING 2 VOICES AT ONCE): The AK220 has the option of playing 2 voices simultaneously. You can also get creative and make multiple combinations. To set a dual voice press the (DUAL) button whilst a voice is selected. The “DUAL” and “VOICE R2” signals will appear on the LCD screen to indicate you are in dual mode. In dual mode you are selecting the second voice you wish to play - the first is the voice you are set on before you press the (DUAL) button. Pressing the (DUAL) button again will take you out of dual mode. - Page 6 - AK220.indd 11 29/2/08 10:52:56 AM... -
Page 12: Sustain, Touch, Split/Lower Voice, Modulation
LOWER LO W ER section of the keyboard. The separation note for the 2 sections is the #F3 note (see diagram). To turn on lower voice press (LOWER) button - the flag will appear next to “LOWER” and “VOICE L” will appear on the LCD screen. Press (LOWER) button again to turn off. MODULATION: Press and hold the (MODULATION) button. You can hear the modulation effect when playing the keyboard. Press again to disable. - Page 7 - AK220.indd 12 29/2/08 10:53:10 AM... -
Page 13: Transpose, Octave, Pitch Bend
G note by adjusting transpose level. Press (TRANSPOSE +) or (TRANSPOSE -) to adjust the pitch level. To cancel the function press both buttons simultaneously. You CAN use this function when the lower voice function is on. OCTAVE: Press (OCTAVE +)/(OCTAVE -) buttons to adjust the octave and the value of octave will appear on the display. You can only adjust the current note one octave either way (up/down). To cancel this function, press both buttons simultaneously until the value of the octave reads “0”. PITCH BEND: The pitch bend wheel can be used to bend the note lower or higher. The range is between +/- 2 semitones. When you release the wheel, the note will set back to normal. - Page 8 - AK220.indd 13 29/2/08 10:53:17 AM... -
Page 14: Style Control
“accompaniment range” of the keyboard, the system will automatically recognise the chord and begin to play the appropriate bass line and the parts of the chord along with the selected style. The chord name is recognised and displayed. SYNC START: Press the (SYNC) button to enter the sync start waiting mode. Play any of the accompaniment keys to start the accompaniment. STOPPING A STYLE: To stop a style press the (START/STOP) button again and the style will stop. - Page 9 - AK220.indd 14 29/2/08 10:53:23 AM... -
Page 15: Other Operations: Intro/Ending, Fill In A/B, Tempo, Fade
(BPM) to 280 BPM. If you hold down a button you will either ‘increase’ or ‘decrease’ the tempo selection. Press both buttons together to set the tempo to its default value. FADE: 1. FADE IN: Before starting a style, press the (FADE) button and the fade indicator will light up. When a style is started the style will fade in (gradually get louder) and the fade function will shut off. 2. FADE OUT: While a style is playing, press the (FADE) button and the fade indicator will light up. The style will end by fading out (gradually get softer). This function is an alternative to the ending option. - Page 10 - AK220.indd 15 29/2/08 10:53:27 AM... -
Page 16: Memory
6 memories to be stored inside. Press the (MEMORY BANK) button to access the library, you can navigate via this button also; the current memory bank/parameter will be shown on the LCD screen as 02 - 1 (02: memory bank, 1: 1 to 6 memory storage spaces - see above). STORE/LOAD PARAMETER: Press and hold (STORE) button, then press (M1), (M2), (M3), (M4), (M5) or (M6) to choose the key you wish to set a memory parameter to. Press or hold any of the (M) buttons for loading the data from memory. The number of the memory will appear on the LCD screen. If you press the (+/YES) and (-/NO) buttons together, the memories will set back to default when the keyboard is restarted. O.T.S FUNCTION: One touch setting is a great function that allows you to reconfigure all settings instantly with the touch of a button: voice R1 # and volume, dual function, voice R2 # and volume, reverb and chorus type and level, octave. Select one of the styles; each style has 4 presets. Press the (O.T.S) button to enter/exit the O.T.S mode (A.B.C will be turned on automatically). Press any of the (M1) - (M4) buttons, corresponding to the 1 - 4 presets to adjust. When a style is playing, press (O.T.S) to turn on; it will insert a fill automatically (M1/M2 will ‘fill A’, M3/M4 will ‘fill B’). - Page 11 - AK220.indd 16 29/2/08 10:53:31 AM... -
Page 17: Record
(START/STOP) button. It will start recording and the beat will follow the current tempo. New data will over-write old recorded data. Note: If there is data stored in the ACCOMP track, then the playback tempo will follow the tempo of the ACCOMP track. If there’s no data stored in the ACCOMP track, the MELODY tempo will then be one of the MELODY tracks’ tempos when recording. STOP THE RECORDING: If the capacity is full, recording will be stopped automatically even when recording is in process; the screen will indicate “FULL”. To stop manually, simply press the (RECORD) button again. PLAYBACK THE RECORDING: After selecting the track, press the (PLAY/STOP) button to start/stop playing the track data. If the recording memory is empty “EMPTY” will appear on the LCD display. - Page 12 - AK220.indd 17 29/2/08 10:53:34 AM... -
Page 18: Function Menu
(-/NO) buttons to adjust the beat. To set to default press (+/YES) and (-/NO) buttons simultaneously. SPLIT POINT: Press the (FUNCTION) buttons to enter the SPLIT POINT sub-menu. Use the (+/YES) and (-/NO) buttons to adjust the split point (lowest C to highest C). To set to default press (+/ YES) and (-/NO) buttons simultaneously. - Page 13 - AK220.indd 18 29/2/08 10:53:39 AM... -
Page 19: Midi Channel, Portamento & Modulation. Portamento Type
Press the (FUNCTION) buttons to enter the PORTAMENTO & MODULATION sub-menu. Use the (+/YES) and (-/NO) buttons to select portamento or modulation. PORTAMENTO TYPE: Press the (FUNCTION) buttons to enter the PORTAMENTO TYPE sub-menu. Use the (+/ YES) and (-/NO) buttons to select a type/range of portamento from 1 to 3. DSP EFFECT: REVERB TYPE: Press (FUNCTION) buttons to enter the reverb type setting function. Use the (+/YES) and (-/NO) buttons to select one of the 8 types of reverbs. REVERB LEVEL: Press (FUNCTION) buttons to enter the reverb level setting function. Use the (+/YES) and (-/NO) buttons to select the volume from 0 to 7. - Page 14 - AK220.indd 19 29/2/08 10:53:53 AM... -
Page 20: Mixer
FUNCTION MENU: CHORUS TYPE: Press (FUNCTION) buttons to enter the chorus type setting function. Use the (+/YES) and (-/NO) buttons to select one of the 8 types of choruses. CHORUS LEVEL: Press (FUNCTION) buttons to enter the chorus level setting function. Use the (+/YES) and (-/NO) buttons to select the volume from 0 to 7. MIXER: Through mixed control, you can adjust the keyboard by controlling the accompaniment, bass and track volume of individual keyboard sound components The parameter will appear on the screen. All volumes are adjustable from 0 to 31. Press (RHYTHM/+)/(RHYTHM/-) buttons to adjust the track volume of drums. Press (BASS/+)/(BASS/-) buttons to adjust the track volume of drums. Press (ACCOMP/+)/(ACCOMP/-) buttons to adjust the track volume of accompaniment. Press (LOWER/+)/(LOWER/-) buttons to adjust the volume of the left keyboard section. Press (UPPER/+)/(UPPER/-) buttons to adjust the volume of the left keyboard section. - Page 15 - AK220.indd 20 29/2/08 10:54:02 AM... -
Page 21: Dsp (Digital Signal Processing)
DSP (DIGITAL SIGNAL PROCESSING): This function measures and imitates the output signal of a musical instrument played in a realistic environment. You can adjust the value of DSP from the FUNCTION menu. Press the (DSP) button to turn it on and off. METRONOME: Press the (METRO) button to turn on/off the metronome. The metronome is able to be selected in any mode or function. PIANO: Press the (PIANO) button to enter/exit the piano mode. “PIANO” will appear on the display and the keyboard voice will be set to piano. If you are in A.B.C mode, turning piano mode on will exit the A.B.C mode. In piano mode you can play styles without accompaniment. You are not able to use record in this mode and the (DEMO), (SONG) and (MEMORY) buttons will exit the piano mode. DEMO: Press (DEMO) to start/stop playing a demo song. Select from the 5 songs using the (+/YES) and (-/NO) keys. - Page 16 - AK220.indd 21 29/2/08 10:54:08 AM... -
Page 22: Song
LCD screen. Lesson 1 will test your accuracy of keeping in time. Press the (START/STOP) button to begin. No matter what keys you have pressed, the note still sounds out correctly- the grading system will give you marks according to the total number of right & wrong notes played. LESSON 2: PRACTICE NOTE ACCURACY: When you have entered the lesson mode by pressing the (LESSON) button. It will default to “LESSON 1”. Press (LESSON) again to start Lesson 2. Lesson 2 will test your accuracy of notes. Press the (START/STOP) button to begin. The song continues to play when you have hit the correct keys according to the display. A “waiting” status will appear if a wrong key is pressed- the grading system will give you marks according to the total number of right & wrong notes played. LESSON 3: MEMORY OFF: When you have entered the lesson mode by pressing the (LESSON) button. It will default to “LESSON 1”. Press (LESSON) twice to start Lesson 3. Lesson 3 will test your accuracy of timing and notes. Press the (START/STOP) button to begin. The accompaniment will keep playing: you must make sure you hit the right notes on time. Hitting the wrong notes will deduct points; right notes will add points. A total count will be displayed upon completion. - Page 17 - AK220.indd 22 29/2/08 10:54:12 AM... -
Page 23: Chord Dictionary
1. P ress the (RIGHT)/(CHORD DICTIONARY) button continuously for 2 seconds to enter the dictionary mode. The flag will light on the screen and “DICT” will be displayed. 2. S pecify the chord you wish to play by entering the chord root note or family (from the chord root area) and the chord type (from the chord type area) that you want in that order. 3. A fter selecting the chord root and the chord type that you want to study, the chord type and note combination will be displayed on the keyboard LCD screen. When the note is played correctly the chord type indicator will flash. A list of chord roots and types are displayed on the following page. - Page 18 - AK220.indd 23 29/2/08 10:54:26 AM... -
Page 24: Chord Dictionary List
CHORD TYPE: NOTE CHORD TYPE NOTE CHORD 7(b9) M(9) 7(9) 7(#9) 7(b13) 7(13) 7(#11) m(9) dim7 m7(9) 7aug m7b5 7sus4 sus4 CHORD TYPE: NOTE CHORD ROOT NOTE CHORD TYPE F#/Gb C#/Db Ab/G# Eb/D# Bb/A# - Page 19 - AK220.indd 24 29/2/08 10:54:28 AM... -
Page 25: Midi Function
USB CONNECTION System Requirements: - CPU: >300MHz, >Pentium 2 - Memory: >64MB - Driver: CDROM 24X - OS: Windows 2000/XP Connect a standard USB cable from jacks on both keyboard and computer. You can purchase an Ashton USB cable from your nearest dealer. Connect the USB before turning the instrument power on, connect the USB to the computer when it is “live” and not in standby or off - this will ensure the keyboard or the computer will not freeze. MIDI APPLICATION: PC Recorded Data (MIDI) can be played on the keyboard. In order to transfer songs between... -
Page 26: Appendix: Voice List
118. Melodic Drum 035. Picked Bass 077. Blown Bottle 164. UFO Organ 119. Synth Drum 036. Fretless Bass 078. Shakuhachi 165. Q-Organ 120. Reverse Cymbal 037. Slap Bass 1 079. Whistle 166. Elorg1 SOUND EFFECTS: 038. Slap Bass 2 080. Ocarina 121. Guitar Fret Noise 167. 70 El. Organ 039. Synth Bass 1 LEAD 168. 70 El. Organ 2 122. Breath Noise 040. Synth Bass 2 081. Square 169. Slow Organ 123. Seashore STRINGS 082. Sawtooth 170. Ringo 124. Bird Tweet 041. Violin 083. Calliope 171. Autolux 125. Telephone Ring - Page 21 - AK220.indd 26 29/2/08 10:54:31 AM... - Page 27 DRUM SET 208. Fg-Bs-Kb 255. High Brass 301. Standard Drum 1 209. Fusion Bass 256. Teno Sax 302. Standard Drum 2 210. Picked Kb 257. Baritone Kb 303. Room Drum 211. Fretless Kb 258. Basso Kb 304. Rock Drum 212. Slap Bass 259. Sweet Brass 305. Electric Drum 213. Slap Bass 2 Kb 260. Soft Saxaphone 306. Analog Drumset 214. Synth Bs 1 261. Whistle 307. Dance Drumset 215. Synth Bass 1 262. Pan Flute 2 308. Jazz Drum 216. Synth Bass 2 263. Lead 1 309. Brush Drumset 217. Synth Bs 2 264. Lead 2 310. Standard Drumset 218. Synth Bs 2 Kb 265. Lead 3 - Page 22 - AK220.indd 27 29/2/08 10:54:33 AM...
-
Page 28: Appendix: Style List
119. Beguine 033. Pop Ballad 1 076. Funk 120. Slow Bolero 034. Pop Ballad 2 077. El. Funk 121. Disco Samba 035. EP Ballad 078. Groove Funk 122. Mambo 036. Piano Ballad 079. Rubber Funk 123. Meneito 037. New R&B Ballad 080. Cool Funky 124. Rumba 2 038. Natural Ballad 081. Jazz Funk 125. Tikitikita’ 039. Love Ballad 082. Groove 126. Dancing Tribe 040. Easy Ballad 083. Soul 127. Lambada BALLAD 084. Hip Hop Soul 128. Pop Cha Cha 041. Soft Rock 085. Hip Hop Beat 129. Cha Cha Cha 042. Hard Rock 086. R & B 130. Salsa - Page 23 - AK220.indd 28 29/2/08 10:54:34 AM... - Page 29 030. P ianosonatan 08 In Cm In 117. Santa Claus Is Coming To Town 072. Chrysanf Pathetique 118. Brave Cavalier 073. Maple Leaf Rag 031. Arpeggione Sonata In Am 119. America The Beautiful FOLK & COUNTRY 074. June Samba 120. Music Box Dancer 075. Funk 032. Country 076. I Can... 033. Jambalaya 077. Sea Shore 034. Susanna 078. Guitar & Saxaphone 035. Bridge 079. The Hip Hop’s Night 036. Battle Hymne Of The Republic 080. Blue Lunch 037. The Old Gray Mare 081. Cobweb 038. American Patrol 082. Wine 039. In The Rain 083. Jazz Old Man 040. Sippin Cider Through A Straw 084. Dark Eyes 041. Christmas - Page 24 - AK220.indd 29 29/2/08 10:54:35 AM...
- Page 30 1-(2)-3-#4-5-b7 or 1-2-3-#4-(5)-b7 C7(#11) C7(#11) Seventh Add Thirteenth [7(13)] 1-3-(5)-6-b7 C7(13) C7(13) Seventh Flattened Ninth [7(b9)] 1-b2-3-(5)-b7 C7(#9) C7(#9) Seventh Add Flattened Thirteenth [7(b13)] 1-3-5-b6-b7 C7(b13) C7(b13) Seventh Sharp Ninth [7(#9)] (1)-#2-3-(5)-b7 C7(#9) C7(#9) Major Seventh Augmented [M7aug] 1-3-#5-7 CM7aug CM7aug Seventh Augmented [M7aug] (1)-3-#5-b7 C7aug C7aug Suspended Fourth (sus4) 1-4-5 Csus4 Csus4 One plus two plus five [1+2+5] 1-2-5 C1+2+5 - Page 25 - AK220.indd 30 29/2/08 10:54:36 AM...
- Page 31 D. T he product does not appear to be operating normally, or exhibits a marked change in performance E. The product has been dropped or the cabinet damaged 12. D o not attempt to service the product beyond that described in the manual instructions. All other servicing should be referred to qualified service personnel. 13. W ARNING ! Do not place objects on products, the power cord or place it in a position where anyone could trip over, walk on or roll anything over it. Do not allow the any part of the product to rest on or be installed over power cords of any type. Improper installations of this type create the possibility of fire hazard and/or safety hazard. - Page 26 - AK220.indd 31 29/2/08 10:54:39 AM...
- Page 32 AK220.indd 32 29/2/08 10:54:39 AM...
- Page 33 AK220.indd 33 29/2/08 10:54:40 AM...
Need help?
Do you have a question about the AK220 and is the answer not in the manual?
Questions and answers