Table of Contents
Advertisement
Advertisement
Table of Contents

Related Manuals for Ashton AK110


Summary of Contents for Ashton AK110
- Page 1 AK110 USER MANUAL...
-
Page 2: Table Of Contents
CONTENTS: INTRODUCTION PACK CONTENTS SPECIFICATIONS SETTING UP: POWER SUPPLY, USING HEADPHONES, MUSIC STAND SUSTAIN INPUT, USB CONNECTION TOP/REAR/LCD PANEL DESCRIPTION 4 - 5 BASIC OPERATION: VOLUME & DEMO VOICES AND EFFECTS: SELECTING A VOICE, DUAL VOICE FUNCTION SUSTAIN, TOUCH, METRONOME, PIANO STYLE CONTROL: SELECT/START A STYLE, A.B.C MODE, SYNC START, STOPPING A STYLE SYNC START, STOPPING A STYLE OTHER OPERATIONS: INTRO/START, MAIN/FILL, END, TEMPO CHORDS: CHORD RECOGNITION CHORDS: A QUICK BASIC GUIDE, READING CHORD NAMES MEMORY ONE TOUCH SETTING RECORD: START RECORDING, STOP RECORDING, PLAYBACK THE RECORDING FUNCTION MENU: TRANSPOSE, OCTAVE, BEAT SPLIT POINT, MIDI CHANNEL, ACCOMP VOLUME, BANK SELECT SONG LESSON MODE: LESSON 1, LESSON 2, LESSON 3, GRADE FUNCTION... -
Page 3: Introduction
INTRODUCTION: Ashton is designed in Australia by a team of industry experts that have years of experience in the development, design and production of musical instruments and equipment. Ashton’s range of products are a result of years of development and careful testing. Every Ashton product is designed with value in mind and features the highest quality materials available. We highly recommend that you read and understand the information in this manual before beginning use. Enjoy, The Ashton Team PACK CONTENTS: 1 x AK110 keyboard unit 1 x Ashton “Learn To Play” DVD SPECIFICATIONS: • 61 keys with touch response • 157 voices • 100 styles • 100 songs • 2 demo songs • Polyphony: 32-note (max) • Accompaniment • Controls: start/stop, sync, intro/ending, main/fill, A.B.C. • Overall controls: dual, touch, sustain, function, one touch setting • Other controls: record & playback • Connectors: 12V DC, sustain, headphones, USB • Lesson function & DVD • Chord dictionary function •... -
Page 4: Setting Up
SETTING UP: POWER SUPPLY USING AN ADAPTOR: Connect the adaptor to the DC IN jack located on the rear panel of the unit and plug into power outlet. Do not use adaptors other than what is specified. The technical specifications for the power adaptor on the Ashton AK110 is DC12V1A+. USING BATTERIES: 1. O pen the battery compartment cover on the underside of the unit. 2. I nsert 8 x alkaline “D” sized, R 20, SUM-1 or equivalent batteries. Read the polarity instructions (negative and positive guide). Close the battery compartment. -
Page 5: Sustain Input, Usb Connection
SETTING UP: SUSTAIN INPUT An optional footswitch can be plugged into the SUSTAIN input jack for sustain control. The sustain pedal acts as a damper pedal (like on a piano). Press for sustain, release for normal sound. Attach the sustain as shown in the diagram on the left. SETTING UP: USB CONNECTION Connect a PC or other USB host device that supports USB audio via the USB input. When you have installed the keyboard on the external device, choose USB audio device in the device menu of the keyboard to transfer midi data. -
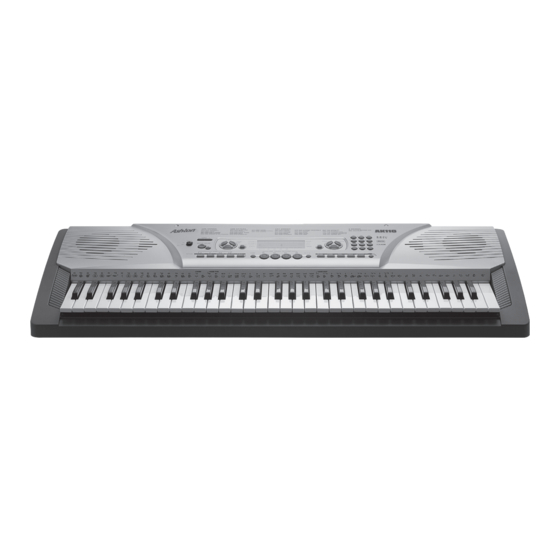
Page 6: Top/Rear/Lcd Panel Description
DESCRIPTION: TOP PANEL 14. INTRO/ENDING :: 1. POWER ON/OFF 15. MAIN/FILL :: 2. TEMPO +/- 16. A.B.C. 3. MASTER VOLUME 4. LEFT HAND LESSON MODE 17. STORE 5. R IGHT HAND LESSON MODE/ 18. PANEL MEMORY (M1-M4) CHORD DICTIONARY 19. ONE TOUCH SETTING 6. LESSON 20. METRONOME 7. FUNCTION 21. PIANO 8. DEMO 22. DUAL 9. STYLE 23. TOUCH 10. VOICE 24. SUSTAIN 11. SONG 25. RECORD 26. NUMBERIC KEYPAD STYLE MODE :: SONG MODE 27. LCD DISPLAY 12. START/STOP :: 13. SYNC :: - Page 4 -... - Page 7 DESCRIPTION: REAR PANEL 1. USB CONNECTION 2. SUSTAIN INPUT 3. PHONES JACK 4. POWER DC IN DESCRIPTION: LCD DISPLAY 11. TEMPO/COUNT INDICATOR 1. LESSON 1 FLAG INDICATOR 12. BEAT INDICATOR 2. LESSON 2 FLAG INDICATOR 3. LESSON 3 FLAG INDICATOR 13. METRONOME ON/OFF INDICATOR 4. A.B.C. FLAG INDICATOR 14. VOLUME LEVEL INDICATOR 5. RIGHT FLAG INDICATOR 15. BASS CLEF NOTE INDICATOR 6. LEFT FLAG INDICATOR 16. TREBLE CLEF NOTE INDICATOR 7. DUAL FLAG INDICATOR 17. 61 KEY KEYBOARD NOTATION INDICATOR 8. TOUCH FLAG INDICATOR 18. NORMAL/VARIATION 9. CHORD INDICATOR 19. ONE TOUCH SETTING FLAG INDICATOR 10. VOICE/STYLE/DEMO/SONG IND. 20. MEMORY (M1 - M4) FLAG INDICATOR - Page 5 -...
-
Page 8: Basic Operation: Volume & Demo
BASIC OPERATION MASTER VOLUME: The keyboard volume can be adjusted from the values of 0 to 31 via the (MASTER VOLUME +/-) button. The LCD screen will read MVL24, 24 being the example volume setting, DEMO: The AK110 keyboard includes 2 classic demo songs. Press (DEMO) to enter the demo mode. Select a demo song with the (+/YES), (-/NO) or number (1 & 2) buttons. Press (START/STOP) or (DEMO) to exit the demo mode. Note: all function keys excluding the ones needed to control the demo mode are disabled when the demo mode is engaged. - Page 6 -... -
Page 9: Voices And Effects
DUAL VOICE FUNCTION (PLAYING 2 VOICES AT ONCE): The AK110 has the option of playing 2 voices simultaneously. You can also get creative and make multiple combinations. To set the dual voice press the (DUAL) button whilst a voice is selected. The “DUAL” and “VOICE 2” signals will appear... -
Page 10: Sustain, Touch, Metronome, Piano
VOICES AND EFFECTS: SUSTAIN: This function allows you to set a voice with a sustain effect. Press the (SUSTAIN) button to activate the desired effect. “SUSTAIN” will be displayed on the LCD screen. To turn the sustain effect off, simply press the (SUSTAIN) button again. Note: the sustain pedal has a stronger sustain effect and works separately from the in-built sustain function. TOUCH: The touch function engages touch response on the keyboard. This will allow for greater diversity when playing. To turn the touch function on, press the (TOUCH) button. To determine whether this function is enabled - simply refer to the right hand side of the LCD screen - a small flag will appear next to the “touch” text to indicate the function is enabled. METRONOME: Press the (METRO) button to engage or disengage the metronome function. A metronome illustration will appear on the LCD screen to indicate it is on. The metronome can not be used in SONG/CHORD DICT modes. When recording the metronome will sound but will not be recorded. -
Page 11: Style Control
STYLE CONTROL: BASIC OPERATION SELECTING A STYLE: To select a style press the (STYLE) button and use the the (+/YES) or (-/NO) buttons, or type the number in using the numeric buttons. STARTING A STYLE: Press the (STYLE) button to enter the style mode. Then press (START/STOP) to start the backing accompaniment track. You can play over the top freely using any of the other keys. A.B.C MODE: The A.B.C mode’s default is off; when the A.B.C mode is enabled, you can navigate the lower split of the... -
Page 12: Other Operations: Intro/Start, Main/Fill, End, Tempo
STYLE CONTROL: OTHER OPERATIONS INTRO/START: Press the (INTRO/END) button when the style is not playing. The “NOR” flag will flash on the LCD, indicating the intro section is ready to play. The length of the intro section varies in different styles. Press the (START/STOP) button to start the intro section; this will lead straight in to the main section. MAIN/FILL: In MAIN mode, press the (MAIN/FILL) button to insert a fill into the accompaniment. The “VAR” variation section will continue after the fill. Press the (MAIN/FILL) button again to go back the “NOR” normal accompaniment. In VARIATION mode, press (MAIN/FILL) button to insert a fill. The main section will continue after the fill. If you hold down the (MAIN/FILL) button when the style is playing, it will repeat until the button is released. END: The accompaniment can be stopped at any time using the (START/STOP) button. Though you may also want to complete the style with an ending section; to do this press the (INTRO/ END) button and the ending sequence unique to the style selection will play. TEMPO: Press the (TEMPO +/-) buttons to change the tempo of a current style. To set the tempo back to the default for your current style, press both the (TEMPO +) and (TEMPO -) buttons simultaneously. When you change the style the new style will automatically be set to the default tempo for that style. -
Page 13: Chords: Chord Recognition
STYLE CONTROL: CHORDS CHORD RECOGNITION: When the A.B.C. mode is enabled, and a style is selected, you can navigate the accompaniment range to create chords while the accompaniment is playing. There are two methods of creating chords; single & multi finger chords. SINGLE FINGER CHORDS: This method allows you to play chords easily within the accompaniment range using one, two or three fingers. (Example chords are: C, Cm, C7 and Cm7, shown below.) To play a seventh chord, press the To play a major chord, root note together with the nearest press the root note of the chord white key to the left of it. To play a minor chord, press the root To play a mintor seventh chord, note together with the nearest black press the root notes together with the key to the left of it. nearest white and black keys to the left of it. MULTI FINGER CHORDS: This method allows you to play chords with normal fingering within the accompaniment range of the keyboard. -
Page 14: Chords: A Quick Basic Guide, Reading Chord Names
STYLE CONTROL: CHORDS CHORDS (A QUICK BASIC GUIDE): The most basic kind of chord is the “triad” consisting of three notes: the root, third and fifth degrees of the corresponding scale. For example the “C major triad” is made up of the notes C (the root), E (the third note in the C major scale) and G (the fifth note in the C major scale). In the C major triad (shown above), the lowest note is the “root” note. The root is the central sound of the chord- which supports and anchors the other notes. The distance (interval) between the notes of a triad in root position is a MAJOR or a MINOR chord. The lowest interval in our root-position triad (between the root and the third) determines whether the triad is a major or minor chord, we can shift the highest note up or down a semitone to produce two additional chords; augmented and diminished. READING CHORD NAMES: Chord names tell you just about everything you need to know about a chord. The chord name tells you what the root of a chord... -
Page 15: Memory
MEMORY: There are 4 memory banks for storage; (M1), (M2), (M3) and (M4) - see diagram below. To store, press together (STORE) and one of the 4 memory buttons. The data will be stored in the memory bank as follows: VOICE DATA: - VOICE: VOICE 1, VOICE 2; - VOICE EFFECT: TOUCH ON/OFF, SUSTAIN - ON/OFF, TRANSPOSE, OCTAVE SPLIT POINT; ACCOMP DATA: STYLE NUMBER, TEMPO, A.B.C. ON/OFF, NORMAL/VARIATION STATUS. ONE TOUCH SETTING: One touch setting is a powerful and convenient function that allows you to reconfigure all settings instantly with the touch of a single button. In this function four types of parameters (M1 - M4) will be loaded for operating the current style. P ress the (O.T.S) button to turn this mode on and the O.T.S flag on the LCD will be lightened. Press any of the (M1 - M4) buttons, the data parameter will be loaded according to the current style. The keyboard will turn the A.B.C. mode on automaticcaly while the O.T.S. is on. P ress any of the (M1 - M4) butons, which correspond to your desired setting - press the (O.T.S) button again to turn off the one touch setting mode. - Page 13 -... -
Page 16: Record
RECORD: START RECORDING: Press the (RECORD) button, the four-beat LCD will flash simultaneously, indicating the “record waiting status”. A voice, style and memory can be selected in this status. The ACCOMP track and MELODY track can be recorded together. After all the settings in the “record waiting status” have been selected, play the keyboard (or chord area when using ACCOMP) or press the (START/STOP) button; it will start recording and the beat will be displayed according to the current tempo. When new recording has started, original data will be lost. -
Page 17: Function Menu
FUNCTION MENU: Press the (FUNCTION) key to enter the OPTION RANGE DEFAULT function menu. The default option of the menu TRANSPOSE XPS 00 -6 TO 6 is “TRANSPOSE”. Every time you enter the OCTAVE OCT 00 -1 TO 1 menu, the last used function will be displayed. BEAT BET 04 0, 2 TO 9 Press (FUNCTION) to select the option you SPLIT SPT 19 1 TO 61 19 (#F3) desire. Use the (+/YES) and (-/NO) buttons to MIDI IN... -
Page 18: Split Point, Midi Channel, Accomp Volume, Bank Select
FUNCTION MENU: SPLIT POINT: Press the (FUNCTION) button to enter the SPLIT POINT sub-menu. The LCD will display current split point value. Use the (+/YES) and (-/NO) buttons to adjust the split point value. MIDI CHANNEL: Press the (FUNCTION) button to enter the MIDI CHANNEL sub-menu. Use the (+/YES) and (-/NO) buttons to select a midi in/out channel from 1 to 16. ACCOMPANIMENT VOLUME: Press the (FUNCTION) button to enter the ACCOMP VOLUME sub-menu. The LCD will display current accompaniment volume value; ranging between 0 and 31). Use the... -
Page 19: Song
SONG: There are 100 songs on the AK110 keyboard (see appendix). Each song can be practised in the MELODY OFF mode. 1. START/STOP the song: Press the (SONG) button to enter the “song mode”, the song flag will light on the LCD- all songs are looped. Press (START/STOP) button to stop the song. 2. LOOP: The second time you start playing the song, press the (START/STOP) button, it will play the current song repeatedly. 3. SELECT the song: Use the (+/YES), (-/NO) buttons or the numeric keypad to select a song. 4. REW/FF/PAUSE: When a song is playing press (REW) to rewind, (FF) to fast forward or (PAUSE) to pause the song. When the song is stopped press (STYLE), (VOICE) or (DUAL) to exit the song mode. LESSON MODE: The lesson mode allows you to learn a song via timing and accuracy. To enter lesson mode, select song mode (press [SONG] button), then press the (LESSON) button. There are 3 levels to score the performance of your playing. You can use the (R) or (L) buttons to select which hand you want to practice with. (R) hand is default. You can also select both hands for the lesson. Note: The hand choice varies on different songs. If a chord song is chosen the left hand provides the chord and the right hand for the melody. The LCD will indicate the melody position . -
Page 20: Lesson 1, Lesson 2, Lesson 3, Grade Function
LESSON MODE: LESSON 1: PRACTICE TIMING: When you have entered the lesson mode by pressing the (LESSON) button. It will default to “LESSON 1”. Lesson 1 will test your accuracy of keeping in time. Press the (START/STOP) button to begin. Select either (L), (R) or (L) & (R). Whatever you have chosen, you will need to follow the melody of that hand/hands, Once the lesson is completed - your evaluation will be announced. LESSON 2: PRACTICE NOTE ACCURACY: When you have entered the lesson mode by pressing the (LESSON) button. It will default to “LESSON 1”. Press (LESSON) again to start Lesson 2. Lesson 2 will test your accuracy of notes. Press the (START/STOP) button to begin. Select either (L), (R) or (L) & (R). Whatever you have chosen, you will need to follow the melody of that hand/hands, Once the lesson is completed - your evaluation will be announced. LESSON 3: MELODY OFF When you have entered the lesson mode by pressing the (LESSON) button. It will default to “LESSON 1”. Press (LESSON) twice to start Lesson 3. Lesson 3 will test your accuracy of timing and notes. Press the (START/STOP) button to begin. -
Page 21: Chord Dictionary
CHORD DICTIONARY: The chord dictionary is a built-in chord book showing you the individual notes or the chords. It is a great learning tool and also acts a great practising tool. 1. To engage the chord dictionary press the (CHORD DICT.) button. The LCD will read “dict”. 2. If you want to play a CM7 chord. Press the C key in the selection of the keyboard labelled chord root. The note will not sound. The root note you have selected will appear on the keyboard diagram. Press the M7 key, indicated by the panel above the keys that is labelled chord type (the refers to all types of chords). The note will not sound. The note will appear on the keyboard diagram. You have now programmed this as the chord you are wanting to play. -
Page 22: Midi Function
WHAT IS MIDI: MIDI stands for “Musical Instrument Digital Interface”, that is the standard interface between a computer and another electronic instrument. USB connections can be used for MIDI data transfer with a computer or other devices that support USB inputs. Use the keyboard as a tone generator, the data (MIDI) recorded on the computer can be played on the keyboard. NOTE: while recorded data and a style is being played, you cannot use the MIDI IN function, or the song you are playing will have an error in the same channel. USB CONNECTION System Requirements: - CPU: >300MHz, >Pentium 2 - Memory: >64MB - Driver: CDROM 24X - OS: Windows 2000/XP Connect a standard USB cable from the USB connection on both keyboard and computer. You can purchase an Ashton USB cable from your nearest dealer. Connect the USB before turning the instrument power on, connect the USB to the computer when it is “live” and not in standby or off - this will ensure the keyboard or the computer will not freeze. MIDI APPLICATION: PC Recorded Data (MIDI) can be played on the keyboard. In order to transfer songs between your computer and the keyboard you will need to install other applications. - Page 20 -... -
Page 23: Appendix: Voice List
VOICE LIST PIANO 042. Viola 126. Helicopter 084. Chiff 001. Grand Piano 043. Cello 127. Applause 085. Charang 002. Bright Piano 044. Contrabass 128. Gunshot 086. Voice 003. El Grand Piano 045. Tremolo Strings SYNTH VOICE 087. Fifths 004. Honky-Tonk Piano 046. Pizzicato Strings 129. 70elep 088. Bass Lead 005. Electric Piano 1 047. Harp 130. Fuzz Piano 006. Electric Piano 2 048. Timpani 131. Ep3 089. Fantasia 007, Harpsichord STRING ENSEMBLE 132. Ep4 090. Warm 008. Clavi 049. Strings 1 133. Ep5 091. Poly Synth MALLET 050. Strings 2 134. Harp Piano 092. Choir... -
Page 24: Appendix: Style List
STYLE LIST 8/16 BEAT 044. Soul Shuffle 087. Waltz 001. 8 Beat 1 045. Soul Blues 088. Slow Waltz 002. 8 Beat 2 046. R & B 089. Vienna Waltz 003. 8 Beat 3 047. 6/8 Gospel 090. Musette 004. 8 Beat 4 048. Pop Groove PIANO 005. 60’s 8 Beat JAZZ 091. 8 Beat 006. 8 Beat Ballad 049. Swing 092. Ballad 007, 8 Beat Rock 050. Cool Jazz 093. Boogie 008. 16 Beat 1 051. Pop Swing 094. Jazz 009. 16 Beat 2 052. Swing Fox 095. Swing 010. 16 Beat Pop 053. Big Band 096. Jazz Waltz 011. 16 Beat Shuffle 054. Big Band Medium 097. Twist 012. Ballad 055. Jazz Waltz 098. March 013. Slow Ballad... -
Page 25: Appendix: Song List
SONG LIST CLASSICAL 045. I’ve Been Workin’ On The Railroad PIANO & KEYBOARD 001. Cannon 046. In The Rain 086. Four Little Swans 002. Thai Meditation 047. She Wore A Yellow Ribbon 087. Did You Ever See A Lassie 003. Old France 048. My Bonnie 088. Spring 004. Minuet 049. Yankee Doodle 089. Impromptu 005. Ode To Joy 050. Red River Valley 090. Gavotte 006. Wiegenlied 051. Auld Lang Syne 091. Nocturine 007. “The Surprise” Symphony 052. W hen The Saints Go 092. Pizzicato Polka 008. Swan Lake Marching In 093. Musical Moments 009. Spring From “The Four Seasons” 053. Twinkle Twinkle Little Star 094. Reggae 010. Habanera from “Carmen” 054. Happy Birthday To You 095. All Kind Of My Everything 011. Joy To The World 055. Little Brown Jug 096. Valse No.6 “Petit Chien”... -
Page 26: Appendix: Demo List
DEMO LIST: 001. Little Brown Jug 002. Cha Cha CHORD LIST: Chord Name/(Abbreviation) Normal Voicing Chord (C) Display Major (M) 1-3-5 Sixth (6) 1-(3)-5-6 Major Seventh (M7) 1-3-(5)-7 Major Add Ninth [M(9)] 1-2-3-5 CM(9) CM(9) Augmented (aug) 1-3-# 5 Caug Caug Minor (m) 1-b3-5 Minor Sixth (m6) 1-b3-5-6 Minor Seventh (m7) 1-b3-(5)-b7 Minor Seventh Flattened Fifth (m7b5) 1-b3-b5-b7 Cm7b5 Cm7b5 Minor Major Seventh (mM7) 1-b3-(5)-7 CmM7 CmM7 Diminished (dim) 1-b3-b5... -
Page 27: Safety Information
SAFETY INFORMATION: INSTRUCTIONS RELATING TO RISK OF FIRE, ELECTRIC SHOCK, OR INJURY TO PERSONS. WARNING! When using any electronic product basic precautions should always be followed, including the following: 1. R ead all the safety and installation instructions and explanations of graphic symbols before using the products. T his product must be earthed. In the unlikely malfunction or breakdown, grounding provides a path of least resistance for electronic current to reduce the risk of electric shock. This product is equipped with a cord having an equipment-grounding conductor and a grounding plug. The plug must be connected to an appropriate outlet that is properly installed and earthed in accordance with all local codes and ordinances. - Page 28 info@ashtonmusic.com.au...
Need help?
Do you have a question about the AK110 and is the answer not in the manual?
Questions and answers