Table of Contents
Advertisement
Advertisement
Table of Contents

Related Manuals for Nikon CoolPix P3


Summary of Contents for Nikon CoolPix P3
- Page 1 The Nikon Guide to Digital Photography with the DIGITAL CAMERA...
-
Page 2: Trademark Information
. D-Lighting technology is provided by o Apical Limited. All other trade names mentioned Identix in this manual or the other documentation provided with your Nikon product are trademarks or reg- istered trademarks of their respective holders. Apple Public Source License This product includes Apple mDNS source code that is subject to the terms of the Apple Public Source License located at URL http://developer.apple.com/darwin/. - Page 3 Thank you for your purchase of a Nikon COOLPIX P3 digital camera. This manual has been written to help you enjoy taking pictures with your Nikon digital camera. Read this man- ual thoroughly before use, and keep it handy when using the product.
-
Page 4: Table Of Contents
Table of Contents Before You Begin ... 6 For Your Safety ... 6 Notices... 8 Introduction ... 11 Parts of the Camera ... 12 The Monitor ... 14 First Steps... 16 Charging the Battery ... 16 Inserting the Battery ... 18 Inserting Memory Cards ... - Page 5 Viewing Pictures on the Camera ... 49 Full-screen Playback Mode... 49 Viewing Multiple Pictures: Thumbnail Playback ...50 Histogram Display...51 Deleting Pictures...51 Taking a Closer Look ... 52 Quick Playback Zoom ... 52 Playback Zoom ... 53 Creating a Cropped Copy... 54 Voice Memos ...55 Recording Voice Memos ...
- Page 6 Advanced Camera Settings... 76 Using the Menus ... 76 Displaying the Menus... 76 Navigating the Menus ... 77 The Shooting Menu... 78 Metering... 79 Continuous... 80 BSS ... 82 Auto Bracketing... 83 Image Adjustment ... 84 Image Sharpening ... 84 Saturation Control ...
- Page 7 Wireless Transfer Mode ... 109 What is Wireless Transfer Mode?...109 Setting Up Wireless Transfer Mode ... 110 Confirming Profiles...120 Transferring Images to a Computer ...121 Transferring Images to a Printer ...130 Technical Notes... 132 Optional Accessories...132 Caring for Your Camera ... 133 Error Messages ...136 Troubleshooting ...140 Appendix...143...
-
Page 8: Before You Begin
Before You Begin For Your Safety To prevent damage to your Nikon product or injury to yourself or to others, read the following safety precautions in their entirety before using this equip- ment. Keep this manual where all those who use the product will read them. - Page 9 AC adapters Use only the cables, batteries, battery chargers, and AC adapters provided or sold by Nikon for the purpose, to main- tain compliance with product regula- tions. Removing memory cards Memory cards may become hot during use.
-
Page 10: Notices
• Reorient or relocate the receiving antenna. • Nikon will not be held liable for any damages re- sulting from the use of this product. • While every effort has been made to ensure that... - Page 11 Modifications The FCC requires the user to be notified that any changes or modifications made to this de- vice that are not expressly approved by Nikon Corporation may void the user’s authority to operate the equipment. Notice for customers in Canada...
- Page 12 Notice Concerning Prohibition of Copying or Reproduction Note that simply being in possession of material that has been digitally copied or reproduced by means of a scanner, digital camera or other device may be punishable by law. • Items prohibited by law from being copied...
-
Page 13: Introduction
Before taking pictures on important occasions (such as at weddings or before taking the camera with you on a trip), take a test shot to ensure that the camera is functioning normally. Nikon will not be held liable for damages or lost profits that may result from product malfunction. -
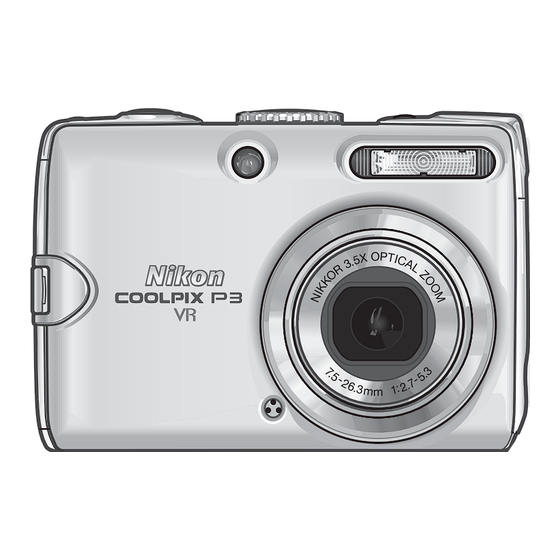
Page 14: Parts Of The Camera
Parts of the Camera Mode dial To select a mode, align the mode icon with q next to the mode dial. a Setup mode (P.98) Shutter-release button (P.26) Power-on lamp (P.24) Power switch (P.24) Eyelet for camera strap Interface connector cover Power connector cover... -
Page 15: Multi Selector
Zoom (j/kl) buttons (P.25, 15) m button (P.76) Monitor (P.14) Wireless transfer LED (P.123) Speaker Tripod socket (P.30, 35 - 37, 48) Multi selector Press the multi selector up, down, left, or right to highlight pictures and menu items, then press d to select. The buttons on the multi selector are also used to: J: Display the Flash menu (P.28) g: Transfer pictures (P.63) H: Display the Self-timer... -
Page 16: The Monitor
The Monitor Shooting Icons displayed vary with camera settings. 1 Shooting mode ..24, 33, 41, 58 2 AE-L indicator ....40 3 Focus mode . - Page 17 Playback Icons displayed vary with camera settings. 1 Current folder ....147 2 File number and type ... . . 147 3 Internal memory/Memory card indicator .
-
Page 18: First Steps
• The supplied power cable is intended solely for use with the MH-61 and is for domestic use only. It may be necessary to purchase another cable for use abroad; consult with a local Nikon- authorized retailer or service representative. - Page 19 Ambient temperature should be in the range of 0 to 40°C (32 to 104°F). • A charging error has occurred. Immediately unplug the wall plug from the power outlet. Contact your local retailer or Nikon representative for details.
-
Page 20: Inserting The Battery
Inserting the Battery Insert a fully-charged EN-EL5 battery into the camera. Battery latch Open battery chamber/memory card slot cover. Slide the cover until it stops (1) and open it (2). Insert battery. • Confirm that the positive s and negative t termi- nals are oriented correctly as described on the label at the entrance of the battery chamber, and insert the battery. -
Page 21: Removing The Battery
The Battery Chamber/Memory Card Slot Cover • The camera cannot be turned on when the battery chamber/memory card slot cover is open. • If the battery chamber/memory card slot cover is opened while the camera is on, the camera turns off and the lens retracts. Removing the Battery Turn the camera off and confirm that the power-on lamp has gone out before opening the battery chamber/memory card slot... -
Page 22: Inserting Memory Cards
Inserting Memory Cards Pictures can be stored in the camera’s internal memory (approximately 23 MB) or on an optional Secure Digital (SD) memory card. If a memory card is inserted in the camera, pictures will automatically be stored on the card and only the pictures stored on it are played back or de- leted. - Page 23 CARD IS NOT FORMATTED Format Removing Memory Cards Turn the camera off and confirm that the power-on lamp has gone out before removing memory cards. Open the battery chamber/ memory card slot cover and press the card to pop it up. The card can then be re- moved by hand.
-
Page 24: Basic Setup
Basic Setup A language-selection dialog is displayed the first time the camera is turned on. Select a language and set the time and date as described below. The multi selector is used in the following steps. The buttons needed to perform a task in each step are shown in white. - Page 25 HOME TIME ZONE London,Casablanca Back Select home time zone. DATE Edit Day (order of Day, Month, and Year may differ in some areas). DATE Edit Month. • Repeat steps 10 and 11 to edit Year, hour, and minute. DATE Select date display order. Note on Daylight Saving Time To turn daylight saving time on or off, press the multi selector down to highlight DaylightSaving and press d in step 5.
-
Page 26: Basic Photography And Playback
Basic Photography and Playback X Mode This section describes how to take pictures in X (Auto shooting) mode, an automatic, “point and shoot” mode recommended for first-time users of dig- ital cameras. Step 1. Select X mode. Step 2. Turn camera on. Check battery level and number of exposures remaining. -
Page 27: Step 3. Frame Picture
Step 3. Frame picture. 1/60 1/60 1/60 F2.7 F2.7 F2.7 Zoom Press the zoom buttons to activate the optical zoom and frame the subject on the monitor. • Press j (t) to zoom out, increasing the area visible in the frame. -
Page 28: Step 4. Focus And Shoot
Step 4. Focus and shoot. Focus indicator 1/60 1/60 1/60 F2.7 F2.7 F2.7 Note on Recording When the y icon is displayed or the memory icon (M or O) is blinking, pictures are being stored. Removing the memory card or battery while recording may affect pictures or damage the camera or card. -
Page 29: Viewing Pictures
Viewing Pictures 2006.05.15 2006.05.15 2006.05.15 100NIKON 100NIKON 100NIKON 15:30 15:30 15:30 0001.JPG 0001.JPG 0001.JPG 1/ 1/ 1/ Deleting Pictures Erase 1 image (s)? Erase 1 image (s)? Erase 1 image (s)? No No No OK OK Erase 1 image (s)? Erase 1 image (s)? Erase 1 image (s)? OK OK OK... -
Page 30: Using The Flash
Using the Flash The following five flash modes are available: Mode z Auto Flash fires automatically when lighting is poor. (default setting) Pre-flashes are fired several times at low-intensity before Auto with the main flash to reduce “red- red-eye eye”. If “red-eye” is detected reduction after a picture is taken, the camera will correct “red-eye”... - Page 31 Selecting the Flash Option Flash Display Flash menu. 1/60 1/60 1/60 Note on Using the Flash When taking flash pictures at a wide-angle zoom position, bright reflections from dust particles in the air may appear in the picture as bright spots. To reduce these bright reflections, set the flash to B (Flash Cancel) or zoom in on the subject.
-
Page 32: Taking Pictures With The Self-Timer
Taking Pictures with the Self-Timer The self-timer allows you to appear in your own pictures. When using the self-timer, mount the camera on a tripod (recommended) or rest it on a flat, level surface. Self-timer Display Self-timer menu. 1/60 1/60 1/60 H icon is displayed on monitor. -
Page 33: Selecting Focus Option
Selecting Focus Option The following four options are available: Mode The camera automatically adjusts AF Autofocus the focus according to the dis- (default setting) tance to the subject. The camera focuses on subjects w Infinity from 5 m (16 ft. 5 in.) to infinity. The camera can focus on sub- Focusing jects from 2 m (6 ft. -
Page 34: Exposure Compensation
Exposure Compensation Exposure compensation is used to alter the exposure from the value suggested by the camera. Exposure compensation can be set to values between –2.0 EV (underexposure) and +2.0 EV (overexposure) in increments of 1/3 EV. Histogram Display exposure compensation setting screen. -
Page 35: Selecting Scene Mode
Selecting Scene Mode Scene Mode You can select from a menu of 16 “scenes”, each corresponding to a partic- ular situation. Camera settings are automatically adjusted to suit the selected scene, sparing you the necessity of adjusting each setting separately. Selecting the Advanced option allows 3 effects, Normal, Effect 1, and Effect 2, to be selected for 9 of the 16 scenes. - Page 36 PORTRAIT Exit Highlight option. Advanced Options Effects You may not be able to check the Advanced options effects on the monitor while shooting. To see the results, play back the picture. Normal Effect 1 Effect 2 Help Set option and return to Shooting mode.
- Page 37 Available Scene Modes A PORTRAIT (FACE AF) Use for portraits (from the waist up) of up to three people. When the camera recognizes human faces, a square focus area is dis- played and the subject is in focus (Face-priority AF). See page 39 for more information on how to take pictures with this function.
- Page 38 E LANDSCAPE Use for vivid landscape shots that enhance outlines, colors, and con- trast in such subjects as skyscapes and forests. Effect 1: Colors are enhanced, causing the landscape to appear more vivid and clear. Effect 2: The blue color of the sky is captured more vividly. •...
- Page 39 I SUNSET Preserves the deep hues seen in sunsets and sunrises. Effect 1: Red hues are captured more vividly. Effect 2: The colors of the sunset and sunrise are captured more realistically. • The camera focuses at infinity. The focus indicator lights when- ever the shutter-release button is pressed halfway.
- Page 40 M CLOSE UP Photograph flowers, insects, and other small objects at close range. Effect 1: The subject is captured more vividly and clearly. Effect 2: Background details are softened and shutter speeds are faster. Optimal for freezing moving subjects such as flowers sway- ing in the breeze.
- Page 41 Using A PORTRAIT (FACE AF) Mode Rotate mode dial to b. • Default setting is A PORTRAIT (FACE AF). If you have already selected a differ- ent scene, press m to select A. K blinks in the center of the monitor. Press shutter-release button the rest of the way down to take picture.
- Page 42 Using F PANORAMA ASSIST Mode Exit Highlight F (PANORAMA ASSIST) in Scene menu. 1/60 1/60 1/60 Take first shot. • The G icon is displayed and approxi- mately 1/3 of the picture is shown super- imposed. • Settings for white balance and exposure are determined by the first shot.
-
Page 43: Additional Shooting Options
Additional Shooting Options Using Exposure Control Two types of Exposure modes M (Programmed au- to) and E (Aperture-priority auto) are available. M and E modes also allow you to control ISO Sensitiv- ity (P.45), white balance (P.46), and the options in the Shooting menu (P.78). - Page 44 E Aperture Priority Auto 1/60 1/60 1/60 Rotate mode dial to E. 0 0 0 Set aperture. • Press d to return to the Shooting mode. • If the selected aperture would result in the picture being underexposed or overex- posed, the aperture icon on the monitor will flash when the shutter-release button is pressed halfway.
-
Page 45: Selecting Image Quality And Size
Selecting Image Quality and Size The image quality and size you select determine the file size of a picture when stored in the internal memory or on the memory card. Image Quality The process of reducing the image file size when storing is called compression. In this camera, pictures are compressed and recorded as JPEG files. -
Page 46: Selecting Image Quality Or Size
Selecting Image Quality or Size IMAGE MODE Image quality Image size Rotate mode dial to Z. IMAGE MODE menu is displayed. IMAGE SIZE 3264×2448 2592×1944 2048×1536 1024×768 640×480 Highlight option and press d. Image Quality or Size in the Shooting Menu Image quality and size can also be set in the Shooting menu (P.78). -
Page 47: Using Iso Sensitivity
Using ISO Sensitivity ISO Sensitivity is a measure of how the camera’s sensor reacts to light. Setting a high ISO will let you take pictures with smaller apertures under low lighting conditions or make it easier to freeze action with faster shutter speeds. How- ever, the higher the ISO, the more likely “noise”... -
Page 48: Setting White Balance
Setting White Balance Adjust the white balance based on the light source to give the image the most realistic colors possible. Auto (default setting) will cover most situations, but the white balance may be changed to compensate for unusual lighting con- ditions that may produce images with unnatural colors. -
Page 49: Preset White Balance
Preset White Balance Preset white balance is used when shooting under mixed lighting or to compensate for light sources with a strong color cast (for example, to make pictures taken under an in- candescent light look as though they had been taken under white light). -
Page 50: Using Vibration Reduction (Vr)
Using Vibration Reduction (VR) Vibration reduction adjusts the lens to compensate for camera motion that can blur your image while shooting still pictures or movies. It makes blurring less likely to occur in situations where it is difficult to hold the camera steady, such as when shooting at slow shutter speeds in dimly lit surroundings or when zoomed in for close-up shots. -
Page 51: Viewing Pictures On The Camera
Viewing Pictures on the Camera Full-screen Playback Mode Press i in Shooting mode to view pictures in Full- screen playback mode. The following operations can be performed in this mode. View next picture View previous picture Delete picture Zoom in View thumbnails View Playback menu Record/Play voice memo... -
Page 52: Viewing Multiple Pictures: Thumbnail Playback
Viewing Multiple Pictures: Thumbnail Playback Pressing j (t) in Full-screen playback mode (P.49) displays pictures in “contact sheets” of 4, 9 or 16 thumbnail images. The following operations can be performed in Thumbnail playback mode. Highlight picture Change number of pictures displayed Delete highlighted picture Exit to Full-screen playback mode View Playback menu... -
Page 53: Histogram Display
Histogram Display Press d in Full-screen playback mode (P.49) to view the histogram display. The following settings appear on the right side of the display: • Shooting mode (M/E) • Shutter speed • Aperture • Exposure compensation • ISO Sensitivity View histogram of next picture View histogram of previous picture Delete picture... -
Page 54: Taking A Closer Look
Taking a Closer Look Quick Playback Zoom Press k (v) in Full-screen playback mode (P.49) to activate Quick playback zoom and display an enlarged (approxi- mately 3×) part of the picture. • The center area of the picture is enlarged but other areas of the picture may also be viewed. -
Page 55: Playback Zoom
Playback Zoom While Quick playback zoom is in effect, press k (v) or j (t) to zoom the picture in or out. Pictures can be zoomed in to a maximum of 10×. • When an image is zoomed in on, the zoom ratio is dis- played on the monitor. -
Page 56: Creating A Cropped Copy
Creating a Cropped Copy When the N:u icon is displayed in Quick playback zoom (P.52) or Playback zoom mode (P.53), you can crop part of a picture and save it as a separate file. x x 3.0 3.0 x 3.0 SCROLL SCROLL SCROLL... -
Page 57: Voice Memos
Voice Memos A voice memo can be recorded using the built-in microphone and appended to any picture marked with the N:O (voice memo recording guide) icon in Full-screen playback mode (P.49). Recording Voice Memos Press and hold the shutter-release button to record a voice memo. -
Page 58: Recording And Viewing Movies
Recording and Viewing Movies Selecting Movie Options Selecting Movie Options Select the type of movie according to your shooting intent. Mode Q TV movie 640 (default setting) S Small size 320 U Smaller size 160 V Time-lapse movie Rotate mode dial to T. Exit Highlight Movie options. -
Page 59: Selecting Auto-Focus Mode
Selecting Auto-Focus Mode Auto-focus mode can be selected when shooting movies. Select Auto-focus mode in the Movie menu, and select one of the following two modes. The camera focuses on the center of the frame when the shutter- Z Single AF release button is pressed halfway. -
Page 60: Recording Movies
Recording Movies Movies are recorded with sound via the camera’s built-in microphone as QuickTime files with the extension “.MOV”. The files can be played back on a computer after transfer. Rotate mode dial to S. The monitor shows the available recording time. -
Page 61: Recording A Time-Lapse Movie
Recording a Time-Lapse Movie The camera takes pictures at a specified intervals to create a silent movie with a frame rate of 30 frames per second and a frame size of 640 × 480. The maximum recording time is 35 seconds (1,050 frames). MOVIE OPTIONS TV movie 640 Small size 320... -
Page 62: Movie Playback
Movie Playback Movies are marked with the S icon in Full-screen playback mode (P.49). Press d to play back a movie. Playback controls are displayed at the top of the monitor. Press the multi selector left or right to high- light a control, then press d to perform the selected operation. -
Page 63: Tv, Computer Or Printer Connection
TV, Computer or Printer Connection When viewing pictures or movies on a TV or computer, using the optional EH-62A AC adapter kit is recommended to prevent the camera from turning off unexpectedly during playback. Connecting to a TV VIDEO MODE NTSC Turn camera off and connect supplied EG-CP14 A / V cable (hereafter A / V cable). -
Page 64: Connecting To A Computer
• Confirm that PictureProject has been installed on your computer. Mass storage Turn camera off and connect supplied UC-E6 USB cable as illustrated. • Operation via a USB hub has not been tested by Nikon. Set USB option in INTERFACE menu of Set-up menu (P.107). - Page 65 Data transfer starts. All pictures and movies marked with the E (Transfer mark) icon (P.95) will be transferred to the computer. Messages on the monitor are shown below. PREPARING TO TRANSFER Disconnect camera after transfer is complete (P.66). Marking Pictures for Transfer Pictures set for transfer are marked with the E icon in Playback mode.
- Page 66 Selecting a USB Option for Connection to a Computer Rotate the mode dial to a and select Interface to set the USB option. Consult the following table when selecting a USB option for connection to a computer (P.107). The de- fault option is PTP.
- Page 67 Notes on Transfer While transfer is in progress, do not: • Disconnect the USB cable. • Turn the camera off. • Remove the battery or the memory card. • Disconnect the AC adapter kit. Failure to observe these precautions may interfere with normal functioning of both the camera and the computer.
-
Page 68: Disconnecting The Camera
Disconnecting the Camera When PTP is selected in USB Option: Turn the camera off and disconnect the USB cable once transfer is complete. When Mass storage is selected in USB Option: Turn the camera off after performing the following operations, and disconnect the USB cable. -
Page 69: Connecting To A Printer
Connecting to a Printer When the camera is connected to a PictBridge-compatible printer via the UC-E6 USB cable, selected pictures can be printed directly from the camera. • You can use Wireless transfer mode (P.109) to print pictures directly from a printer connected to a computer. -
Page 70: Connecting The Camera To A Printer
Connecting the Camera to a Printer Mass storage Turn printer on. Connect supplied UC-E6 USB cable as illustrated. • Operation via a USB hub has not been tested by Nikon. Set USB option to PTP in INTERFACE menu of Set-up menu (P.107). Turn camera off. -
Page 71: Printing Pictures One At A Time
Printing Pictures One at a Time Connect the camera and printer (P.68), and then follow the steps below: PictBridge Start print Copies Paper size Exit Confirm settings and print pictures. Press the multi selector up or down to highlight an option and press d to select: Printing begins. -
Page 72: Printing Multiple Pictures
Printing Multiple Pictures Connect the camera and printer (P.68), and then follow the steps below: PRINT MENU Print selection Print all images DPOF printing Paper size Exit Select pictures to print and confirm settings. Press the multi selector up or down to highlight an option and press d to select: Print selection Select pictures and set the number of copies. -
Page 73: Start Printing
Selected pictures are displayed. 0 0 6 PRINTS • To return to the PRINT SELECTION screen, press m. 1 1 1 2 2 2 3 3 3 4 4 4 5 5 5 Back Start print Start printing. • The camera returns to the PRINT MENU Printing when printing is complete. -
Page 74: Creating A Dpof Print Order: Print Set
Creating a DPOF Print Order: Print Set You can create a digital “print order” specifying the pictures to print, the number of copies, and the information to be included with each print. The pictures can be printed using Print set settings with a DPOF-compatible device or at a digital photo lab which supports DPOF (P.154). - Page 75 PRINT SELECTION Back PRINT SET Done Date Info Exit Set Date and Info options. • To print the recording date on all pictures in the print order, highlight Date and press d. A y will be displayed in the check box. •...
-
Page 76: Print Set
CHOOSE DATE Back Highlight date. PRINT SET Done Date Info Exit Set Date and Info options. • To print the recording date on all pictures in the print order, highlight Date and press d. A y will be displayed in the check box. •... - Page 77 Date If Date is selected, the recording date will appear on pictures printed using DPOF. The date to be printed will remain unchanged even if Date in the Set-up menu is changed after shooting pictures. If a picture is taken without setting the camera clock, the date will not be printed even if Date is selected in the PRINT SET menu.
-
Page 78: Advanced Camera Settings
Advanced Camera Settings Using the Menus Shooting, playback, movie, and camera set-up menus are available. Displaying the Menus To display the Shooting menu (P.78): Rotate mode dial to M or E. To display the Playback menu (P.89): Press i. To display the Movie menu (P.56): Rotate mode dial to •... -
Page 79: Navigating The Menus
Navigating the Menus When navigating the menus, use the multi selector. Make selection Move cursor left Exit Highlight menu item. METERING Matrix Center-weighted Spot Spot AF area Exit Highlight option. Move cursor up Move cursor right Move cursor down Metering Help Display options. -
Page 80: The Shooting Menu
The Shooting Menu The Shooting menu includes the items in the follow- ing table. See “Using the Menus” (P.76) for more in- formation on displaying and using the Shooting menu. d White balance m Metering q Continuous A BSS C Auto bracketing F Image adjustment M Image sharpening P Saturation control... -
Page 81: Metering
Metering The camera’s built-in light metering system calculates the brightness of the subject to determine the best exposure to use. m Matrix (default setting) n Center-weighted o Spot p Spot AF area Note on Metering When digital zoom is used, the camera automatically switches to a setting similar to Center- weighted. -
Page 82: Continuous
Continuous Select one of the following six options. r Single (default setting) q Continuous w Multi-shot 16 x Ultra HS y 5 shot buffer z Intvl timer shooting Takes one picture each time the shutter-release button is fully pressed. While the shutter-release button is pressed, pictures can be taken continuously. -
Page 83: Interval Timer Shooting
Restrictions on Continuous Shooting • Settings other than Single cannot be used in combination with BSS (P.82), Auto bracketing or WB bracketing (P.83). The previous setting is used and the earlier setting is canceled. • Noise reduction (P.88) has no effect even if set to On. •... -
Page 84: Bss
When Best Shot Selector (BSS) is on, the camera takes up to 10 pictures while the shutter-release button is pressed. The sharpest picture in the series is saved and the others are discarded. BSS is recommended when: • The camera is zoomed in. •... -
Page 85: Auto Bracketing
Auto Bracketing Use this function when unusual lighting conditions make it difficult to deter- mine the correct exposure or proper white balance settings. Auto bracketing automatically adjusts these settings over a series of pictures, “bracketing” a selected Exposure compensation or White balance setting. D Off (default setting) C Auto bracketing... -
Page 86: Image Adjustment
Image Adjustment This setting adjusts contrast for optimal results before storing pictures in the internal memory or on the memory card. G Auto Automatically adjusts contrast according to shooting conditions. (default setting) Performs the same standard contrast adjustment on all pictures. H Normal Suitable for a wide variety of scenes, from dark to bright. -
Page 87: Saturation Control
Saturation Control Saturation control increases or decreases the vividness of colors. Q Maximum Gives vivid color effects. Select when printing pictures “as is,” with- out further modification. R Enhanced S Normal Best choice for most situations. (default setting) U Moderate Select if retouching pictures on a computer. -
Page 88: Af Area Mode
AF Area Mode Use this option to determine where the camera focuses. Automatically selects a focus point from 11 focus areas containing the subject closest to the camera. The selected focus area is l Auto displayed when the shutter-release button (default setting) is pressed halfway. -
Page 89: Auto-Focus Mode
Auto-focus Mode Use this option to determine how the camera focuses when shooting still pic- tures. Z Single AF Focuses only when the shutter-release button is pressed halfway. (default setting) Adjusts the focus continuously even when the shutter-release a Full-time AF button is not pressed halfway. -
Page 90: Fixed Aperture
Fixed Aperture This option keeps the aperture from shifting when zooming. This function is available only when the dial mode is set to E. J Off Aperture changes with the zoom position. (default setting) Aperture is kept as close as possible to the f/-number selected by you or the camera. -
Page 91: The Playback Menu
The Playback Menu The Playback menu includes the items in the follow- ing table. See “Using the Menus” (P.76) for more in- formation on displaying and using the Playback menu. L List by date u D-Lighting w Print set z Slide show A Delete Protect E Transfer marking... -
Page 92: Navigating The Picture Selection Screen
Navigating the Picture Selection Screen When selecting a picture in Print set (P.72), Delete (P.94), Protect (P.94), Transfer marking (P.95) or Copy (P.97), a picture selection screen, such as the screen on the right, is displayed. PROTECT Back Highlight picture. The selected picture is displayed in the cen- ter. -
Page 93: Navigating The Choose Date Screen
Navigating the Choose Date Screen When Choose date is selected in Print set (P.72), Delete (P.94) or Transfer marking (P.95), a CHOOSE DATE screen, such as the screen on the right, is displayed. The above menu options affect all pictures recorded on the same date. -
Page 94: List By Date
List by Date Pictures in the internal memory or on the memory card are sorted by the re- cording date. The following five operations can be performed on all pictures on the same date: D-Lighting, Print set, Delete, Transfer marking, and Small pic. LIST BY DATE Exit Highlight date. -
Page 95: Slide Show
Slide Show Pictures in the internal memory or on the memory card can be played back in an automated “slide show” with a three-second interval between images. • Pictures are played back in the recorded order (smallest to largest file number). •... -
Page 96: Delete
Delete You can delete selected pictures or all pictures stored in the internal memory or on the memory card. • When a memory card is in the camera, only the pictures stored on it are deleted. • When there is no memory card in the camera, pictures stored in the internal memory are deleted. -
Page 97: Transfer Marking
Transfer Marking You can select pictures for transferring to a computer by marking with the E icon. E All on F All off L Choose date P Select image(s) Notes on Transfer Marking • No more than 999 pictures can be marked with the E icon using Transfer marking. To transfer more than 999 pictures, use PictureProject. -
Page 98: Small Pic
Small Pic. You can create a small copy of a picture displayed in Full-screen playback mode. The following resize options are available. I 640 × 480 Suitable for displaying on a TV. J 320 × 240 Suitable for displaying on web pages. K 160 ×... -
Page 99: Copy
Copy You can copy selected pictures (P.90) or all pictures from the internal memory to the memory card, or vice versa. Copies pictures stored in the internal memory to the memory card. Copies pictures stored on the memory card to the internal memory. Notes on Copying Pictures •... -
Page 100: The Set-Up Menu
The Set-up Menu The Set-up menu includes the items in the following table. See “Using the Menus” (P.76) for more infor- mation on displaying and using the Set-up menu. Menus Welcome screen Date Monitor settings Date imprint Shot confirmation AF assist Sound settings Auto off M/O Format memory/card... -
Page 101: Menus
You can select the welcome screen to be displayed when the camera is turned on. Disable welcome A welcome screen is not displayed when the camera is turned on. Nikon Displays a welcome screen when the camera is turned on. Animation Displays a short animation when the camera is turned on. -
Page 102: Date
Date Use this option to set the time and date. When traveling, you can use the Time zone option to automatically display the date and time at your destination (the camera calculates the time zone differences). Set the camera clock to the current date and time. For more information, Date see “Basic Setup”... -
Page 103: Monitor Settings
Monitor Settings You can set the monitor indicators on/off, and adjust the brightness of the monitor. Photo Info Displays the current settings or operation guide Show info on the monitor when taking or viewing pic- (default setting) tures. Displays the current settings or operation guide Auto info on the monitor for five seconds. -
Page 104: Date Imprint
Date Imprint Date information will be imprinted on the bottom right corner of pictures when shooting. The imprinted date will be printed even if a printer does not support DPOF. You cannot use this option to imprint a date stamp on pictures after record- ing. -
Page 105: Display Options
Date Counter Use this option to imprint the number of days remaining un- til a specified date or the number of elapsed days since a specified date. Use this option to track the growth of a child or count down the days until a birthday or wedding. Store up to three dates. -
Page 106: Shot Confirmation
Shot Confirmation The shot confirmation LED will light after shooting to confirm that the shot has been taken. The shot confirmation LED will not light after shooting. (default setting) The shot confirmation LED will light after shooting. When Multi-shot 16 or 5 shot buffer is selected for Continuous, the lamp will light after all pictures in the series have been taken. -
Page 107: Sound Settings
Sound Settings You can set the button sound on/off and select the volume of shutter and start-up sounds. When On is selected, a beep will sound once when operations are Button sound completed successfully, three times when an error is detected. Shutter sound Set the volume of the shutter sound to Loud, Normal or Off. -
Page 108: Format Memory/Card
Format Memory/Card Use this option to format the internal memory or memory card. • To format the internal memory, remove the memory card from the camera. Format memory appears in the Set-up menu. • When the memory card is inserted in the camera, Format card appears in the Set-up menu. -
Page 109: Interface (Usb/Video Mode)
Interface (USB/Video Mode) Use this option to change the interface settings for connecting the camera to a computer, printer, or video device. Select Mass storage or PTP for connecting to a computer or printer (P.64). Select NTSC or PAL to match the video standard used in the connected Video mode device (P.61). -
Page 110: Reset All
For more information, see “Default Settings” (P.143). Firmware Version Use this option to check the firmware version for the camera. The 12-digit number displayed below the firmware version is the camera’s MAC address. COOLPIX P3 Ver.1.0 MAC address XX-XX-XX-XX-XX-XX Back MAC address... -
Page 111: Wireless Transfer Mode
Wireless Transfer Mode What is Wireless Transfer Mode? Wireless transfer mode, which is based on the IEEE 802.11b/g standard, is a communication feature that allows you to wirelessly connect to a Wi-Fi-enabled computer so that you can transfer and print pictures. You can even use the op- tional PD-10 wireless printer adapter to wirelessly connect to a printer and print pictures directly. -
Page 112: Setting Up Wireless Transfer Mode
Setting Up Wireless Transfer Mode Use the supplied Wireless Camera Setup Utility (hereafter Setup Utility) to configure your computer as a “profile device” in the camera. Before starting, see “Configuration Procedure” (P.112) for more information on configuring a profile device. The Wireless Camera Setup Utility/PictureProject In- staller CD (hereafter CD-ROM) supplied with the camera is required for installation. - Page 113 • Windows: Select Start stalled. • Macintosh: Applications folder in the Nikon Software folder and check whether the Setup Utility is in- stalled. When the Setup Utility is Already Installed If the Setup Utility is installed, select or double-click the program icon to run.
-
Page 114: Configuration Procedure
Configuration Procedure After starting the Setup Utility, perform the following steps to configure a profile de- vice. • For more information on the procedure below, see “Configuration Details” (P.114). • For more information on the options for steps 5 and 6 when selecting Create Pro- file manually, see “Information about Profile Configuration”... - Page 115 Create Infrastruc- ture (Access Point) net- work file Enter network (enter available settings. items only) Configure TCP/IP. Configure wireless print- ing. * After step 6, repeat procedure from step 5 of Create an Ad-hoc (Camera to Computer) net- work profile. After the ad-hoc network is set up, wireless printing is configured. When “Create an Ad-hoc (Camera to Computer) network profile”...
-
Page 116: Configuration Details
Configuration Details Confirm that your camera’s battery is inserted and fully charged. After connecting the camera and computer using the supplied UC-E6 USB cable and confirming the follow- ing, click Next. • The battery is fully charged or the optional EH-62A AC adapter kit is used. - Page 117 Select type of configuration from options that are displayed. The Setup Utility shows types of configuration based on the wireless LAN settings in your computer. The following procedure differs depending on the selection. • If your computer has a fixed IP address, does not have a wireless network set up using Windows XP’s built-in wireless network features, runs Windows XP SP1, or is a Macintosh, complete the settings for Create Profile manually.
- Page 118 Enter network settings. Enter the settings for connecting the camera and the computer via a wireless network. • When selecting (Access Point) network profile or Create Infra- structure (Access Point) and Ad-hoc (Camera to Computer) network profile, select a network name from the Network Name (SSID) list that will be used for connecting the camera and the computer.
- Page 119 Configure wireless printing. If a printer is connected to the computer, select the printer to be used for wireless printing (P.130), enter a printer profile name and select a printer icon. • When selecting Create Infrastructure (Access Point) and Ad-hoc (Camera to Computer) net- work profile, the Setup Utility automatically returns to the screen in step 5 without configuring a printer, and a new ad-hoc network is set up in...
- Page 120 Information about Profile Configuration Configuration of Profile Devices Every computer that will connect to the camera must be configured as a profile device. Maximum Number of Profile Devices You can configure a maximum of nine profile devices (computers, printers connected to a comput- er, the optional PD-10 wireless printer adapter) in the camera.
-
Page 121: Mac Address Filtering
Authentication and Security for Wireless Transfer The following combinations are available on this camera (AES is not available). Authentication Security The security levels from lowest to highest are None, WEP and TKIP. Changing the security method may lower the security level. MAC Address Filtering When MAC address filtering is enabled, only devices with an authorized MAC address can access the wireless LAN. -
Page 122: Confirming Profiles
Confirming Profiles A profile is information about a profile device and is stored in the camera. You can use the Setup Utility to view or delete profiles saved in the camera, or edit a profile name. Start Setup Utility. Select Profiles tab. Select the desired profile name from the list. -
Page 123: Transferring Images To A Computer
Transferring Images to a Computer Using Wireless Transfer Mode Wirelessly transfer images to a computer or print images using the functions below. Transfer images in the internal memory or on the memory Easy Transfer card not already in the computer. Shooting Date Transfer images taken on a specific recording date. - Page 124 Transferring Images to a Computer Displaying the WIRELESS MENU: CHOOSE PROFILE Profile-A Profile-B Profile-C Rotate mode dial to Y and turn cam- era on. • The CHOOSE PROFILE screen is dis- played and the most recently used pro- files are shown first. (The screens in steps 1 and 2 are examples.
-
Page 125: Signal Indicator
Signal Indicator The signal strength is represented by a five-level indicator on the monitor. When the camera is out- side the range of the signal, the indicator is displayed in red. If the signal strength is weak, remove any obstacles between the camera and computer. If an Error Occurs When the connection to a profile device or the connection after selecting WIRELESS MENU has... -
Page 126: Transfer Images
Transferring Images Not in a Computer: Easy Transfer WIRELESS MENU Easy Transfer Shooting Date Marked Images Selected Images Shoot & Transfer Highlight Easy Transfer in WIRELESS MENU. Transfer completed. Connection terminated. Choose Profile Checking Connection with Profile Device In Wireless transfer mode, highlight an item and press d to display the screen to check the status. - Page 127 Transferring Images by Specific Recording Date: Shooting Date WIRELESS MENU Easy Transfer Shooting Date Marked Images Selected Images Shoot & Transfer Highlight Shooting Date in WIRE- LESS MENU. SHOOTING DATE 2 0 0 6 . 0 6 . 1 0 2 0 0 6 .
- Page 128 Transferring Images with Transfer Mark: Marked Images WIRELESS MENU Easy Transfer Shooting Date Marked Images Selected Images Shoot & Transfer Highlight Marked Images in WIRE- LESS MENU. Transfer completed. Connection terminated. Choose Profile Help Transfer images. Press d to transfer images with the transfer mark E (P.95) after the connection confir- mation screen (P.124) is displayed.
- Page 129 Selecting and Transferring Images: Selected Images WIRELESS MENU Easy Transfer Shooting Date Marked Images Selected Images Shoot & Transfer Highlight Selected Images in WIRE- LESS MENU. SELECTED IMAGES 2 0 0 6 . 0 5 . 1 5 1 5 : 3 0 Exit Select pictures for transfer.
-
Page 130: Changing The Settings
Immediately Transferring Recorded Images: Shoot & Transfer WIRELESS MENU Easy Transfer Shooting Date Marked Images Selected Images Shoot & Transfer Highlight Shoot & Transfer in WIRE- LESS MENU. Transferring images to computer Cancel Changing the Settings Press m while the camera is in Shooting mode to display the SHOOT & TRANSFER screen and make the following changes. -
Page 131: Connect To Computer
Transferring Images Using a Computer: PC Mode WIRELESS MENU PC Mode Highlight PC Mode in WIRELESS MENU. When Multiple Computers Share the Same SSID If the camera has stored the profiles of multiple devices with the same network name (SSID) and those devices are started, the camera connects only to the profile device specified in the CHOOSE PROFILE screen (P.122). -
Page 132: Transferring Images To A Printer
Transferring Images to a Printer Printing Images from a Printer Connected to a Computer: Wireless Printing CHOOSE PROFILE Profile-A Profile-B Profile-C Rotate mode dial to Y and turn cam- era on. • The CHOOSE PROFILE screen is dis- played and the most recently used pro- files are shown first. - Page 133 Note on Printing via Wireless LAN In infrastructure mode, only printers on the same network as the computer can be used. Printers on other networks connected via a router (a network with a different access point) cannot be used. When Multiple Printers are Connected to a Computer Start the Setup Utility on the computer.
-
Page 134: Technical Notes
Technical Notes Optional Accessories The following optional accessories are available for your Nikon digital camera. Contact your local retailer or Nikon representative for details. Rechargeable battery Battery charger AC adapter Carrying case Wireless printer adapter Approved Memory Cards The following memory cards have been tested and approved for use:... -
Page 135: Caring For Your Camera
Caring for Your Camera To ensure continued enjoyment of your Nikon product, observe the following precautions when storing or using the device. Keep dry The device will be damaged if immersed in water or subjected to high levels of moisture. - Page 136 The camera may be damaged if foreign matter gets inside the camera body. Nikon cannot accept liability for damage caused by dirt or sand. Do not use alcohol, thinner, or other volatile chemicals.
- Page 137 Storage Turn the camera off when not in use and check that the power-on lamp is off before putting the camera away. To prevent mold or mildew, store the cam- era in a dry, well-ventilated area. If the product will not be used for an extend- ed period, run the battery flat and remove it from the camera.
-
Page 138: Error Messages
Error Messages The following table lists the error messages and other warnings that appear on the monitor and how to deal with them. Display Clock not set. (Flashes) WARNING!! BATTERY EXHAUSTED Battery exhausted. Camera cannot focus. (flashes red) • Camera turned off WARNING!! during recording. - Page 139 If error per- sists, contact your local retailer or Nikon representative. memory • Press i to return to shooting mode. • To show pictures in the internal mem- ory, remove memory card from cam- era.
- Page 140 Turn camera off, unplug optional AC adapter (if using), remove and reinsert battery, and turn camera on. If error per- sists, contact local retailer or Nikon repre- sentative. See the manual for the printer and solve the problem. Solution Page –...
- Page 141 Error Messages During Wireless Transfer Mode Display Error occurred when Transfer error images ferred to computer. Profile not registered. A profile for wireless Set up profile. transfer has not been set. Camera could not con- u NETWORK nect to wireless net- CONNECTION FAILED work.
-
Page 142: Troubleshooting
Troubleshooting If your camera fails to function as expected, check the list of common prob- lems below before consulting your local retailer or Nikon representative. Refer to the page numbers listed in the right-most column for more information. Electronically-Controlled Cameras In extremely rare instances, unusual characters may appear on the monitor and the camera may stop functioning. - Page 143 Problem • Camera is in Playback mode. • Battery is exhausted. • Flash lamp blinks: flash is charging. No picture is taken • Message “CARD IS NOT FORMATTED” appears in monitor: memory when shutter- card is not formatted for use in camera. release button •...
- Page 144 Problem Copy cannot be cre- • Picture is a retouched copy. ated using small pic- • There is not enough free space in the memory or on the memory ture, crop, card to store new copy. Delete unwanted pictures from the memory D-Lighting to make free space.
-
Page 145: Appendix
Appendix Default Settings (P.108) For Reset All (P.108) restores the following default settings: Scene menu Advanced option Shooting menu White balance Metering Continuous Intvl timer shooting Auto bracketing Image adjustment Image sharpening Saturation control Sensitivity Image quality Image size AF area mode Auto-focus mode Fixed aperture Noise reduction... -
Page 146: Image Quality
• Reset all also clears the current file number (P.147) from memory. Numbering will continue from the lowest number available. To reset file numbering to 0001, per- form Reset all after deleting all pictures (P.94) or formatting the internal memory or memory card (P.106). - Page 147 Image Quality/Size and Number of Exposures Remaining Image mode Image size Image quality c 3264×2448 (default setting) d 2592×1944 e 2048×1536 h 1024×768 i 640×480 j 3264×2176 • If number of exposures remaining is 10,000 or more, camera exposure count display will show 9999.
- Page 148 Settings for Scene Mode The following table shows each default setting for the Scene modes. Each setting re- turns to default when the power is turned off, mode is altered, Playback mode is set or Reset all in Set-up menu is performed. However, settings in brackets are invariable. Scene mode (P.33) A PORTRAIT (FACE AF)
-
Page 149: Image File And Folder Names
Image File and Folder Names In the internal memory or on the memory card, pictures are identified by file names with three parts: a four-letter identifier, a four-digit file number assigned automatically by the camera in ascending order, and a three-letter extension (e.g., “DSCN0001.JPG”). - Page 150 Time Zone (P.100) The camera supports the following time zones. Time zone increments of less than one hour are not supported. When traveling to or from destinations at half- or quarter-hour increments from Greenwich Mean Time (GMT), set the camera clock to local time (P.100).
- Page 151 Options for ISO Sensitivity Approximately equivalent to ISO 50 is set as default. When lighting is Auto poor, however, camera automatically compensates by raising sensitivity to (default setting) maximum of ISO 200 equivalent. Approximately equivalent to ISO 50. Approximately equivalent to ISO 100. Approximately equivalent to ISO 200.
- Page 152 Restrictions on Editing Images You can edit images by trimming them (cropping), adjusting the brightness (D-Lighting), or creating a smaller copy (Small picture). The following restrictions apply when editing an image that has already been edited. First Edit Cropping D-Lighting Small Picture * When attempting to apply a second edit, the message “IMAGE CANNOT BE SAVED”...
-
Page 153: Specifications
Specifications Nikon COOLPIX P3 Digital Camera Type Compact digital camera Effective pixels 8.1 million Image sensor 1/1.8 in. high-density CCD; total pixels: 8.3 million • 3,264 × 2,448 [8M] Image size (pixels) • 2,048 × 1,536 [3M] • 640 × 480 [TV] Lens 3.5×... - Page 154 Supported language ian, Dutch, Norwegian, Polish, Portuguese, Russian, Finnish, Swed- ish, Chinese (Simplified and Traditional), Japanese, Korean, Thai • One Nikon Li-ion Rechargeable Battery EN-EL5 (supplied) Power sources • EH-62A AC Adapter kit (available separately) Approx. 200 shots, with EN-EL5 battery Battery life Dimensions (W×H×D)
-
Page 155: Battery Charger
Infrastructure/ad-hoc AC 100 - 240 V, 50/60 Hz, 0.12 - 0.08 A DC 4.2 V, 950 mA Nikon Li-ion Rechargeable Battery EN-EL5 Approx. 2 hrs. when no charge remains 0 - 40°C (32 - 104°F) Approx. 67 × 26 × 67 mm (2.6 × 1.0 × 2.6 in.) Approx. -
Page 156: Digital Print Order Format (Dpof)
Specifications • Nikon will not be held liable for any errors this manual may contain. • The appearance of this product and its specifications are subject to change without notice. Design Rule for Camera File system (DCF) This camera conforms to the Design rule for Camera File system (DCF), a standard widely used in the digital camera industry to ensure compatibility among different makes of camera. -
Page 157: Index
Index Symbols E Aperture-priority auto, 12, 41, 42 X Auto shooting mode, 12, 24-26 T Delete button, 13, 27, 51, 94 I Exposure compensation, 13, 32, 42 J Flash lamp, 29 J Flash mode, 13, 29 L Focus mode, 13, 31 l Help button, 13, 15, 122 Z Image mode, 12, 44 e ISO Sensitivity mode, 12, 45... - Page 158 Direct sunlight, 149 D-Lighting, 92, 150 DPOF, 70, 72, 75, 154 DSCN, 147 DUSK/DAWN J, 37, 146 EG-CP14, see Audio/video (A / V) cable EH-62A, see AC adapter kit E-mail attachments, 96 EN-EL5, 16, 18, 132, 153 see also Battery Error messages, 136-139 Exif 2.2, 154 Exposure compensation, 32, 42...
- Page 159 Monitor, 13, 14-15, 134 indicators, 14-15 Monitor brightness, 101 Monitor settings, 101 Brightness, 101 Photo info, 101 MOV, see Movies Movie menu, 56, 76 Movie options, 56, 145 Small size 320, 56, 145 Smaller size 160, 56, 145 Time-lapse movie, 56, 59, 145 TV movie 640, 56, 145 Movies, 56-60, 145 recording, 58-59...
- Page 160 Speaker, 13 SPORTS P, 38, 146 SSCN, 147 Standby mode, 25, 105, 121 Strap, camera, 12 SUNSET I, 37, 146 Support information, 11 Telephoto button, see k v button Thumbnail playback, 50 Time zone, 22, 100 Transfer marking pictures for, 95 Transfer marking, 95 Tripod, 13, 30 connecting to, 61...
- Page 161 No reproduction in any form of this manual, in whole or in part (except for brief quotation in critical articles or reviews), may be made without written authoriza- tion from NIKON CORPORATION. Fuji Bldg., 2-3 Marunouchi 3-chome, Chiyoda-ku, Tokyo 100-8331, Japan...
Need help?
Do you have a question about the CoolPix P3 and is the answer not in the manual?
Questions and answers