Table of Contents
Advertisement
Quick Links
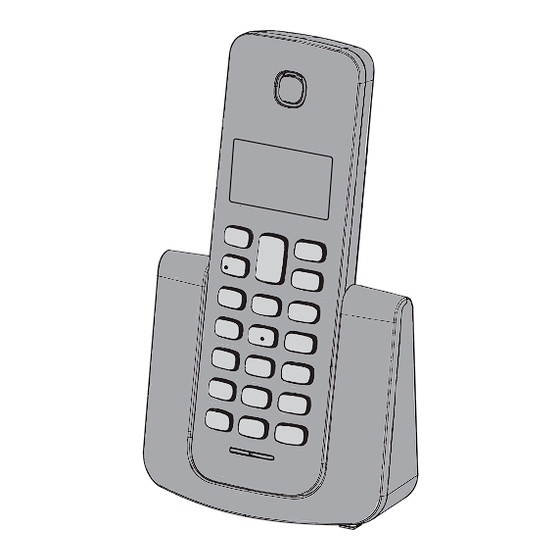
Model shown is KX-TGB110.
Before initial use, see "Getting Started"
on page 9.
Thank you for purchasing a Panasonic product.
Please read these operating instructions before using the unit and save them
for future reference.
KX-TGB112UE.indd 1
Operating Instructions
Digital Cordless Phone
KX-TGB110UE
Model No.
KX-TGB112UE
12/01/2017 11:54
Advertisement
Table of Contents

Subscribe to Our Youtube Channel
Related Manuals for Panasonic KX-TGB110UE


Summary of Contents for Panasonic KX-TGB110UE
- Page 1 KX-TGB112UE Model shown is KX-TGB110. Before initial use, see “Getting Started” on page 9. Thank you for purchasing a Panasonic product. Please read these operating instructions before using the unit and save them for future reference. KX-TGB112UE.indd 1 12/01/2017 11:54...
-
Page 2: Table Of Contents
Table of Contents Introduction Programming Accessory information ..... 3 Clock and Alarm ......22 Important Information Personal settings ......22 Base settings ......... 23 For your safety......... 4 Useful Information Important safety instructions.... 5 For best performance ...... 6 Voicemail ........27 Other information ...... -
Page 3: Introduction
Rechargeable batteries Handset cover Charger See below for replacement battery information. The handset cover comes attached to the handset. Additional/replacement accessories Please contact your nearest Panasonic dealer for sales information. Accessory item Model number Rechargeable Battery type: batteries – Minimum amperage of 300 mAh –... -
Page 4: Important Information
Important Information ● Never touch the plug with wet For your safety hands. Danger of electric shock exists. To prevent severe injury and loss of life/property, read this section Installation carefully before using the product to ● To prevent the risk of fire or ensure proper and safe operation of electrical shock, do not expose your product. -
Page 5: Important Safety Instructions
Important Information frequency) energy. (The product Battery operates in the frequency range ● We recommend using the of 1.88 GHz to 1.90 GHz, and the batteries noted on page 3. RF transmission power is 250 mW USE ONLY rechargeable Ni-MH (max.).) batteries AAA (R03) size. -
Page 6: For Best Performance
● Do not place heavy objects on top The base unit and other compatible of the product. Panasonic units use radio waves to ● When you leave the product communicate with each other. unused for a long period of time, ●... -
Page 7: Other Information
Important Information than 0 °C or greater than 40 °C. Information on Disposal in Damp basements should also be other Countries outside the avoided. European Union ● The maximum calling distance may be shortened when the product is used in the following places: Near obstacles such as hills, tunnels, underground, near These symbols are only valid in... - Page 8 Important Information Note: ● The range of the handset under maximum conditions is 50 metres indoors and 300 metres outdoors. Please note it will probably be shortened when near concrete barriers, etc. KX-TGB112UE.indd 8 12/01/2017 11:54...
-
Page 9: Setting Up
Getting Started Note: Setting up ● Use only the supplied Panasonic AC adaptor S003AIB0600040. Connections ■ Base unit Connect the AC adaptor plug to the unit until you hear a click. Connect the AC adaptor to the power outlet. Connect the telephone line... -
Page 10: Note When Setting Up
● Use the supplied rechargeable charging, icon will scroll on the batteries. For replacement, we display. recommend using the Panasonic rechargeable batteries noted on page 3 and 5. Note for battery charging ● It is normal for the handset to feel warm during charging. -
Page 11: Navigating The Menus
Getting Started Panasonic Ni-MH battery Date and time performance (supplied batteries) “CLOCK/ ALARM”, press Operation Operating time “DATE & TIME”. In continuous use 10 hours max. to select. Not in use (standby) 200 hours max. Enter the date using the keypad If eco mode is off. -
Page 12: Controls
Getting Started Speaker Controls During a call, press to increase Handset earpiece volume, page 15. When the phone is ringing, press to increase the handset ringer volume, page 15. Press to scroll through the menu options, redial list, calls list and phonebook entries. -
Page 13: Display Icons
Getting Started Phonebook/Delete/Back Base unit In standby mode, press to open the phonebook list. In editing mode, press to delete characters and digits. Go back to the previous menu level. End Call/Exit/Handset on/off Press to end a call. When viewing the redial / calls list / phonebook or when in the menu, press to exit and return to standby. -
Page 14: Menu Map
Getting Started Signal icon Menu Map Steady when registered and in range. Flashes when PHONEBOOK - VIEW out of range of the base or - ADD NEW searching for the base.* - EDIT Eco mode is ON - DELETE* Zero Emit is ON - DELETE ALL* CLOCK/ALARM - DATE &... -
Page 15: Making/Answering Calls
Making/Answering Calls Note: Making calls ● A 3 second pause is inserted each time you press and hold (Pause) on the handset. When there is a dial tone, dial the phone number. Answering calls When you finish talking, press or place the handset on the When an external call is received, the base unit or charger. -
Page 16: Intercom, Transferring Calls And Conference Calls
Making/Answering Calls to answer the call. For call waiting or Call Waiting Caller ID service users Transferring calls To use call waiting or Call Waiting Outside calls can be transferred or a Caller ID, you must first subscribe conference call with an outside party with your service provider/telephone can be made between 2 handsets. -
Page 17: Lock/Unlock The Keypad
Making/Answering Calls Lock/unlock the keypad : Select the desired phone The keypad can be locked so that number. it cannot be operated accidentally while carrying it around. Note: Note: If you have Caller ID and the caller’s When the keypad is locked an number exactly matches an entry incoming call can still be answered stored in the phonebook, the name is... -
Page 18: Phonebook
Phonebook View or dial an entry Phonebook icon is displayed. The phonebook can store up to 50 : Select the required entry. names and numbers. Names can be up to 12 characters long and Enter the first letter of the name numbers up to 24 digits. - Page 19 Phonebook : To select the entry that needs to be deleted, or search alphabetically, press to confirm or to cancel. Delete all entries . “PHONEBOOK”. “DELETE ALL”, press to confirm or to cancel. Store a quickdial number Your phone can store 2 quickdial numbers for key 1 and 2.
-
Page 20: Caller Id And Calls List
Caller ID and Calls list View the Calls list Caller ID and Calls list to open the Calls list. If there IMPORTANT are no calls in the list, the display To use Caller ID, first subscribe to the shows “LIST EMPTY”. service from the network provider. - Page 21 Caller ID and Calls list Delete an entry to open the Calls list. : To the required entry. “DELETE”. , “CONFIRM ?”. to confirm or to cancel. Delete the entire Calls list to open the Calls list. “DELETE ALL”. , “CONFIRM ?”. to confirm or to cancel.
-
Page 22: Programming
Programming Clock and Alarm Personal settings Setting the date and time Handset ringer volume If you have subscribed to Caller ID The handset ring volume can be set Service, the date and time will be set to different volume level. Choose on your handset whenever a call is from 5 volume levels or Off. -
Page 23: Base Settings
Programming “AUTO ANSWER”, press Key tones “PERSONAL : Select “ON” or “OFF”. SET”, press to confirm or to return “HANDSET TONE”, press to the previous menu. : Select “KEY TONE”, press Language : Select “ON” or “OFF”. “PERSONAL SET”, press to confirm or to return to the previous menu. - Page 24 Programming Zero Emit Recall Time When Zero emit is activated and the This setting is useful to access unit has been idle for about 1 minute, certain network and PBX/switchboard the transmitted power between the services. handset and the base will stop, an The default recall time is suitable for incoming call or pressing any key will your country and network operator.
- Page 25 Programming When entering a PIN, the digits are If the handset is already shown as ****. registered to a base, press “ADVANCED SET”, “ADVANCED press SET”, press “REGISTER”, press “CHANGE PIN”, press Enter the 4 digit PIN code (default If the PIN is already changed = 0000), press from default setting, enter the current 4 digit PIN, press...
- Page 26 Programming Default settings by reset Restore default settings The phone can be restored to its Key tone default (original) settings. All the Auto answer handsets that are registered to the Ringer melody base will be retained. Ringer volume IMPORTANT Receiver volume 5 Resetting the phone to its default Language ENGLISH...
-
Page 27: Useful Information
Useful Information Voicemail Troubleshooting Voicemail is an automatic answering No dial tone service offered by your service ● Use only the telephone line cord provider/telephone company. supplied. After you subscribe to the service, your service provider/telephone ● Check that the telephone line cord company’s voicemail system is connected properly. - Page 28 Useful Information ● The caller may have withheld their icon flashes number. ● Handset is out of range. Move ● The record cannot be found in closer to the base. the phonebook. Check that the correct name/number is stored in ●...
-
Page 29: Index
Index Keypad lock: 17 Index Key tones: 23 Alarm: 22 Language: 23 Answering calls: 15 Making calls: 15 Auto answer: 23 Menu Map: 14 Auto Prefix: 24 Mute: 15 Base unit controls: 13 Pause: 15 Battery: 3, 5 Phonebook: 18 Battery charging: 10 PIN code: 24 Battery installation: 9, 10... - Page 30 Notes KX-TGB112UE.indd 30 12/01/2017 11:54...
- Page 31 Notes KX-TGB112UE.indd 31 12/01/2017 11:54...
- Page 32 © Panasonic Corporation 2015 Version 11 (UE) KX-TGB112UE.indd 32 12/01/2017 11:54...
Need help?
Do you have a question about the KX-TGB110UE and is the answer not in the manual?
Questions and answers