Lifely Mia Series Assemble Instructions
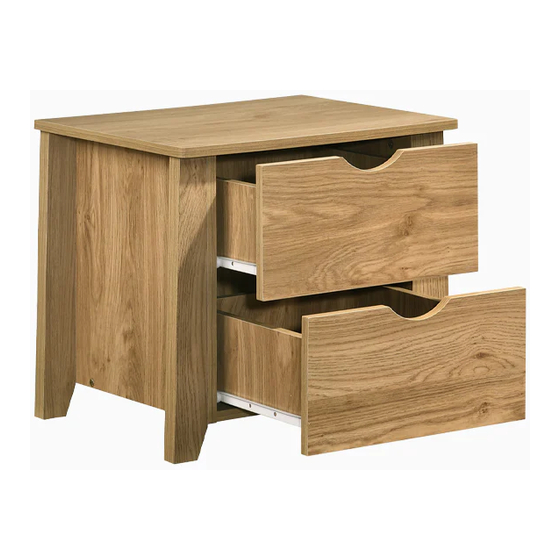
Bedside table 500*400*465mm
Hide thumbs
Also See for Mia Series:
- Assemble instructions (28 pages) ,
- Assemble instructions (21 pages) ,
- Assemble instructions (22 pages)
Advertisement
Quick Links
Assemble Instructions
Mia Series
Product Code
MIA BT5040-NT
Bedside Table
Dimensions(W x D x H)
500*400*465mm
Important
Please read through instructions carefully
Before assembly and keep for future reference.
For our full catalogue of assembly instructions,
Visit:lifely.com.au/assembly.
Advertisement

Related Manuals for Lifely Mia Series


Summary of Contents for Lifely Mia Series
- Page 1 Assemble Instructions Mia Series Product Code Important MIA BT5040-NT Please read through instructions carefully Bedside Table Before assembly and keep for future reference. Dimensions(W x D x H) For our full catalogue of assembly instructions, Visit:lifely.com.au/assembly. 500*400*465mm...
- Page 2 Important Tips and Maintenance New use ammonia based To avoid fading,keep furniture Keep children and animals Newer place liquids or anything cleaning products as it will out of direct sunlight. away from working area as damp upon furniture as it damage the finish.
- Page 3 So your relationship is strong.But is it flat-pack furniture strong?Unless you're an aerospace engineer,assembling furniture can be slightly stressful.We recommend meditating quietly,pouring yourself a herbal tea (or slightly less herbal wine) and tackling things one step at a time. If you feel a passive aggressive remark coming on,try a compliment instead .E.g."You're so good looking".
- Page 4 Components Hardware Please check you have all the fittings part or tools are listed in below. No.D No.C No.A No.B No.B Quantity:24Pcs Quantity:20Pcs Quantity:4Pcs Quantity:20Pcs Quantity:20Pcs Screw M3.5*35mm Screw M3.5*14mm Dowel Cam Bolt Cam Nut No.K No.E No.G Quantity:4Pcs Quantity:28Pcs Quantity:2Pcs Back Plate Clamp Perfect Cover...
- Page 5 Components Panels & Part List Please check you have all the panels are listed below. Side panel_r Small bottom panel_f Small bottom panel_b Side panel_l Top panel Back panel Drawer back Drawer side_l Drawer side_r Drawer front Drawer base MIA BT5040-NT / 5...
- Page 6 STEP 1 No.D Quantity:8Pcs Screw M3.5*35mm STEP 2 No.E No.C No.A No.B No.B Quantity:2Pcs Quantity:4Pcs Quantity:2Pcs Quantity:4Pcs Quantity:2Pcs Drawer Runner Screw M3.5*14mm Dowel Cam Bolt Cam Nut MIA BT5040-NT / 6...
- Page 7 STEP 3 No.D Quantity:8Pcs Screw M3.5*35mm STEP 4 No.E No.C No.A No.B No.B Quantity:2Pcs Quantity:4Pcs Quantity:2Pcs Quantity:4Pcs Quantity:2Pcs Drawer Runner Screw M3.5*14mm Dowel Cam Bolt Cam Nut MIA BT5040-NT / 7...
- Page 8 STEP 5 2&3 No.B Quantity:8Pcs Cam Nut STEP 6 MIA BT5040-NT / 8...
- Page 9 STEP 7 STEP 8 No.B Quantity:4Pcs Cam Bolt MIA BT5040-NT / 9...
- Page 10 STEP 9 STEP 10 No.C No.K Quantity:4Pcs Quantity:4Pcs Back Plate Clamp Screw M3.5*14mm MIA BT5040-NT / 10...
- Page 11 STEP 11 8&9 No.B Quantity:8Pcs Cam Nut DRAWER X 2 STEP 12 No.B Quantity:8Pcs DRAWER X 2 Cam Bolt MIA BT5040-NT / 11...
- Page 12 DRAWER X 2 STEP 13 No.D Quantity:8Pcs Screw M3.5*35mm STEP 14 MIA BT5040-NT / 12...
- Page 13 STEP 15 DRAWER X 2 STEP 16 DRAWER X 2 No.E No.C Quantity:4Pcs Quantity:8Pcs Drawer Runner Screw M3.5*14mm MIA BT5040-NT / 13...
- Page 14 STEP 17 STEP 18 In order to make the product more beautiful, please paste hardware G on the exposed holes No.G Quantity:28Pcs Perfect Cover MIA BT5040-NT / 14...
- Page 15 Great Job,You're done! Don't forget to share how it looks in your space and tag us on Instagram. @lifelyhome#homewithlifely!
Need help?
Do you have a question about the Mia Series and is the answer not in the manual?
Questions and answers