
Related Manuals for Italforni CARUSO CA6


Summary of Contents for Italforni CARUSO CA6
- Page 1 rev.11/2021 USE AND MAINTENANCE MANUAL -ELECTRIC OVEN- CARUSO pag. 2 pag. 20 direttive 73/23-89/336-93/68...
- Page 2 use and maintenance manual PREMESSA Il presente manuale contiene le necessarie istruzioni per l’uso e le norme di sicurezza da adottare corretto funzionamento dell’apparecchiatura. Questo manuale consegnato alle persone preposte all’uso della macchina ed alla sua manutenzione.
- Page 3 use and maintenance manual INDICE CAP. 1 - INFORMAZIONI GENERALI 1.1 Premessa 1.2 Scopo del manuale 1.3 Garanzia 1.4 Identificazione della macchina 1.5 Postazioni di lavoro CAP. 2 - NORME DI SICURAZZA PER L’USO DEL MACCHINARIO 2.1 Norme di sicurezza 2.2 Dispositivi di protezione individuale (DPI) CAP.
- Page 4 use and maintenance manual CAP. 1 - INFORMAZIONI GENERALI 1.1 Premessa La ringraziamo per aver scelto un nostro forno. Questa apparecchiatura è stata costruita facendo uso dei più moderni ritrovati tecnologici per garantire una lunga durata nel tempo e avere sempre il massimo rendimento durante il normale utilizzo.
- Page 5 use and maintenance manual 1.4 Identificazione della macchina Il forno si identifica attraverso una targhetta che indica modello, anno di fabbricazione, matricola, marchio CE di conformità ed altre notizie necessarie per la corretta conduzione dell'apparecchiatura. Questa è posizionata nel pannello posteriore. Altre informazioni relative alla costruzione della macchina si possono desumere dalla lettura della dichiarazione di conformità...
- Page 6 use and maintenance manual Il forno deve essere posizionato su di una superficie piana ad almeno 10 cm dalle pareti della stanza in modo da dare adeguata aerazione. Il forno è munito di uno scarico dei fumi. Questo deve essere collegato ad una canna fumaria e munito di uno scaricatore di condensa collocato in modo da non far accedere acqua all'interno del forno.
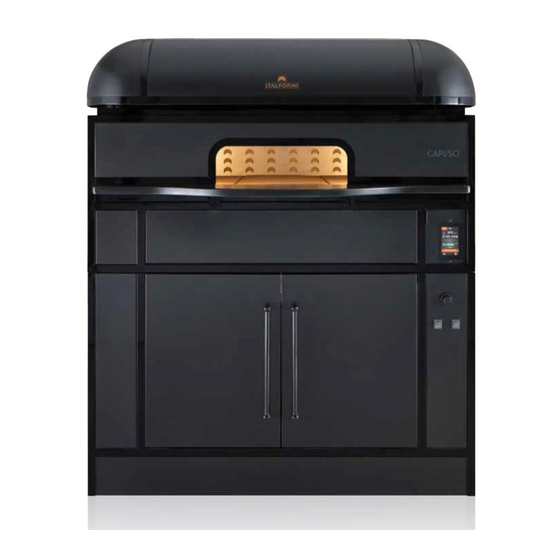
- Page 7 use and maintenance manual CAP. 3 - DESCRIZIONE DELLA MACCHINA 1 Caratteristiche tecniche Il forno CARUSO è stato costruito con lamiere trattate per essere utilizzate ad alte temperature, un piano di cottura in “biscotto di Sorrento” e un telaio coibentato con fibra e lana di roccia. Il rivestimento è...
- Page 8 use and maintenance manual CAP. 4 - ISTRUZIONI PER L'INSTALLAZIONE E IL FUNZIONAMENTO 4.1 Istruzioni per la corretta installazione Prima di installare il forno leggere attentamente il capitolo 2 relativo alle avvertenze. 4.1.1 Scarico e movimentazione del forno Per movimentare il forno fare uso di mezzi meccanici. Il forno viene consegnato su bancale di legno imballato con cartone e film di plastica trasparente, fare attenzione a posizionare il mezzo meccanico in corrispondenza dei punti indicati in modo da poter procedere al trasporto in piena sicurezza.
- Page 9 use and maintenance manual ATTENZIONE: Queste operazioni devono essere eseguite da personale qualificato. 4.2.1 Collegamento elettrico Accertarsi che l’interruttore generale dell’impianto del cliente sia sulla posizione di OFF (disinserito) e che la tensione di alimentazione sia la stessa di quella dichiarata dal costruttore. Collegare ognuna delle camere di cottura con un interruttore generale quadripolare in accordo con i dati riportati in tabella e con la normativa del paese di riferimento.
- Page 10 use and maintenance manual 4.3 Descrizione dei comandi 4.3.1 Schermata STAND-BY TASTO ATTIVAZIONE PROGRAMMAZIONE SETTIMANALE Permette di impostare le accensioni programmate settimanali. IMPOSTAZIONI Permette invece di accedere all’impostazione di data e ora e alla configurazione dei parametri.
- Page 11 use and maintenance manual 4.3.2 Schermata ON SPEGNIMENTO Il forno è dotato di 1 ingresso analogico (termocoppia) per la regolazione della temperatura sul display di controllo. La potenza viene ripartita in percentuale tra le MODALITA’ ENERGY SAVING resistenze del cielo e della platea. Funzione di risparmio energetico, non è...
- Page 12 use and maintenance manual 4.3.3 Schermata screen saver Trascorso un tempo di inattività della tastiera, il display passa in modalità Screen Saver in modo da garantire una maggior visibilità delle temperature della camera di cottura. Se è in corso un ciclo di cottura, verranno visualizzate le percentuali impostate e la temperatura camera, il timer di cottura, il numero di fase attiva e lo stato delle uscite cielo-platea (linea rossa con resistenza...
- Page 13 use and maintenance manual 4.4 Accensione L’accensione del dispositivo avviene attraverso l’attivazione del sezionatore posto sul lato destro del forno. Posizionata la leva su ON il display, dopo qualche secondo, si avvierà sulla schermata stand-by. Per accedere alla schermata ON premere il tasto 4.5 Spegnimento Una volta iniziata la cottura, dopo alcuni minuti, nel display comparirà...
- Page 14 use and maintenance manual 4.6 Impostazione ciclo manuale Per impostare manualmente un ciclo di cottura, è necessario modificare le impostazioni di TEMPO e TEMPERATURA attraverso le icone dedicate. Per la temperatura, quando si ha un forno ad una sonda (1 ingresso analogico) premere sul simbolo che ci permetterà...
- Page 15 use and maintenance manual 4.7.1 Memorizzazione di una ricetta È possibile memorizzare fino a un massimo di 99 ricette. La procedura per memorizzare una ricetta è la seguente: Assicurarsi che il dispositivo sia acceso e che non vi siano cicli in corso ...
- Page 16 use and maintenance manual 4.8 Accensione programmata settimanale La funzione “ACCENSIONE PROGRAMMATA SETTIMANALE consente di programmare fino a un massimo di 9 accensioni settimanali del dispositivo per il preriscaldamento del forno. La ricetta verrà caricata ed il forno si porterà alla temperatura predisposta per la ricetta. Per essere eseguita dovrà...
- Page 17 use and maintenance manual Una volta impostata l’accensione programmata, il dispositivo ne propone l’attivazione ogni volta che viene spento. In caso di più accensioni programmate, verrà proposta quella temporalmente più vicina. Per spegnere il dispositivo senza attivare l’accensione programmata, optare per il tasto Spegni. Per attivare l’accensione programmata, toccare sul tasto Spegni con Pianificazione 4.9 Impostazioni Dalla schermata Stand-by, toccando il tasto...
- Page 18 use and maintenance manual 4.10 Allarmi Se si manifesta un allarme, il buzzer viene attivato e nella schermata ON, al posto del campo orologio, verrà visualizzata la seguente icona d’allarme. La prima pressione di questo tasto tacita il buzzer, la seconda dà accesso alla schermata Menu con relativa visualizzazione dell’allarme in corso e gestione reset.
- Page 19 use and maintenance manual allarme di temperatura di massima cielo/platea rimedi: ALLARME - verificare la temperatura rilevata dalla sonda cielo/platea; si vedano i parametri A0, A1 e A3 Temperatura principali conseguenze: - nessuna conseguenza allarme di temperatura di impiego rimedi: ALLARME - verificare la temperatura di impiego del modulo di controllo;...
- Page 20 use and maintenance manual INTRODUCTION This manual contains the necessary instructions for use and the safety rules to be applied for the correct operation of the appliance. This manual must be delivered to the people in charge of using the machine and its maintenance.
-
Page 21: Table Of Contents
use and maintenance manual CONTENTS CHAP. 1 - GENERAL INFORMATION 1.1 Introduction 1.2 Purpose of the manual 1.3 Warranty 1.4 Machine identification 1.5 Workstations CHAP. 2 - SAFETY RULES FOR USING THE MACHINE 2.1 Safety rules 2.2 Personal protective equipment (PPE) CHAP. -
Page 22: Chap. 1 - General Information
use and maintenance manual CHAP. 1 - GENERAL INFORMATION 1.2 Introduction Thank you for choosing one of our ovens. This equipment has been built by using the most modern technological means to ensure a long lifespan and always have the maximum performance during normal use. Special care has been taken in designing the machine in compliance with European safety regulations and in order to affix the CE marking. -
Page 23: Machine Identification
use and maintenance manual 1.4 Machine identification The oven is identified by a plate that indicates the model, year of construction, serial number, CE conformity marking and other information required to correctly operate the equipment. This is located on the rear panel. Additional information relating to the construction of the machine can be obtained by reading the declaration of conformity with the safety regulations attached to this manual. -
Page 24: Personal Protective Equipment (Ppe)
use and maintenance manual The oven is equipped with a smoke outlet. This must be connected to a flue and fitted with a condensate drain positioned so that no water may enter the oven. Make sure that there are no electrical devices in the immediate vicinity of the oven that may be affected by the electromagnetic field it produces. -
Page 25: Chap. 3 - Machine Description
use and maintenance manual CHAP. 3 - MACHINE DESCRIPTION 1 Technical specifications The CARUSO oven has been built with sheet metal panels treated to be used at high temperatures, a cooking surface made with clay bricks known as biscotto di Sorrentino and a frame insulated with fibre and rock wool. -
Page 26: Chap. 4 - Installation And Operation Instructions
use and maintenance manual CHAP. 4 - INSTALLATION AND OPERATION INSTRUCTIONS 4.1 Instructions for correct installation Before installing the oven, carefully read chapter 2 concerning warnings. 4.1.1 Unloading and moving the oven Use mechanical equipment to move the oven. The oven is delivered on a wooden pallet packaged with cardboard and transparent plastic film, be careful to position the mechanical equipment at the points indicated so that it can be safely transported. -
Page 27: Electrical Connection
use and maintenance manual CAUTION: These operations must be performed by qualified personnel. 4.2.1 Electrical connection Make sure that the main switch of the customer's system is set to OFF (disconnected) and that the supply voltage matches the one declared by the manufacturer. Connect each of the cooking chambers with a four-pole main switch in accordance with the data shown in the table and with the regulation of the reference country. -
Page 28: Description Of The Controls
use and maintenance manual 4.3 Description of the controls 4.3.1 STAND-BY screen POWER BUTTON WEEKLY PROGRAMMING It sets the weekly scheduled switch-ons. SETTINGS Instead, it enables access the date and time setting and parameter configuration. -
Page 29: On Screen
use and maintenance manual 4.3.2 ON screen SHUTDOWN The oven is equipped with 1 analogue input (thermocouple) for temperature adjustment on the control display. The power is distributed as a percentage ENERGY SAVING MODE between the top and bottom resistors. The energy-saving function cannot be enabled when rapid heating is in progress. - Page 30 use and maintenance manual 4.3.3 Screen saver After the keyboard has been inactive for a set time, the display switches to Screen Saver mode to ensure greater visibility of the cooking chamber temperatures. If a cooking cycle is in progress, the percentages set and the room temperature, the cooking timer, the number of active phase and the state of the top- bottom outputs will be displayed (red line with...
-
Page 31: Switch-On
use and maintenance manual 4.4 Switch-on The device is switched on by activating the cut-out switch on the right side of the oven. After setting the lever to ON, after a few seconds the display will start on the stand-by screen. Press the key to access the ON screen. -
Page 32: Manual Cycle Setting
use and maintenance manual 4.6 Manual cycle setting To manually set a cooking cycle, change the TIME and TEMPERATURE settings by using the dedicated icons. With regard to the temperature, when you have a single probe oven (1 analogue input), press , which will enable you to choose the most suitable temperature for your needs. - Page 33 use and maintenance manual 4.7.1 Storing a recipe Up to 99 recipes can be stored. Proceed as follows to store a recipe: Make sure the device is turned on and no cycle is in progress Set the cooking cycle, as indicated in the above paragraph ...
-
Page 34: Weekly Scheduled Switch-On
use and maintenance manual 4.8 - Weekly scheduled switch-on The "WEEKLY SCHEDULED SWITCH-ON" function makes it possible to program up to a maximum of 9 weekly switch-ons of the oven preheating device. The recipe will be loaded and the oven will be brought to the temperature set for the recipe. To be carried out, it must be started manually from the relative button. -
Page 35: Settings
use and maintenance manual Once the scheduled switch-on is set, the device proposes its switch-on every time it is switched off. In case of multiple scheduled switch-ons, the one closest in time will be proposed. To switch off the device without activating the scheduled switch-on, tap the Off key. To activate the scheduled switch-on, tap on the Shutdown with Planning key 4.9 Settings From the Stand-by screen, press the... -
Page 36: Alarms
use and maintenance manual 4.10 Alarms If an alarm triggers, the buzzer is activated and the ON screen displays the following alarm icon instead of the clock field. The first time this key is pressed silences the buzzer, the second time accesses the Menu screen with the relative display of the alarm in progress and reset management. -
Page 37: Chap.5 - Maintenance
use and maintenance manual maximum top/bottom temperature alarm solutions: ALARM - Check the temperature read by the top/bottom probe; refer to parameters A0, A1 and A3 Temperature main consequences: - no consequence operating temperature alarm solutions: ALARM - check the control module’s operating temperature; refer to parameter A4 High board main consequences: temperature...
Need help?
Do you have a question about the CARUSO CA6 and is the answer not in the manual?
Questions and answers