
Related Manuals for Italforni TS Gas


Summary of Contents for Italforni TS Gas
- Page 1 REV.02 (Nov.2017) INSTRUCTIONS FOR USE AND MAINTENANCE TS Gas Category: II2H3+ Construction type: B 0705...
- Page 2 Instructions for use and maintenance IMPORTANT The present manual contains the necessary instructions for the correct use and proper working conditions of the appliance, and the safety norms to adopt. This manual must be consigned to all the persons using the appliance or doing its maintenance.
- Page 3 Instructions for use and maintenance INDEX CAP.1 - INTRODUCTION AND OVEN DESCRIPTION 1.1 General warnings 1.2 Technical data plate and supplementary plate 1.3 Technical information CAP.2 - GENERAL INSTRUCTIONS (for the installer) 2.1 Assembly and installation place 2.2 Gas connection 2.3 Electrical connection CAP.3 - COMMISSIONING (for the installer) 3.1 Checking the nominal thermal capacity...
- Page 4 Total or partial failure to observe the instructions. Failure to send off the guarantee certificate. The electric-gas conveyor oven Mod. TS GAS carries the CE symbol issued by an authorised agency, entrusted with and responsible for assessing compliance with the essential requisites set out by gas Directive 2009/142/CEE.
- Page 5 Instructions for use and maintenance 1.1 General warnings Read this booklet carefully as it provides directions on safety for the oven use and maintenance. The purpose of this manual is to inform operators of the rules and essential criteria for guaranteeing their safety and for prolonging the working life of the oven.
- Page 6 Instructions for use and maintenance 1.2 Techinical data plate and supplementary plate The technical data plate (Fig. 1) is located on the “unloading” side of the of the oven and contains the voltage rating and all the other information necessary for installation. The supplementary plate (Fig. 2) sates the basic rules to be followed for correct installation.
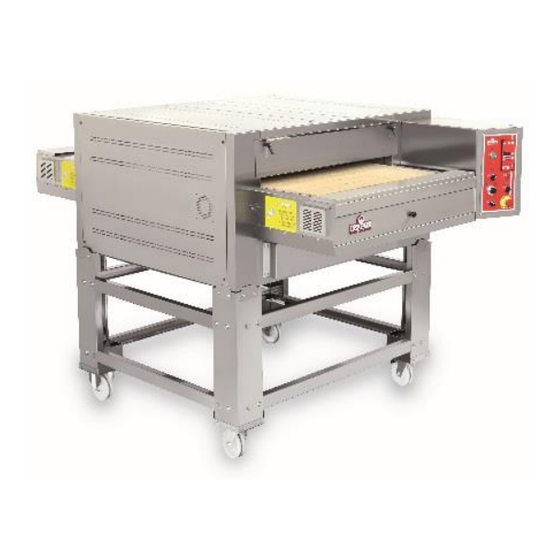
- Page 7 Instructions for use and maintenance 1.3 Technical information Tab. 1 Model TS GAS External dimension L x P x H 1420 x 2160 x 661 mm Stand dimension L x P x H 1150 x 1330 x 622 mm Total nominal thermal capacity...
- Page 8 Instructions for use and maintenance Views and overall dimension Fig. 3 Support stand Fig. 4...
- Page 9 Instructions for use and maintenance CAP.2 - GENERAL INSTRUCTIONS (for the installer) 2.1 Assembly and installation place On receipt of the oven and before proceeding with installation check that the goods supplied correspond with the order specifications and that no damage has been caused during transit; in the event of damage or missing parts, inform immediately and in full detail the forwarding agent (see page 4).
- Page 10 Instructions for use and maintenance Installation Key: Fig. 5 C = Interlocked extractor hood F = Chimney flue R = Stop cock upsteam of the oven V = Interlocked hood cut off valve 2.2 Gas connection Before installation, make sure that the oven is set up to take the gas available. If it is not, see the paragraph “Conversion to other types of gas”...
- Page 11 Instructions for use and maintenance 2.3 Electrical connection Connection to the electrical power supply must be carried out according to the applicable rules. Before making the electrical connection make sure that the voltage and frequency shown on the technical data plate are the same as those of the power supply.
-
Page 12: Minimum Maximum
Instructions for use and maintenance 3.2 Checking the gas supply pressure Before putting the oven into service, a check must be made to see whether it is suitable for the family and type of gas available, as stated on the technical data plate. If it is not, see the paragraph “Conversion to other types of gas”. - Page 13 Instructions for use and maintenance The outgoing pressure must be checked and, if necessary, corrected using the screw “ A ” and the nut “ B ” located on the pressure regulator “ R ”. After removing the plastic cap, adjust the outgoing pressure by means of the nut “...
- Page 14 Instructions for use and maintenance 3.3 Conversion to other type of gas Gas spare parts are supplied with the oven; if any spare parts are needed, contact the manufacturer’s service assistance dept. Conversion must be carried out by a qualified engineer. Referring to table 4, change the two main injectors and regulate the primary air through the two relative brass bushings.
- Page 15 Instructions for use and maintenance 3.4 Instructions for changing certain components WARNING - Carry out this operation only after closing the gas shutoff cock located upstream of the appliance and disconnecting the oven electrical power supply. Any component changes must be carried out by an authorised installer.
- Page 16 Instructions for use and maintenance 3.5 Fault finding A) The oven will not switch on. Possible causes: No electrical power. Electrical wires disconnected. B) The burner does not ignite, continuously defaults or goes out. Possible causes: Ignition plug is not properly secured, is badly connected, is wrongly positionned or the wire is damaged. ...
- Page 17 Instructions for use and maintenance CAP.4 – OPERATING INSTRUCTIONS (for the user) WARNING: This gas oven is intended for professional use and must only be operated by staff trained in its use. The user must only responsibly use the appliance and do the ordinary cleaning. ...
- Page 18 Instructions for use and maintenance Turning on (Fig. 9) Open the gas shutoff cock upstream of the oven and plug in the electrical power. Turn the main switch “ 1 “ to “ON” position. Turn the belt start switch “ 3 “ to “ON” position. ...
- Page 19 Instructions for use and maintenance Safety Device The oven is equipped with an automatic safety thermostat which cuts in when the baking chamber is in over-temperature; the “ OVER TEMPERATURE” warning light on the control panel comes on; contact the service center for solving the anomaly.
- Page 20 Instructions for use and maintenance CAP.5 – CLEANING AND ROUTINE MAINTENANCE The oven must be cleaned regularly to ensure the best working efficiency and maximum performance. In the event of malfunction, do not attempt to remedy the problem but contact the dealer or his technical assistance service which will deal with the problem.
-
Page 21: Daily Maintenance
• Every 40 hours of operation of the oven, grease the conveyor belt chain. This operation must be carried out when the oven is switched on (but still cold), on the loading side of the belt, using a specific ITALFORNI lubricant. - Page 22 Instructions for use and maintenance STICKER APPLIED ON THE OVEN SIDE On the oven side it is applied a sticker with the indication of the Compulsory Maintenance Schedule to be performed by the shop attendants.
- Page 23 Instructions for use and maintenance 5.1 Wiring Diagram MAIN SUPPLY INPUT TERMINAL BLOCK QS-1 2 POS. LEVER SWITCH – SUPPLY INPUT QS-2 2 POS. LEVER SWITCH – ENGINE CONTROL QS-3 2 POS. LEVER SWITCH – MINIMUM CONTROL POTENTIOMETER LIN.2W 10G 1KOHM POTENTIOMETER KNOB GEAR 24V CC 45WR RPM 14 REGULATION ENGINE ELECTRONIC CARD...
- Page 24 Instructions for use and maintenance 5.2 Gas circuit diagram PIPE Cu Ø16x1 SEAL COUPLING ½”x16 WITH CONICAL HEAD COUPLING NIPPLE NUT M22 M/M ½” VIEW FROM ELECTRO- E LE TT R O V A LV O LA V IS T A D A "A " WITH POINT “A”...
- Page 25 Instructions for use and maintenance NOTE: _______________________________________________________________________________________ _______________________________________________________________________________________ _______________________________________________________________________________________ _______________________________________________________________________________________ _______________________________________________________________________________________ _______________________________________________________________________________________ _______________________________________________________________________________________ _______________________________________________________________________________________ _______________________________________________________________________________________ _______________________________________________________________________________________ _______________________________________________________________________________________ _______________________________________________________________________________________ _______________________________________________________________________________________ _______________________________________________________________________________________ _______________________________________________________________________________________ _______________________________________________________________________________________ _______________________________________________________________________________________ _______________________________________________________________________________________ _______________________________________________________________________________________ _______________________________________________________________________________________ _______________________________________________________________________________________ _______________________________________________________________________________________ _______________________________________________________________________________________ _______________________________________________________________________________________ _______________________________________________________________________________________ _______________________________________________________________________________________ _______________________________________________________________________________________ _______________________________________________________________________________________ _______________________________________________________________________________________ _______________________________________________________________________________________ _______________________________________________________________________________________ _______________________________________________________________________________________ _______________________________________________________________________________________ _______________________________________________________________________________________ _______________________________________________________________________________________ _______________________________________________________________________________________ ____________________________________________________________________...
- Page 26 Instructions for use and maintenance ITALFORNI Pesaro S.r.l. Via Dell’Industria, 130 Loc. Chiusa di Ginestreto 61100, Pesaro (PU) ITALIA Tel: 0721 - 481515 Fax: 0721 - 482453 http: www.italforni.it email: info@italforni.it...
Need help?
Do you have a question about the TS Gas and is the answer not in the manual?
Questions and answers