Table of Contents
Advertisement
Quick Links
Advertisement
Table of Contents

Related Manuals for Italforni BULL Series


Summary of Contents for Italforni BULL Series
- Page 1 rev.10/2016 USE AND MAINTENANCE MANUAL BULL...
- Page 2 Use and Maintenance manual INTRODUCTION The present manual provides safety directions and instructions for the oven use and maintenance. This manual must be consigned to the people working on the oven or doing the maintenance.
-
Page 3: Table Of Contents
Use and Maintenance manual INDEX 1 – GENERAL INFORMATION 1.1 Introduction 1.2 Aim of this manual 1.3 Warranty 1.4 Equipment identification 1.5 Operator working position 2 – GENERAL WARNINGS 3 – EQUIPMENT DESCRIPTION 3.1 Technical characteristics 3.2 Manufacturer’s recommended use 3.3 Technical data 4 –... -
Page 4: General Information
Use and Maintenance manual CHAP.1 – GENERAL INFORMATION 1.1 Introduction Thank you for having chosen our product. This piece of equipment has been constructed with the help of the most up to date technology available to guarantee long lasting use and maximum performance under normal working conditions. -
Page 5: Equipment Identification
Use and Maintenance manual 1.4 Equipment identification The oven is identified by a fitted plate showing the model, year of manufacture, serial number, ETL conformity symbol and other information necessary for correct operation. This plate is located on the rear of the oven. Further information regarding the equipment manufacture can be obtained by reading the declaration of conformity with safety regulations enclosed with this manual. -
Page 6: General Warnings
Use and Maintenance manual CHAP.2 - GENERAL WARNINGS These warnings have been listed for your own safety as well as the safety of others; we urge you to read the manual carefully before installing the oven. This equipment has been designed and manufactured for use by adults responsible for ... -
Page 7: Equipment Description
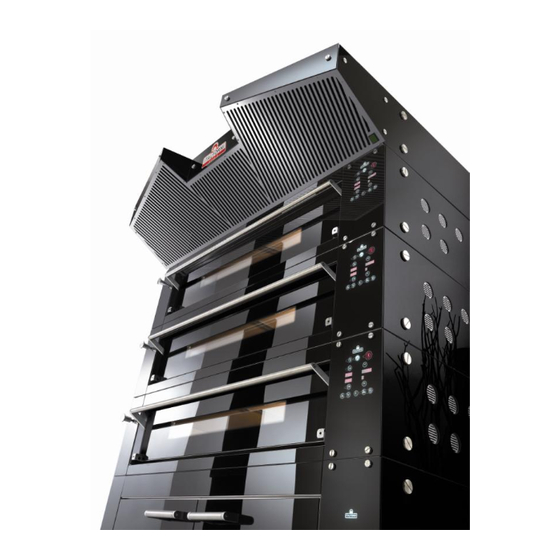
Use and Maintenance manual CHAP.3 - EQUIPMENT DESCRIPTION 1 Technical characteristics The oven had been constructed using sheet steel specially treated to withstand high temperatures, a cooking surface in refractory material and a frame insulated with rockwool and fibre. External coating is made of coloured , shock and high temperature-resistant, tempered and stained glass. -
Page 8: Instructions For Installation And Use
Use and Maintenance manual CHAP.4 – INSTRUCTIONS FOR INSTALLATION AND USE 4.1 Instructions for correct installation WARNING! These operations must only be carried out by qualified technicians N.B. Before installing the oven read carefully chapter 2 on general warnings. The oven must be positioned on a flat surface at least 4” (10 cm) from the wall to ensure adequate ventilation. -
Page 9: Environmental Conditions For Use
Use and Maintenance manual 4.1.2 Environmental conditions for use The oven must be used indoor as it’s not suitable for outdoor use. Room temperature must be between 6°C and 40 °C and humidity should not exceed 90%. Place the oven on a flat surface. 4.1.3 Electrical connections Make sure that the client’s main on/off switch is in the OFF position. -
Page 10: Steam Generator Connection
Use and Maintenance manual 4.1.4 Steam generator connection WATER INLET 0,5/0,6 mbar max pressure reducer has to be installed WATER DISCHARGE Øint. 12mm rubber hose has to be connected WARNING! The manufacturer declines all responsibility for damage or problems caused by lack of observation of the required safety norms during oven installation. -
Page 11: Description Of Controls
Use and Maintenance manual 4.2 Description of controls 4.2.1 User interface SERIAL1 Sw10 Sw11 Sw12 KEYS... - Page 12 Use and Maintenance manual KEYBOARD LOCKING key A single pressure activates/deactivates the keys block LIGHT key Pressing once turns on/off the light in the chamber unless the card is turned off. ON/OFF key With the card Off: pressing once turns the card on With the card in standby: pressing continuously for three seconds turns the card off.
- Page 13 Use and Maintenance manual DECREMENT key Is used to decrease the value selected and to turn off the buzzer. With code entry function: by pressing once it is possible to enter the second digit of the code. ENTER key With the card Off: by pressing continuously for 10 seconds it is possible to enable parameter programming.
-
Page 14: Operations
The Led is on if the chamber light has been switched on by pressing the LIGHT button. LOGO ITALFORNI led The led is off if the card is in off, or it’s on if the card is in or the cooking cycle is in progress. -
Page 15: Maintenance
Use and Maintenance manual Pressing the ON/OFF key turns the card on. When it is on the TIME display shows the length of the program, the TOP ELEMENT display shows the temperature of ceiling, the BOTTOM ELEMENT display shows the temperature of the baseand the NPROG display shows the program number. The ON/OFF Led is on, the TOP ELEMENT and BOTTOM ELEMENT Leds are off, while the HUMIDITY Led and the LIGHT Led can be on if, respectively, the humidity and the light have been activated using the corresponding keys. - Page 16 Use and Maintenance manual This programming phase ends by pressing the PROG key or after a timeout given by the P8 parameter The values set are saved to memory and the next time the card is turned on the manual program will have new values.
- Page 17 Use and Maintenance manual Pressing the TIME key enables changing the program activation time, the part of the display for the hours flashes, use the INCREMENT and DECREMENT keys to change the value. The next time the TIME key is pressed the minutes can be changed, the part of the display for the minutes flashes, use the INCREMENT and DECREMENT keys to change the value.
- Page 18 Use and Maintenance manual cycle too. If there is no electrical power at the moment the program should be carried out it waits and then starts when the card is supplied with power. A program is carried out automatically just once during the week and remains set for the following week.
- Page 19 Use and Maintenance manual CLOCK SETTING With the card off press the TIME key for three seconds. The part of the TIME display for the hour flashes, and can be changed using the INCREMENT and DECREMENT keys. By pressing the TIME key again the minutes can be changed in the same way and pressing TIME once more will allow the day of the week to be set, which is shown on the TIME display, using the strings Mon, Tues, Weds, Thurs, Fri, Sat, Sun, (which will be shown according to the type of display).
-
Page 20: Cleaning The Oven
Use and Maintenance manual CHAP.5 – MAINTENANCE WARNING: Before carrying out any maintenance operations make sure that the machine has been disconnected from the main electrical supply. Read the instructions given here carefully, following them step by step. 5.1 Standard maintenance 5.1.1 Cleaning the oven INTERNAL CHAMBER - Build up of grease or other food residue inside the oven can constitute a fire hazard and so... -
Page 21: Further Maintenance
Use and Maintenance manual 5.2 Further maintenance Any other procedures which have not been described in this manual must be carried out by specialized technicians or alternatively contact the manufacturer’s service assistance. Before carrying out any further maintenance operations make sure that the machine has been disconnected from the main electrical supply. - Page 22 Use and Maintenance manual - Make sure that the new insulating rope is properly fastened into its location. The use of a rubber hummer is recommended.
- Page 23 Use and Maintenance manual Note: ________________________________________________________________________________ ________________________________________________________________________________ ________________________________________________________________________________ ________________________________________________________________________________ ________________________________________________________________________________ ________________________________________________________________________________ ________________________________________________________________________________ ________________________________________________________________________________ ________________________________________________________________________________ ________________________________________________________________________________ ________________________________________________________________________________ ________________________________________________________________________________ ________________________________________________________________________________ ________________________________________________________________________________ ________________________________________________________________________________ ________________________________________________________________________________ ________________________________________________________________________________ ________________________________________________________________________________ ________________________________________________________________________________ ________________________________________________________________________________ ________________________________________________________________________________ ________________________________________________________________________________ ________________________________________________________________________________ ________________________________________________________________________________ ________________________________________________________________________________ ________________________________________________________________________________ ________________________________________________________________________________ ________________________________________________________________________________ ________________________________________________________________________________ ________________________________________________________________________________ ________________________________________________________________________________ ________________________________________________________________________________ ________________________________________________________________________________ ________________________________________________________________________________ ________________________________________________________________________________ ________________________________________________________________________________ ________________________________________________________________________________ ________________________________________________________________________________...
- Page 24 Use and Maintenance manual Italforni Pesaro S.r.l. Via Dell’industria, 130 – Loc. Chiusa di Ginestreto 61122 – Pesaro (PU) Italy...
Need help?
Do you have a question about the BULL Series and is the answer not in the manual?
Questions and answers