Table of Contents
Advertisement
Give Us a Call: 1-800-544-1108
(Toll Free, US and Canada Only)
Replacement Parts List
(on select models)
• Buckle Assembly
• Non-Magnetic Chest Clip
• SecureTech™ Magnetic
Chest Clip
• Seat Pad Set
• Removable Cup Holder(s)
For parts availability and questions, call, text, or chat.
If requested color is not available, similar color
Applicable tax and shipping & handling
Send Us a Text: 1-812-652-2525
(US and Canada Only.
Carrier Fees May Apply)
Find Us Online: www.safety1st.com
Email Us: support@djgusa.com
• Cup Holder Snack Lid
• Shoulder Belt-Positioning Clip
• Top Tether
• Locking Clip
• Instructions
will be substituted.
will also be added.
Advertisement
Table of Contents

Related Manuals for Safety 1st SlimRide EverSlim


Summary of Contents for Safety 1st SlimRide EverSlim
- Page 1 Send Us a Text: 1-812-652-2525 (US and Canada Only. Carrier Fees May Apply) Find Us Online: www.safety1st.com Email Us: support@djgusa.com Give Us a Call: 1-800-544-1108 (Toll Free, US and Canada Only) Replacement Parts List (on select models) • Buckle Assembly •...
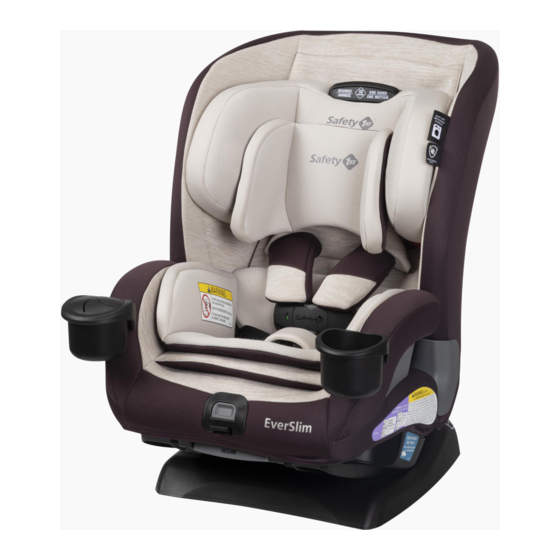
- Page 2 SlimRide EverSlim All-in-One Convertible Car Seat Your model may look different than one shown on cover. KEEP INSTRUCTIONS FOR FUTURE USE. Read all instructions before using this car seat. WARNING Failure to follow the warnings on the labels and in the instruction manual can result in serious injury or death to your child.
- Page 3 Welcome to the Safety 1st Family! Thank you for choosing this car seat, also known as a child restraint! To help you get started using your child’s new car seat, here are the 4 main tasks you’ll need to complete.
- Page 4 Car Seat ©2022 Dorel Juvenile Group, Inc. Safety 1st and the Safety 1st logo and design are trademarks of Dorel Juvenile Group, Inc. (800) 544-1108 www.safety1st.com. Styles and colors may vary. Los estilos y los colores pueden variar. Made in CHINA. Hecho en CHINA.
-
Page 5: Table Of Contents
Contents Getting Started Parts of Car Seat Accessory Use Choosing Car Seat Mode Rear-Facing Section Rear-Facing Child Fit Rear-Facing Vehicle Install Forward-Facing Section Forward-Facing Child Fit Forward-Facing Vehicle Install Securing Child in Car Seat Booster Seat Section Storing Harness System Booster Seat Child Fit Backed... - Page 6 Harness Adjustment for Smaller Infants Reclining Car Seat Wash & Care Removing Seat Pad Set & Cleaning Parts of Car Seat Installing Seat Pad Set LATCH & Vehicle Belt Information LATCH: Lower Anchor Belt Vehicle Belts Top Tether Safety Information Child Restraint Use Vehicle Seating Position Installation in Vehicle...
-
Page 7: Parts Of Car Seat
CC303 SlimRide - No cup holder snack lid, no Parts of Car Seat magnetic chest clip CC303 SlimRide - CC343 EverSim - No cup holder snack lid, no Has cup holder snack lid, & magnetic chest clip has magnetic chest clip SlimRide Model Back View Adjustable... - Page 8 Backless Booster Only Backless Belt- Instruction Sheet Storage Positioning Booster (under Backless seat pad) Belt Path Rear-Facing Level Line (on label) Shell (Car Seat) Forward- Facing Belt Path Base Backed Belt- Rear-Facing Positioning Booster Belt Path Belt Path CC303 SlimRide - CC343 EverSim - No cup holder snack lid, no Has cup holder snack lid, &...
-
Page 9: Accessory Use
Accessory Use Head Pillow & Body Pillow (on select models) Only For Use in Rear-Facing Mode The head and body pillows MUST be used together. To remove head pillow, from the back of the head pillow gently pull the fabric tabs out of the seams in the headrest fabric. To attach head pillow,... - Page 10 Cup Holder Snack Lid (on select models) For Use in All Modes The cup holder lid is top-rack dishwasher safe. To install, fit front of cup holder lid around cup holder. Then press down around the top edges to secure the lid. To remove, pull off of the cup holder. Buckle Cover (on select models) For Use in...
-
Page 11: Choosing Car Seat Mode
Choosing Car Seat Mode WARNING: Measure your child’s weight and height (DO NOT guess) before choosing this car seat’s mode. Your child’s height, weight, and age determine how the car seat should be placed in the vehicle. Children vary widely in body size, shape, and temperament—please consult your doctor before switching between any modes within the limits and fit requirements of the car seat. - Page 12 Rear-Facing Mode 5-40 lb (2.3-18 kg) and 19-40 in. (48-101.6 cm) Rear-Facing Section PAGE 7 Rear-Facing Child Fit & Vehicle Install PAGE 9 & 11 Forward-Facing Mode 22-65 lb (10.1-29 kg) and 29-49 in. (73.6-125 cm) and at least 1 year old Forward-Facing Section PAGE 18 Forward-Facing Child Fit &...
-
Page 13: Rear-Facing Section
Rear-Facing Section 5-40 lb (2.3-18 kg) and 19-40 in. (48-101.6 cm) Children under 1 year of age MUST ride Rear-Facing. In this car seat, your child can remain Rear-Facing until they outgrow any one of the following: • Weight Limit: 40 lb (18 kg); OR •... - Page 14 WARNING: NEVER install a rear-facing child restraint in the front seat of a vehicle equipped with an active frontal airbag. DO NOT use the tether for rear-facing mode. Secure the tether strap hook to its storage attachment. DO NOT use the lower anchor belt along with the vehicle lap or lap/shoulder belt.
-
Page 15: Rear-Facing
Rear-Facing Child Fit Fully Loosen Harness Straps Push down on the harness release lever (through the opening in the pad) while pulling out on the harness straps as shown. Undo Chest Clip Press in on the release button and pull apart. Press in on the top &... - Page 16 Check Head Position The top of your child’s head MUST be at least 1 in. (2.5 cm) below the top of the car seat’s headrest. Check Harness Strap Position The harness strap MUST at or slightly below shoulders; never above. Check Buckle Position •...
- Page 17 Rear-Facing Vehicle Install There are 2 different methods for install. Use only one: Vehicle Belt LATCH: Lower Anchor Belt WARNING: DO NOT use both the LATCH: lower anchor belt and vehicle belt at the same time to install the car seat. Before installing the car seat in your vehicle, check to see if you need to adjust the buckle position for your child.
- Page 18 Place Car Seat Rear-Facing Back Seat The car seat base MUST be flat on the vehicle seat. Recline Car Seat & Check Rear-Facing Level Line For children who cannot sit up unassisted, the Rear-Facing Level Line on the car seat MUST be parallel with the ground using Positions 2-5.
- Page 19 Locate Rear-Facing Belt Path & Route Vehicle Belt or Lower Anchor Belt Through It For the LATCH belt: You may need to fully lengthen the belt before routing it into the belt path. Squeeze the adjuster button and pull the belt out as shown. For Lower Anchor Belt Installation Pull front of seat pad down as shown.
- Page 20 Vehicle Belt or Lower Anchor Belt Goes: • under the car seat pad; AND • across the car seat; AND • in front of the buckle; AND • out the other Rear-Facing Belt Path opening. DO NOT twist the belt. Finished Lower Anchor Belt Routing The lower anchor belt adjuster can be...
- Page 21 Tighten Belt Place your hand in the car seat and firmly push the car seat down and back towards the vehicle seat. Pull the belt towards you and parallel (in line) with the belt path as shown. For the LATCH belt or Lap Only Vehicle Belt: it may be easier to tighten if you route the free end of the belt...
- Page 22 If the car seat moves more than 1 in. (2.5 cm), you can try: • Pulling the belt tighter; OR • Reinstalling the car seat; OR • Changing to a different seating location; OR • Switching to a different install method (LATCH or vehicle belt). Recheck Rear- Facing Level Line...
- Page 23 FINISHED! Lap/Shoulder Belt Lap Belt LATCH: Lower Anchor Belt Vehicle Belt Install: Is the vehicle belt locked? See step 5. LATCH: Lower Anchor Belt Install: Are the hooks securely attached to the vehicle’s lower anchors? See step 5. Is the belt tightened enough so that the car seat does not move more than 1 in (2.5 cm) from side to side? Check the tightness of the install often to make sure it has not loosened.
-
Page 24: Forward-Facing Section
Forward-Facing Section 22-65 lb (10.1-29 kg) and 29-49 in. (73.6-125 cm) and at least 1 year old Children MUST be at least 1 year of age to Forward-Facing. ride In this car seat, your child can remain harnessed Forward-Facing until they outgrow any one of the following: •... - Page 25 WARNING: DO NOT use the lower anchors of the child restraint anchorage system (LATCH system) to attach this child restraint when restraining a child weighing more than 45 lb (20 kg). The vehicle belt MUST be used for installation if your child weighs more than 45 lb (20 kg).
-
Page 26: Forward-Facing
Forward-Facing Child Fit Fully Loosen Harness Straps Push down on the harness release lever (through the opening in the pad) while pulling out on the harness straps as shown. Undo Chest Clip Press in on the release button and pull apart. Press in on the top &... - Page 27 Head Position The tops of your child’s ears MUST be below the top of the car seat’s headrest. Harness Strap Position The harness strap MUST at or slightly above shoulders; never below. Buckle Position • Use the slot closest to your Buckle child.
- Page 28 Forward-Facing Vehicle Install There are 2 different methods for install. Use only one: Vehicle Belt LATCH: Lower Anchor Belt for children up to 65 lb (29 kg) for children up to 45 lb (20 kg) WARNING: DO NOT use both the LATCH: lower anchor belt and vehicle belt at the same time to install the car seat.
- Page 29 Put Car Seat into Most Upright Position & Place Car Seat Forward- Facing in Back Seat The vehicle seat back MUST be upright. If your vehicle has a headrest that interferes with a flush car seat fit, check your vehicle owner’s manual to see if it can be removed, adjusted, or if there are other possible seating locations for you to install.
- Page 30 Loosely Attach Tether Hook to Vehicle’s Top Tether Anchor Locate Forward-Facing Belt Path & Route Vehicle Belt or Lower Anchor Belt Through It For the LATCH belt: You may need to fully lengthen the belt before routing it into the belt path.
- Page 31 Vehicle Belt or Lower Anchor Belt Goes: • behind the car seat pad; • across the car seat; AND • out the other Forward- Facing Belt Path opening. DO NOT twist the belt. Finished Lower Anchor Belt Routing The lower anchor belt adjuster can be on either side of the car seat.
- Page 32 Buckle Vehicle Belt switchable If your car has a retractor, use it to lock the vehicle belt. Review pages 67-70 of this manual or your vehicle owner’s manual. Attach Lower Anchor Belt Hooks to Vehicle’s Lower Anchors Tighten Belt Place your hand in the car seat and firmly push the car seat down and back towards the vehicle seat.
- Page 33 Tighten Tether Push firmly on the back of the car seat and pull the free end of the tether strap to remove all of the slack. Check Belt Tightness Hold the Forward-Facing Belt Path with your non- dominant hand. Push and pull from side to side.
- Page 34 FINISHED! Lap/Shoulder Belt + Tether for children up to 65 lb (29 kg) Lap Belt + Tether for children up to 65 lb (29 kg) LATCH: Lower Anchor Belt + Tether for children up to 45 lb (20 kg) Vehicle Belt Install: Is the vehicle belt locked? See step 7. LATCH: Lower Anchor Belt Install: Are the hooks securely attached to the vehicle’s lower anchors? See step 7.
-
Page 35: Securing Child In Car Seat
Securing Child in Car Seat WARNING: Do not use the magnetic chest clip with children who have an implanted electronic IMPLANTED medical device. ELECTRONIC MEDICAL A magnet is used to help secure the chest DEVICES clip locking mechanism together which may interfere with the proper function of an implanted electronic medical device. - Page 36 When the magnetic chest clip is properly secured, the triangle will change from red to green. Buckle Harness Pull the harness straps up to make sure the buckle is locked. Tighten Harness Pull the harness adjustment strap straight out to snugly tighten the harness.
- Page 37 FINISHED! A snug strap should not allow any slack. It lies in a relatively straight line without sagging. It does not press on the child’s flesh or push the child’s body into an Your child is now secured in the car seat. unnatural position.
-
Page 38: Booster Seat Section
Booster Seat Section Backed Backless 40-100 lb (18.1-45.4 kg) and 43-52 in. (110.1-132.1 cm) In this car seat, your child can remain in a Booster Seat until they outgrow any one of the following: • Weight Limit: 100 lb (45.4 kg); OR •... -
Page 39: Storing Harness System
Storing Harness System You MUST remove head pillow, toddler pillow & harness covers. To remove accessories, see pages 3 & 4. Fully Loosen Harness Straps Adjust Headrest to Highest Position Undo Chest Clip Press in on the release button and pull apart. Press in on the top &... - Page 40 Remove Backless Booster Locate the backless booster release levers under the seat pad as shown. Squeeze both levers and pull out on the backless booster to remove it from the main car seat. From Bottom of Backless Booster, Rotate Buckle’s Metal Retainer &...
- Page 41 Pull Bottom of Seat Pad Down & Locate Fasteners on Lower Back of Seat Pad Secure Chest Clip & Buckle Tongues Behind Seat From front of seat, feed left buckle tongue & left half of chest clip through opening to back as shown. Repeat for other side.
- Page 42 Feed Buckle Strap’s Metal Retainer Behind Buckle & Between Harness Straps As Shown The harness system is now stored for Booster Seat Mode. Attach Backless Booster to Main Shell Align backless booster & slide into opening at bottom of backed shell. Push firmly. The booster seat will click on both sides when it locks into place.
- Page 43 Replace Seat Bottom Pad Tuck side flaps behind seat bottom pad. Replace Bottom of Headrest Pad Secure Top Tether Strap & Lower Anchor Straps To Storage Locations As Shown Pull end of straps to tighten and remove slack. FINISHED! The car seat has been converted to Backed Booster Seat Mode.
-
Page 44: Booster Seat Child Fit
Booster Seat Child Fit Backed & Backless Booster Modes Car Position 5 in. (12.7 cm) DO NOT use the booster seat if your child’s head is less than 5 in. (12.7 cm) below the roof of the car. Consult your vehicle manual for proper seatbelt usage. - Page 45 Backless Booster Mode Head Position The tops of your child’s ears should never be above the top of the vehicle seat back or vehicle headrest. Shoulder Belt Position The shoulder belt should lay snugly across the center of your child’s shoulder and across their chest.
-
Page 46: Backed Booster
Backed Booster Seat Use in Vehicle WARNING: DO NOT use the harness system when using as a booster seat. DO NOT use LATCH when using as a booster seat. Secure the lower anchor belt and the tether strap to their storage attachments. - Page 47 Adjust Booster Seat To Fully Upright Position If your vehicle has a headrest that interferes with a flush car seat fit, check your vehicle owner’s manual to see if it can be removed, adjusted, or if there are other possible seating locations for you to install.
- Page 48 Buckle Vehicle Belt Pull the shoulder belt up to tighten. Position Shoulder Belt on Child Thread the shoulder belt through the belt- positioning guide in the headrest. Pull the shoulder belt up to tighten so that it lies snugly across the center of your child’s shoulder and across their chest.
-
Page 49: Converting To Backless
Converting to Backless Booster Seat Mode Fully Loosen Harness Straps Undo Buckle Push Harness Adjustment Strap Through Opening in Bottom of Pad As Shown... - Page 50 Remove Backless Booster Locate the backless booster release levers under the seat pad as shown. Squeeze both levers and pull out on the backless booster to remove it from the main car seat. Remove Buckle & Buckle Cover From Car Seat Rebuckle crotch buckle to store on backed seat while not in use.
- Page 51 Remove Shoulder Belt Positioning Clip from Storage Location Turn backed car seat over & rotate plastic plate to remove clip from bottom of base. To store clip, roll & flatten strap. Fit strap and clip into opening in shell as shown. Rotate plastic plate.
-
Page 52: Backless Booster
Attach Seat Pad Fasteners Wrap loose end of seat pad around front bottom of backless booster. Attach both fasteners & both elastic straps as shown. FINISHED! The car seat has now been Backless Booster converted to Seat Mode. Backless See pages 47-50 for Booster Seat Use in Vehicle. - Page 53 Backless Booster Seat Use in Vehicle WARNING: DO NOT use the harness system when using as a booster seat. DO NOT use this booster seat if the tops of your child’s ears are above the top of the vehicle seat back or vehicle headrest.
- Page 54 Place Backless Booster Seat in Back Seat of Vehicle The vehicle seat back MUST be upright. Have Child Sit in Booster Seat The tops of your child’s ears should never be above the top of the vehicle seat’s headrest. Position Lap Belt on Child Route the lap portion of the lap/shoulder belt through...
- Page 55 Buckle Vehicle Belt Position Shoulder Belt on Child Pull the shoulder belt up to tighten so that it lies snugly across the center of your child’s shoulder and across their chest. The vehicle’s shoulder belt MUST GO UNDER the armrest on the vehicle buckle side and over the armrest on the non-buckle side.
- Page 56 Belt-Positioning Clip Use With child in booster seat, pull the belt-positioning clip across the child’s back to the top of the child’s shoulders. The top of the shoulder must be even with the bottom of the positioning clip as shown. Pull the shoulder belt up to tighten so that it lies snugly across the center of your child’s shoulder and...
-
Page 57: Changing Headrest/Harness Height
Changing Headrest/ Harness Height Fully Loosen Harness Straps Push down on the harness release lever (through the opening in the pad) while pulling out on the harness straps as shown. Adjust Headrest/ Harness Height 1. Squeeze the adjustment handle lever up. 2. - Page 58 To Use Headrest in Lowest Position: Fold Bottom of Headrest Pad Up Underneath Middle Section of Headrest Pad Adjust Headrest to Lowest Position NOTE: To use headrest in higher position, do opposites of steps 1 & 2. If the harness straps have been removed from the chest clip &...
-
Page 59: Changing Buckle Position
Changing Buckle Position WARNING: Failure to place buckle’s metal retainer completely through pad and child restraint can result in serious injury or death. You must remove backless booster to change buckle position. See Convert to Backless Booster, pages 43-46. To reattach backless booster to main shell, see page 36, step 13. - Page 60 Insert Buckle’s Metal Retainer into Buckle Slot Closest to Child From top of booster seat, tuck the ends of the buckle cover into the same pad slot as the buckle. Check Buckle Pull up on the buckle to make sure it is secured. The buckle MUST NOT pull out.
-
Page 61: Harness Adjustment For Smaller Infants
Harness Adjustment for Smaller Infants If you cannot achieve a snug harness fit for your child, you may need to adjust the harness strap as shown in this section. When using the lower shoulder harness slots for smaller children, you MUST use the head and body pillow and the headrest MUST be in the lowest position. - Page 62 Move Buckle to 1st Buckle Slot To access buckle’s metal retainer, you must first remove backless booster. To remove backless booster, see pages, 43-46. To change buckle slot, see pages 53-54. From Back of Car Seat, Remove Harness Strap Loops From Splitter Plate Attach 2nd Harness Strap Loops to...
- Page 63 Fold Bottom of Headrest Pad Up & Adjust Headrest to Lowest Position The bottom section of the headrest pad will need to be folded up behind the middle section. See page 52. The sewn ends of the harness strap loops MUST face towards you.
-
Page 64: Reclining Car Seat
Reclining Car Seat This car seat has 5 positions. There is a small window on each side of the seat that shows which position the car seat is in. NOTE: When the car seat is in Position 5 - Fully Reclined, the number window on the side of the seat will no longer be visible. -
Page 65: Removing Seat Pad Set & Cleaning Parts Of Car Seat
Removing Seat Pad Set & Cleaning Parts of Car Seat You do not need to remove the harness system to remove the pad from the car seat. DO NOT fully pull the harness strap out of the car seat. Leave it threaded in the hip harness slots. If removed, you will not be able to rethread it. - Page 66 Unbuckle Harness Press in toward top of red button. Slide Shoulder Straps Out from Shoulder Slots in Seat Pad From Behind Seat, Locate Elastic Straps There are two elastic straps behind the top of the headrest & two on the seat back.
- Page 67 Locate Fasteners at Bottom of Seat Pad Undo fasteners. Pull Sides of Fabric Down & Out From Around Booster Belt Path Pull elastic straps down and out from under belt path covers. Lift pad up off sides & top of car seat.
- Page 68 Remove Backless Booster See pages 43-46. Undo Elastic Straps Underneath Front of Backless Booster Underneath backless booster, there are 2 elastic straps that attach to tabs in shell. There are also 6 plastic seat pad tabs that slide into slots in the shell.
-
Page 69: Installing Seat Pad Set
Remove Pad From Backless Booster Pull pad down & out from around belt path covers & backless booster cup holder attachments. Slide pad up off of armrests & remove pad from shell. Cleaning Pad & Accessories Machine wash separately with cold water on a gentle cycle. Make sure the harness covers are closed so the fastening strips are not exposed. - Page 70 4. Fit pad around harness adjustment lever cover. 5. Flip plastic tabs down and slide into slots around bottom of booster. 6. Attach seat pad elastics to tabs in shell. 7. Pull front of seat pad around bottom of shell and snap fasteners into openings in shell.
-
Page 71: Latch: Lower Anchor Belt
LATCH: Lower Anchor Belt Your vehicle’s features may be considerably different than those pictured here. The lower anchors of LATCH (Lower Anchors and Tethers for CHildren) is a universal system for installing car seats without using vehicle seat belts. The LATCH: lower anchor belt can ONLY be used in vehicles that have the lower anchor bars installed in designated seating positions. - Page 72 To Remove Lower Anchor Belt from Vehicle’s Lower Anchor Bars Remove the tension from the belt by pushing down on the side of the car seat with the adjuster. Press the adjuster’s button to loosen the belt. Squeeze the spring lever on the hooks, push the hooks back into the vehicle seat, and rotate the hooks to the side.
-
Page 73: Vehicle Belts
Vehicle Belts Your vehicle’s features may be considerably different than those pictured here. If LATCH: lower anchors are not an option or if your child weighs more than 45 lb (20 kg), you MUST use the vehicle seat belt system to install the car seat. Not all vehicle belts and seating positions will work with car seats. - Page 74 You MUST Review Your Vehicle Owner’s Manual Your vehicle owner’s manual will let you know which vehicle belts and seating positions car seats can be installed in. Check How This Car Seat Will Be Locked Into Place The vehicle belt MUST NOT loosen after tightening.
- Page 75 Types of Retractors Switchable Retractor (most vehicles have this type) This retractor can be switched to a locking mode. You MUST have the retractor in the locking mode to use the seat belt with this car seat. Switching to locking mode: Slowly pull the shoulder belt all the way out, then let it go back in 1-2 in.
- Page 76 Emergency Locking Locking Latch Retractor with Plate a Sliding Latch Plate Check Latch Plates Latch plates are the part of the seat belt that goes into the buckle. To see if the latch plate locks: 1. Buckle Vehicle Belt 2. Firmly Tug Lap Portion of Seat Belt While Pulling It Up If the vehicle belt does not slide through the latch plate, it’s locked.
-
Page 77: Top Tether
Top Tether Your vehicle’s features may be considerably different than those pictured here. When anchors are available, you MUST always attach, adjust, and secure the tether (top anchorage) strap when installing the car seat Forward-Facing Mode in the with internal harness. Tethers improve the installation and stability of car seats and reduce the risk of injury. -
Page 78: Child Restraint Use
Child Restraint Use WARNING: NEVER take your child out of the child restraint while the vehicle is moving. NEVER leave your child unattended. Placing your child in a hot child restraint may result in burns. DO NOT use a child restraint with damaged or missing parts. -
Page 79: Vehicle Seating Position
Vehicle Seating Position WARNING: NEVER place a child rear-facing in a seating position with an active frontal air bag. Check the vehicle owner’s manual for more information about air bag/child restraint use. Use the child restraint only on vehicle seats that face forward. -
Page 80: Installation In Vehicle
To avoid your child being seriously burned, take the following precautions: • Park in the shade or where the sun does not directly hit the car seat. • Cover the car seat with a sheet or blanket when not in use. •... -
Page 81: Replacement & Expiration
Replacement & Expiration DO NOT risk your child’s safety. To keep your child as safe as possible, Dorel Juvenile Group strongly recommends replacing the car seat even after a minor crash, even if it was not occupied at the time. Replacement After a Minor Crash The National Highway Traffic Safety Administration states that for a crash to be considered minor ALL of the following MUST be true:... -
Page 82: Registration & Safety Notices
Registration & Safety Notices Brand Car Seat 05/16/2015 Brand Car Seat 05/16/2015 Brand Car Seat 05/16/2015 Example of model number, manufacture date, and line code. If you don’t have the card or if your address changes, you will find the model number, manufacture date, and line code on the label located on the... -
Page 83: Aircraft Information
Aircraft Information This restraint is certified for aircraft use when used with the internal harness. Rear-Facing Aircraft Installation Follow the steps on pages 11-17, skipping the lower anchor belt steps. Forward-Facing Aircraft Installation Follow the steps on pages 22-28, skipping the lower anchor belt &... -
Page 84: Warranty
Warranty Dorel Juvenile Group, Inc. (DJG) warrants this product to the original retail purchaser as follows: This product is warranted against defective materials or workmanship for one year from the date of original purchase. An original receipt is required to validate your warranty. DJG will, at its option, provide replacement parts or replace this product.
Need help?
Do you have a question about the SlimRide EverSlim and is the answer not in the manual?
Questions and answers
How to remove cup holder to clean car seat cover
@Debbie McKeever Just pull as hard as you can!
To remove the cup holder from the Safety 1st EverSlim car seat for cleaning, pull out on the cup holder. It is top-rack dishwasher safe.
This answer is automatically generated
At what point should I remove the newborn insert in the everslim car seat? I can’t find anything in the manual relating to this.