Table of Contents
Advertisement
To see installation videos, scan the QR Code
or visit www.safety1st.com
©2015 Dorel Juvenile.
4358-6653 Grow and Go 3 in 1.indd 1-2
4358-6653 Grow and Go 3 in 1.indd 1-2
™
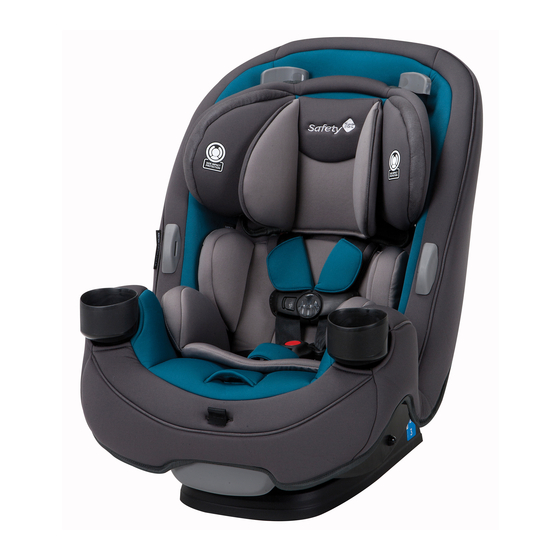
Grow and Go
3-in-1
rear-facing child restraint
5-40 lb (2.3-18 kg) and 19-40 in. (48-101.6 cm)
forward-facing child restraint
22-65 lb (10.1-29 kg) and 29-49 in. (73.6-125 cm)
and at least 2 years old
booster seat
40-100 lb (18.1-45.4 kg) and 43-52 in.
(110.1-132.1 cm) and at least
4 years old
KEEP INSTRUCTIONS FOR
FUTURE USE.
Read all instructions
before using this
child restraint.
Failure to follow the warnings on the labels and in the
instruction manual can result in serious injury or death
to your child.
4358-6653
4.10.15
4/15/15 8:47 AM
4/15/15 8:47 AM
Advertisement
Table of Contents

Related Manuals for Safety 1st Grow and Go 3-in-1


Summary of Contents for Safety 1st Grow and Go 3-in-1
- Page 1 4358-6653 4.10.15 ™ Grow and Go 3-in-1 rear-facing child restraint 5-40 lb (2.3-18 kg) and 19-40 in. (48-101.6 cm) forward-facing child restraint 22-65 lb (10.1-29 kg) and 29-49 in. (73.6-125 cm) and at least 2 years old booster seat 40-100 lb (18.1-45.4 kg) and 43-52 in. (110.1-132.1 cm) and at least 4 years old KEEP INSTRUCTIONS FOR...
- Page 2 Choosing Rear Facing, Forward Facing, or WARNING: Verify your child’s weight and height (do not Booster Seat guess) before choosing the child restraint’s position. Your child’s height, weight, and age determine how your child restraint or booster seat should be placed in the vehicle. LATCH Install Page 33 5-22 lb...
-
Page 3: Table Of Contents
Rear Facing ........... 32 Table of Contents LATCH Installation ..........33 Getting Started ........1 Vehicle Belt Installation ........38 Parts of the Child Restraint ........1 Forward Facing ........41 Prepare Child Restraint to Fit Your Child ....3 Tether Use ............ -
Page 4: Parts Of The Child Restraint
Parts of the Child Restraint Side View Front View Back View Harness System Detail Rear Facing Level Line Chest Clip Headrest/Harness Shoulder Belt Positioning Adjustment Levers Guide (behind headrest pad) Forward-Facing Belt Lower Shoulder Harness Path Slots for Smaller Infants Adjustable Headrest Easy Out Harness Holders LATCH Attachment for... -
Page 5: Prepare Child Restraint To Fit Your Child
Prepare Child Restraint to Fit Your Child 2. Or the buckle tongues can be Fully Loosen Harness placed into the slots in the harness Straps holders as shown. Push down on harness release lever (under fl ap on front of seat pad) while pulling out on harness straps as shown. -
Page 6: How Does Your Child Fit
How Does Your Child Fit? Changing Position of Buckle Use the guidelines below to determine if the buckle and harness Unbuckle Harness strap are in the right place for your child. Press in towards the top of the red button. REAR FACING Pull buckle tongues out. -
Page 7: Adjusting Headrest/Harness Height
Adjusting Headrest/Harness Height From Top of Seat, Fully Loosen Harness Pull Buckle and Buckle Straps Cover Out of Shell and Push down on harness release lever (under fl ap on front of seat pad) while pulling out on harness straps as shown. Insert Buckle’s Metal Retainer into Slot Closest to Child... -
Page 8: Harness System Adjustments For Smaller Infants
Harness System Adjustments for Smaller Infants Adjust the Headrest to the When using the lower shoulder harness slots for smaller infants, Lowest Position MUST MUST use the body pillow and the headrest be in the MUST The headrest be in the lowest lowest position. -
Page 9: Securing Child In Child Restraint
Securing Child in Child Restraint Pull Bottom of Headrest Place Child in Child Pad Off of Headrest Restraint Thread harness straps through slots in headrest pad. The child’s bottom and back should be flat against the child restraint. Thread harness straps through lower shoulder harness slots in headrest and Position harness strap over child’s through the slots in seat back (shell). -
Page 10: Reclining Child Restraint
Reclining Child Restraint Position Chest Clip This child restraint has 3 positions: The chest clip must be placed at Rear Facing - 2 and 3 mid-chest (even with armpits) and away from the child’s neck. For children who cannot sit up unassisted, the level line on shell MUST be parallel with the ground. -
Page 11: Storing Harness System
Storing Harness System Adjust the Headrest Only store the harness system when converting child to the Highest Position restraint into a booster seat. To remove acessories see page 24. Fully Loosen Harness Straps Push down on harness release lever (under fl ap on front of seat Undo Fasteners on pad) while pulling out on harness Headrest Pad As Shown... -
Page 12: Removing Seat Pad For Cleaning
Removing Seat Pad for Cleaning You DO NOT need to remove the harness system to remove Thread Harness Straps the pad from the shell. into Slots on Sides of Headrest As Shown To remove acessories see page 24. Unbuckle Harness Press in towards the top of the red button. - Page 13 Pull Headrest Pad Off From the Top, Pull Pad of Bottom of Headrest Off of Shell As Shown Remove headrest pad from shell. Undo Fasteners on Seat Pad As Shown WARNINGS: Do not use child restraint without the seat pad. Failure to do this can result in serious injury or death.
-
Page 14: Installing Harness System
Installing Harness System Adjust the Headrest Fully Recline the Child to the Highest Position Restraint Pull out on recline handle and push top of child restraint back. Undo Fasteners on Seat and Headrest Pad and Insert Buckle’s Metal Pull Headrest Pad Off Retainer into Slot Bottom of Headrest Closest to Child... -
Page 15: Accessories On Select Models
Accessories on Select Models Thread Harness Straps Head Pillow into Shoulder Harness To remove head pillow, gently pull tabs on Slots back of head pillow out of headrest pad. To attach the head pillow, slide the tabs If you will be using the lower on back of head pillow into headrest pad. -
Page 16: Child Restraint Use
Child Restraint Use Vehicle Seating Position Never place a child rear facing in a seating Do not use this child restraint unless the child is position with an active frontal air bag. 5-100 lb (2.3-45.4 kg) and 19-52 in. (48-132.1 cm). Check the vehicle owner’s manual for more Never take your child out of the child restraint while information about air bag/child restraint use. -
Page 17: Understanding Your Vehicle
Understanding Your Vehicle Choosing LATCH or Vehicle Belts Your vehicle’s features may be considerably different When used correctly the LATCH or Vehicle Belts are equally safe. than those pictured here. The LATCH System LATCH Anchor Bars LATCH (Lower Anchors and Tethers for CHildren) is a universal system for installing child restraints without using vehicle seat belts. -
Page 18: Knowing Your Vehicle Belts
Knowing Your Vehicle Belts Review your vehicle owner’s manual for vehicle seat belt use with WARNING: ELR lap-only belts MUST NOT be used with child restraints. This is your best source for information concerning this child restraint. your vehicle. Not all vehicle belts will work with this child restraint. This child restraint must be tightly locked in place at all times. -
Page 19: Aircraft Information
Aircraft Information Rear Facing This restraint is certifi ed for aircraft use when used with the internal 5-40 lb (2.3-18 kg) and 19-40 in. (48-101.6 cm) harness. This child restraint is not certifi ed for use in aircraft when used as a booster seat because aircraft seats do not have shoulder belts. -
Page 20: Latch Installation
LATCH Installation Route LATCH Belt Safety Tips: Through Rear-Facing Make sure harness and buckle fit your child correctly before Belt Path installing the child restraint. See pages 3-5. Do not twist belt. Experts agree that children should remain rear facing as long LATCH adjuster can be on either as possible. - Page 21 Place Child Restraint Check Belt Tightness Rear Facing in Back Hold child restraint at the belt Seat path with your weakest hand. For children who cannot sit up Push and pull from side to side. unassisted, the level line on shell If it moves more than 1 in.
-
Page 22: Vehicle Belt Installation
Vehicle Belt Installation To Release LATCH Safety Tips: Remove child from child restraint. Make sure harness and buckle fit your child correctly before Remove tension from LATCH belt installing the child restraint. See pages 3-5. by pushing down on side of child restraint with LATCH adjuster. - Page 23 Place Child Restraint Tighten Belt Rear Facing in Back Place hand in child restraint. Seat Firmly push down and towards For children who cannot sit up the vehicle seat back while pulling unassisted, the level line on shell shoulder belt or free end of lap belt MUST be parallel with the ground.
-
Page 24: Forward Facing
Forward Facing Tether Use The top anchorage strap (tether) is used only for the forward- 22-65 lb (10.1-29 kg), 29-49 in. (73.6-125 cm), facing position. and at least 2 years old. We strongly recommend that you use the tether in the forward-facing position. -
Page 25: Latch Installation
LATCH Installation Route LATCH Belt Safety Tips: Through Forward- Facing Belt Path Make sure harness and buckle fit your child correctly before installing the child restraint. See pages 3-5. Do not twist belt. Experts agree that children should remain rear facing as long LATCH adjuster can be on either as possible. - Page 26 Hook LATCH to Vehicle Check Belt Tightness Anchor in Seat Bight Hold child restraint at the belt path with your weakest hand. Push and pull from side to side. If it moves more than 1 in. (2.5 cm), try reinstalling the child restraint, try another seating location, or try using the vehicle belts.
-
Page 27: Vehicle Belt Installation
Vehicle Belt Installation Route Vehicle Lap or Lap/Shoulder Belt Safety Tips: Through Forward- Make sure harness and buckle fit your child correctly before Facing Belt Path installing the child restraint. See pages 3-5. Review pages 29-30 and your vehicle Experts agree that children should remain rear facing as long owner’s manual to determine what as possible. -
Page 28: Booster Seat
Booster Seat Lap and Shoulder Belt Installation 40-100 lb (18.1-45.4 kg), 40-52 in. (110.1-132.1 Place Booster Seat Forward Facing Flush cm), and at least 4 years old. Against Vehicle Seat Back Do not use any recline position except to make the booster seat Lap/Shoulder Belt flush against the vehicle seat back. -
Page 29: Using A Locking Clip
Using a Locking Clip You will rarely need to use a locking clip except in some older Buckle Vehicle Belt vehicles. Built-in child restraint locking systems have been required in vehicles since 1996, and many vehicles had these features even earlier. -
Page 30: Troubleshooting
Troubleshooting Locate a Child Safety Seat Inspection Station for hands on training on how to use your child restraint: Visit your local Child Passenger Inspection Station or go to http://www.safercar.gov/cpsApp/ Position Locking Clip cps/index.htm to fi nd your closest station. It should be about 1 in. -
Page 31: Registration And Safety Notices
Registration and Safety Notices Replacement Parts Order Form Please complete the postage-paid registration card that came Complete the form. Your model number and manufacturer date with your child restraint, and send it to us. Child restraints could code MUST be included on the form to ensure proper replacement be recalled for safety reasons. -
Page 32: Warranty
Warranty Replacement Parts List Dorel Juvenile Group, Inc. (DJG) warrants this product to the original NOTE: If requested color is not available, similar color will be retail purchaser as follows: substituted. Prices are subject to change. Part Cost Total Cost This product is warranted against defective materials or workman- ship for one year from the date of original purchase.
Need help?
Do you have a question about the Grow and Go 3-in-1 and is the answer not in the manual?
Questions and answers