Table of Contents
Advertisement
Quick Links
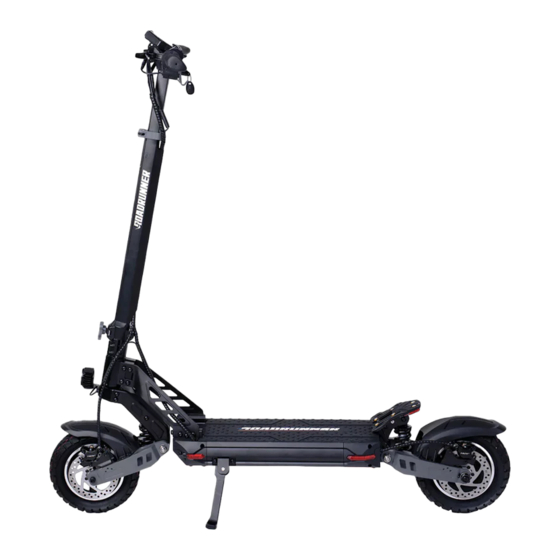
RoadRunner R4 Scooter
Pictures in this manual are for reference only. Please read the full instruction manual before
using your Scooter.
For instructional videos on how to: get your scooter ready to ride, maintain your scooter, and
repair your scooter, scan this QR code with your camera phone and browse dozens of videos.
Advertisement
Table of Contents

Related Manuals for RoadRunner R4


Summary of Contents for RoadRunner R4
- Page 1 RoadRunner R4 Scooter Pictures in this manual are for reference only. Please read the full instruction manual before using your Scooter. For instructional videos on how to: get your scooter ready to ride, maintain your scooter, and repair your scooter, scan this QR code with your camera phone and browse dozens of videos.
-
Page 2: Table Of Contents
Scooter and Accessories 2. Scooter Components 3. Scooter Specs 4. Product Display 5. Charging the Scooter 6. Battery and Charger Information 7. Handlebar Controls and Instruments 8. LCD Display 9. Parameter Settings (P Settings) 10. Riding Instructions 11. Operating instructions 12. -
Page 3: Scooter And Accessories
1. Scooter and Accessories Scooter Accessories 1. Owner’s Manual 2. Charger 3. Multi-tool... -
Page 4: Scooter Components
2. Scooter Components... -
Page 5: Scooter Specs
3. Scooter Specs Product name RoadRunner R4 Electric Scooter Product model 50” (l) x 24” (w) x 23” (h) Folded Dimensions 51” (l) x 24” (w) x 51” (h) Unfolded Dimensions Net weight 62 lbs Max load 265 lbs Max speed... -
Page 6: Product Display
4. Product Display Scooter unfolded Scooter folded... -
Page 7: Charging The Scooter
4. Cover the charging port once the charger is removed. 6. Battery and Charger Information Every RoadRunner R4 Scooter is equipped with a dedicated lithium battery and a dedicated smart charger. Please do not use any other charger or battery with your scooter, and do not use your dedicated charger with any other product. -
Page 8: Handlebar Controls And Instruments
7. Handlebar Controls and Instruments 1. Handlebar 2. Left Brake Handle 3. T-bar 4. LCD Display 5. Right Brake Handle 6. Headlight 7. Electric Lock 8. Power (on/off) Button / Gear Switch Button... -
Page 9: Lcd Display
8. LCD Display... -
Page 10: Parameter Settings (P Settings)
9. Parameter Settings (P Settings) To make changes to any P-settings, press the power button quickly three times in row. Once the selected values begin flashing, quickly press the power button just once to cycle through the options. Press the power button to exit the current P settings or to advance to the next P- setting. -
Page 11: Riding Instructions
10. Riding Instructions 1. Choose an open space without obstacles or uneven surfaces. 2. Unfold your scooter according to section 7 and wear protective gear. 3. Turn your key to the right to turn on the scooter. 4. Begin with one foot on the deck and one foot on the road. 5. -
Page 12: Operating Instructions
11. Operating instructions Power on/off: a. Turn your key to the right to turn on, to the left to turn off. b. Long press the power button to turn the LCD display on/off. c. Press once quickly to switch gears (default is gear 1). Gear setting: Press the button located on the throttle to switch gears. -
Page 13: Safety Instructions
12. Safety Instructions Please read the following carefully before use. ● This scooter is for use by one adult rider at a time. ● When riding, please wear safety gear including a helmet. ● Always keep both hands and both feet on your scooter while riding. ●... -
Page 14: Stem Height Adjustment
13. Stem Height Adjustment The stem is divided into three telescopic positions: low, middle, and high. To adjust, loosen the quick release. Gently press in the ball bearing and raise or lower the stem. Once you’re done adjusting, tighten the quick release. -
Page 15: Error Codes
15. Error codes E-001 Rear motor haul error - swap front and rear motor heads. If code still appears, replace the controller. If it does not appear, replace the motor. E-003 Controller error - change the controller and try again E-005 Voltage error - battery is low;... -
Page 16: Troubleshooting Common Errors
Try resetting options. 3. Display appears opaque or shows discontinuous values a. Maybe due to a poor contact connection or low battery. b. Restart your scooter or contact RoadRunner Support. 4. Complete diagnosis a. Power on b. Check power on the display screen c. -
Page 17: Unfolding The Scooter
17. Unfolding the Scooter 1. Press the clip with one hand 2. Pull the stem upright. while pulling up on the upright tube with the other. 3. Once the stem is up, pull the 4. Lock the folding clip. folding clip. -
Page 18: Folding The Scooter
18. Folding the Scooter Note: For your safety, be sure your Scooter is powered off before folding. 1. Pull the safety catch upward. 2. Pull the folding buckle outward. 3. Push the stem down toward the 4. Push the lever hook into the deck. -
Page 19: How To Carry Your Scooter
19. How to carry your scooter When folded up, your scooter can be carried with one or two hands. -
Page 20: Optional Seat Assembly
20. Optional Seat Assembly 1. Secure the seat bracket to the 2. Once screws are tightened, loosen battery box pedal using 4 screws. the seat for quick disassembly. 3. When the seat is ready to be 4. Once the seat is in place, turn it to removed and loosened, insert the seat remove it quickly and lock it. -
Page 21: Seat Folding
21. Seat Folding 1. Release the seat and recline it in 2. When the seat is reclined and ready the direction of the arrow: to be removed, press the seat axle on the side. 3. Once the seat axle is pressed all the way, place one hand on the seat bracket and slowly recline the seat. -
Page 22: Seat Raising
22. Seat Raising 1. Press down on the seat axle while 2. Once the seat bracket is fully raising the seat bracket. upright, release the seat axle so that the seat axle is stuck into the slot. 3. Shake the seat bracket to ensure 4. -
Page 23: Warranty Policy
23. Warranty Policy The RoadRunner R4 Scooter comes with a one-year limited warranty. For full warranty information scan this QR code with your camera phone or visit our website at: https://roadrunnerscooters.com/pages/warranty-policy-1 Words and trademarks are trademarks or registered trademarks of RoadRunner Scooters, LLC.
Need help?
Do you have a question about the R4 and is the answer not in the manual?
Questions and answers