Zoom F4 Setup Manual
Field recorder/mixer
Hide thumbs
Also See for F4:
- Supplementary manual (20 pages) ,
- Supplementary manual (23 pages) ,
- Operation manual (160 pages)
Table of Contents
Advertisement
Quick Links
Advertisement
Table of Contents

Related Manuals for Zoom F4


Summary of Contents for Zoom F4
- Page 1 Zoom F4 Field Recorder/Mixer Setup Guide...
-
Page 2: Table Of Contents
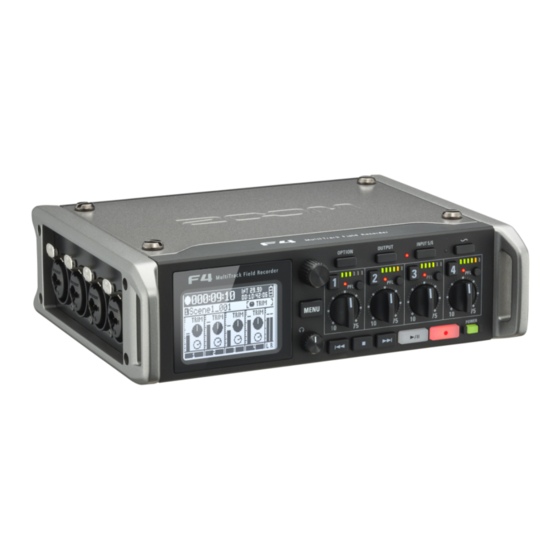
Contents Zoom F4 Mixer/Recorder Instructions – [page 1 – 2] Zoom F4 – Setup – [page 3 – 4] – Check the SD card [page 3] – Factory Reset [page 3] – Setting the Clock [page 3] – Phantom power (+48) [page 3] –... - Page 3 Zoom F4 Mixer/Recorder Instructions When the Zoom F4 is issued to you it comes with a protective case and a rain hood. You can unhinge the hood by tearing the Velcro strip on one side or remove it by unzipping it on the other side.
- Page 4 1. Sub out – send an output to a subwoofer 2. USB – The zoom can connect to a computer for data transfer via USB. The USB is not able to power 3. RTN Input 5/6 – Input from a DSLR or equivalent.
-
Page 5: Zoom F4 - Setup
P a g e Zoom F4 - Setup There is a six-step procedure for setting up the Zoom F4 field recorder so that it is ready to record professional film audio. Check the SD card Turn the recorder on and watch the screen. When the home screen loads, a warning display appears for a few seconds that reads “SD2 : No Card!”... -
Page 6: Setting The Input Limiter
. Each track is separate and unmixed. The default sample rate is 48Hz and the bit depth is 24. Home/Mixer screen The default Home or mixer screen, below, is what you see when you power up the Zoom F4. It can be identified because it has four virtual dials on it. HOMESCREEN Trim mode Pressing down on the menu dial highlights in black an item called trim. -
Page 7: Fader
The headphones are plugged in on the right-hand side. Typically, there is an audio splitter plugged. This is so, if there is a separate boom operator to sound mixer, the boom op and the Zoom op can both listen to the audio being recorded. Setting the audio level When recording you should aim for your average signal to be between -12 and -14 DBFS. -
Page 8: Recording
P a g e Recording When you are happy with the level, press the physical record button. A solid red light should show if you are recording. • If you press the stop button, a new audio file is written to the SD card. •... -
Page 9: Naming Files
Naming files The Zoom F4 allows you to name files before you record them and organise your files after they have been recorded. The first two options on the main menu deal with these operations. -
Page 10: The Finder Menu
Inside there is a large camera battery. Carefully remove it. Ideally you should not detach the cable connecting the battery to the Zoom. Under the battery there is a panel with the Zoom logo on it. Unscrew the screw to the left of the logo to open the panel. -
Page 11: Usb Menu
You do not have to physically remove the SD card to transfer the files to a computer. Go to USB menu, the bottom item on the main menu. Plug a mini-USB cable into the Zoom using the mini USB socket on the right panel. You get this symbol on the display...
Need help?
Do you have a question about the F4 and is the answer not in the manual?
Questions and answers