Table of Contents
Advertisement
Quick Links
Gas Barbecue
Use, Care & Assembly Manual
With Grill Lighting Instructions
Model 9993 Series (LP Gas)
ASSEMBLER/INSTALLER:
Leave these instructions with the consumer.
CONSUMER/USER:
Read all instructions and keep in a safe place for future reference.
For Outdoor Use Only
www.coleman.com
IMPORTANT
Read this manual carefully before assembling,
using or servicing this grill. Keep this manual for
future reference. If you have questions about
NOTE:
assembly, operation, servicing or repair of this
Propane tank is not included.
grill, please call Coleman at 1-800-356-3612 or
®
®
TDD: 316-832-8707. In Canada call
ANSI Z21.58-2007 • CSA 1.6-2007
Outdoor Cooking Gas Appliances
1 800 387-6161.
Advertisement
Table of Contents

Related Manuals for Coleman 9993 Series


Summary of Contents for Coleman 9993 Series
- Page 1 Keep this manual for future reference. If you have questions about NOTE: assembly, operation, servicing or repair of this Propane tank is not included. grill, please call Coleman at 1-800-356-3612 or ® ® TDD: 316-832-8707. In Canada call ANSI Z21.58-2007 • CSA 1.6-2007 Outdoor Cooking Gas Appliances 1 800 387-6161.
-
Page 2: Table Of Contents
Grill Features ..........6 Special Unpacking Instructions - 9993 Series ......7 Parts Identification . -
Page 3: General Installation
A certified plumber must make connection to gas source. Electrical Attachments The maximum sum total amperage rating of electrical accessories attached to the 9993 Series Coleman Grill must not exceed 10 amps. When using an electric attachment with the grill, follow the specification and warning statements accompanying the attachment. -
Page 4: Portable L.p. Gas Barbecue Cylinders
L.P. gas is heavier than air and tends to collect in low areas. It is important that there are no leaking connections on your gas grill that could cause a fire or explosion (see the section titled “LEAK TESTING”). -
Page 5: Hose And Regulator
The pressure regulator and hose assembly with the Type 1 fitting supplied with the appliance must be used. Do not use another hose and regulator assembly other than the one supplied with the grill or a Coleman® replacement pressure regulator assembly. The pressure regulator and hose assembly provided is factory set at an outlet pressure of 11 inches water column (1/2 psi). -
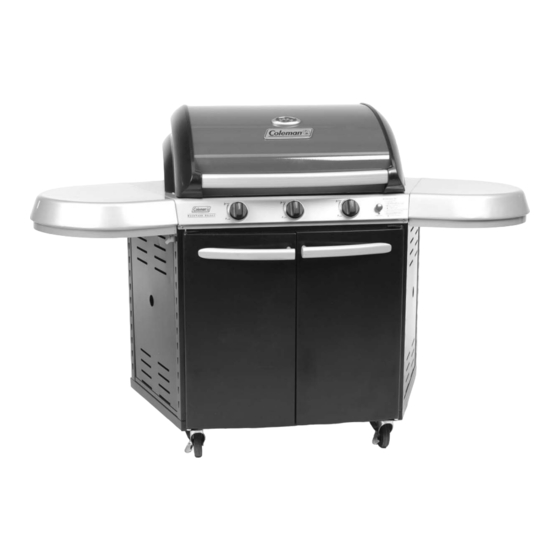
Page 6: Grill Features
4. Side Shelf 5. Electronic Igniter 6. Control Knobs NOTE: See your dealer for Side Solution™ accessories that are purchased separately. Grill Features — 9993 Series 7. Cart with Doors 8. 120 VAC Electrical Outlet 9. 120 VAC Electrical Cord Inlet 10. -
Page 7: Special Unpacking Instructions - 9993 Series
Special Unpacking Instructions - 9993 Series Read All the Unpacking Instructions before starting this section! 1. Cut the shipping straps and remove the top of the cardboard container. 2. Remove the door assemblies that are located in the protective packing on each end of the grill. -
Page 8: Parts Identification
Parts Identification - 9993 Series IMPORTANT: Remove all packing material prior to assembly/use. If your grill has stainless steel components, remove all protective plastic film from stainless steel parts prior to assembly/use. This film is installed at the factory to prevent damage that could occur during shipment and handling. -
Page 9: Grill Assembly
Assemble the Wheels 1. Place part of the shipping carton behind the grill for protection. Lay the grill on its back to assemble the four wheels (Fig. 14). 2. Assemble the locking wheels at the front of the grill. Secure each wheel with four screws each. - Page 10 Assemble the Grill Lid (continued) 5. Install one washer and a hairpin cotter on each pin (Fig. 26). Fig. 26 Assemble the Warming Rack and the Grease Tray Fig. 27 Fig. 28 Fig. 29 Assemble the Propane Tank Retainer 1. Insert the ends of the Propane Tank Retainer into the holes provided in the right side panel (Fig.
-
Page 11: 20# Lp Cylinder Installation
Fig. 37 20# LP Cylinder Installation NOTE: Your 9993 Series grill is set up from the factory to use a 20# refillable LP cylinder. You may purchase a 20# LP cylinder from the store where you bought your grill, or from your local propane dealer. -
Page 12: Leak Testing - Refillable Cylinders
20# LP Cylinder Installation 4. Check that all grill burner knobs are in the off position (Fig. 40). Fig. 40 5. Remove the protective caps from the cylinder valve and coupling nut. NOTE: The coupling nut connects to the large outside threads on the valve outlet. -
Page 13: Fixing A Fuel Leak
2. Wash off soapy solutions with cold water and towel dry. 3. Stop a leak by tightening the loose joint, or by replacing the faulty part with a replacement part recommended by Coleman. DO NOT attempt to repair the cylinder valve if it should become damaged;... -
Page 14: Lighting Instructions
Lighting Instructions WARNING THE FOLLOWING RULES MUST ALWAYS BE FOLLOWED IN THIS ORDER (Fig. 44): 1. OPEN THE GRILL LID! Any attempt to light the grill with the lid down could cause an explosion. 2. Check that the burner control knobs are turned to “OFF”. 3. -
Page 15: Shutting Off The Grill
Shutting Off the Grill CAUTION DO NOT touch hot grill parts with your bare hands! You MUST use protective gloves. 1. Turn all burner control knobs to off. 2. After the burner flame goes out, turn off the fuel supply. Turn the L.P. -
Page 16: Grilling Tips And Hints
L.P. cylinder, cylinder valve, regulator, gas supply hose, burner valve(s) and burner(s). 5. If any of the above mentioned components are damaged, seek replacement from Coleman before operating the grill again. Locate your nearest service center by calling 1-800-356-3612. Note: •... -
Page 17: Cleaning The Venturi
Care, Maintenance and Cleaning STAINLESS STEEL After initial usage, areas of the grill may discolor from the intense heat given off by the burners, this is normal and not considered a defect. Purchase a mild stainless steel cleaner and rub in the direction of the grain of the metal. - Page 18 2. Remove the cooking grates and heat tents and set aside. Using a screwdriver, remove the single screw holding each burner tube. Push the burner tube away from the valve until it clears the valve. Next, lift the burner and remove from the grill. Repeat for the other burners and set aside (Fig.
-
Page 19: Moving And Storage
Moving and Storage CAUTION A collision with the grill, as with any metal object, could cause injury. Use care when moving a portable gas grill. Moving the grill: • Move the grill slowly. DO NOT run with or pull the grill behind you;... -
Page 20: For Your Additional Safety
O.P.D. feature. YOUR NEW GAS GRILL IS EQUIPPED WITH A TYPE 1 CONNECTION DEVICE WHICH HAS 3 SAFETY FEATURES (FIG. 55): 1. -
Page 21: Department Registration
¨ warranty. PROTECT YOUR PRODUCT: We will keep the model number and date of purchase of your new Coleman you refer to this information in the event of an insurance claim such as fire or theft. PROMOTE BETTER PRODUCTS: We value your input. Your responses will help us develop products designed to best meet your needs. - Page 22 Porcelain or stainless steel cooking grates Thank you for filling out this questionnaire. Your answers are important to us. Please check here [ ] if you prefer not to learn more about Coleman ® Outdoor Cooking Products or obtain information on new interesting opportunities from other companies.
-
Page 23: Replacement Parts List
Caster With Lock 9993-5471 Door Assembly Right 9993-5481 Door Assembly Left 9993-5171 Door Handle Assembly 9993-5251 Regulator Assembly 9993-1481 Knob 9993-1491 Knob Bezel Unless noted otherwise, all repair parts listed are for one item only. Replacement Parts List — 9993 Series... -
Page 24: Warranty
Warranty The Coleman Company, Inc. (“Coleman”) warrants that for a period of three years from the date of original retail purchase, this product will be free from defects in material and workmanship. Coleman, at its option, will repair or replace this product or any component of the product found to be defective during the warranty period.
Need help?
Do you have a question about the 9993 Series and is the answer not in the manual?
Questions and answers