Page 1
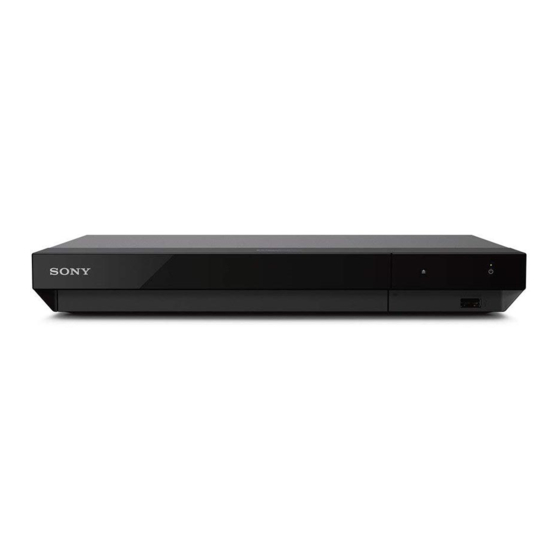
UBP-X700 / UBP-UX70 RMT-VB201U / RMT-VB201D / RMT-VB400T SERVICE MANUAL Ver. 1.0 2017.06 US, Canadian Model US Model AEP Model UK Model Australian Model Taiwan Model Singapore Model Middle East Model E Model India Model UBP-X700 US, Canadian Model US Model...
Page 2
Specifications : UBP-UX70/X700 U2/UC2 Specifications and desig n are subject to change without notice. System Laser Semiconductor laser Inputs and outputs Jack name Jack type/Output level/Load impedance DIGITAL OUT (COAXIAL) Phono jack /0.5 Vp-p/75 ohms HDMI 19-pin standard connector HDMI OUT 1*/2 * Only HDMI OUT 1 supports video output.
Page 3
Specifications : UBP-X700 EC1/CEK Specifications and desig n are subject to change without notice. System Laser Semiconductor laser Inputs and outputs Jack name Jack type/Output level/Load impedance DIGITAL OUT (COAXIAL) Phono jack /0.5 Vp-p/75 ohms HDMI 19-pin standard connector HDMI OUT 1*/2 * Only HDMI OUT 1 supports video output.
Page 4
Specifications : UBP-X700 SP6/EA7/IN5 Specifications and desig n are subject to change without notice. System Laser Semiconductor laser Inputs and outputs Jack name Jack type/Output level/Load impedance DIGITAL OUT (COAXIAL) Phono jack /0.5 Vp-p/75 ohms HDMI 19-pin standard connector HDMI OUT 1*/2 * Only HDMI OUT 1 supports video output.
Page 5
Specifications : UBP-X700 E32 Specifications and design are subject to change without notice. System Laser Semiconductor laser Inputs and outputs Jack name Jack type/Output level/Load impedance DIGITAL OUT (COAXIAL) Phono jack /0.5 Vp-p/75 ohms HDMI 19-pin standard connector HDMI OUT 1*/2 * Only HDMI OUT 1 supports video output.
Page 6
Specifications : UBP-X700 TW1 Specifications and desig n are subject to change without notice. System Laser Semiconductor laser Inputs and outputs Jack name Jack type/Output level/Load impedance DIGITAL OUT (COAXIAL) Phono jack /0.5 Vp-p/75 ohms HDMI 19-pin standard connector HDMI OUT 1*/2 * Only HDMI OUT 1 supports video output.
Page 7
Specifications : UBP-X700 AU2 Specifications and desig n are subject to change without notice. System Laser Semiconductor laser Inputs and outputs Jack name Jack type/Output level/Load impedance DIGITAL OUT (COAXIAL) Phono jack /0.5 Vp-p/75 ohms HDMI 19-pin standard connector HDMI OUT 1*/2 * Only HDMI OUT 1 supports video output.
Page 8
FONCTIONNEMENT. NE REMPLACER CES COMPOSANTS It is best to use only unleaded solder but unleaded solder QUE PAR DES PIÈSES SONY DONT LES NUMÉROS SONT may also be added to ordinary solder. DONNÉS DANS CE MANUEL OU DANS LES SUPPÉMENTS PUBLIÉS PAR SONY.
SECTION 1 SERVICE NOTE 1-1. DISC REMOVAL PROCEDURE IF THE TRAY CANNOT BE EJECTED (FORCED EJECTION) 1. Remove the upper case. Upper Case 2. Insert a pin or clip in the hole of a drive to open the tray. Screws (Black) Slide the upper case to back.
1-4. DRIVE REPAIRING 1-4-1. Preparation ESD Measures It is necessary to check the working space ESD condition before starting the Drive Optical Unit or BU repairs. The ESD-resistance of BD Laser is weaker than DVD/CD Laser. As prevention of ESD destruction, please make sure the working space and human ESD. 1-4-2.
1-4-4. Optical Unit (BU) Repair Guide BDP-X700 /UX70 series component structure is as same as conventional BD Players. BD player requires precise read out functions and also secure contents Protection system. Since above requirement, it is necessary to set/adjust BU data to MB serial flash The following cases need adjustments : (1) Replace BU (MB is original) (2) Replace MB (BU is original)
1-4-6. KEM-481AAA/C2R part packing ❷ ❸ ❶ Take out Top Cushion Open the box ❹ ❺ ❻ Tak e out BU ‘Holding area’ ❾ ❽ ❼ Do not touch the area!! Tak e out BU from antistatic bag Do not re-use antistatic bag!! KEM-481AAA/C2R master carton packing 1 piece of BU KEM-481 inside antistatic bag and excess part of T o p c u s h i o n...
1-4-8. MD (Mechanical Deck) Assy for Service ① Holder Assy, Chuck (A-2189-191-B) MD Assy service parts consists of 2 parts. ② Loading Assy (A-2143-751-A) Above service part ① & ② can be used for both UBP-X700/UX70. Holder Assy, Chuck (CI-J) Loading Assy Tape...
SECTION 2 DISASSEMBLY This set can be disassembled in the order shown below. 2-1. DISASSEMBLY FLOW 2-2 CASE UPPER 2-3 PANEL FRONT & FR PWB 2-4 WIFI & MB 2-5 BD DRIVE 2-2. CASE UPPER Three Screw +BTP 3X8 TYPE2 N-S (tightening torque = 6.5 to 7.5kgf*cm) Case, Upper...
SECTION 4 PRINTED WIRING BOARDS 4-1. THIS NOTE IS COMMON FOR PRINTED WIRING BOARDS : Uses unleaded solders. • : Pattern from the side which enables seeing. • (The other layers’ patterns are not indicated) Caution: Pattern face side: Parts on the pattern face side seen from (SIDE B) the pattern face are indicated.
Connect the set to AC, and wait initialization cycle complete . Power ON set into normal mode. When User Interface screen (UI) appear, Use Sony BDP remote controller, key in the following SIRCS code. [STOP] -> [Display] -> [PAUSE] -> [ ↑...
Page 31
Function Support List Service Mode UBP-X700 / (Top) Category Device UBP-UX70 Diag Device Test D/A Converter √ IF CON *FDP all ON *Show Strings *LED Sequantial ON *Fan Control ON External HDMI Transcorder Video Test √ Audio Test √ Audio Input Test...
Page 32
Service Mode Menu Outline: Service Mode Top Menu It selects to each function from here. output HDMI/Component 480p forcibly. Operation: Select and Activate Diag Menu. Select and Activate Log Menu, Select and Activate Factory Initialize Menu., Select and Activate Network Menu (not Used) Select and Activate Version Up (DISC version Up) Select and Activate System Information Menu.
Page 33
Diag Menu (Video Test/ Audio Test) Outline: (Window 1) Activate Video Test and Audio Test * Diag (Window 1)Select Video Test Category Operation: Category : Video Test [ENT] [ENT] Activate and display Color Bar [UP][RET] Return to test category selection. [ENT] Show Color Bar (Window 2)Display Color Bar (Window 2)
Page 34
Log Menu Outline: Display each contents of the log, (Window 1) (Window 1) select log. * Select Log Operation: Activate and Display Error log Activate and Display Command Log [1] Error Log [UP] Move Up cursor [2] HDD Log [DOWN] Move Down cursor [ENT] Activate the selected cursor.
Page 35
Factory Initialize Menu Outline: (Window 1) Return all of the player setting to their factory defaults. * Factory Initialize (Window 1) select initialize. Operation: [ENT] Start Initialize When you return a set to the factory defaults, push [1] on this screen. [RET] Return to Top Menu [ENT] Start Factory Initialize...
Page 36
Network Menu (Network Test : Ifconfig) Outline: (Window 1) Network Menu for the wired Ethernet. * Network (Window1)Ifconfig Test Ping Test: I f c o n f i g Operation: [ENT] Activate Ifconfig( Display network setting) (Window 2) [RIGHT] Select Ping Test. * Network [RET] Return to Service Top Menu.
Page 37
Network ( Network Test: Ping) Outline: (Window 1) Ping Test for the wired Ethernet. * Network (Window 1)Ping Test Test: I f c o n f i g Ping Operation: Ping To : [LEFT] Select Ifconfig Test. [DOWN] Ping execution preparation. [START] [RET] Return to Service Top Menu.
Page 38
System Information Outline: (Window 1) Display System Information * System Information (Window 1)Basic Information Menu Operation: Main LSIname: CXD90049GG-CA [RIGHT] Drive Information (delta IOP of a drive is measured ) and Model: BDP13G-CE Wireless device Information (only wireless model) Destination: xx displayed.
Page 39
Drive Outline: (Window 1) Activate Drive test * Drive (Window 1) Select Drive test category a a ra r am m et e te e r r C C he h ec c k k M M [1] Drive OP data Write Operation:...
Page 40
Error Log Information Error LogCode issue note Category ErrorCode ErrorInfo_0 ErrorInfo_1 ErrorInfo_2 ErrorInfo_3 IFCON - Communication 0x03 0x01 0x00 0xXX 0xXX 0x00 No response from Ifcon time out NAND - Unknown Error 0x04 0x00 0x00 0xXX 0xXX 0x00 Unknown/Undeclare Error NAND - Bad Block Marking 0x04 0x01...
SECTION 6 TROUBLESHOOTING 6-1. Main Flowchart Start (and return from each flowchart) and turn of automatically. Power LED Light up about 10s Are all the power line mentioned 6-2. Power System Flowchart in Power flow (x-x) normal? Check IC401, pin 2 (output) UNSW 1.8V Set can power ON by Power 6-3.
Page 42
6-2. Power (System) Flow AC IN Check the output voltages from the DC Jack. Check that the DC cord has been inserted J401 pin 1: +12V (UNSW12V) properly. If there is no problem, replace the AC Adaptor. Check the fuses Blown fuse s ->...
6-3. Remote Control Flowchart Remote Control Does Not Operate Check CN705 pin2 +3.3V? Check IC101 pin2 +3.3V? To Power Supply flowchart (FR Board) (MB Board) Check CN101 pin2 +3.3V? Check FFC connection from Change FR Board (FR Board) CN101? Reconnect FFC. If still not Change FR Board improve ->...
6-5. Video Section Flowchart HDMI 1 Video does not appear right Is there power supply to IC101? (#B19: +1.8V , To Power Supply Flowchart #B16: +1.05V, (#B15: +3.3V) Is there power supply to Is IC1102 (#5: +12V) To Power Supply Flowchart IC1102? (#4: 5V) Check HTPLG IC101 (#A32: +5V) Check CN1101 (#15/#16)
6-6. Audio (SPDIF) Section Flowchart Video is output properly? To Video section flowchart Audio does not sound right? To Main Flowchart Is the Drive operation To Drive Flowchart properly? Is there AUDIO digital signal (SPDIF) input to SPDIF circuit? Check SW3.3V To Power Supply Flowchart -------------------------------------- IC101 (CXD90049GG-BA) :...
6-7. Drive Flowchart Optical Unit (BU) IOP check flow [zz] Optical Unit (BU) Replacement flow [yy] ~ Before BU Replacement Remove defective BU assy from Loading The following cases need Enter Service Mode (HOME) Assy OP Data Write: Press <STOP><DISPLAY><PAUSE><↑> (1) Replace BU (MB is original) Remove insulator and weight from defective BU...
6-8. Ethernet flowchart Cannot connect with the network, cannot update through the network Is the LAN cable plugged in properly? Plug in the LAN cable firm ly Is the LED of the hub router lit? (LINK To Power System Flowchart Is power supplied to the MB board? LED) Replace the MB board.
Page 48
6-10. USB (Front) Device Flow USB device is not recognized Insert the USB device again. Poor contact of the USB device. Is it recognized when the power is If USB connector damage replace turned OFF and then ON again? FR board. Replace the FFC between the MB Is 5V present at CN201 Replace the MB board...
SECTION 7 REPAIR PARTS LIST 7-1. EXPLODED VIEWS NOTE: • Items marked “*” are not stocked since they are seldom The components identified by mark or dotted • -XX and -X mean standardized parts, so they may required for routine service. Some delay should be line with mark are critical for safety.
The components identified by mark or dotted line with mark are critical for safety. Replace only with part number specified. 7-1-3. DRIVE SECTION Les composants iden tifi és par une marque sont critiquens pour la sécurité. Ne les remplace r que par une pièce portant le numéro spécifi é.
The components identified by mark or dotted line with mark are critical for safety. 7-1-4. Accessories Replace only with part number specified. Les composants iden tifi és par une marque sont critiquens pour la sécurité. Ne les remplace r que par une pièce portant le numéro spécifi é.
Page 53
REVISION HISTORY Ver. Date Description of Revision 2017.
Need help?
Do you have a question about the UBP-X700 and is the answer not in the manual?
Questions and answers