Advertisement
Table of Contents
- 1 Table of Contents
- 2 Table of Contents Table of Contents
- 3 Warnings
- 4 Device Keys
- 5 App Instala�On
- 6 First Use
- 7 Connect to the Device
- 8 App Interface and Menus
- 9 Ground Scan
- 10 Live Scan
- 11 Pinpointer
- 12 Monitor
- 13 Graph Analysis
- 14 Depth Analysis
- 15 Se�Ngs
- 16 Costumer Service (Repair)
- Download this manual
Advertisement
Table of Contents

Related Manuals for Conrad GR-3


Summary of Contents for Conrad GR-3
- Page 1 User Manual...
-
Page 3: Table Of Contents
Contents Table of contents Table of Contents............Warnings ..............Device Keys ..............App Instala�on ............First Use ..............Connect To the Device ..........App Interface and Menus .......... 3D Ground Scan ............Live Scan ..............Pin Pointer ..............3D Monitor ..............Graph Analysis ............ -
Page 4: Warnings
CONRAD Detectors is strictly prohibited. General Informa�on CONRAD products, must be used carefully just like the electronic devices. The main unit must be used carefully; it must be protected from shocks and rigid objects, and excessive force must be avoided. -
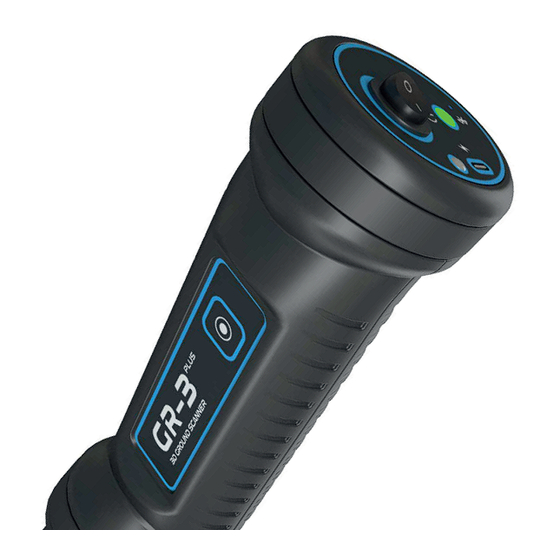
Page 5: Device Keys
Device Keys Connection LED Power Button Micro USB Port Charging LED Start Button... - Page 6 Only charge the device with the original charging adapter. If the charging adapter is lost or bro-ken, please contact the technical service of CONRAD. While the device is charging, the LED next to the USB port will light up.
-
Page 7: App Instala�On
To start working with the device, you should first download the applica�on CONRAD GR-3 on your device such as tablet or phone (Android� IOS) . To do so, search CONRAD GR -3 on Google Play Store or App Store. then Install the CONRAD GR-3 applica�on on your device. -
Page 8: First Use
First Use A�er ac�va�on, you will see the main page of the applica�on. Before you can scan with the device, you should establish a wireless connec�on. For wireless connec�on. A) To do tap the "Se�ngs" menu in the applica�on. In the Se�ngs menu, you must allow some features that... - Page 9 First Use B) In the Se�ngs menu, go to the Permissions sec�on. You will need to confirm both bu�ons. These permissions are necessary to save scan results establish a wireless connec�on. Note: This process only applies to the ini�al setup. Once done, you do not need to repeat it for next use.
-
Page 10: Connect To The Device
Connect To Device The secound step is connec�ng the app to the GR-3 Device To do go to the “Se�ngs” menu and Click on the “Connec�on” sec�on. Tap on the "Scan for devices" to start scan process for around bluetooth devices. -
Page 11: App Interface And Menus
1 . Ground Scan System 2 . Live Scan System 3 . Recorded Scan Files Folder 4 . App Se�ngs Note: a�er establishing wireless connec�on with the GR-3 once, you can directly connect and start your scans with quick connec�on icon... -
Page 12: Ground Scan
Ground Scan 3D Ground Scan The 3D Ground Scan allows you to create 3D graphics based on your scans of a specific area. To create a 3D ground scan, enter the "Ground Scan" menu on the main page of the applica�on. Scan Mode this op�on gives an op�on to user to select... - Page 13 Ground Scan Star�ng Point: You can set your scan start point from the lower right or lower le� corner. To do this, you must select the le� or right start point. If you start searching from the lower le� corner, you should proceed to the next scan job on your right.
- Page 14 Ground Scan Scan Pa�ern: You can do your scans in zigzag or parallel pa�ern. You should start the scan at your start point and end it at your ending point, as shown in the figure below. When the number of signal pulses entered for each row is complete, you must proceed to the next series of scans.
- Page 15 Ground Scan Width: Enter the number of rows you want to scan according to the size of the area to be scanned. For example, 10 rows. The distance between each row should be 20 cm to 30 cm on average. Height: Select how many measurement signals must be present for each row.
- Page 16 Ground Scan Ac�ve bar Start Scan In the middle of the scan screen, you can see the immediate data that you get. Ac�ve bar: indicates the immediate measurement severity. Stop: Use to stop scan process Data: ac�ve in manual scans. Stop Scan Show Data...
- Page 17 Ground Scan A�er you start ge�ng data; You will see colors such as green, red, yellow, and blue according to the measurements you get. You can see all metallic objects and most objects with high magne�c effect as red, some as orange, cavi�es, earth fills, caves underground as blue, the earth...
- Page 18 Ground Scan A�er finishing all entered rows and steps (width & height) . a preview will be created. In this screen, save obtained data or exit without saving. case choosing «Save», You should enter a file name for this scan file.
-
Page 19: Live Scan
Live Scan By selec�ng this item a screen will apear that gives two different systems. 1 . Live Scan Live scan is a 2D search mode with 3 different search op�ons that allows you to make quick and pinpoint detec�on. Instant observa�on of objects and underground changes can be done very easily using... - Page 20 Live Scan Soil and minerals with rela�vely low magne�c effect are displayed in yellow and orange colors Scan Value Calibra�on Scan Value the dirth level and the numerical values of the immediate measurements. Calibra�on By tapping the "Calibra�on" Bu�on in the lower right corner, you can reset the dirt level.
-
Page 21: Pinpointer
Pin Pointer 2 . Pinpointer You can use the pinpoint op�on to determine the exact posi�on of the metallic or magne�c object you have detected. Before scanning in the Pinpointer mode; tapping the "Calibra�on" icon in the lower right corner, you can reset the dirt level tapping the "Calibra�on"... - Page 22 Pin Pointer You can see the severity of the signal and graphic bar according to the type of the object in the middle. When objects with magne�c effect and metallic objects are detected, the bar will increase to the le� side. The bad will be increase to the right side when structures such as cavi�es and caves are detected.
-
Page 23: Monitor
3D Monitor 3D Monitor All completed ground scan graphsed is saved in «Files» sec�on. which user can review or analyse this files by using this sec�on. From the main menu, tap the "Files" sec�on to open the scaned files. You can change the file name or delete the file using the icons on the right of... - Page 24 3D Monitor in this screen user can analyze the data graphically and numerically. On the top of this screen there is 6 Analysis Tools tool icons that you can use to make the graph analysis as it`s descripted below: Reset: return the scan screen to the top view Soil:To make depth measurement in the...
- Page 25 3D Monitor Depth: With the “Depth Analysis” func�on, you can see the signal values corresponding to each frame in the data you have obtained, you can see the point depth value by choosing the soil type. Color Filter: user can turn on and off the red, blue, yellow, green and light blue colors on the graph Se�ngs: user can perform the analysis se�ngs.
-
Page 26: Graph Analysis
Graph Analysis Graph Analysis When you observe the data you have obtained graphically and numerically, you can figure out whether there is any variability in the scan result. The meanings of the colors in the graph obtained as a result of scanning are as follow: Red: Metallic objects and objects with high magne�c effect. - Page 27 Graph Analysis The metallic objects have an obvious shape whereas the minerals are usually sca�ered and diffused. The metallic objects are red, mineral structures are usually yellow and orange. The most important feature of the metallic objects that dis�nguishes them from minerals is that there is a certain numeric difference from the soil according to the obtained data.
- Page 28 Graph Analysis In the Cavity data: Underground cavi�es such as tunnels, chambers, and tombs that have been ar�ficially created are shown in blue in the graphic. In case there is any kind of subsidence or earth fill inside the underground cavity, the cavity data will be light blue, turquoise and light green.
-
Page 29: Depth Analysis
Depth Analysis Depth Analysis: For the point depth value, you should first select the correct soil type for your scan area. Tap on "Soil Selec�on" then select the correct soil type for the area you are scanning. You should select the proper soil type for the area that you are working in. - Page 30 Depth Analysis The numbers in the graph are in meters. You can see the depth value for each point within each signal frame. If there is no magne�c object or other anomaly underground during your measurements, you will see the depth value as 0 (zero) or very low numbers in the applica�on.
-
Page 31: Se�Ngs
Se�ngs Se�ngs To change the applica�on se�ngs, you should use “Se�ngs” menu. 1 . Language: select your favo�t language 2 . Connec�on:use this item to edit wireless connec�ons. 3 . Permisions: the permissions that the applica�on must use on your device. 4 . -
Page 32: Costumer Service (Repair)
Customer Service Customer Service ( Repair) Repairs caused by technical defects and made within two (2) years from the date of purchase are free of charge. Contact your dealer for product service or your ques�ons. The unit will be inspected by a qualified technician and repaired if neces-sary.
Need help?
Do you have a question about the GR-3 and is the answer not in the manual?
Questions and answers
Hello I have metal detecteur GR3 plus I can't use it cause of problem with app any one can help me pls
To fix app issues with the Conrad GR-3 metal detector, follow these steps:
1. Reinstall the App: Uninstall and reinstall the Conrad GR-3 app from the Google Play Store or App Store.
2. Check Activation: Ensure the app is properly activated by entering the required serial number, name, and email.
3. Verify Bluetooth Connection: Go to the app settings, select "Connection," and tap "Scan for devices." Ensure the GR-3 device appears and connect to it.
4. Confirm Bluetooth is On: Make sure the Bluetooth on your mobile device is enabled.
5. Check Battery Status: Ensure both the GR-3 device and your mobile device have sufficient battery.
6. Restart Devices: Restart both your mobile device and the GR-3 detector.
7. Use Quick Connect: If you previously connected the device, use the quick connection feature for faster access.
8. Check App Settings: Navigate to the app's settings to verify configurations.
If issues persist, consider updating your app or contacting support.
This answer is automatically generated
@Chouaib where are u from . Im in casa maybe i can help u
ضيعت الرقم التسلسلي كيف اربطه بالجهاز
The provided context states that to connect the Conrad GR-3 device, you need to enter the serial number, name, and email. There is no information on how to connect the device without the serial number.
This answer is automatically generated
الون الاحمر لما يعني
Saludos, respecto al icono datos, es necesario que los valores sean a mas de 200 puntos para que un objeto sea positivo, quiero decir por ejemplo metalico? Por que en las tomas que he realizado, lo maximo que me ha subido es entre 79 y 144 puntos, osea que no lo puedo tomar como positivo para metal?
انتهت صلاحية الحهاز
ارجو التحليل