Table of Contents
Advertisement
Quick Links
Advertisement
Table of Contents

Related Manuals for Egret AUDI PRO


Summary of Contents for Egret AUDI PRO
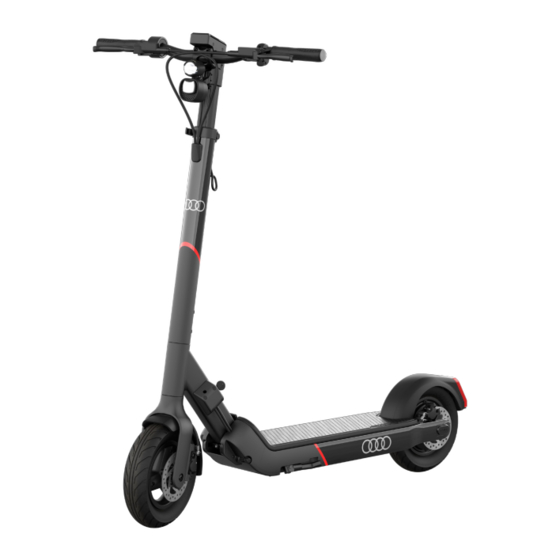
- Page 1 Audi electric kick scooter User Guide powered by...
- Page 3 The configuration of the models shown may vary depending on the respective model and export version. Egret also reserves the right to modify the appearance of the design, its configuration and the respective technology. The manufacturer reserves the right to change products, to issue firmware updates and to update this manual at any time.
- Page 4 Egret is a brand of Walberg Urban Electrics GmbH info@my-egret.com +49 (0) 40 320 270 80 (Mon–Fri, 8 a.m.–6 p.m.) Alter Wandrahm 6 20457 Hamburg Germany ENGLISH (Translation) 02–47...
-
Page 5: Table Of Contents
Contents Warning and safety instructions 6–9 Before the first ride 9–11 General information 11–13 Environmental information Scope of delivery and components 15–16 Controls and display Assembly instructions 18–20 Operation 21–37 Folding mechanism 21–27 • Lock • Charging • Switching on and off •... -
Page 6: Warning And Safety Instructions
The kick scooter is a vehicle for leisure use. To control the vehicle, you must practise using it. Neither Egret nor Audi AG and Audi dealers can be held liable for any injury or damage resulting from the inexperience of a rider or failure to comply with the instructions in this document. - Page 7 WARNING 2. Using accessories and spare parts • Use only Egret-approved spare and (supplied) accessories and the original charger, which are in sound technical condition. • Do not make any changes to your kick scooter. Any changes, technical or visual...
- Page 8 WARNING 3. After the first 50 km, check again that all bolted connections – especially on the folding mechanism and wheel axles – are firmly seated and tighten as necessary. Loose bolted con- nections can lead to functional failure and serious accidents. WARNING 4.
-
Page 9: Before The First Ride
WARNING 7. Do NOT touch the engine or brake discs after riding, as there is a risk of burns. Note 8. Do not allow any other person to use your kick scooter independently, without having read this manual first. The safety of a new rider is your responsibility. Help new riders until they are familiar with the basic functions of the kick scooter. - Page 10 The exact procedure is described in the section "Charging" (p. 28). Note 4. Download the Egret app before starting your kick scooter for the first time. The exact procedure is described in the section "Starting the kick scooter for the first time and down-...
-
Page 11: General Information
Note 5. Do not attempt your first test rides in areas where you may encounter children, pedes- trians, animals, vehicles, cyclists or other obstacles and potential hazards. The throttle grip can be very sensitive at the highest speed. Be aware that operating the scooter quickly or abruptly can result in you losing your balance. - Page 12 • As with all other electronic devices, use a surge protector during charging to protect your kick scooter against damage caused by overloads and voltage peaks. • Only use the charger supplied by Egret for charging. Do not use a different mod- el of charger.
- Page 13 8. In areas where the law does not apply, follow the safety guidelines outlined in this manual. Neither Egret nor Audi AG and Audi dealers are liable for any damage to property, personal injury/death, accidents or legal disputes resulting from violations of the warning and safety instructions.
-
Page 14: Environmental Information
Environmental information Environmental information By riding your kick scooter, you are contributing to low-emission mobility. When disposing of your electric scooter, make sure that you dispose of all parts as well as the packaging and individual elements of this correctly and, if possible, take them to the appropriate recycling points. -
Page 15: Scope Of Delivery And Components
Scope of delivery Audi electric kick scooter DATA CONFIRMATION OWNER'S MANUAL QUICK START GUIDE ACCESSORIES KICK SCOOTER Two tools Lock eyelet Tyre inflation adapter Charger When unpacking your kick scooter, please check that the above-mentioned items are included in the package. If you are missing any components, contact your dealer/supplier or the nearest service centre (see "Contact", p. - Page 16 Components Audi electric kick scooter Steering tube Folding mechanism Front brake Safety lock Side stand Footboard Rear brake Rear light Accessory hook Control buttons Horn and reflector Display Throttle grip Front light Brake lever for rear wheel brake Brake lever for front wheel brake...
-
Page 17: Controls And Display
Controls and display On/Off button Horn Plus button Minus button Speedometer Total mileage (ODO) Trip mileage (TRIP) Battery charge level Riding mode Light on Wireless connection Error Pedestrian mode... -
Page 18: Assembly Instructions
Assembly instructions 1. Fold up the scooter (see "Folding mechanism", p. 20). 2. Remove the cable protector. This is only required for shipping the kick scooter. - Page 19 3. Mount the handlebar (A) on the steering tube (B), taking care not to trap the cables. The pre-set grub screw (D) must line up with the groove ( E). This ensures that the handlebar is mounted in the correct position. Push the handlebar onto the steering tube until the round section of the tube (C) is fully inserted in the handlebar ( A).
- Page 20 4. Tighten the two screws (F) by hand (6 Nm). WARNING Risk due to loose screw connection! Improper assembly and screws that are not correctly tightened can cause screw connections to become loose. This can lead to falls and accidents.
-
Page 21: Operation
Folding mechanism Unfolding the scooter 1. Push the folding lever (H) towards the footboard to release the lock. 2. Unfold the scooter until the folding lever (H) of the folding mechanism visibly and audibly clicks securely into place. The scooter is in locking step 1. - Page 22 Unfolding the scooter 3. Push the folding lever (H) forwards towards the handlebar until it is completely resting against the recess on the footboard. The folding lever (H) is now securely locked (closed). The scooter is in locking step 2. Open Closed 4.
- Page 23 Safety lock Open Closed WARNING Risk of falling! The folding mechanism is not properly closed until the folding lever (H) of the folding mechanism is completely resting against the footboard. In addition, the safety lock (G) must be closed every time the scooter is ridden. Ensure that the folding mechanism is properly and securely closed in locking step 3 before each journey.
- Page 24 Adjusting the handlebar clamp lever The resistance of the handlebar clamping lever can be adjusted on the kick scooter via the knurled nut in the upper area of the steering tube. The nut must be adjusted before every journey. The nut must be adjusted with the clamping lever open and only by hand – never with a tool –...
- Page 25 Collapsing the scooter 1. Pull out the safety lock (G) and turn it 90° so that it visibly protrudes (open). Closed Open...
- Page 26 2. Pull the folding lever (H) backwards against the direction of travel. 3. Continue to push the folding lever (H) towards the footboard until the scooter folds. Hold the kick scooter by the steering tube and push the handlebar forwards slightly if necessary.
- Page 27 4. Fold the scooter until it audibly clicks into place in the lock. 4.1 The scooter is now folded up and can be carried by the steering tube.
-
Page 28: Lock
You can use the supplied lock eyelet with a conventional bicycle lock. Alternatively, the lock can be used with the "Egret mate by tex-lock" (not included in the scope of delivery). The key has a four-digit code. Make a note of this code on the card provided and keep it safe. -
Page 29: Charging
Charging the scooter 1. Connect the charger to the electric socket 2. Untwist the protective cap of the charging socket (K). The charging socket (K) on the scooter is located on the front right-hand side of the footboard 3. With the kick scooter switched off, connect the charging cable to the scooter 4. -
Page 30: Switching On And Off
Deep-sleep mode The lithium-ion battery offers a deep-sleep mode. This function is used to protect the bat- tery from deep discharge. If the scooter is in deep-sleep mode, it cannot be started as usual by pressing the "On/Off" button. To wake the scooter up from deep sleep mode, connect the charger for approximately 15 seconds. -
Page 31: Starting The Kick Scooter For The First Time And Downloading The App
Download the Egret app* before starting your kick scooter for the first time. Then create a My-Egret account. Once the account has been confirmed, follow the instruc- tions in the app to connect it to the kick scooter. Switch on the scooter. -
Page 32: Assigning A Pin And Setting Up The App
Assigning a PIN and setting up the app After you have started your kick scooter for the first time, you will be asked to set your own four-digit PIN. The current digit position in the PIN flashes. Press the "Plus" button or the "Minus"... -
Page 33: Switching The Light On And Off
Switching the light on and off Switching on the light To switch on the light on the scooter, press the "On/Off" button (L) for approximately 0.5 seconds. Switching off the light To switch off the light on the scooter, press the "On/Off" button (L) for approximately 0.5 seconds. -
Page 34: Braking
Brakes Rear brake Front brake Pull the right-hand brake lever (O) to apply Pull the left-hand brake lever (N) to apply the front disc brake and brake the the rear disc brake and brake the scooter. scooter. WARNING Risk when braking! The front and/or rear wheels may lock up if you brake the scooter abruptly. -
Page 35: Riding Levels
Riding levels Three riding levels Level 1 (ECO): Maximum range in energy-saving mode Level 2 (TOUR): Maximum comfort in balanced mode Level 3 (SPORT): Maximum riding fun in sporty mode The riding level selected is shown in the middle of the display: Increasing the riding level To increase the riding level, press the "Plus"... -
Page 36: Horn
To go to the menu, press the "Plus" (P) and "Minus" (Q) buttons simultaneously for approximately two seconds. The PIN is entered in the same way as described in "Starting the Egret for the first time and assigning a PIN" (see page 31). Menu navigation To move the cursor to the next menu item, press the "On/Off"... -
Page 37: Display
"Minus" button (Q) for approximately two seconds. Battery status The battery status (U) is displayed under the mileage. Other symbols Note Error This warning appears in the display when an error occurs. Please contact our Service department at www.my-egret.com... -
Page 38: Other Icons/Menu Items
Menu items SET1: PIN lock on/off To activate the PIN lock, press the "Plus" or "Minus" button. SET2: Change PIN Press the "Plus" or "Minus" button to activate change mode. The numbers can be changed in the same way as when you started your kick scooter for the first time (see page 31). -
Page 39: Data Sheet
Data sheet Audi electric kick scooter Version in accordance with StVZO (German Road Traffic International version Licensing Regulations) Maximum speed 20 km/h 25 km/h Range Up to 80 km* Charging time 100% in 5 hours & 30 mins Max. load 120 kg Vehicle weight 22.5 kg... -
Page 40: Certifications
Warning RoHS certified P02 Fire, open light and CE certification smoking prohibited Battery recycling Do not throw! Equipment in protection class II Keep dry Electrical waste must not be disposed of with house- Caution – fragile! hold waste. Take to an authorised recycler. IPX5 / IPX7 This way up! AC voltage... -
Page 41: Trademark And Legal Notice/Contact
Trademark and legal notice Egret is a registered trademark of Walberg Urban Electrics GmbH; Android and Google Play are trademarks of Google Inc.; App Store is a service mark of Apple Inc.; the respective owners of these trademarks reserve the rights to their trademarks mentioned in this guide. - Page 42 To download the app, please visit the Apple App Store (iOS) or the Google Play Store (Android). Please note that the different Egret models vary in terms of the functions that they offer. Therefore, not every function described applies to every model. Walberg Urban Electrics GmbH reserves the right to change the design and functionality of the product and the documentation without prior notice.
-
Page 43: Optional Service Documentation
Optional service documentation Vehicle identification number (please always enter) Service – 100 km. km: __________________ Service – 500 km km: __________________ ________________________________________ ________________________________________ Date, signature, dealer stamp Date, signature, dealer stamp Service – first year km: __________________ Service – second year km: __________________ ________________________________________ ________________________________________... -
Page 44: Eu Declaration Of Conformity
The following manufacturer/distributor WALBERG URBAN ELECTRICS GMBH ALTER WANDRAHM 6 20457 HAMBURG is responsible for technical documents in accordance with machinery directive and hereby declares that the product EGRET PRO ELECTRIC SCOOTER 48 Volt 17.5 Ah Serial number WUE PR00 S2 xxxxxxxx... - Page 45 WALBERG URBAN ELECTRICS GMBH ALTER WANDRAHM 6 20457 HAMBURG is responsible for technical documents and hereby declares that the product EGRET PRO CHARGER FOR Standard Charger BC304546030 Type Is in accordance with the relevant provisions of the following EC directives including all associated modifications:...
- Page 46 WALBERG URBAN ELECTRICS GMBH ALTER WANDRAHM 6 20457 HAMBURG is responsible for technical documents and hereby declares that the product EGRET PRO CHARGER FOR Fast Charger BC303480050 Type Is in accordance with the relevant provisions of the following EC directives including all associated modifications:...
Need help?
Do you have a question about the AUDI PRO and is the answer not in the manual?
Questions and answers