Advertisement
Please dispose of packaging for the product in a responsi-ble
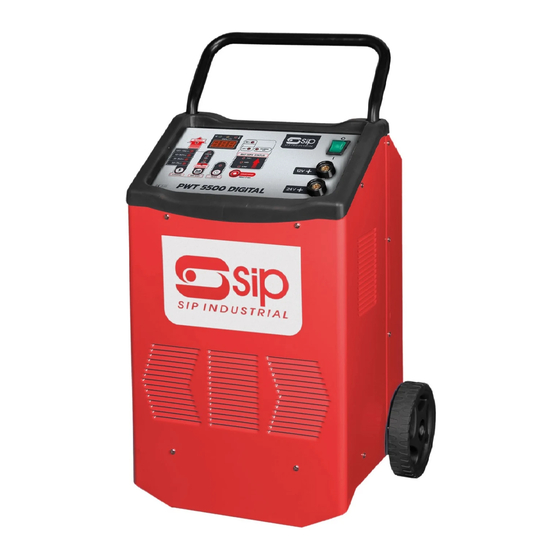
Startmaster
manner. It is suitable
for recycling.
Help to protect the
environment, take the packaging to the local amenity tip and place
into the appropriate recycling bin.
Digital Range
Never dispose of electrical equipment or batteries in with your
of Starter / Chargers
domestic waste. If your supplier offers a disposal facili-ty please
use it or alternatively use a recognised re-cycling agent. This will
allow the recycling of raw materials and help protect the
environment.
FOR HELP OR ADVICE ON THIS PRODUCT PLEASE CONTACT YOUR DISTRIBUTOR, OR
05545 05546 05548
SIP DIRECTLY ON:
TEL:01509500400
EMAIL: sales@sip-group.com or AFTER SALES: technical@sip-group.com
www.sip-group.com
Please read and fully understand the instructions in this manual
before operation. Keep this manual safe for future reference
Ref: 14SEPT2020
24
1
Advertisement

Summary of Contents for SIP Startmaster Digital Series
- Page 1 FOR HELP OR ADVICE ON THIS PRODUCT PLEASE CONTACT YOUR DISTRIBUTOR, OR 05545 05546 05548 SIP DIRECTLY ON: TEL:01509500400 EMAIL: sales@sip-group.com or AFTER SALES: technical@sip-group.com www.sip-group.com Please read and fully understand the instructions in this manual before operation. Keep this manual safe for future reference...
- Page 2 Conforms to the requirements of the following directive(s), as indicated. 2014/35/EU Low Voltage Directive 2014/30/EU EMC Directive 2011/65/EU RoHS Directive And the following harmonised standard(s) EN 60335-2-29 EN 60335-1 EN 61000-3-3 EN 55014-1-2 Signed: Mr P. Ippaso - Director - SIP (Industrial Products) Ltd Date: 14/09/2020.
-
Page 3: Table Of Contents
PAGE NO. DESCRIPTION www.sip-group.com/techzone Sa fety Symb ols Used Throug hout This Ma nua l Alternatively call SIP After Sales 01509 500400 Or Sa fety Instruc tions Email : technical@sip-group.com for a pdf copy. Gua ra ntee Elec tric a l Connec tion... -
Page 4: Safety Symbols Used Throughout This Manual
Read all of these instructions before operating the charger and save this user manual for future reference. SIP recommends that the starter / charger should not be modified or used for any application other than that for which it was designed. - Page 5 SAFETY INSTRUCTIONS….cont WIRING DIAGRAM 05546 PWT6500 Do not dismantle the starter / charger - If repairs are required, they should be per- formed by a suitably qualified person. Incorrect reassembly may result in a fire hazard and / or electric shock. Always disconnect the starter / charger from any connected battery and the mains supply prior to cleaning the casing or changing fuses etc.
- Page 6 SAFETY INSTRUCTIONS….cont WIRING DIAGRAM 05545 PWT 5500 DISCONNECT THE STARTER / CHARGER FROM THE MAINS SUPPLY AND BATTERY: When not in use. DO NOT ABUSE THE MAINS LEAD: Never pull the mains lead it to remove the plug from the mains socket.
-
Page 7: Guarantee
GUARANTEE The SIP Starmaster Digital Range of Starter / Chargers are covered by 12 months parts and labour warranty covering failure due to manufacturers defects. This does not cover failure due to misuse or operating the charger outside the scope of this manual - any claims deemed to be outside the scope of the warranty may be subject to charges Including, but not limited to parts, labour and carriage costs. -
Page 8: Electrical Connection
ELECTRICAL CONNECTION OPERATING INSTRUCTIONS….cont WARNING! It is the responsibility of the owner and the operator to read, understand and Disconnect the cables from the battery and replace the battery caps. comply with the following: Disconnect the charger from the mains supply and store it in a dry place. You must check all electrical products, before each use, to ensure that they are safe. -
Page 9: Technical Specifications
OPERATING INSTRUCTIONS….cont ELECTRICAL CONNECTION...cont Note: Always make sure the mains supply is of the correct voltage and the correct fuse, type Connect the POSITIVE (Red) clip from the battery charger to the POSITIVE (POS, P, +, Red) and rating, is used. ungrounded post of the battery. -
Page 10: Getting To Know Your Starter / Charger
GETTING TO KNOW YOUR STARTER / CHARGER OPERATING INSTRUCTIONS..cont Charging using the timer: A new generation of professional battery charger featuring electronic overvoltage pro- The display will alternate between the battery voltage and the residual charge time; LEDs 15 tection in the charge and boost functions meaning this battery charger is fit to start and 16 will alternatively light up;... - Page 11 OPERATING INSTRUCTIONS..cont GETTING TO KNOW YOUR STARTER / CHARGER….cont BATTERY SIZE (Ah) 1617 Using key 3, select the charge step according to the capacity of the battery you are going to charge (read the value on the battery). For a rapid charge you may select a step one level higher, but it is recommended to set also the timer.
-
Page 12: Assembly Instructions
ASSEMBLY INSTRUCTIONS OPERATING INSTRUCTIONS Items supplied. CHARGING A BATTERY A. Axle. B. Handle. Wheel (x 2). CAUTION: Check the battery to be charged, ensuring that the case is in good D. Handle Screws (x 4). Wheel Clip (x 2). Spare Fuse. condition, with no leaks and that the terminals are not oxidized.


Need help?
Do you have a question about the Startmaster Digital Series and is the answer not in the manual?
Questions and answers