Table of Contents
Advertisement
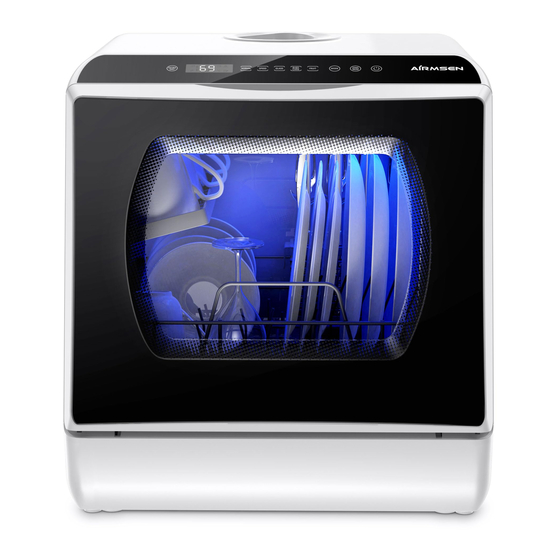
USER MANUAL
Meet a better life
Complete Portable Countertop Dishwasher
Model No.: TDQR03
Please give us a chance to make it right and do better!
Contact our friendly customer service department for help first. Replacements for missing
or damaged parts will be shipped ASAP!
Questions or Concerns?
@AIRMSEN
support@airmsen.com
www.airmsen.com
Advertisement
Table of Contents

Related Manuals for AIRMSEN TDQR03


Summary of Contents for AIRMSEN TDQR03
- Page 1 USER MANUAL Meet a better life Complete Portable Countertop Dishwasher Model No.: TDQR03 Please give us a chance to make it right and do better! Contact our friendly customer service department for help first. Replacements for missing or damaged parts will be shipped ASAP!
- Page 3 Take “technology, innovation, health” as its core value, to be the preferred brand of household products in your healthy and quality life. AIRMSEN focus on researching, developing and manufacturing various kinds of household supplies with advanced technologies and the idea of sustainable...
-
Page 4: Table Of Contents
TABLE OF CONTENTS PACKAGE CONTENTS PACKAGE CONTENTS 1 × Inlet Hose (61 in/154 cm) SPECIFICATIONS AND PARAMETERS 1 × Drain Hose (61 in/154 cm) IMPORTANT SAFEGUARDS 1 × Fruit Basket General Safety 1 × Pitcher Operating Safety Precautions 1 × Hose Collar GETTING TO KNOW YOUR DISHWASHER 1 ×... -
Page 5: Specifications And Parameters
CONGRATULATIONS ON YOUR PURCHASE OF A FARBERWARE PROFESSIONAL 5-LITER COMPLETE PORTABLE COUNTERTOP DISHWASHER FEATURES INCLUDE: • 5 Wash Programs • Choice of Built-in Tank or Faucet Hookup • Steam generated during clean cycle cleans baby bottles • LED Digital controls •... -
Page 6: Important Safeguards
IMPORTANT SAFEGUARDS Always follow basic safety precautions when using your countertop dishwasher. Read all instructions. General Safety Operating Safety Precautions Do not Power socket must be grounded, avoiding to open the door when washing avoiding possible electric leakage or shock; to hot water flying out causing any hurts;... -
Page 7: Getting To Know Your Dishwasher
GETTING TO KNOW YOUR DISHWASHER DISHWASHER FEATURES Water tank Upper spray arm Control panel LED lamp Lower spray arm Filter system Detergent dispenser Glass door Storage rack Cutlery basket Tableware basket Built-in LED Lamp The LED lamp allows you to clearly check the working status of the dishwasher. When the glass door is opened, the lamp will automatically turn on and when the glass door is closed, it will automatically turn off within 2 minutes. -
Page 8: Control Panel
GETTING TO KNOW YOUR DISHWASHER CONTROL PANEL START EXTRA B A B Y MODE NORMAL SPEED GLASS FRUIT C A R E PAUSE BUTTON / INDICATOR FUNCTION Press and hold this button for 3 seconds to turn on or turn POWER off the machine. -
Page 9: Led Display
GETTING TO KNOW YOUR DISHWASHER LED DISPLAY Display of temperature, time, error code, etc. Dry indicator Water tank mode Time icon Door opened Faucet mode Temperature icon in Celsius PARTS LIST Inlet Hose × 1 Drain Hose × 1 Fruit Basket × 1 (61 in/154 cm) (61 in/154 cm) Pitcher ×... -
Page 10: Installation
INSTALLATION Connecting the Drain Hose to the Machine WARNING: The dishwasher drain hose is an essential part of the machine, so it must be installed correctly to drain water and perform its job effectively. Connect the drain hose to the water outlet located on the back of the machine. -
Page 11: Adding Water To Dishwasher
INSTALLATION Adding Water to Dishwasher NOTE: This machine supports two water supply modes, including faucet mode water tank mode Faucet Mode Remove the silica gel plug from the water inlet on the back of the machine. Then, attach one end of the water inlet hose onto water inlet of the machine. - Page 12 INSTALLATION Open the water tank lid and fill with about 1.3 gallons(5 L) of water, or approximately 3 pitchers. When the tank is full, 3 beeps will be heard. There is no need to add more water during the washing process. NOTE: To prevent loss of the tank lid, attach it to the water tank. If the water tank is not full when you start a wash cycle, a red flashing water shortage indicator will display on the panel and the buzzer will beep. When the water tank is full, a white water tank mode indicator will appear. Before starting any wash cycle, if the machine detects that the water tank is full, it will automatically switch to the water tank mode. To drain the water tank by hand. pause the wash cycle and press and hold both the EXTRA DRY button and POWER button simultaneously for 3 seconds.
-
Page 13: Operating Instructions
OPERATING INSTRUCTIONS Loading the Dishwasher Basket Remove large, hard food scraps before loading tableware into the dishwasher Refer to the illustration when loading the dishwasher. All tableware and cutlery should be tilted to improve cleaning performance, with the dirty side facing toward the spray arm. Load tableware such that they are leaning against each other, and load hollow items such as cups, glasses, etc. with the opening facing downwards. Ladles should face open side down. Improper placement of tableware and cutlery may block the spray arm, which may affect the cleaning. Try to leave the dirty facing toward the spray arm. Recommended Layout for 4 Place Settings 4 ×... -
Page 14: Detergent Use
OPERATING INSTRUCTIONS IMPORTANT For the best cleaning performance, follow these loading guidelines: Scrape off any large food particles. Soften and/or soak remnants of burnt food in pans. It is not necessary to rinse all dishes under running water. - Load hollow items such as cups, glasses, pans etc. with the opening facing downwards. - Curved items or items with recesses should be loaded at a slant so that water can run off. - All tableware and cutlery should be placed such that the spray arms can rotate freely during washing. Knives and other utensils with sharp points should be loaded in the storage rack or cutlery basket with their points down or placed in a horizontal position so that they do not damage the inside of the dishwasher. Very small items should not be washed in the dishwasher, as they could fall out. Dishes and cutlery should not lie inside, be stacked with, or lie against each other. To avoid damage to glasses, ensure they are not touching each other. not overload the dishwasher. Position the dishes and cookware such that they will not be moved by the water spray. -
Page 15: Mode Selection
MODE SELECTION WASH CYCLE MODE DESCRIPTION OF CYCLE TEMPERATURE DETERGENT TIME AIR DRYING TIME Hot water washing 131℉ / 55℃ Cold water rinsing NORMAL 0.28 oz (8 g) 69 minutes 60 minutes 154℉ / 68℃ Cold water rinsing Hot water rinsing Hot water washing 122℉... -
Page 16: Starting A Wash Cycle
MODE SELECTION NOTE: The EXTRA DRY mode cannot be paused or canceled during operation of air-drying and intermittent circulation. If you want to cancel the EXTRA DRY mode, press and hold the POWER button for 3 seconds to turn off the dishwasher. How the Working Status Panel Displays the Air-Dry Function POWER button, START/PAUSE button, and MODE button will stay Air Dry in any wash cycle (except FRUIT mode) illuminated with remaining time and on the working status panel. EXTRA DRY button and POWER button will stay illuminated with ”b” Air Dry in EXTRA DRY mode and on the working status panel. Starting a Wash Cycle “Loading the Dishwasher Basket“... -
Page 17: Forget To Add A Dish
MODE SELECTION DRY button either before or after a wash cycle is started, or when the wash If needed, press the EXTRA cycle is finished to add an extra 60 minutes of air-drying and 72 hours of intermittent ventilation for storage. START EXTRA B A B Y NORMAL SPEED GLASS FRUIT MODE C A R E PAUSE To pause the dishwasher, press the START/PAUSE button. The button will flash until it is pressed again to resume the wash cycle. NOTE: The EXTRA DRY mode cannot be paused or canceled during operation of air-drying and POWER intermittent circulation. -
Page 18: Cleaning & Maintenance
CLEANING & MAINTENANCE FILTER SYSTEM NOTES: Never run the dishwasher without the filters in place. Improper placement of the filters may reduce the performance level of the dishwasher and damage dishes and utensils. Make sure the filters are properly assembled. The entire filter system should be cleaned once a week. Remove food remnants and clean the filters under running water. When cleaning the filters, do not knock them against surfaces. This can contort the filters and affect the performance of your dishwasher. The filters prevent larger remnants of food or other objects from getting inside the pump. For best performance and results, regularly clean the filter system. The filter system consists of a coarse filter, a flat filter (main filter), and a micro filter (fine filter). Coarse filter: This filter traps larger items, such as pieces of bone or glass that could block the drain. Fine filter: This filter catches soil and food residue in the cylindrical base and prevents the soil from being ... - Page 19 CLEANING & MAINTENANCE To Remove the Filter System To Clean the Filter System Turn the fine filter counterclockwise to remove it Rinse the filter system under running water. from the machine Use a soft cleaning brush to clean the coarse filter and the fine filter. Push the tabs at the bottom center of the fine filter to separate the coarse filter from the fine To reinstall the filter system, position the main filter. filter on its seat and push downwards, align the tabs on the bottom of the coarse filter with the corresponding hole of the fine filter, and then insert the coarse filter into the fine filter. Then, place the fine filter into its seat and rotate clockwise to tighten. Remove the main filter by pulling upwards. ...
-
Page 20: Spray Arms
CLEANING & MAINTENANCE SPRAY ARMS The upper and lower spray arms can be easily removed for periodic cleaning of the nozzles, preventing potential clogging. Wash them under running water and carefully replace them in their seats, checking that rotary movement is in no way impeded. To Remove and Clean the Spray Arms Open the door and take out the basket. Remove the lower spray arm by grasping the middle arm and pulling upwards. Unscrew the upper spray arm by rotating counterclockwise. Lower Upper Wash the arms under running water and brush each spray arm. Use tools with a sharp point, such as a needle, to clean nozzles if needed. Replace the lower spray arm to its seat by pushing downward until it clicks into place. Replace the upper spray arm by screwing clockwise into its seat. Ensure that the spray arm movement is not impeded before running another cycle. Lower Upper... -
Page 21: Caring For The Dishwasher
CARING FOR THE DISHWASHER Daily Maintenance The control panel and exterior should be cleaned by using a lightly damp cloth. After cleaning, make sure to dry thoroughly. Never use sharp objects, scouring pads, or harsh cleaners on any part of the dishwasher. To remove spots or stains from the surface of the interior, use a cloth dampened with water and a little vinegar. There may be some oil stains left on the edge of the dishwasher’s interior wall or door after heavily soiled loads have been washed. To clean the edge around the door, only use a soft, warm, damp cloth. Avoid getting water inside the door lock and electrical components. Regularly clean the door seals with a damp sponge to prevent odors from trapped food particles in the door seal. WARNING: Never use a spray cleaner to clean the door panel, as it may damage the door lock and electrical components. Abrasive agents or paper towels should not be used due to risk of scratching or leaving spots on the stainless-steel surface. - Page 22 CARING FOR THE DISHWASHER Water drainage - The drain hose must be properly fitted to avoid water leaks. Ensure that the water drain hose is not kinked or in any way impeded. If the sink is higher than the surface where you have placed your dishwasher, it will be necessary to drain excess water into a bucket that is in a lower position than the dishwasher. If you need a drain hose extension, be sure to use a similar drain hose, and that it is no longer than 12 feet long. Otherwise, the cleaning effect of the dishwasher could be reduced.
-
Page 23: Error Codes
Turn off the appliance and check if Draining error anything is blocking the filter system or drain hose. Make sure all hoses are not blocked. Tilt the machine backwards to a 30-45 degree and hold it in this position for at least 2 minutes, allowing water to flow out Overflow from the machine. Restart the appliance. If the error code still persists, please contact 5 beeps every AIRMSEN support team. 2 seconds Thermistor error Internal communication Restart the appliance. If the error error code still persists, please contact AIRMSEN support team. Heating system failure Pressure switch failure... -
Page 24: Troubleshooting
TROUBLESHOOTING PROBLEMS POSSIBLE CAUSES SOLUTIONS Replace the fuse or reset the circuit Fuse is blown, or the breaker. Remove any other appliances circuit breaker is sharing the same circuit with the tripped. dishwasher. Make sure the power cord is properly plugged into the wall socket. Power supply is not Dishwasher turned on. doesn’t start Make sure the dishwasher is turned on and the door is closed securely. Open the faucet or add water to the Water shortage. tank until the water shortage indicator turns off. Dishwasher door is not Make sure the door is fully closed. - Page 25 TROUBLESHOOTING PROBLEMS POSSIBLE CAUSES SOLUTIONS Detergent with Stained tub Do not use detergents with colorants. colorant was used. interior Discoloration of Washing temperature Select a wash cycle with lower plastic is too high. temperatures. tableware. This problem is difficult to avoid in GENERAL areas with hard water. To clean the PROBLEMS White film on interior, use a damp sponge with the inside Hard water minerals.
- Page 26 TROUBLESHOOTING PROBLEMS POSSIBLE CAUSES SOLUTIONS Egg custard Wash the tableware with egg custard left on the Protein solidification. by hand. tableware UNSATISFAC- Black or gray TORY Aluminum utensils have Check that dishes are loaded properly marks on WASHING rubbed against dishes. and not rubbing against each other. dishes RESULT Dishes are blocking Detergent left in Check that dishes are loaded properly. the detergent dispenser dispenser. Improper loading. Check that dishes are loaded properly. Inappropriate wash ...
-
Page 27: Warranty Information
Some states do not allow this exclusion or limitation of incidental or consequential losses, so the foregoing disclaimer may not apply to you. AIRMSEN warrants all products to be of the This warranty gives you specific legal rights and highest quality in material, craftsmanship,... -
Page 28: Customer Support
If you encounter any issues or have any questions regarding your new product, please contact our helpful Customer Support Team. Your satisfaction is our goal! Customer Support Email: support@airmsen.com * Please have your order confirmation number ready before contacting Customer Support. - Page 29 We hope this has been helpful to you. We can’t wait to see your beautiful results, and we think you’ll want to share glam shots! Others already in the community await your uploads—just pick your platform of choice below. Snap, hashtag, and tag away, AIRMSEN chef! #AIRMSEN @AIRMSEN Considering what to cook? Many recipe ideas are available, both from us and the Cosori community.
- Page 30 Questions or Concerns? support@airmsen.com www.airmsen.com...
Need help?
Do you have a question about the TDQR03 and is the answer not in the manual?
Questions and answers
sprinkler arms do not turn