Table of Contents

Related Manuals for Denver DVBT-1


Summary of Contents for Denver DVBT-1
- Page 1 Digital Terrestrial Receiver User Manual DENVER DVBT-1 www.denver-electronics.com Thank you for purchasing the new DVB-T receiver. For perfect operation and security, read the manual carefully and keep it for future reference.
- Page 2 SAFETY INSTRUCTIONS Read all the safety instructions before first use of your DVB-T Receiver. Power source The STB unit power should be supplied by the adaptor. The adaptor power’s cord should be plugged into a 100V to 230V AC, 50/60Hz supply. Safety considerations Position the power supply lead and other leads so that they are not likely to be walked on or pinched by things placed on or against them.
- Page 3 overheating. NEVER let children push anything into the holes or slots on the case. Servicing There are no user serviceable parts in your DVB-T receiver. When servicing, refer to qualified service personnel. Consult the helpline if you are ever in doubt about the installation, operation or safety of your equipment. Battery disposal Please ensure batteries are disposed of safety.
-
Page 4: Table Of Contents
INDEX 6.2 S YSTEM PGRADE 1. GETTING STARTED ..............1 6.3 S YSTEM NFORMATION 1.1 U EMOTE ONTROLLER 7. PLAYBACK ................18 1.2 STB U 1.3 C 7.1 P ONNECTING TO ROGRAM INFORMATION 1.4 R 7.2 TV/R EMOTE ONTROLLER ADIO 7.3 F AVOURITE 2. -
Page 5: Getting Started
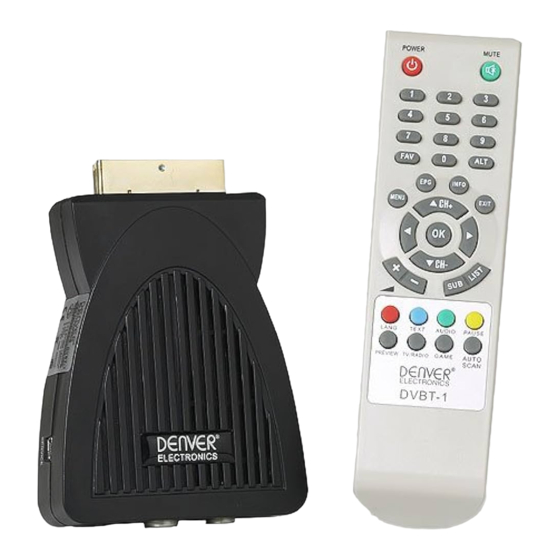
1. Getting Started Remove your STB unit carefully from the box. You may wish to store the packaging for future use. In the box Included in this package should be: ① STB unit ③ Power adaptor ④ Remote Receiver ② Remote control ⑤... -
Page 6: Use Remote Controller
⑥ User Guide ⑧ Scart Cable Read these instructions before use. ⑦ Quick startup guide 1.1 Use Remote Controller 1. Open the battery compartment. and “-” of the batteries to the marks in the battery 2. Insert two AAA batteries, make sure to match “+” compartment. - Page 7 3. Close the battery compartment. Do not block the path of the beam from the remote control to the remote receiver, Dark walls direct sunlight or bright light will reduce the remote control sensitivity. Notes: Control STB Unit Batteries can last for about 6 months Point it at the front of the remote receiver;...
-
Page 8: Stb Unit
1.2 STB Unit Fig 1.1... -
Page 9: Connecting To Tv
1.3 Connecting to TV Note: Before connect this STB to other devices, please SHUT DOWN all devices. Fig 1.2 Directly plug STB unit into the Scart socket in TV set; Put the Terrestrial aerial’s connector jack into the STB receiver’s “ANTENNA IN” socket on its rear panel. ”ANTENNA OUT” socket also can be connected to another STB, which provides same aerial signals. -
Page 10: Remote Controller
1.4 Remote Controller 1. POWER: Turns the receiver power on/off. 2. Numeric Key (0-9): You can change channel by input the channel number directly. 3. FAV: Press to display the favorite List. 4. EPG: The EPG menu of the current TP is displayed. 5. -
Page 11: Main Menu
2. Main Menu The STB contains a facilitated user interface, this function is to make user easy to call all device functions. Operation Steps: Press <MENU>, you can see this main menu. Fig 2.1 When no menu is appeared on the screen, you press the <MENU> key that will display the main menu. The focus is stopped in the first item until the user select it. -
Page 12: Edit
3.1 Channel Manager 3. Edit You can edit channel information in the “Channel Manager” Menu Use the main menu, you can press left or right key to select (Fig 3.2). “Edit” icon (see Fig 3.1). Use “TV/Radio” key to view TV or radio channel list. From this menu, we can select “Channel Manger”, “Add Favourites”... -
Page 13: Add Favourite Channels
3.2 Add Favourite Channels Use “Add Favorites”, you can designate the channels of the current TV/Radio list as favorite channels. Fig.3.3 Fig 3.4 Move cursor to the required channel with Up/Down key, and then press “Red” key on the remote controller to set channel as favorites. If “Red”... -
Page 14: Favourite Manager
3.3 Favourite Manager The function is basically the same as the channel manager menu. Fig 3.5 Lock: Same as the Lock function in “Channel Manager” menu. Skip: Same as the skip function in “Channel Manager” menu. Rename: Same as the rename function in “Channel Manager” menu. Sort: Same as the Sort function in “Channel Manager”... -
Page 15: Scan
4. Scan Use the main menu, you can press left or right key to select 4.1 Auto Search “Scan” icon. (Fig 4.1) From “Scan” menu (Fig 4.1), you can select “Auto Searching” From this menu, we can select ”Auto Searching”, ”Manual menu (Fig 4.2). -
Page 16: Manual Searching
4.2 Manual Searching From “Scan” menu (Fig 4.1), you can select “Manual Searching” menu (Fig 4.3). Set the “TP Frequency” and “Bandwidth”. Set “Auto Mode” to “NO”. Set “Trans Mode” (Fig 4.4) and “Guard Interval” (Fig 4.5) parameter. If there is some signal displayed in “Signal Power” and “Signal Quality” items. Press “RED” key to search program. If you can not see any signal, please check the parameter setting. -
Page 17: Timer Setting
4.3 Timer Setting Use the “Up/Down” button to select the timer. If you press “OK” to From “Scan” menu (Fig 4.1), you can select “Timer Setting” menu select a timer, you can see the current setting state of this timer (Fig 4.8). - Page 18 Please verify your “Current Date” and “Current Time” If you use this timer, please set “Timer State” to “Enable” status. setting.(ref 5.3) You can see an extended menu (Fig 4.10). The timer function could be used in playback or standby mode. If you turn off the power switch, all timers will be erased.
-
Page 19: Config
5.1 Clear Data From “Config” menu (Fig 6.1), you can select “Clear Data” menu 5. Config (Fig 5.2) Use the main menu, you can press left or right key to select “Config” icon (see Fig 5.1). From this menu, we can select “Clear Data”, “TV Setting”, “Set Time”, ”System Update”... -
Page 20: Tv Setting
6.1 Set Time 6. TV Setting From “Config” menu (Fig 5.1), you can select “Set Time” menu From “Config” menu (Fig 5.1), you can select “TV Setting” menu (Fig 6.2) to set your STB’s time. This function is useful for EPG (Fig 6.1) to set video and RF output. -
Page 21: System Upgrade
6.2 System Upgrade 6.3 System Information You can do “System Update” via other STB. From “Config” menu (Fig 5.1), you can select “System Information” menu (Fig 6.4). “System Information” menu shows the system information including the Firmware version and model name. Fig 6.3 Fig 6.4... -
Page 22: Playback
7. Playback In play status, various menus can be displayed on the screen with remote control action. You can change the current status and mode with various Keys. 7.1 Program information The bottom banner shows the information of the current channel. (See Fig 7.1) (Fig 7.1) ①... -
Page 23: Tv/Radio List
7.2 TV/Radio List 7.3 Favourite List If you press “TV/RADIO/OK” key on the remote controller, at No If you press “FAV” on the remote controller at No menu state, the menu state, the screen is displayed as follows (Fig 7.2). screen is displayed as follows (Fig 7.3). -
Page 24: Epg
7.4 EPG EPG shows the event information of the current channel by time Move the cursor to an event in the required time zone, and press zone. “RED” key. Then the timer is set to the designated time. See “4.7 EPG is divided into Weekly mode, Daily mode, and Extend mode, Timer Setting”... -
Page 25: Volume Control
7.5 Volume Control 7.6 INFO Adjust volume: Press “Volume+/Volume-” key on the If you press the INFO button once, a banner is displayed on the remote controller at No menu state. upper part of the screen, and if you press the button again before Mute: Press “Mute”... -
Page 26: Teletext
7.7 TELETEXT This unit supports TELETEXT display, press “TEXT” button to access this mode. Below is the page select operation: 1. Page up: Press the button. 2. Page down: Press the button. 3. Page forward jump: Press the button. The page number will jump in hundred steps. 4. -
Page 27: Preference
8. Preference In “Preference” menu user can select “Language”, “OSD Setting” and “Parent Lock” settings. 8.1 Language User can use “Language” menu (Fig 8.1) to set the language type. Fig 8.1... -
Page 28: Osd Setting
8.2 OSD Setting 8.3 Parent Lock When you select “Parent Lock” menu (Fig 8.3), you can set lock “OSD Setting” menu (Fig 8.2) let user select the color of menu. function or modify your Pin code. If “Parent Lock” item is set to “ON”, you must input the correct Pin code when you change to a locked channel. -
Page 29: Game
9. Game This DVB-T receiver reserved a Tetris game. You can active it by press the “MENU” button and select the “Game” item or press the “Game” button on the remote control directly. Game Operations: 1. Adjust game level: Press “VOL+” button to increase the game level, press “VOL-” button to decrease the game level. The game is between 0-20. -
Page 30: Technical Specification
10. Technical Specification COFDM: 2K and 8K Demodulator Mode: Frequency Range: VHF:170~230 MHz UHF:470~862 MHz Bandwidth 7M/8M Input Signals Voltage: -78~-10 dBm Input Impedance: 75 Ω (RF connector) MPEG2 compatible (Main Profile @ Main Level ) Video Decoder: 1.5-15Mb/s(720*576) Standard NTSC/SECAM/PAL Compliant Audio Decoder MPEG2 Layer I &... -
Page 31: Troubleshooting
11. Troubleshooting : When you found some problems about this STB, please check the table in below. Because these may not be any serious problems Fault Phenomenon Probably Reasons Resolve Power on, but no Please carefully check the power Put firmly the power plug to the socket on wall. any displays in plug to see it is in socket of wall or screen... - Page 32 The materials are recyclable as mentioned in this marking. By recycling, material recycling or other forms of re-utilization of old appliances, you are making an important contribution to protect our environment. Please inquire at the community administration for the authorized disposal location. All rights reserved Copyright Denver Electronics www.denver-electronics.com...
Need help?
Do you have a question about the DVBT-1 and is the answer not in the manual?
Questions and answers