Table of Contents
Advertisement
Quick Links
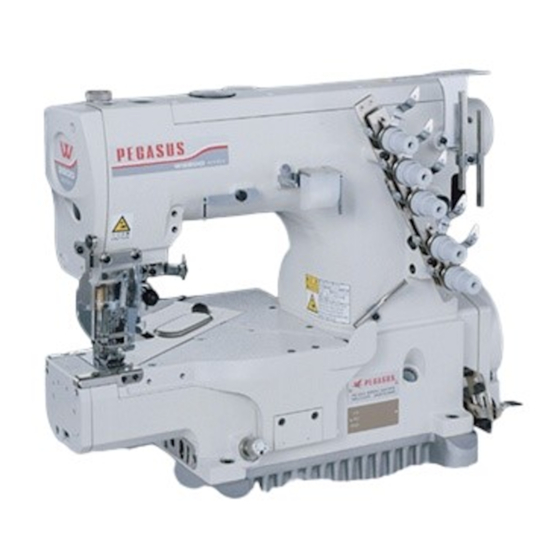
W2600
Thank you very much for purchasing Pegasus W2600
Series machine.
This instruction manual describes daily routine
maintenance and safety precautions to keep the
machine in the best possible conditions.
Please study this manual very carefully before operating
the machine.
2 or 3-needle cylinder bed interlock
stitch machine
INSTRUCTIONS
Series
9A2171E
Advertisement
Table of Contents

Related Manuals for Pegasus W2600 Series


Summary of Contents for Pegasus W2600 Series
- Page 1 W2600 Series Thank you very much for purchasing Pegasus W2600 Series machine. This instruction manual describes daily routine maintenance and safety precautions to keep the machine in the best possible conditions. Please study this manual very carefully before operating the machine.
-
Page 3: Table Of Contents
CONTENTS CONTENTS Oil replacement ..........17 . -
Page 4: Copyright
We assume no responsibility for these information, and any errors and/or incorrect descriptions that may appear in this instruction manual. ●Pegasus Sewing Machine Mfg. Co., Ltd. has a policy that we always modify the performance and/or specifications of this product introducing the state-of-the-art technology. Accordingly we reserve the right to change the specifications and/or design without notice. -
Page 5: Introduction
1.Introduction@@@@@@@@@@@@@@ ●This is the instruction manual that describes how to use this product safely. ●Read this instruction manual and learn very carefully how to operate, adjust and service this sewing machine before beginning any of the procedures. ●You should realize first that there is always the risk of contacting moving parts, such as needles because you have to work at point-blank range to them when you are operating industrial sewing machines. -
Page 6: Safety Precautions
safety. safety. Be sure to study very carefully Symbols and messages Symbols and messages Be sure to follow the instructions when you operate the machine and/or labor saving device. If you use the machine and/or labor saving device incorrectly, you may get an electrical shock. If you use the machine and/or labor saving device incorrectly, your hands and/or fingers may be injured. -
Page 7: Notes For Each Procedure
●Do not modify the machine yourself. printed on the boxes. 2.Never hold the area near the needle and/or thread guide related ※Consult your local Pegasus' sales office or representative for parts when taking out the machine from the cushion. modification. - Page 8 1.Never start the machine with no oil in the reservoir. 4.Adjust the height of the table according to a working posture of Use HIGHSPEED SEWING MACHINE OIL specified by Pegasus the operator. (Equivalent of ISO requirements: Viscosity Index of VG22).
- Page 9 4.Carry out daily maintenance work and periodical inspections the first one month. properly by following these precautions and the instruction manual. 5.Employ Pegasus' genuine parts when repairing the machine ARNING ARNING and/or replacing the parts. We are not responsible for accidents caused by any improper repair/adjustment and substituting other parts for thoes manufactured by Pegasus.
-
Page 10: Location Of Warning Labels And Safety Devices
safety. safety. Be sure to study very carefully 5.Location of warning labels and safety devices Pulley cover Eye guard Side cover Sliding plate Front cover Finger guard... -
Page 11: Protectors For Safety
(7) Side cover 6.Protectors for safety Never leave the side cover open. This chapter describes each protector for safety. Therefore, read The looper travels left to right while drawing an arc as seen from the and study the following carefully. front of the machine. -
Page 12: Assembling The Machine Rest Board
Assembling the machine rest board (Semi-submerged installation) Assemble the components comprising the machine rest board by referring to the illustration below. Be sure to secure all rods, nuts and bolts firmly with no shake. (Non-submerged installation) Sewing machine installation UTION UTION Always turn off the power, unplug the machine and then well- qualified technicians should install the machine. -
Page 13: Lubrication
Lubrication 1. Oil Use the oil "HIGH SPEED SEWING MACHINE OIL" specified by Pegasus (ISO Viscosity Grade 22). 2. To fill the machine with oil Remove cap Add the oil until the oil level (see oil gauge ) reaches (H). -
Page 14: Silicone Oil For H.r. Device
Silicone oil for H.R. device Always turn off the power and unplug the machine when you fill the HR device with silicone oil. Fill silicone oil tanks with silicone oil. To prevent thread breakage or fabric damage, add the silicone oil before it is too low. -
Page 15: Threading
Threading Always turn off the power and unplug the machine when you thread the machine. Open eye guard and covers Press button once. Bracket pops out. Press bracket into place after threading the machine. In case the machine is threaded previously Be sure to thread the machine correctly by referring to the threading diagram. - Page 16 Threading diagram To use woolly threads...
-
Page 17: Adjusting Presser Foot Pressure
Adjusting presser foot pressure The presser foot pressure should be as light as possible, yet Light Heavy sufficient to feed the fabric correctly and provide the uniform stitch formation. Loosen nut . Adjust the presser foot pressure. Adjustment is made by turning screw clockwise or counterclockwise using a coin. -
Page 18: Adjusting The Thread Tension
Adjusting the thread tension To obtain the proper thread tension, adjust needle thread tension knobs , top cover thread tension knobs and looper thread To tighten tension knob To loosen To tighten the thread, turn each knob clockwise. To loosen the thread, turn each knob counterclockwise. Each thread tension should be as light as possible, yet be sufficient to produce balanced and beautiful stitches. -
Page 19: Replacing The Needle
Replacing the needle Always turn off the power and unplug the machine when you replace the needle(s). Loosen screw(s) using a red-handled key wrench (1.5mm). Remove the old needle(s) by using a pincette (provided as accessaries). Fix the needle so that its scarf faces the rear side of machine. Insert a new needle into the needle hole as far it will go by using a pincette. -
Page 20: Oil Replacement
Oil replacement Replace the oil one month after the first use and thereafter every six months. If you keep using the old oil, it may cause the damage to the machine. To drain the oil Drain the oil by removing screw on the left side of the oil pan. -
Page 21: Adjusting The Needle Thread Guard
Adjusting the needle thread guard Always turn off the power, unplug the machine and then well- qualified technicians should adjust the needle thread guard. Loosen screw . Adjust needle thread guard to the appropriate position according to the type of thread being used (see the illustration right). -
Page 22: Removing And Reinstalling The Looper Thread Take-Up
Removing and reinstalling the looper thread take-up Always turn off the power, unplug the machine and then well- qualified technicians should remove/reinstall the looper thread take- To remove the looper thread take-up Raise looper thread take-up bracket by pressing push button twice. -
Page 23: Adjusting The Looper Thread Guides
Adjusting the looper thread guides Always turn off the power, unplug the machine and then well- qualified technicians should adjust the looper thread guides. To increase the supply of looper thread Loosen screws (see the illustration below). Align each To increase eyelet on looper thread guides with alignment mark (standard position). -
Page 24: Adjusting The Spreader
Adjusting the spreader UTION UTION Always turn off the power, unplug the machine and then well- qualified technicians should adjust the spreader. 1. To adjust the spreader (1) To adjust the spreader height : Adjust distance from the top surface of the needle plate to the bottom surface of spreader . -
Page 25: Adjusting The Top Cover Thread Guide
Adjusting the top cover thread guide Always turn off the power, unplug the machine and then well- qualified technicians should adjust the top cover thread guide. Loosen screw so that there should be a distance of approximately 20mm (see the illustration) between the left end of spreader thread guide and the left end of top cover thread guide (standard... -
Page 26: Adjusting The Feed Dog Height
Adjusting the feed dog height UTION UTION Always turn off the power, unplug the machine and then well- qualified technicians should adjust the feed dog height. When the feed dogs are at their highest point of travel, there should be a distance of 0.8~1.2mm from the top surface of the needle plate to extended line from the tips of main and differential... -
Page 27: Adjusting The Needle Height
Adjusting the needle height UTION UTION Always turn off the power, unplug the machine and then well- qualified technicians should adjust the needle height. Adjust distance from the point of the left needle to the top surface of the needle plate when the needle is at the top of its stroke. The distance varies according to the machine being used. -
Page 28: Adjusting The Looper
Adjusting the looper UTION UTION Always turn off the power, unplug the machine and then well- qualified technicians should adjust the looper. Adjusting the looper-needle setting distance Adjust looper-needle setting distance from the center of the right needle to the point of looper when the looper is at its farthest position to the right. -
Page 29: Adjusting The Needle Guard (Rear)
Adjusting the needle guard (rear) UTION UTION Always turn off the power, unplug the machine and then well-qualified technicians should adjust the needle guard (rear). When the point of the looper has reached the center line of the right needle from the extreme right end of its travel, there should be a distance of 1mm from line on needle guard (rear) -
Page 30: Adjusting The Differential Feed Ratio
Adjusting the differential feed ratio To shrink The differential feed ratio is set to 1:0.9~1:1.3 at the factory. (except -03G) Always turn off the power, unplug the machine and then well- qualified technicians should adjust the differential feed ratio. To stretch In the case of a differential feed ratio of 1:1.3~1:1.8 UTION UTION... - Page 31 In the case of a differential feed ratio of 1:0.6~1:1.1 UTION UTION Always turn off the power, unplug the machine and then well- qualified technicians should adjust the differential feed ratio. Remove screw , washer and bushing in sequence. Align the hole on link with the lower screw hole.
-
Page 32: Changing The Needle Bar Stroke
Changing the needle bar stroke UTION UTION Always turn off the power, unplug the machine and then well- qualified technicians should change the needle bar stroke. If you use the machine with high stroke, be sure to run the machine at a speed less than 6,000 rpm. If you change the needle bar stroke, be sure to readjust the needle height (see page 24), the looper (see page 25) and the nee- dle guard (see page 26). -
Page 34: Subclass Specifications
W2600 Series subclass specifications W2600 Series Max. Presser foot lift Max. speed Number Number Diff. stitch Needle space Application Subclass (mm) (rpm) Remarks feed tatio length (mm) needles threads (mm) 3.2・4 6,500 6,000 0.9〜1.3 W2664-01G 5.6・6.4 Versatile ー W2664S-01G 0.9〜1.3 7,000 ー... - Page 36 PEGASUS SEWING MACHINE MFG. CO., LTD. 5-7-2, Sagisu, Fukushima-ku, Osaka 553-0002, Japan. Phone :(06)6458-4739 Telefax:(06)6454-8785 September 2001 Printed in Japan The description in this INSTRUCTIONS is subject to change without prior notice for improvement.
Need help?
Do you have a question about the W2600 Series and is the answer not in the manual?
Questions and answers