Sony MDR-RF995RK - Wireless Stereo Headphone System Manual
- Operating instructions (3 pages) ,
- Service manual (2 pages)
Advertisement
- 1 Checking the included items
- 2 Features
- 3 How to use
- 4 If you cannot receive a lear audio signal
- 5 Noise Reduction process
- 6 Tips for charging
- 7 Using the headphones with separately-sold dry batteries
- 8 Battery life
- 9 Tips for connection
- 10 Tips for volume setting
- 11 Tips for sound effect
- 12 Tips for better reception
- 13 Replacing the earpads
- 14 Precautions
- 15 Troubleshooting
- 16 Specifications
- 17 WARNING
- 18 Documents / Resources
Checking the included items

Wireless stereo headphones MDR-RF995R (1)

RF stereo transmitter TMR-RF995R (1)

AC adaptor (1)

Stereo mini cable (stereo mini plug), 1.5 m (1)

Rechargeable nickel-metal hydride battery BP- HP800-11 (1)
Features
Thank you for purchasing the Sony MDR-RF995RK Wireless Stereo Headphone System. Before operating the unit, please read this manual thoroughly and retain it for future reference.
Some features are:
- Wireless system that allows you to listen to a program free the restriction of a cable
- Up to 45 meters reception range*
- High fidelity sound reproduction
- New mode "VOICE" for clear hearing of personal voice range
- Noise reduction system to reproduce a clear sound with minimum transmission noise
- Comfortable fit
- Smooth and Comfortable Earpads
- Long playback time (maximum 20 hours)
- Easy recharging function with secure charging mechanism
- Rechargeable Battery
- Automatic tuning on headphones for optimum signal reception
- 3 transmission channels available
- Volume control function and sound effect function on the headphones
* Transmission distance varies depending on conditions of use
How to use
- Insert the supplied rechargeable battery BP-HP800-11 into the left housing of the headphones.
Observe the correct polarity when installing battery.

- Insert the end first
- Rechargeable nickel-metal hydride battery BP-HP800-11 (supplied)
- Connect the AC adaptor.

- Charge the headphones.

- Check the CHARGE/RED indicator lights up red.
- Complete when indicator turns off.
- Connect the A/V component, following hookup A or B below.
- Using the headphone jack of the A/V component

- Using the audio out (L/R) jacks of the A/V component
Use a connection cable (not supplied) between the transmitter and the A/V component.

If the sound is distorted by connecting the transmitter to the A/V component's audio out (L/R) jacks, reconnect the transmitter to the headphone jack.
If the transmitter detects no signal or no sound, check the connection of the connected A/V components, then check the audio setting of the connected A/V components.
- Using the headphone jack of the A/V component
- Wear the headphones.
Before listening
To reduse the risk of hearing damage, first lower the volume

- Start playback of the A/V component.

- Adjust the volume.


After use
Turn off the power of the headphones.
About sending RF signals
The transmitter starts sending RF signals automatically when it detects an audio signal from the connected component. Note that;
- Noise may occur depending on the transmitter position and room conditions. It is recommended to place the transmitter in a location that produces the clearest sound.
- If the transmitter is placed on a metallic table, you may hear noise, or the reception range may decrease. Do not place on a metallic table.
If no signal or low signal is input for about 4 minutes
When no signal is input for about 4 minutes, the transmitter turns off automatically*. The POWER indicator of the transmitter blinks for 4 minites, then turns off. The transmitter restarts after receiving an audio signal again.
The transmitter may also turn off if low signal is input for about 4 minutes. In this case, raise the volume of the connected A/V component within the range where the sound is not distorted, then lower the volume of the headphones.
* If signal noise is output from the connected A/V component, the transmitter may not turn off, even when no audio signal is input.
If you cannot receive a lear audio signal
First change the radio frequency with the CHANNEL selector switch on the transmitter, then briefly press the AUTO TUNING button on the headphones.

Noise Reduction process
The transmitter compresses the audio signal and converts it to RF signal. The headphones convert the received RF signal to an audio signal and decompresses it. This process reduces noise picked up during transmission.

- The transmitter compresses the audio signals dynamic range, then converts it to RF signal.
- Noise may occur due to long distance transmission, etc.
- The headphones convert the RF signal to an audio signal.
- Noise may occur during conversion.
- Decompression of the audio signals dynamic range reduces the noise level and improves the S/N (signal-to-noise) ratio.
Tips for charging
Charge supplied battery first
The supplied rechargeable nickel-metal hydride battery is not charged from the first time you use it. Be sure to charge them before use.
About auto charge function
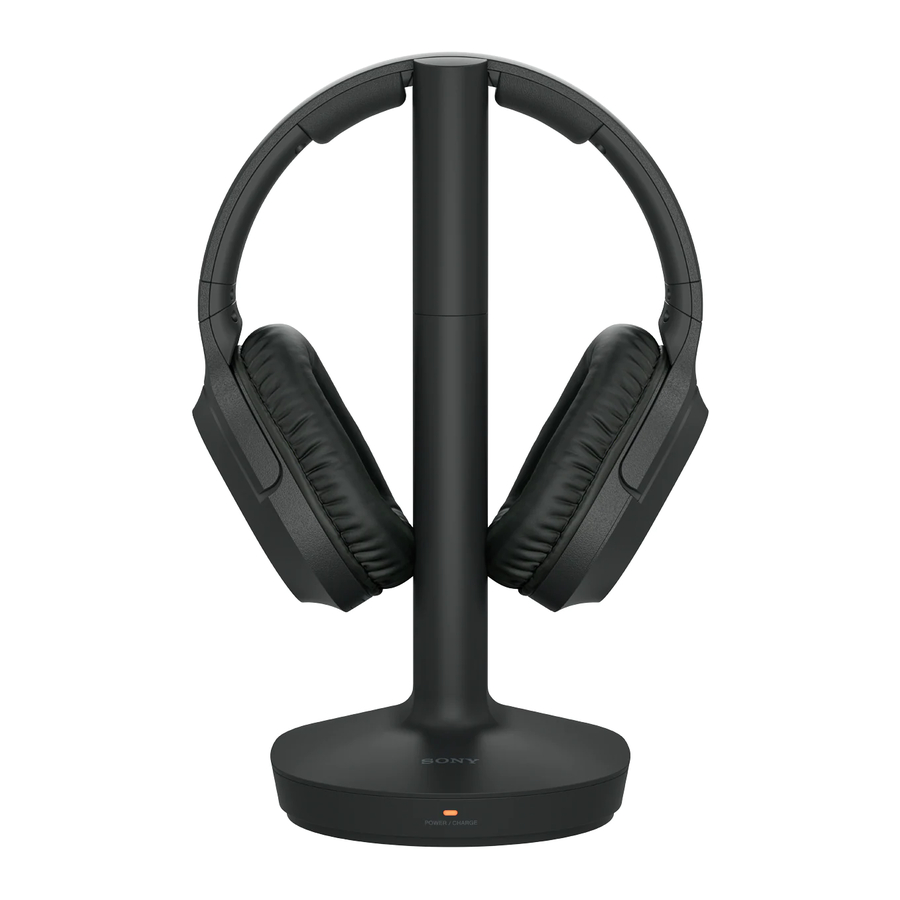
Placing the headphones on the transmitter automatically turns them off, then charging starts. This eliminates the need for turning on/off every time you wear and take off the headphones.
If CHARGE/RED indicator does not light up red
- Check if the right and left headphones are rested on the transmitter correctly. Take off the headphones and place them on the transmitter again so that the headphones' contact points meet the transmitter's contact pins.
- Charging may not be completed if the transmitter's contact pin and headphones' contact point are dusty. Wipe them with a cotton bud, etc.
Charging and usage time
| Approx. charging time | Maximum usage time1) |
| 7 hours2) | 20 hours3) |
- at 1 kHz, 0.1 mW + 0.1 mW output
- hours required to fully charge an empty battery
- Time may vary, depending on the temperature or conditions of use.
To recharge supplied battery after use
Place the headphones on the transmitter after use. The CHARGE/RED indicator lights up red, then charging starts. When charging is complete, there is no need to remove the headphones from the transmitter.
Remaining battery
To check the remaining battery charge of the headphones, turn on the POWER switch and check the POWER indicator. The battery is still serviceable when the indicator lights up green.
Charge the headphones if the POWER indicator turns off, dims, flashes, or the sound becomes distorted or noisy.
Notes
- Insert the AC adaptor plug firmly.
- Be sure to use the supplied AC adaptor. Using AC adaptors with different plug polarity or other characteristics can cause product failure.
![]()
- The battery capacity may decrease if the headphones are turned on and placed on the transmitter with the AC adaptor disconnected.
- The transmitter automatically turns off while charging the headphones.
- This system is designed to charge only the supplied rechargeable battery BP-HP800-11 for safety. Note
- that other types of rechargeable battery cannot be charged with this system.
- If dry batteries are installed, they cannot be charged.
- Do not attempt to use the supplied rechargeable battery BP-HP800-11 for other components. It is for use with this system only.
- Charge in an environmental temperature of between 5°C and 35°C.
- When the battery life reduces to half, this may be the end of battery lifetime. The supplied rechargeable battery BP-HP800-11 is not commercially available. You can order the battery from the store where you purchased this system, or at your nearest Sony dealer.
- Do not touch the contact pins of the transmitter. If the contact pins become dirty, charging may not be possible.
- Charging may not be completed if the transmitter's contact pins and headphones' contact points are dusty. Wipe them with a cotton bud, etc.

Using the headphones with separately-sold dry batteries
Commercially available (LR03 (size AAA)) dry batteries can also be used to power the headphones. Install two batteries in the same manner as described in step 1 of "How to use."
If you attempt to charge the headphones with dry batteries installed, the CHARGE/RED indicator lights up red for 15 seconds, then turns off. The battery charge function is not activated.
Battery life
| Battery | Approx. usage time1) |
| Sony alkaline battery LR03 (size AAA) | 24 hours2) |
- at 1 kHz, 0.1 mW + 0.1 mW output
- Time may vary, depending on the temperature or conditions of use.
Note
Do not carry a dry battery together with coins or other metallic objects. It can generate heat if the positive and negative terminals of the battery are accidentally come into contact with metallic objects.
Tips for connection
- When you connect the stereo mini cable (stereo mini jack) directly to an earphone jack (monaural mini jack), the audio signal may not be output through the right channel.
Tips for volume setting
- If you connect the transmitter to the headphone jack of the A/V component, set the volume of the A/V component as high as possible but not so high that the audio signal becomes distorted.
- When watching videos, be careful not to raise the volume too high in quiet scenes. You may hurt your ears when a loud scene is played.
Tips for sound effect
Slide the switch to select the desired sound effect, OFF or VOICE.

| Position of switch | Sound effect and suitable sound source |
| OFF | Normal playback of the headphones. |
| VOICE | Produces a clearer announcer's voice. |
Notes
- The volume of the headphones may vary, depending on the input signal and the setting of the EFFECT switch.
- The sound effect may not be obtained depending on the input sound sources.
Tips for better reception
Receiving performance
This system utilizes very high frequency signals in the 900 MHz band so the receiving performance may deteriorate due to the surroundings. The following examples illustrate conditions that may reduce the reception range or cause interference.
- Inside a building with walls containing steel beams
- An area with many steel file cabinets, etc.
- An area with many electrical appliances capable of generating electromagnetic fields
- The transmitter is placed on a metal instrument.
- An area facing a roadway
- Noise or interfering signals exist in the surroundings due to radio transceivers in trucks, etc.
- Noise or interfering signals exist in the surroundings owing to wireless communication systems installed along roadways.
Effective area of the transmitter
The optimum distance is up to approximately 45 m (150 ft) without the system picking up some interference.
However, the distance may vary depending on the surroundings and environment.
- If the system picks up some noise within the above mentioned distance, reduce the distance between the transmitter and the headphones, or select another channel.
- When you use the headphones inside the effective area of the transmitter, the transmitter can be placed in any direction from the listener.
- Even within the signal reception area, there are some spots (dead spots) where the RF signal cannot be received. This characteristic is inherent to RF signals, and does not indicate malfunction. By slightly moving the transmitter, location of the dead spot can be changed.
Replacing the earpads
The earpads are replaceable. If the earpads become dirty or worn out, replace them as illustrated below. The earpads are not commercially available. You can order replacements from the store where you purchased this system, or at your nearest Sony dealer.
- Remove the old earpad by pulling it out of the groove on the housing.

- Fit the new earpad in the groove of the housing. Make sure the earpad is set to the vertical position.


Precautions
- When this system is not to be used for a long period of time, disconnect the AC adaptor from the AC outlet holding the plug, and remove the battery from the headphones to avoid damage caused by battery leakage and subsequent corrosion.
- Do not leave this system in a location subject to direct sunlight, heat or moisture.
- You may hear some noise when you disconnect the AC adaptor from the transmitter before taking off the headphones.
- Avoid exposure to temperature extremes, direct sunlight, moisture, sand, dust or mechanical shock.
- Please note that water does not splash, this product is not waterproof specification.
Notes on headphones
To reduce the risk of hearing damage
Avoid using headphones at high volume. Hearing experts advise against continuous, loud and extended play. If you experience a ringing in your ears, lower the volume or discontinue use.
Caring for others
Keep the volume at a moderate level. This will allow you to hear outside sounds and to be considerate to the people around you.
Note on static electricity
Static electricity accumulated in the body may cause mild tingling in your ears. To minimise the effect, wear clothes made from natural materials.
If you have any questions or problems concerning the system that are not covered in this manual, please consult your nearest Sony dealer.
Be sure to bring the headphones and the transmitter to the Sony dealer when requiring repair work.
Troubleshooting
If you run into any problems using this system, use the following checklist. Should any problem persist, consult your nearest Sony dealer.
No sound/Low sound
- Check the connection of the A/V component or the AC adaptor.
- Check that the A/V component is turned on.
- If you connect the transmitter to an A/V component using the headphone jack, raise the volume level on the connected A/V component within the range where the sound is not distorted.
- Change the radio frequency with the CHANNEL selector on the transmitter, then change the radio frequency to that of the transmitter with the AUTO TUNING button on the headphones.
- Use the headphones near the transmitter, or change the position of the transmitter.
- Charge the supplied rechargeable battery, or replace dry batteries with new ones. If the POWER indicator is still off after charging, take the headphones to a Sony dealer.
- Raise the headphone volume.
The sound cuts off
- The transmitter turns off if no signal or low signal is input for 4 minutes. If you connect the transmitter to an A/V component using the headphone jack, raise the volume level on the connected A/V component within the range where the sound is not distorted.
Distorted or intermittent sound (sometimes with noise)
- Use the headphones near the transmitter, or change the position of the transmitter.
- Do not place the transmitter on a metallic table.
- If you connect the transmitter to an A/V component using the headphone jack, lower the volume level on the connected A/V component within the range where the sound is not distorted.
- Change the radio frequency with the CHANNEL selector on the transmitter, then change the radio frequency to that of the transmitter with the AUTO TUNING button on the headphones.
- Charge the supplied rechargeable battery, or replace dry batteries with new ones. If the POWER indicator is still off after charging, take the headphones to a Sony dealer.
Loud background noise
- If you connect the transmitter to an A/V component using the headphone jack, raise the volume level on the connected A/V component within the range where the sound is not distorted.
- Charge the supplied rechargeable battery, or replace dry batteries with new ones. If the POWER indicator is still off after charging, take the headphones to a Sony dealer.
- Do not place the transmitter on a metallic table.
- Use the headphones near the transmitter.
The POWER/GREEN indicator flashes green
- No signal or low signal is input. Start playback of the A/V component, or raise the volume of the connected A/V component within the range where the sound is not distorted, otherwise the transmitter will turn off. If no signal or low signal is input for about 4 minutes, the transmitter turns off automatically.
Battery cannot be charged/ CHARGE/RED indicator flashes red, or does not light up red
- Check that the right/left of the headphones and transmitter correspond, and put the headphones on the transmitter correctly.
- Install the supplied rechargeable nickel-metal hydride battery. Dry batteries and rechargeable batteries other than the supplied cannot be charged.
- If the CHARGE/RED indicator does not light up red even though you put the headphones on the transmitter and wait for a while, it may be the end of battery lifetime.
You can order the supplied rechargeable battery
BP-HP800-11 from the store where you purchased this system, or at your nearest Sony dealer. - Charging may not be completed if the transmitter's contact pin and headphones' contact point are dusty. Wipe them with a cotton bud, etc.
Short usage time (the supplied rechargeable battery)
- Clean the + and - terminal of the supplied rechargeable battery and the charging terminal of transmitter/ headphone with a dry cloth.
- Recharge the supplied rechargeable battery after the fully discharged.
Specifications
RF stereo transmitter (TMR-RF995R)
Modulation
FM stereo
Carrier frequency
915.5 MHz, 916.0 MHz, 916.5 MHz
Channel
Ch1, Ch2, Ch3
Transmission distance
Approx. 45 m of longest
Audio inputs
Stereo mini jack
Power requirements
DC 12 V (from the supplied AC adaptor)
Dimensions
Approx. 130 mm × 273 mm × 160 mm (w/h/d)
Mass
Approx. 265 g
Rated power consumption
2.0 W
Operating temperature
5°C to 35°C
Wireless stereo headphones (MDR- RF995R)
Frequency response
10 Hz – 22,000 Hz
Power source
Supplied rechargeable nickel-metal hydride battery BP-HP800-11, or commercially available (LR03 (size AAA)) dry batteries
Mass
Approx. 275 g
Operating temperature
5°C to 35°C
Included items
RF stereo transmitter TMR-RF995R
Wireless stereo headphones MDR-RF995R
AC adaptor (12 V) (1)
Stereo mini cable (stereo mini plug), 1.5 m (1)
Rechargeable nickel-metal hydride battery BP-HP800-11 (1)
Card warranty (1)
Operating Instructions (this manual) (1)
Design and specifications are subject to change without notice.
WARNING

To reduce the risk of fire or electric shock, do not expose this apparatus to rain or moisture.
To reduce the risk of fire or electric shock, do not expose this apparatus to dripping or splashing, and do not place objects filled with liquids, such as vases, on the apparatus.
Do not expose the batteries (battery pack or batteries installed) to excessive heat such as sunshine, fire or the like for a long time.
Do not dismantle, open or shred secondary cells or batteries.
In the event of a cell leaking, do not allow the liquid to come in contact with the skin or eyes. If contact has been made, wash the affected area with copious amounts of water and seek medical advice.
Secondary cells and batteries need to be charged before use. Always use the correct charger and refer to the manufacturer's instructions or equipment manual for proper charging instructions.
After extended periods of storage, it may be necessary to charge and discharge the cells or batteries several times to obtain maximum performance.
Dispose of properly.
To avoid electrical shock, do not open the cabinet. Refer servicing to qualified personnel only.
Do not install the appliance in a confined space, such as a bookcase or built-in cabinet.
The AC Adaptor is not disconnected from the mains as long as it is connected to the AC outlet, even if the unit itself has been turned off.
As the main plug of AC power adaptor is used to disconnect the AC power adaptor from the mains, connect it to an easily accessible AC outlet. Should you notice an abnormality in it, disconnect it from the AC outlet immediately.
Excessive sound pressure from earphones and headphones can cause hearing loss.
The nameplate of transmitter is located on the bottom exterior.
The nameplate of the headphones is located on the back side of the slider.
For the customers in the USA
You are cautioned that any changes or modifications not expressly approved in this manual could void your authority to operate this equipment.
If you have any questions about this product, you may call:
Sony Customer Information Services Center 1-800-222-7669 or http://www.sony.com/
Note
This equipment has been tested and found to comply with the limits for a Class B digital device, pursuant to Part 15 of the FCC Rules. These limits are designed to provide reasonable protection against harmful interference in a residential installation. This equipment generates, uses and can radiate radio frequency energy and, if not installed and used in accordance with the instructions, may cause harmful interference to radio communications. However, there is no guarantee that interference will not occur in a particular installation. If this equipment does cause harmful interference to radio or television reception, which can be determined by turning the equipment off and on, the user is encouraged to try to correct the interference by one or more of the following measures:
- Reorient or relocate the receiving antenna.
- Increase the separation between the equipment and receiver.
- Connect the equipment into an outlet on a circuit different from that to which the receiver is connected.
- Consult the dealer or an experienced radio/ TV technician for help.
For the customers in Canada
This device complies with Industry Canada's licence- exempt RSSs. Operation is subject to the following two conditions:
- This device may not cause interference; and
- This device must accept any interference, including interference that may cause undesired operation of the device.

Disposal of Old Electrical & Electronic Equipment (Applicable in the European Union and other European countries with separate collection systems)

Documents / Resources
References
Download manual
Here you can download full pdf version of manual, it may contain additional safety instructions, warranty information, FCC rules, etc.
Download Sony MDR-RF995RK - Wireless Stereo Headphone System Manual
Advertisement


Need help?
Do you have a question about the MDR-RF995RK and is the answer not in the manual?
Questions and answers