Advertisement
Available languages
Available languages
Quick Links
Advertisement

Related Manuals for Logitech BRIO 500


Summary of Contents for Logitech BRIO 500
- Page 1 BRIO 500 Setup Guide 设置指南...
- Page 2 CONTENTS English 한국어 Indonesia 简体中文 繁體中文...
-
Page 3: Know Your Product
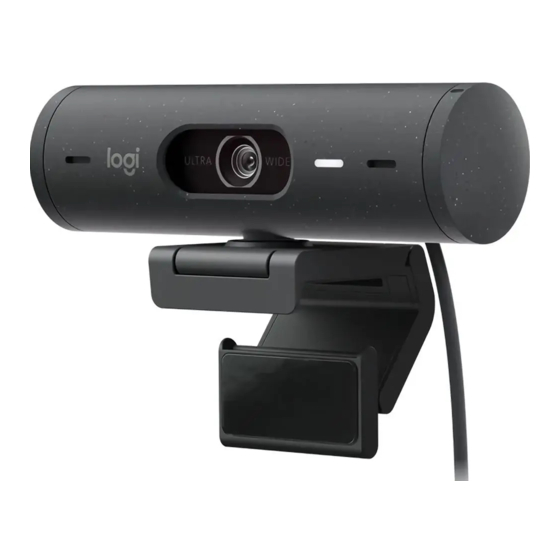
KNOW YOUR PRODUCT BRIO 500 FRONT VIEW WITH FUNCTION INDICATIONS Privacy shutter dial LED activity light Brio 500 webcam Privacy shutter Ultrawide-angle lens with 90° dFOV Dual noise reduction microphones ¼-20 adaptor for 3rd party mounts Magnetic thread mount screw... -
Page 4: Step 1: What's In The Box
STEP 1: WHAT’S IN THE BOX 1 Webcam with attached USB-C cable 2 Mount clip with removable mount adaptor 3 User documentation USB-C STEP 2: DETERMINE MOUNT PLACEMENT Placement to allow one-handed camera adjustments (using micro-suction pad) 1 Determine the best placement for your webcam before continuing 2 Wipe the back of your monitor to clear any dust or dirt... - Page 5 (Optional) Placement without the micro-suction pad Slide the removable mount adapter down to remove it from the webcam foot Adjust the foot on the mounting clip until it is flush with the back of your device and press firmly in place STEP 3: MOUNT ADAPTOR REMOVAL AND CLEANING 1 Remove the webcam from mount and gently peel the adaptor from one corner to remove 2 With a wet finger gently rub the pad clear of dust and dirt and let the micro-suction pad...
- Page 6 STEP 5: CONNECT THE WEBCAM VIA USB-C & GET STARTED 1 Plug the USB-C connector into the USB-C port on your computer, monitor, laptop, or docking station 2 Rotate the dial on the right side of the webcam to open/close the privacy shutter 3 Adjust the webcam by turning side to side and tilting up and down to find the best framing for your video meetings...
-
Page 7: Step 7: Show Mode
STEP 7: SHOW MODE Easily show physical items in video calls by tilting the camera down to present sketches, objects, and work in progress There are two ways to use Show Mode: 1 If mount is secured with micro-suction pad: Using one hand, tilt the camera down to show your desktop, and tilt back up to show yourself 2 If mount is not secured with micro-suction... - Page 8 Logi Tune helps boost your webcam performance with periodic software and www.logitech.com/tune firmware updates It is recommended to update your webcam To do so, download Logi Tune from www logitech com/tune ADJUSTABLE OPTIONS • Show Mode • Auto-framing Brio 500 CONNECTED •...
- Page 9 STEP 9: (OPTIONAL) ATTACH TO A TRIPOD For placement on a tripod (not included) 1 Rotate counterclockwise to remove the mounting screw from the bottom of the webcam 2 Locate the ¼ inch tripod thread on the bottom of the universal mounting clip 3 Secure the webcam on your tripod by twisting it into the ¼...
-
Page 10: Mounting Clip
Weight: 1 4 oz (40 g), incl Removable mount adapter www.logitech.com/support/Brio500 © 2022 Logitech Logitech, Logi and the Logitech logo are trademarks or registered trademarks of Logitech Europe S A and/or its affiliates in the U S and other countries The Bluetooth word ®... - Page 11 了解您的产品 BRIO 500 前视图,带功能指示 隐藏式镜头旋钮 LED 活动指示灯 Brio 500 网络摄像头 隐藏式镜头 具有 90° dFOV 的超 广角镜头 双降噪麦克风 用于第三方安装配 件的 ¼-20 适配孔 磁性螺纹安装螺丝 (可拆卸) 随附的USB-C 线缆 安装配件设计概览 磁性安装接收器 倾斜度调节铰链 显示器尺寸后置调 节铰链 衬垫脚 微型吸盘 微型吸盘可将安装配件牢固地固定在显示器上。 这种可拆卸的衬垫不会留下残留物,可以用水 可拆卸安装适配器 清洗。 微型吸盘保护膜 (安装前取下) 简体中文...
- Page 12 步骤 1:包装内容 1 带 USB-C 线缆的网络摄像头 2 带可拆卸安装适配器的安装夹 3 用户文档 USB-C 步骤 2:确定安装位置 单手调节摄像头位置(使用微型吸盘) 1 在继续之前确定网络摄像头的理想位置。 2 擦拭显示器背面以清除灰尘或污垢。 3 取下微型吸盘的保护膜。 4 完全打开支架并将其放在显示器顶部, 确保前夹板的衬垫与显示器的正面接 触。 5 向下旋转后支脚,直至接触到显示器的 后部。 6 将微型吸盘牢固地按在显示器背面,以 形成良好的粘合。 注意: – 安装适配器可以移除并重新用于安装调整,而不会留 下任何残留物。 – 清洁微型吸盘时,请先用水冲洗掉碎屑,然后自然风 干以恢复强大的吸力。 简体中文...
- Page 13 (可选)不使用微型吸盘放置 向下滑动可拆卸安装适配器,将其从网络摄像头 脚上卸下。调整安装夹上的支脚,直至与设备背 面齐平,然后用力按压到位。 步骤 3: 安装适配器的拆卸和清洁 1 从安装配件上取下网络摄像头,轻轻地从一角 剥下适配器以将其取下。 2 用沾湿的手指轻轻擦去灰尘和污垢,让微型吸 盘完全风干,然后再重新安装(不要使用布或 纸巾擦干)。 3 重复显示器放置设置步骤,以更好地部署网络 摄像头。 步骤 4:将摄像头安装到安装配件上 将网络摄像头放入安装配件顶部的磁铁连接点。 听到咔嗒声,表示网络摄像头已正确安装在支架上。 简体中文...
- Page 14 步骤 5: 通过 USB-C 连接网络摄像头并开始使用 1 将 USB-C 接头插入电脑、显示器、笔记本电脑或 扩展坞的 USB-C 端口。 2. 旋转网络摄像头右侧的旋钮以打开/关闭隐私 镜头盖。 3 通过左右转动和上下倾斜来调整网络摄像头, 找到适合视频会议的取景画面。 步骤 6:成功连接 当任何视频应用程序使用网络摄像头时, LED 活动指示灯都将点亮。 LED 活动指示灯: • 视频开启/音频开启:白色 • 视频开启/音频关闭:白色 • 视频关闭/音频开启:黄色 • 视频关闭/音频关闭:无指示灯 • 固件更新:紫色呼吸灯 简体中文...
- Page 15 步骤 7:显示模式 可向下倾斜摄像头以拍摄手绘、拍摄对象和 进行中的工作,轻松将实体内容展示在视频通 话之中。有两种使用显示模式的方法: 1 如果支架是用微型吸盘固定的:用一只手 向下倾斜摄像头即可拍摄桌面,向后倾斜 即可拍摄您自己。 2 如果支架没有用微型吸盘固定:一手握住支架, 另一只手向上或向下倾斜摄像头。 简体中文...
- Page 16 步骤 8:LOGI TUNE Logi Tune 通过定期的软件和固件更新帮助改 善网络摄像头性能。 www logitech com/tune 建议您及时更新网络摄像头。为此,请下载 Logi Tune:www logitech com/tune 可调节选项 • 显示模式 • 自动取景 Brio 500 CONNECTED • 变焦调节 Show Mode • 视野 (90°/78°/65°) • 画面调节 • 自动对焦 • 禁用麦克风 RightSight • 视频和音频 LED 开/关...
- Page 17 步骤 9:(可选)连接三脚架 放置于三脚架上(需另购) 1 逆时针旋转,卸下网络摄像头底部的安装螺丝。 2 找到通用安装夹底部的 1/4 英寸三脚架安装 螺纹。 3 将三脚架拧入 1/4 英寸安装螺纹,将网络摄 像头固定于三脚架上。 4 重复显示器放置设置步骤,以更好地部署网 络摄像头。 5 请参阅步骤 5 和 6 完成网络摄像头设置。 简体中文...
- Page 18 高 x 宽 x 深: 约 25 毫米 x 约 45 8 毫米 x 约 65 1 毫米 重量:约 40 克,含可拆卸安装适配器 www.logitech.com/support/Brio500 版权所有 © 2022 罗技。罗技、Logi、Logitech 和罗技标志为罗技欧洲公司和/或其美国及其他国家/地 区附属公司的商标,并或已注册。 蓝牙 文字商标和标志为 Bluetooth SIG, Inc 所有的注册商标,罗技 ™ 对此类商标和标志的所有使用均已获得授权。USB-C 是 USB Implementers Forum 的注册商标。所有其...
- Page 19 瞭解您的產品 BRIO 500 正面檢視,含功能指示 隱私遮罩轉鈕 LED 活動指示燈 Brio 500 網路攝影機 隱私遮罩 超廣角鏡頭,90° dFOV 雙隔噪麥克風 適用於第三方底座 的 ¼-20 轉接器 磁性螺紋安裝螺釘 (可拆卸) 隨附的 USB-C 連接線 安裝套件設計概覽 磁性安裝接頭 傾斜調整鉸鏈 用於顯示器尺寸調 整的後調整鉸鏈 軟墊支架 微吸墊 微吸墊可讓安裝套件牢牢固定在顯示器上。 這個可拆卸的墊子不會留下任何殘留物, 可移除的底座轉接器 可以用水清洗。 微吸墊保護膜 (在設 定底座前移除) 繁體中文...
- Page 20 步驟 1:包裝內容 1 含 USB-C 連接線的網路攝影機 2 含可移除底座轉接器的安裝夾具 3 使用者文件 USB-C 步驟 2:決定安裝位置 擺放位置應足以進行單手攝影機調整 (使用 微吸墊) 1 在繼續之前,為您的網路攝影機決定最佳 位置。 2 擦拭顯示器背面,清除所有灰塵或污垢。 3 取下微吸墊上的保護膜。 4 完全打開底座並將其放在顯示器頂部,確保 前方夾具的墊子與顯示器正面接觸。 5 向下旋轉後支架,直到其接觸到顯示器的 背面。 6 按壓微型墊使其牢牢貼附在顯示器背面, 形成良好的黏合。 注意: – 底座轉接器可移除並可再使用於底座調整,不會留下任 何殘留物。 – 若要清潔微吸墊,請用水沖洗以去除碎屑,然後風乾以恢 復強大的吸力。 繁體中文...
- Page 21 (選用) 不使用微吸墊的擺放方式 向下滑動可拆卸底座轉接器,將其從網路攝影機支 架上取下。調整安裝夾具上的支架,直到其與裝置 背面齊平,然後用力按壓到定位。 步驟 3: 底座轉接器的移除和清潔 1 從底座上取下網路攝影機,然後從一角輕輕剝 下轉接器,將其取下。 2 在重新裝上之前,使用沾濕的手指輕輕擦拭微 吸墊上的灰塵和污垢,讓微吸墊完全風乾 (不要 用布或紙巾擦乾)。 3 重複顯示器放置設定步驟,以獲得您網路攝影 機的最佳部署方式。 步驟 4:將網路攝影機接到底座上 將網路攝影機放入底座上方的磁力接點。助益聆聽 咔噠聲,這表示網路攝影機已正確安裝在底座上。 繁體中文...
- Page 22 步驟 5: 透過 USB-C 連接網路攝影機並準 備就緒 1 將 USB-C 接頭插入電腦、顯示器、筆記型電 腦或擴展塢底座上的 USB-C 連接埠。 2. 旋 轉網路攝影機右側的轉鈕可打開/關上隱私 遮罩。 3 透過左右轉動和上下傾斜調整網路攝影機, 為您的視訊會議找到最佳取景位置。 步驟 6:成功連接 LED 活動指示燈會在任何視訊應用程式使用網路 攝影機時亮起。 LED 活動指示燈: • 視訊開啟 / 音訊開啟:白色 • 視訊開啟 / 音訊關閉:白色 • 視訊關閉 / 音訊開啟:黃燈 • 視訊關閉 / 音訊關閉:無指示燈 •...
- Page 23 步驟 7:展示模式 透過向下傾斜攝影機以展示繪圖、物體和進 行中的工作,輕鬆在視訊通話中展示實際 的物品。有兩種使用展示模式的方法: 1 如果底座使用微吸墊固定:用一隻手向下 傾斜相機以顯示您的桌面,然後向上傾斜 以顯示您自己。 2 如果底座不是使用微吸墊固定:一隻手握 住底座,另一隻手向上或向下傾斜攝影機。 繁體中文...
- Page 24 步驟 8:LOGI TUNE Logi Tune 可透過定期的軟體與韌體更新, 協助加強網路攝影機性能。 www logitech com/tune 建議您更新您的網路攝影機。若要 如此做,請到下列網址下載 Logi Tune:www logitech com/tune 可調整選項 • 展示模式 • 自動取景 Brio 500 CONNECTED • 變焦調整 Show Mode • 視野 (90°/78°/65°) • 影像調整 • 自動對焦 • 停用麥克風 RightSight • 視訊和音訊的 LED 指示燈亮起/熄滅...
- Page 25 步驟 9:(選用) 連接到三腳架 若要放置在三腳架 (未隨附) 上 1 逆時針旋轉以從網路攝影機底部取下安 裝螺釘。 2 找到位於通用安裝夾具底部上的 ¼ 英吋三腳 架安裝螺紋。 3 將三腳架轉入 ¼ 英吋螺紋中,使網路攝影機固 定在三腳架上。 4 重複顯示器放置設定步驟,以獲得您網路攝影機 的最佳部署方式。 5 請參閱步驟 5 和 6 以完成您的網路攝影機設定。 繁體中文...
- Page 26 25 公釐 (1 英吋) x 45 8 公釐 (1 8 英吋) x 65 1 公釐 (2 6 英吋) 重量:40 公克 (1 4 盎司),含可移除的底座轉接器 www.logitech.com/support/Brio500 版權所有 © 2022 羅技。羅技、Logi 和羅技標誌為 Logitech Europe S A 及/或其附屬公司在美國和其他 國家的商標或註冊商標。 藍牙 文字商標和標誌皆為 Bluetooth SIG Inc 的註冊商標,羅技已獲授權同意 使用。USB-C 是 USB Implementers Forum 的註冊商標。所有其他商標均是其各自所有人的財產。羅技...
- Page 27 제품 설명 기능 표시가 있는 BRIO 500 전면 모습 프라이버시 셔터 다이얼 LED 작동 표시등 Brio 500 웹캠 프라이버시 셔터 90° dFOV의 초광각 렌즈 듀얼 노이즈 감소 마이크 타사 마운트용 ¼-20 어댑터 마그네틱 나사산 나사 (제거 가능) 내장 USB-C 케이블 마운트 디자인 개요...
- Page 28 1단계: 내용물 1 USB-C 케이블이 내장된 웹캠 2. 탈착식 마운트 어댑터가 달린 마운트 클립 3. 사용 설명서 USB-C 2단계: 마운트 배치 결정 한 손으로 카메라를 조절할 수 있는 배치 (마이크로 흡착 패드 사용) 1 진행하기 전에 웹캠에 가장 적합한 위치를 결정해야...
- Page 29 (선택 사항) 마이크로 흡착 패드 없이 배치 탈착식 마운트 어댑터를 아래로 밀어 웹캠 다리에서 분리합니다 마운팅 클립 위에서 다리를 조절하여 장치의 후면과 같은 높이로 만든 다음 세게 눌러 고정합니다 3단계: 마운트 어댑터 분리 및 청소 1 마운트에서 웹캠을 제거하고 어댑터의 한쪽 모서리를...
- Page 30 5단계: USB-C로 웹캠 연결 및 시작하기 1 USB-C 커넥터를 컴퓨터, 모니터, 노트북 또는 도킹 스테이션의 USB-C 포트에 연결합니다 2. 웹캠 오른쪽에 있는 다이얼을 돌려 프라이버시 셔터를 열거나 닫을 수 있습니다 3 웹캠을 좌우로 돌리고 상하로 기울여 화상 회의에 가장 적합한 프레임을 찾아보세요 6단계: 연결...
- Page 31 7단계: 보여주기 모드 영상 통화 중 카메라를 기울여 스케치, 물체, 진행 중인 작업 등 다양한 물건을 쉽게 보여줄 수 있습니다 보여주기 모드 사용 방법은 두 가지착니다 1 마운트가 마이크로 흡착 패드로 고정된 경우: 한 손을 사용하여 카메라를 아래로 기울이면 바탕 화면이 표시되고 다시 뒤로 기울이면...
- Page 32 8단계: LOGI TUNE Logi Tune은 정기 소프트웨어 및 펌웨어 업데이트로 웹캠 성능 향상을 지원합니다 www logitech com/tune 웹캠을 업데이트하는 것이 좋습니다 업데이트하려면 www logitech com/tune에서 Logi Tune을 다운로드합니다 조정 가능한 옵션 • 보여주기 모드 • 오토 프레이밍 Brio 500 CONNECTED •...
- Page 33 9단계: (선택 사항) 삼각대에 부착 삼각대 장착용(미포함) 1 시계 반대 방향으로 돌려 웹캠 하단에서 장착 나사를 제거합니다 2 범용 장착 클립 하단에서 ¼인치 삼각대 나사를 찾습니다 3. 웹캠을 ¼인치 나사에 끼워 삼각대에 고정합니다 4 모니터 배치 설정 단계를 반복하여 웹캠을 배치합니다 5 5단계와...
- Page 34 25mm(1인치) x 45 8mm(1 8인치) x 65 1mm(2 6인치) 무게: 탈착식 마운트 어댑터 포함 40g(1 4oz) www.logitech.com/support/Brio500 © 2022 Logitech Logitech, Logi 및 Logitech 로고는 미국과 기타 국가에서 Logitech Europe S A 및/ 또는 그 계열사의 상표 또는 등록 상표입니다 Bluetooth 마크와 로고는 Bluetooth SIG, Inc 가 소유한...
- Page 35 MENGENAL PRODUK BRIO 500 TAMPILAN DEPAN DENGAN INDIKASI FUNGSI Tombol shutter privasi Lampu aktivitas LED Webcam Brio 500 Shutter privasi Lensa sudut ultra-lebar dengan dFOV 90° Mikrofon noise reduction ganda Adaptor ¼--20 untuk mount pihak ke-3 Sekrup mount ulir magnetik (Dapat...
- Page 36 LANGKAH 1: ISI KEMASAN 1 Webcam dengan kabel USB-C terpasang 2 Mount clip dengan mount adaptor yang dapat dilepas 3 Dokumentasi pengguna USB-C LANGKAH 2: TENTUKAN PENEMPATAN MOUNT Penempatan yang memungkinkan penyesuaian kamera dengan satu tangan (menggunakan micro- suction pad) 1 Tentukan penempatan terbaik untuk webcam Anda sebelum melanjutkan 2 Seka bagian belakang monitor untuk...
- Page 37 (Opsional) Penempatan tanpa micro-suction pad Geser mount adaptor yang dapat dilepas ini ke bawah untuk melepaskannya dari kaki webcam Sesuaikan kaki pada mounting clip hingga sejajar dengan bagian belakang perangkat Anda lalu tekan dengan kuat LANGKAH 3: MELEPASKAN DAN MEMBERSIHKAN MOUNT ADAPTOR 1 Lepaskan webcam dari mount dan dengan lembut kelupas adaptor dari salah satu...
- Page 38 LANGKAH 5: HUBUNGKAN WEBCAM VIA USB-C & MULAI 1 Colokkan konektor USB-C ke port USB-C di komputer, monitor, laptop, atau docking station Anda 2 Putar tombol di sisi kanan webcam untuk membuka/menutup shutter privasi 3 Sesuaikan posisi webcam dengan menggerakkannya ke samping lalu memiringkannya ke atas dan ke bawah guna menemukan framing terbaik untuk video meeting Anda...
- Page 39 LANGKAH 7: SHOW MODE Dengan mudah menampilkan benda fisik dalam video call dengan memiringkan kamera ke bawah untuk menampilkan sketsa, objek, dan pekerjaan yang sedang dikerjakan Ada dua cara untuk menggunakan Show Mode: 1 Jika mount sudah terpasang kokoh dengan micro-suction pad: Dengan menggunakan satu tangan, miringkan kamera ke bawah untuk menampilkan desktop Anda,...
- Page 40 Logi Tune membantu meningkatkan kinerja webcam Anda dengan pembaruan software www.logitech.com/tune dan firmware secara berkala Disarankan untuk memperbarui webcam Anda Untuk melakukan hal ini, download Logi Tune dari www logitech com/tune OPSI YANG DAPAT DISESUAIKAN • Show Mode • Auto-framing Brio 500 CONNECTED •...
- Page 41 LANGKAH 9: (OPSIONAL) PASANG DI TRIPOD Untuk penempatan di atas tripod (tidak disertakan) 1 Putar berlawanan arah jarum jam untuk melepaskan sekrup pemasangan dari bagian bawah webcam 2 Cari ulir tripod ¼ inci di bagian bawah universal mounting clip 3 Pasangkan webcam di tripod Anda dengan memutarnya pada ulir ¼...
- Page 42 © 2022 Logitech Logitech, Logi, dan logo Logitech adalah merek dagang atau merek dagang terdaftar Logitech Europe S A dan/atau afiliasinya di AS dan negara lainnya Tanda kata dan logo Bluetooth adalah merek dagang terdaftar yang dimiliki oleh Bluetooth SIG, Inc dan setiap ®...
Need help?
Do you have a question about the BRIO 500 and is the answer not in the manual?
Questions and answers