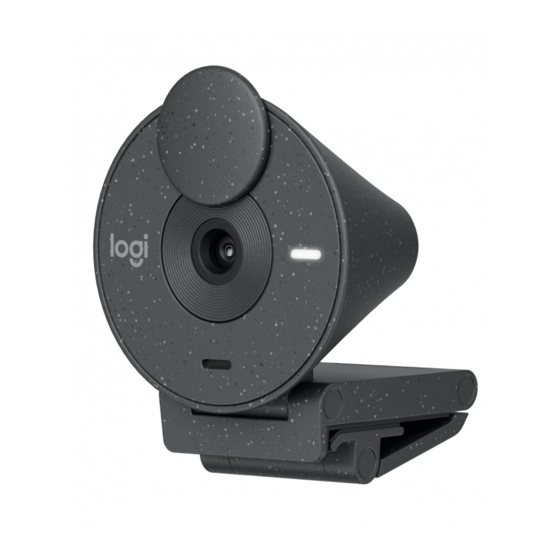
Logitech BRIO Setup Manual
1080p webcam
Hide thumbs
Also See for BRIO:
- User manual ,
- Setup manual (212 pages) ,
- Complete setup manual (176 pages)
Advertisement
Available languages
Available languages
Advertisement
Table of Contents

Summary of Contents for Logitech BRIO
- Page 1 BRIO 1080P WEBCAM Setup Guide Guide d’installation...
- Page 2 CONTENTS English Français...
-
Page 3: Know Your Product
KNOW YOUR PRODUCT Privacy shutter Camera lens Led indicator light Rear hinge (primary mounting hinge) Noise-reducing Front hinge (tilt adjustment) Padded foot Foot hinge (monitor angle adjustment) USB-C connector 3 English... -
Page 4: What's In The Box
1 Brio 1080p Webcam with attached USB-C cable 2 User documentation USB-C OPEN THE MOUNT Open the mounting arm PLACE ON MONITOR Place the Brio 1080p Webcam on top of your monitor and ensure that the front tab of the mount is snug against the front of your screen 4 English... - Page 5 Please note that you may need to adjust the angle of the “foot hinge” to fit your monitor's shape ADJUST THE ANGLE Adjust the angle of the Brio 1080p Webcam by tilting it forwards or backwards PLUG DIRECTLY INTO COMPUTER Plug the attached USB-C connector into the corresponding port on your computer If possible, we recommend plugging...
- Page 6 © 2023 Logitech Logitech, Logi and the Logitech logo are trademarks or registered trademarks of Logitech Europe S A and/or its affiliates in the U S and other countries USB-C and all other trademarks are the property of their respective owners Logitech assumes no responsibility for any errors that may appear in this manual Information contained herein is subject to change...
-
Page 7: Présentation Du Produit
PRÉSENTATION DU PRODUIT Volet de confidentialité Objectif Témoin lumineux Charnière arrière (charnière de montage principale) Micro anti-bruit Charnière avant (réglage de l'inclinaison) Pied rembourré Charnière de pied (réglage de l'angle de l'écran) Connecteur USB-C 7 Français... - Page 8 USB-C fourni 2 Documentation utilisateur USB-C OUVRIR LA FIXATION Ouvrez le bras de fixation PLACER SUR L'ÉCRAN Placez la webcam Brio 1080p sur votre écran et assurez-vous que la languette avant de la fixation est contre le devant de votre écran 8 Français...
-
Page 9: Régler L'angle
Vous devrez peut-être ajuster l'angle de la charnière de pied pour l'adapter à la forme de votre écran RÉGLER L'ANGLE Ajustez l'angle de la webcam Brio 1080p en l’inclinant en avant ou en arrière BRANCHER DIRECTEMENT SUR L'ORDINATEUR Branchez le connecteur USB-C fourni dans... - Page 10 © 2023 Logitech Logitech, Logi et le logo Logitech sont des marques commerciales ou déposées de Logitech Europe S A et/ou de ses sociétés affiliées aux États-Unis et dans d’autres pays USB-C et toutes les autres marques sont la propriété exclusive de leurs détenteurs respectifs Logitech décline toute responsabilité...


Need help?
Do you have a question about the BRIO and is the answer not in the manual?
Questions and answers
How do I test my Brio 1080p webcam after installation. I need to make sure it is working