Table of Contents
Advertisement
Quick Links
Thank you very much for purchasing PIAA product. Please read this instruction manual
thoroughly for proper use of the product. After completing your installation, keep this
manual for future reference.
The ● marks indicated in this manual are cautionary points related to the installation of the product.
To ensure safe and secure installation of the product, please follow these points closely.
To user
To shop owners installing the product ... After installation of the product, make sure the customer is provided
Please read the cautionary points before installation to ensure safe utilization of the product.
● The lamp becomes hot when turned on. When parking your car near fl ammable items , turn off the lamp as it may catch fi re.
● Do not look directly into the light . Doing so may cause eye irritation or visual impairment.
● The lamp and the switch harness are intended for motorized vehicle use only. Do not use for any other purpose.
● This lamp is intended for use in rain (day or night), during foggy or snowy conditions where visibility is hampered.
Do not use during normal driving conditions.
● Do not operate the switch while driving, unless allowed by local regulation.
● If the lamp is kept on when the engine is off , the lamp will consume electricity from the battery.
● Make sure the lamp is installed securely before driving the vehicle. If a problem is found, immediately stop the vehicle and
make necessary repair.
● Check for any loose screws that holds the lamp in place before driving. If you fi nd any loose screws or bolts, tighten them
securely. If you notice a loose part while driving, inspect the section immediately and make necessary adjustments.
● Avoid repeatedly turning the lamp on and off as it may reduce the overall life of the LED.
● Some vehicles produce a high voltage electric charge when the engine is started. To avoid loading surge voltage to the
lamp, turn off the lamp when starting engine.
● Do not disassemble the lamp or the switch harness as it may cause malfunction.
● If the lamp and/or the switch harness is removed and set aside for safekeeping, clean all dust or grime and store in a
place free of moisture.
● If the lens is cracked or damaged in any way, verify whether there is any damage to the harness. If there is any damage to
the cord covering, immediately replace the harness unit.
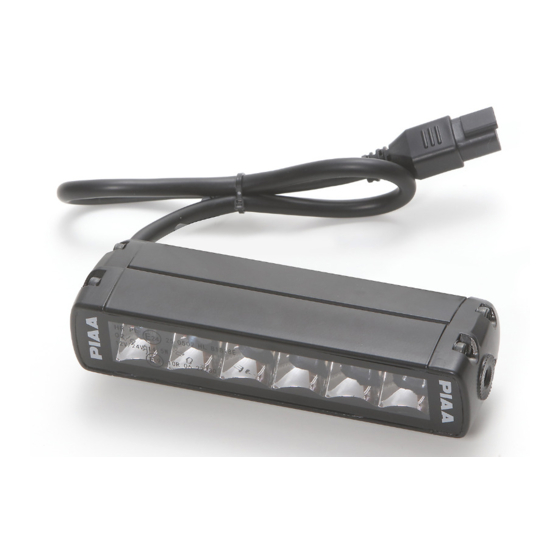
V-RF Series
Installation Instructions
... Please keep this manual and a receipt with the name of the shop where
purchased. When giving this product to a third party, always include
this manual together with the product.
with this owner's manual.
-1-
PKI-0084
Advertisement
Table of Contents

Related Manuals for Piaa V-RF Series


Summary of Contents for Piaa V-RF Series
- Page 1 PKI-0084 V-RF Series Installation Instructions Thank you very much for purchasing PIAA product. Please read this instruction manual thoroughly for proper use of the product. After completing your installation, keep this manual for future reference. The ● marks indicated in this manual are cautionary points related to the installation of the product.
- Page 2 Please read the installation procedures thoroughly beforehand. ● In order for the lamp to safely perform at it’s full potential, use the relay harnesses that comes with your PIAA light kit. ● All work procedures should be carried out in a location with adequate space. Set the vehicle’s transmission to parking position.
- Page 3 PKI-0084 ● Before connecting the lamp to the battery, verify the wiring arrangement. ● When connecting the battery terminal and or other el ectrical units, do not mistake the (-) and (+) terminals. Always start with the (+) terminal. ● After all wiring is complete, confi rm that it works properly. If it fails to activate, refer to page 7, “Troubleshooting” section of this manual.
- Page 4 PKI-0084 Lamp installation When using the side bracket For lamp installation, a hole with a diameter of 8mm is required. Make necessary preparation such as installation of lamp bracket. 8mm Lock Washer ① 8mm allen head bolts Side mounting ② bracket(R) 8mm Socket head bolts Side mounting bracket(L)
- Page 5 PKI-0084 When using the bottom bracket For lamp installation, a hole with a diameter of 8mm is required. Make necessary preparation such as installation of lamp bracket. Lamp harness 6mm Socket head bolts ② 6mm Socket head bolts ③ ④ Protection spacers Bottom mounting brackets ⑤...
- Page 6 PKI-0084 Relay Harness Installation Sequence The numbers shown in the fi gures below indicate the sequence of installation. Remove the (+) terminal Remove the (-) terminal from the battery from the battery. Take the (+) terminal First ground the terminal cord (white) and attach then take the (-) cord it to the (+) terminal and...
- Page 7 PKI-0084 DRIVING Light lamp aiming Typically, driving lights are mounted above the front bumper about 30 inches(76cm) from the ground to provide extra high beam illumination. Driving lights can be mounted below the bumper, although they will not be as eff ective because the light will hit the ground sooner and reduce the range of the light.
- Page 8 PIAA product. PIAA reserves the right to change the design of its products without any obligation to modify any previous product. This warranty gives you specifi c legal rights. You may also have other rights that vary from state to state.
Need help?
Do you have a question about the V-RF Series and is the answer not in the manual?
Questions and answers