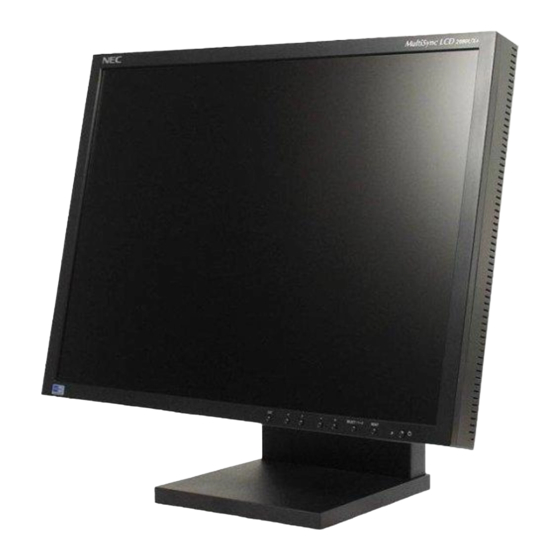
NEC MultiSync LCD2080UX User Manual
Nec multisync lcd2080ux: users manual
Hide thumbs
Also See for MultiSync LCD2080UX:
- Service manual (459 pages) ,
- User manual (122 pages) ,
- Dimensional drawing (1 page)
Table of Contents
Advertisement
Available languages
Available languages
Quick Links
Advertisement
Table of Contents

Subscribe to Our Youtube Channel
Related Manuals for NEC MultiSync LCD2080UX


Summary of Contents for NEC MultiSync LCD2080UX
- Page 1 ® MultiSync LCD2080UX...
-
Page 2: Table Of Contents
Index Warning ... 1 Contents ... 2 Quick Start ... 3 Controls ... 8 Recommended Use ... 12 Specifications ... 14 Features ... 15 Troubleshooting ... 17 References ...18 Limited Warranty ... 19 TCO’99 ... 20 Avertissement ... 23 Contenu ... 24 Mise en marche rapide ... -
Page 3: Canadian Department Of Communications Compliance Statement
CAN/CSA FCC Information 1. Use the attached specified cables with the MultiSync LCD2080UX to interfere with radio and television reception. (1) Please use the supplied power cord or equivalent to ensure FCC compliance. (2) Please use the supplied shielded video signal cable, 15-pin mini D-SUB to DVI-A cable or DVI-D to DVI-D cable. -
Page 4: Contents
DVI-A Cable Cover MultiSync ® LCD2080UX User’s Manual * Remember to save your original box and packing material to transport or ship the monitor. LCD2080UXmanual0605.p65 LCD monitor box* should contain the ® CD-ROM DVI-D to DVI-D cable 6/5/03, 9:01 AM... -
Page 5: Quick Start
NOTE: If you use this monitor at AC125-240V, please refer to Recommended Use section of this manual for proper selection of AC power cord. 5. The Vacation Switch on the left side of the monitor must be turned on. Turn on the monitor with the front power button (Figure D.1) and the computer. -
Page 6: Raise And Lower Monitor Screen
Raise and Lower Monitor Screen The monitor may be raised or lowered in either Portrait or Landscape mode. To raise or lower screen, place hands on each side of the monitor and lift or lower to the desired height (Figure RL.1). -
Page 7: Screen Rotation
To raise the screen, place hands on each side of the monitor and lift up to the highest position (Figure RL.1). To rotate screen, place hands on each side of the monitor screen and turn clockwise from Landscape to Portrait or counter-clockwise from Portrait to Landscape (Figure R.1). -
Page 8: Remove Monitor Stand For Mounting
NOTE: Handle with care when removing monitor stand. Caution: Use the original screws (4 pcs) when mounting to avoid damage to the monitor and stand. To fulfil the safety requirements the monitor must be mounted to an arm which guaranties the necessary stability under consideration of the weight of the monitor. -
Page 9: Long Cable Compensation Adjustment
*1: Black level, RGB sharpness, RGB delay and RGB position are adjusted using Long Cable Software (included). To enter the Advanced OSM • Turn off your monitor. • Turn on your monitor by pressing the “POWER” and “SELECT” buttons simultaneously to open the Advanced OSM menu. To exit the Advanced OSM •... -
Page 10: Controls
Controls ® (On-Screen Manager) control buttons on the front of the monitor function as follows: To access OSM menu, press any of the control buttons ( To change signal input, press the SELECT button. NOTE: OSM must be closed in order to change signal input. - Page 11 Controls –continued width of the picture. Use left/Right Menu to center the image on the screen. If the H.Size is wrongly calibrated, the result would look like on the left drawing. The image should be homogeneous. Wrong FINE (Analog input only) Improves focus, clarity and image stability by increasing or decreasing this setting.
- Page 12 When current video input signal is not present, then the monitor searches for a video signal from the other video input port. If the video signal is present in the other port, then the monitor switches the video source input port to the new found video source automatically. The monitor will not look for other video signals while the current video source is present.
- Page 13 Controls –continued OSM Turn Off submenu, you can select how long the monitor waits after the last touch of a button to shut off the OSM control menu. The preset choices are 10, 20, 30, 45, 60 and 120 seconds.
-
Page 14: Recommended Use
• Do not place any heavy objects on the power cord. Damage to the cord may cause shock or fire. • Do not place this product on a sloping or unstable cart, stand or table, as the monitor may fall, causing serious damage to the monitor. - Page 15 • Rest your eyes periodically by focusing on an object at least 20 feet away. Blink often. • Position the monitor at a 90° angle to windows and other light sources to minimize glare and reflections. Adjust the monitor tilt so that ceiling lights do not reflect on your screen.
-
Page 16: Specifications
1024 x 768* at 60 Hz to 85 Hz 1152 x 870* at 75Hz NEC-Mitsubishi Electronics Display cites 1280 x 1024* at 60 Hz to 85 Hz recommended resolution for optimal 1600 x 1200 at 60 Hz ... display performance. -
Page 17: Features
DFP and other DVI-based digital connectors such as DVI and P&D. P&D (Plug and Display): The VESA standard for digital flat panel monitor interfaces. It is more robust than DFP since it allows for other options off a signal connector (options like USB, analog video and IEEE-1394-995). - Page 18 ® (Intelligent Power Manager) System: Provides innovative power-saving methods that allow the monitor to shift to a lower power consumption level when on but not in use, saving two-thirds of your monitor energy costs, reducing emissions and lowering the air conditioning costs of the workplace.
-
Page 19: Troubleshooting
Unlike CRT monitors, LCD monitors’ image persistence is not permanent, but constant images being displayed for a long period of time should be avoided. To alleviate image persistence, turn off the monitor for as long as the previous image was displayed. For example, if an image was on the monitor for one hour and a residual image remains, the monitor should be turned off for one hour to erase the image. -
Page 20: References
References NEC-Mitsubishi Monitor Customer Service & Support Customer Service and Technical Support: (800)632-4662 Parts and Accessories/Macintosh Cable Adapter: Customer Service Policies & Processes: http://www.necmitsubishi.com/ Online Technical Support Knowledge Base: Customer Service & Technical Support Email: Sales and Product Information Sales Information Line:... -
Page 21: Limited Warranty
Product may vary. Therefore, suitability of a Product for a specific purpose or application must be determined by consumer and is not warranted by NMD-A. For the name of your nearest authorized NEC-Mitsubishi Electronics Display service facility, contact NEC-Mitsubishi Electronics Display of America at 1-800-632-4662. LCD2080UXmanual0605.p65... -
Page 22: Tco'99
TCO’99 Congratulations! You have just purchased a TCO’99 approved and labelled product!Your choice has provided you with a product developed for professional use. Your purchase has also contributed to reducing the burden on the environment and also to the further development of environmentally adapted electronics products. -
Page 23: Cfcs (Freons)
TCO’99 –continued accumulative* processes. Flame retardants have been found in human blood and researchers fear that disturbances in foetus development may occur. TCO’99 demand requires that plastic components weighing more than 25 grams must not contain flame retardants with organically bound chlorine and bromine. Flame retardants are allowed in the printed circuit boards since no substitutes are available. -
Page 24: Declaration Of The Manufacturer
Declaration of the Manufacturer We hereby certify that the color monitor MultiSync Council Directive 73/23/EEC: Council Directive 89/336/EEC: and marked with NEC-Mitsubishi Electric Visual LCD2080UXmanual0605.p65 ® LCD2080UX (L202EV) is in compliance with – EN 60950 – EN 55022 – EN 61000-3-2 –... -
Page 25: Avertissement
CAN/CSA C22.2 No. 60950. Informations FCC 1. Utiliser les câbles spécifiés fournis avec les moniteur couleur MultiSync LCD2080UX provoquer d'interférences avec la réception radio et télévision. (1) Prière d'utiliser le câble d'alimentation fourni ou équivalent pour assurer la conformité FCC. -
Page 26: Contenu
Contenu La boîte* de votre nouveau moniteur NEC MultiSync • Moniteur MultiSync LCD 2080UX™ • Cordon d'alimentation • Câble pour le signal vidéo ( Mini D-SUB mâle 15 broches vers DVI-A) • Câble pour le signal vidéo ( Câble DVI-D vers DVI-D) •... -
Page 27: Mise En Marche Rapide
Macintosh (Figure B.1). NOTA : Certains systèmes Macintosh ne nécessitent pas un adaptateur de câble Macintosh. NOTA : Pour obtenir un adaptateur de câble Macintosh Multisync appeler NEC-Mitsubishi Electronics Display of America, Inc. au (800) 632-4662. 3. Branchez le câble de signal DVI au connecteur situé à l’arrière du moniteur. Placez le câble de signal vidéo (Figure C.1). - Page 28 Mise en marche rapide Fixation de produit NEC en option. N’utilisez pas ce connecteur sauf indication contraire. Levez et baissez l’écran du moniteur Le moniteur peut être levé ou baissé en mode Portrait ou Paysage. Pour lever ou baisser l’écran, placez les mains de chaque côté du moniteur et positionnez-le à la hauteur de votre choix.
-
Page 29: Rotation De L'écran
Mise en marche rapide Rotation de l’écran Avant de tourner l’écran, celui-ci doit être levé au niveau maximum afin d’éviter tout choc contre le bureau ou de pincer vos doigts. Pour lever l’écran, placez les mains de chaque côté du moniteur et levez-le jusqu’à la hauteur maximum (Figure RL.1). Pour tourner l’écran, placez les mains de chaque côté... - Page 30 Mise en marche rapide Enlever le support du moniteur pour le montage Pour préparer le moniteur à différents types de montage : 1. Déconnectez tous les câbles. 2. Placez les mains de chaque côté du moniteur en le soulevant dans sa position la plus haute. 3.
-
Page 31: Réglage De La Compensation De Câble Long
Mise en marche rapide Réglage de la compensation de câble long Il est nécessaire de suivre les étapes suivantes pour effectuer le réglage de compensation de câble long : Ajustez le niveau de réglage automatique (Auto SW) sur DÉTAIL dans le menu avancé... -
Page 32: Commandes
Commandes Les boutons de réglage OSM situés sur l’avant du moniteur fournissent les fonctions suivantes : Pour accéder au menu OSM, appuyez sur une des touches de commande , –, +). À transformer signale de l’entrée, presser le SELECT bouton. NOTA: Menu de OSM doit être fermé... - Page 33 Commandes (suite) la largeur est mal calibrée, le résultat sera semblable à celui du dessin ci-contre. L'image doit être homogène. Incorrect FIN (Entrée analogique seulement) Améliore le point, la clarté et la stabilité de l’image en augmentant ou diminuant ce paramètre.
- Page 34 Commandes (suite) 1ERE DETECTION : L’entrée vidéo doit être commutée en mode « 1ERE DETECTION ». S’il n’existe pas de signal d’entrée vidéo, le moniteur recherche un signal vidéo sur l’autre port d’entrée vidéo. Si le signal vidéo est localisé sur l'autre port, le moniteur bascule automatiquement le port d’entrée vidéo vers la nouvelle source vidéo détectée.
- Page 35 Commandes contraste. Lorsque le menu est activé, vous pouvez régler la luminosité avec Lorsque le menu est désactivé, utilisez les touches + ou - pour régler le contraste. PRÉRÉGLAGE USINE : En choisissant “Factory Preset” vous permet de remettre la plupart des commandes d’OSM.
-
Page 36: Usage Recommandé
être mis hors tension pendant une heure pour effacer l’image. NOTA: Comme pour tous les équipements d’affichage personnels, NEC-Mitsubishi Electronics Display recommande l’utilisation d’un économiseur d’écran mobile à des intervalles réguliers, à chaque fois que l’écran est en veille, ou d’éteindre le moniteur lorsqu’il n’est pas utilisé. - Page 37 Usage recommandé LA MODIFICATION DE LA POSITION ET DU RÉGLAGE DU MONITEUR PEUT RÉDUIRE LA FATIGUE DES YEUX, DES ÉPAULES ET DE LA NUQUE. OBSERVER LES DIRECTIVES CI-APRÈS LORS DU POSITIONNEMENT • Pour une performance optimale, laissez le moniteur se réchauffer pendant 20 minutes. •...
-
Page 38: Fiche Technique
832 x 624* 75 Hz 1024 x 768* 60 Hz 85 Hz à 1152 x 870* 75Hz NEC-Mitsubishi Electronics Display 1280 x 1024* 60 Hz à 85 Hz recommande une résolution pour des 1600 x 1200 60 Hz ... performances d'affichage optimales et couleurs... -
Page 39: Fonctions
Fonctions : À double entrée permettant des entrées analogique et numérique à partir du Technologie ambix ® même connecteur (DVI-I) ainsi que le support de matériel analogique existant à partir d’un connecteur VGA à 15 broches conventionnel. Assure la compatibilité avec la technologie MultiSync traditionnelle ®... - Page 40 La capacité de pivotement ainsi que le support réglage ajoute de la souplesse à vos modes de visionnement préférés. OSM Display Screen Copyright 2003 par NEC-Mitsubishi Electronics Display of America, Inc. LCD2080UXmanual0605.p65 6/5/03, 9:02 AM...
-
Page 41: Dépannage
éteignant l’écran pour pourvu une image fut affichée by afficher la même image dans les couleurs complémentaires ou. NOTA : Tout comme dans le cas des écrans personnels, NEC-Mitsubishi Electronics Display recommande l’utilisation d’un économiseur d’énergie à intervalles réguliers lorsque l’écran n’est pas utilisé. -
Page 42: Références
Références Service à la clientèle et assistance technique du moniteur NEC-Mitsubishi Service à la clientèle et assistance technique: (800)632-4662 Télécopieur: (800) 695-3044 Pièces et accessoires/adaptateur de câble Macintosh: Politiques et processus du service à la clientèle: Base de connaissance de l’assistance technique en lign: Adresse électronique du service à... -
Page 43: Garantie Limitée
à l ’autre. Par conséquent, l’adéquation d’un produit à un besoin ou une applica- tion spécifique doit être déterminée par le consommateur et n’est pas garantie par NMD-A. Pour connaître le nom du centre de service technique agréé NEC-Mitsubishi Electronics Display le plus proche, appeler NEC-Mitsubishi Electronics Display of America au 1-800-632-4662. -
Page 44: Tco'99
TCO’99 (C’est une traduction de portion Anglaise de TCO’99.) Félicitations! Vous avez acheté un produit qui répond à la directive TCO’99. En choisissant ce produit conçu pour une utilisation professionnelle, vous contribuez aussi à la réduction des effets nuisibles sur l’environnement et aussi au développement continu de produits électroniques respectueux de l’environnement. - Page 45 TCO’99 (suite) 25 grammes ne contiennent pas de retardateurs de flame contenant du chlore ou du brome organiquement liés. Les retardateurs de flame sont autorisés dans les cartes à circuits imprimés étant donné qu’aucun substitut n’est encore disponible. Plomb** Le plomb peut être présent dans les tubes cathodiques, les écrans, les soudures et les condensateurs. Le plomb s’attaque au système nerveux et, à...
-
Page 46: Déclaration Du Fabricant
73/23/EEC du Counseil: – EN 60950 la directive 89/336/EEC du Counseil: – EN 55022 – EN 61000-3-2 – EN 61000-3-3 – EN 55024 et porte le sigle NEC-Mitsubishi Electric Visual LCD2080UXmanual0605.p65 moniteurs ® LCD2080UX (L202EV) sont conformes à Systems Corporation 4-13-23, Shibaura,... -
Page 47: Appendix
"Size" "Fine" "Position" SIMPLE FULL DETAIL *1: Automatically adjusts the monitor to optimal settings upon initial setup at 800 x 600 or higher resolution. *2: Black level, Peaking, RGB sharpness, RGB delay and RGB position. LCD2080UXmanual0605.p65 " or " " to highlight another tag. - Page 48 Appendix –continued Tag4 Auto Automatically adjusts the Image Position and H. Size settings and Fine (Analog input only) settings. Press "SELECT" to activate Auto Adjustment. H. Position Controls Horizontal Image Position within the display area of the LCD. Press "+" or "-" to adjust. V.
- Page 49 The OSM control menu will stay on as long as it is in use. In the OSM Turn Off submenu, you can select how long the monitor waits after the last touch of a button to close the OSM control menu. The preset choices are 10, 20, 30, 45, 60 and 120 seconds.
- Page 50 Increases or decreases the current resolution. Press "SELECT" to move the adjustment mode, and press "+" or "-" to adjust. Monitor Info Indicates the model and serial numbers of your monitor. LCD2080UXmanual0605.p65 6/5/03, 9:02 AM...
-
Page 51: Déclaration De Conformité
à condition que ces droits n'ont pas été directement délivrés à d'autres. Les produits de NEC-Mitsubishi Electronics Display of America dont il est question dans ce document sont garantis conformément aux termes de la déclaration de garantie limitée accompagnant chaque produit. Cependant, les performances réelles de chaque produit dépendent de facteurs tels que la configuration du système, les données du client... -
Page 52: Declaration Of Conformity
PROPRIETARY NOTICE AND LIABILITY DISCLAIMER The information disclosed in this document, including all designs and related materials, is the valuable property of NEC- Mitsubishi Electronics Display of America and/or its licensors, as appropriate, reserve all patent, copyright and other proprietary rights to this document, including all design, manufacturing, reproduction, use and sales rights thereto, except to the extent said rights are expressly granted to others.
Need help?
Do you have a question about the MultiSync LCD2080UX and is the answer not in the manual?
Questions and answers