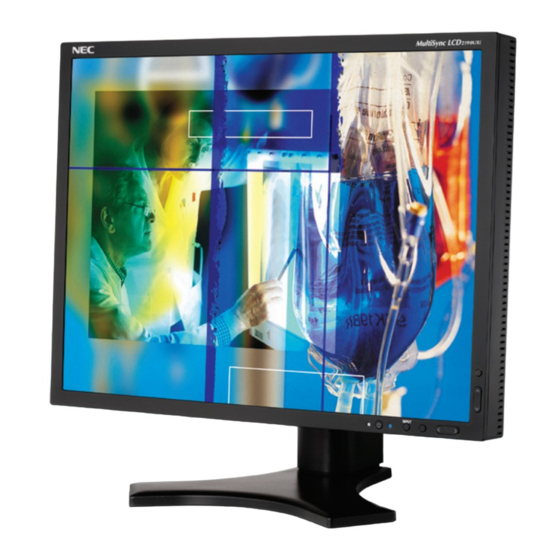
NEC MultiSync LCD2090UXi User Manual
Hide thumbs
Also See for MultiSync LCD2090UXi:
- User manual (29 pages) ,
- Specifications (6 pages) ,
- Brochure & specs (6 pages)

Related Manuals for NEC MultiSync LCD2090UXi


Summary of Contents for NEC MultiSync LCD2090UXi
- Page 1 MultiSync LCD2090UXi SpectraView 2090 User’s Manual Bedienerhandbuch Manual del usuario Manuel Utilisateur Manuale utente Gebruikershandleiding 00Cover_all.p65 4/5/06, 10:47...
-
Page 2: Canadian Department Of Communications Compliance Statement
This device complies with Part 15 of FCC Rules. Operation is subject to the following two conditions. (1) This device may not cause harmful interference, and (2) this device must accept any interference received, including interference that may cause undesired operation. U.S. Responsible Party: NEC Display Solutions of America, Inc. Address: 500 Park Blvd, Suite 1100 Itasca, Illinois 60143 Tel. - Page 3 TCO’03 Congratulations! The display you have just purchased carries the TCO’03 Displays label. This means that your display is designed, manufactured and tested according to some of the strictest quality and environmental requirements in the world. This makes for a high performance product, designed with the user in focus that also minimizes the impact on our natural environment.
- Page 4 Manufacturer’s Recycling and Energy Information NEC DISPLAY SOLUTIONS is strongly committed to environmental protection and sees recycling as one of the company’s top priorities in trying to minimize the burden placed on the environment. We are engaged in developing environmentally- friendly products, and always strive to help define and comply with the latest independent standards from agencies such as ISO (International Organisation for Standardization) and TCO (Swedish Trades Union).
-
Page 5: Table Of Contents
Index Warning, Caution ....... English-1 Avvertenza, Attenzione ...... Italiano-1 Declaration ......... English-1 Dichiarazione ........Italiano-1 Contents ..........English-2 Indice ..........Italiano-2 Quick Start ......... English-3 Guida rapida ........Italiano-3 Controls ..........English-7 Comandi ..........Italiano-7 Recommended use ......English-12 Raccomandazioni per l’uso ....Italiano-12 Waarschuwing, Let op! .... - Page 6 00Cover_all.p65 4/5/06, 10:47...
- Page 7 English Deutsch Español Français Italiano Nederlands 01b_XChapterOpener 4/5/06, 10:47...
- Page 8 01b_XChapterOpener 4/5/06, 10:47...
-
Page 9: Declaration
U.S. registered trademark. NERGY OmniColor is a registered trademark of NEC Display Solutions Europe GmbH in the countries of EU and Switzerland. ErgoDesign is a registered trademark of NEC Display Solutions, Ltd. in Austria, Benelux, Denmark, France, Germany, Italy, Norway, Spain, Sweden, U.K. -
Page 10: Contents
Contents Your new NEC monitor box* should contain the following: • MultiSync LCD2090UXi or SpectraView 2090 monitor with tilt/swivel/pivot/height adjust stand • Power Cord (European Continental) • Power Cord (UK: Black model only) • Video Signal Cable (15-pin mini D-SUB male to DVI-A) •... -
Page 11: Quick Start
Please check Tilt, Rise and Lower monitor screen and screen rotation when you manage cables. 30˚ Tilt Highest Stand Position Power cord DVI-I DVI-D DC-OUT D-SUB Figure C.1 Figure C.2 NEC optional product attachment. Do not use this connector unless specified. English-3 01_English 4/5/06, 10:47... - Page 12 Figure C.3 Figure C.4 7. Hold all cables firmly and place the cable cover onto the stand (Figure D.1). To remove the cable cover, lift the cover off as shown in Figure D.2. 8. Connect one end of the power cord to the AC inlet on the back of the monitor and the other end to the power outlet. NOTE: Please refer to Caution section of this manual for proper selection of AC power cord.
-
Page 13: Raise And Lower Monitor Screen
Raise and Lower Monitor Screen The monitor may be raised or lowered in either Portrait or Landscape mode. To raise or lower screen, place hands on each side of the monitor and lift or lower to the desired height (Figure RL.1). NOTE: Handle with care when raising or lowering the monitor screen. -
Page 14: Remove Monitor Stand For Mounting
Remove Monitor Stand for Mounting To prepare the monitor for alternate mounting purposes: 1. Disconnect all cables. 2. Place hands on each side of the monitor and lift up to the highest position. 3. Place monitor face down on a non-abrasive surface (Figure S.1). Figure S.1 4. -
Page 15: Controls
Controls OSM (On-Screen Manager) control buttons on the front of the monitor function as follows: To access OSM menu, press any of the control buttons (EXIT, LEFT, RIGHT, UP, DOWN). To change signal input, press the SELECT button. NOTE: OSM must be closed in order to change signal input. Landscape Portrait 1 AMBIBRIGHT SENSOR... -
Page 16: Eco Mode
ECO MODE Decreases the amount of power consumed by reducing the brightness level. 1: Decreases the brightness by 25%. 2: Decreases the brightness by 50%. CUSTOM: Decreases the brightness level as determined by the user. Refer to the Advanced OSM menu for custom setting instructions. AUTO BRIGHTNESS There are three settings for Auto Brightness. -
Page 17: Color Control Systems
AUTO FINE (Analog input only) This function automatically and periodically adjusts the “FINE” setting for change in signal condition. This function adjusts approximately every 33 minutes. EXPANSION Sets the zoom method. FULL: The image is expanded to 1600 x 1200, regardless of the resolution. ASPECT: The image is expanded without changing the aspect ratio. -
Page 18: Off Timer
OFF TIMER Monitor will automatically power-down when the end user has selected a pre-determined amount of time. Before powering off, a message will appear on the screen asking the user if they want to delay the turn off time by 60 minutes. Press any OSM button to delay the turn off time. The Intelligent Power Manager allows the monitor to enter into a power saving mode after a period of inactivity. -
Page 19: Hot Key
RESOLUTION NOTIFIER This optimal resolution is 1600 x 1200. If ON is selected, a message will appear on the screen after 30 seconds, notifying you that the resolution is not at 1600 x 1200. HOT KEY You can adjust the brightness and contrast directly. When this function is set to ON, you can adjust the brightness with “Left”... -
Page 20: Recommended Use
NOTE: As with all personal display devices, NEC DISPLAY SOLUTIONS recommends using a moving screen saver at regular intervals whenever the screen is idle or turning off the monitor when not in use. - Page 21 CORRECT PLACEMENT AND ADJUSTMENT OF THE MONITOR CAN REDUCE EYE, SHOULDER AND NECK FATIGUE. CHECK THE FOLLOWING WHEN YOU POSITION THE MONITOR: • For optimum performance, allow 20 minutes for warm-up. • Adjust the monitor height so that the top of the screen is at or slightly below eye level. Your eyes should look slightly downward when viewing the middle of the screen.
- Page 22 English-14 01_English 4/5/06, 10:47...
- Page 23 NERGY NERGY NERGY NERGY 02_Czech 4/5/06, 10:47...
- Page 24 PÛvodní karton a balicí materiál si uschovejte pro pfiípadnou pfiepravu monitoru. 02_Czech 4/5/06, 10:47...
- Page 25 ˚ 02_Czech 4/5/06, 10:47...
- Page 26 02_Czech 4/5/06, 10:48...
- Page 27 02_Czech 4/5/06, 10:48...
- Page 28 02_Czech 4/5/06, 10:48...
- Page 29 02_Czech 4/5/06, 10:48...
- Page 30 02_Czech 4/5/06, 10:48...
- Page 31 02_Czech 4/5/06, 10:48...
- Page 32 02_Czech 4/5/06, 10:48...
- Page 33 02_Czech 4/5/06, 10:48...
- Page 34 02_Czech 4/5/06, 10:48...
- Page 35 02_Czech 4/5/06, 10:48...
- Page 36 02_Czech 4/5/06, 10:48...
-
Page 37: Erklärung
Marke in den USA. NERGY OmniColor ist eine eingetragene Marke der NEC Display Solutions Europe GmbH in den Ländern der EU und der Schweiz. ErgoDesign ist eine eingetragene Marke der NEC Display Solutions, Ltd. in Österreich, Benelux, Dänemark, Frankreich, Deutschland, Italien, Norwegen, Spanien, Schweden und Großbritannien. -
Page 38: Inhalt Der Verpackung
Inhalt der Verpackung Der Karton* mit Ihrem neuen NEC-Monitor sollte folgende Komponenten enthalten: • Monitor LCD2090UXi oder SpectraView 2090 mit neig-, schwenk- und höhenverstellbarem Pivotfuß • Netzkabel (Kontinentaleuropa) • Netzkabel (Großbritannien, nur schwarzes Modell) • Signalkabel (Mini-D-SUB-Stecker mit 15 Stiften auf DVI-A) •... -
Page 39: Kurzanleitung
Achten Sie beim Verlegen der Kabel auf Neigung, Höhe, Senkung und Drehung des Bildschirms. 30° Neigung Höchste Fußposition Netzkabel DVI-I DVI-D D-SUB Abbildung C.1 Abbildung C.2 Gleichspannung (Ausgang) Anschluss für NEC-Zusatzprodukte. Verwenden Sie diesen Anschluss nur, wenn dies explizit angegeben wird. Deutsch-3 03_German 4/5/06, 10:48... - Page 40 Abbildung C.3 Abbildung C.4 7. Halten Sie alle Kabel fest, und setzen Sie die Kabelabdeckung auf den Fuß (Abbildung D.1). Zum Entfernen heben Sie die Kabelabdeckung an, wie in Abbildung D.2 dargestellt. 8. Stecken Sie ein Ende des Netzkabels auf der Rückseite des Monitors und das andere Ende in die Steckdose ein. HINWEIS: Beachten Sie zur Auswahl des richtigen Netzkabels den entsprechenden Sicherheitshinweis in dieser Bedienungsanleitung.
- Page 41 Heben und Senken des Bildschirms Der Monitor kann im Hoch- und im Querformat gehoben oder gesenkt werden. Fassen Sie den Monitor zu diesem Zweck auf beiden Seiten an, und heben oder senken Sie ihn auf die gewünschte Höhe (Abbildung RL.1). HINWEIS: Heben und senken Sie den Monitor vorsichtig.
- Page 42 Entfernen des Monitorfußes für die Montage So bereiten Sie den Monitor für eine alternative Montage vor: 1. Ziehen Sie alle Kabel ab. 2. Fassen Sie den Monitor auf beiden Seiten an, und heben Sie ihn in die höchste Position. 3. Legen Sie den Monitor mit der Vorderseite nach unten auf eine weiche Oberfläche (Abbildung S.1). Abbildung S.1 4.
-
Page 43: Bedienelemente
Bedienelemente Die OSM Bedienelemente (On-Screen-Manager) auf der Vorderseite des Monitors haben folgende Funktionen: Sie können auf das OSM-Menü zugreifen, indem Sie eine der Steuerungstasten (EXIT, LINKS, RECHTS, AUF, AB) drücken. Zum Wechseln des Signaleingangs drücken Sie die Taste SELECT. HINWEIS: Zum Wechseln des Signaleingangs muss das OSM Menü geschlossen werden. Querformat Hochformat 1 AMBIBRIGHT-SENSOR... - Page 44 ECO-MODUS Reduziert den Stromverbrauch durch Verringerung der Helligkeit. 1: Verringert die Helligkeit um 25 %. 2: Verringert die Helligkeit um 50 %. B-DEF.: Verringert die Helligkeit entsprechend der Festlegung durch den Benutzer. Anweisungen zu benutzerdefinierten Einstellungen finden Sie im erweiterten OSM-Menü. AUTOM.
- Page 45 AUTO-OPTIMIERUNG (nur analoger Eingang) Diese Funktion passt die Einstellung „OPTIMIERUNG“ regelmäßig automatisch an geänderte Signalbedingungen an. Die Anpassung erfolgt etwa alle 33 Minuten. AUSDEHNUNG Festlegung der Zoom-Methode. VOLLBILD: Die Bilddarstellung wird unabhängig von der Auflösung auf 1600 x 1200 Pixel erweitert. SEITENMASSE: Das Bild wird vergrößert, ohne das Seitenverhältnis zu ändern.
- Page 46 SIGNALPRIORITÄT Hier wird die Methode der Videosignalerkennung bei mehreren angeschlossenen Computern festgelegt. ERST: Für den Videoeingang wird der Modus „ERSTES“ aktiviert. Ist das ausgewählte Videoeingangssignal nicht verfügbar, sucht der Monitor am anderen Videoeingang nach einem Signal. Ist am anderen Anschluss ein Videosignal verfügbar, aktiviert der Monitor diesen automatisch als neuen Eingang.
- Page 47 OSM ABSCHALTUNG Diese Funktion sperrt den Zugriff auf alle Funktionen der OSM-Steuerungen. Wenn Sie im Modus OSM ABSCHALTUNG auf die OSM-Steuerungen zugreifen, wird ein Bildschirm angezeigt, der auf die Sperre dieser Steuerungen hinweist. Es gibt vier Arten für OSM ABSCHALTUNG: OSM ABSCHALTUNG mit Helligkeits- und Kontraststeuerung: Um die Funktion OSM ABSCHALTUNG zu aktivieren, halten Sie die Tasten SELECT und AUF gleichzeitig gedrückt.
-
Page 48: Einsatzempfehlungen
Monitor mindestens eine Stunde ausgeschaltet werden, damit der Bildschatten verschwindet. HINWEIS: NEC DISPLAY SOLUTIONS empfiehlt die Aktivierung eines Bildschirmschoners auf allen Anzeigegeräten, wenn sich das Bild längere Zeit nicht verändert. Schalten Sie den Monitor aus, wenn Sie ihn nicht verwenden. - Page 49 DURCH RICHTIGE AUFSTELLUNG UND EINSTELLUNG DES MONITORS KÖNNEN ERMÜDUNGSERSCHEINUNGEN VON AUGEN, SCHULTERN UND NACKEN VERMIEDEN WERDEN. BEACHTEN SIE BEI DER AUFSTELLUNG DES MONITORS FOLGENDES: • Optimale Leistung wird erst nach ca. 20 Minuten Aufwärmzeit erzielt. • Stellen Sie den Monitor so auf, dass sich die Oberkante des Bildschirms auf Augenhöhe oder knapp darunter befindet.
- Page 50 Deutsch-14 03_German 4/5/06, 10:48...
- Page 51 NERGY NERGY NERGY NERGY 04_Greek 4/5/06, 10:48...
- Page 52 Θυµηθείτε να υλά ετε τ αρ ικ κ υτί και τα υλικά συσκευασίας για να τα ρησιµ π ιήσετε σε περίπτωση µετα ράς ή απ στ λής της θ νης. 04_Greek 4/5/06, 10:48...
- Page 53 ˚ 04_Greek 4/5/06, 10:48...
- Page 54 04_Greek 4/5/06, 10:48...
- Page 55 04_Greek 4/5/06, 10:49...
- Page 56 04_Greek 4/5/06, 10:49...
- Page 57 04_Greek 4/5/06, 10:49...
- Page 58 04_Greek 4/5/06, 10:49...
- Page 59 04_Greek 4/5/06, 10:49...
- Page 60 04_Greek 4/5/06, 10:49...
- Page 61 04_Greek 4/5/06, 10:49...
- Page 62 04_Greek 4/5/06, 10:49...
- Page 63 04_Greek 4/5/06, 10:49...
- Page 64 04_Greek 4/5/06, 10:49...
-
Page 65: Declaración
NERGY OmniColor es una marca registrada de NEC Display Solutions Europe GmbH en los países de la Unión Europea y en Suiza. ErgoDesign es una marca registrada de NEC Display Solutions, Ltd. en Austria, los países del Benelux, Dinamarca, Francia, Alemania, Italia, Noruega, España, Suecia y el Reino Unido. -
Page 66: Contenido
Contenido La caja* de su nuevo monitor NEC debe contener: • Un monitor MultiSync LCD2090UXi o SpectraView 2090 con base inclinable/giratoria/pivotante/regulable en altura • Cable de alimentación (Europa continental) • Cable de alimentación (Reino Unido: sólo modelo negro) • Cable de señal de vídeo (mini D-SUB/DVI-A 15 clavijas macho) •... -
Page 67: Inicio Rápido
Mientras lo esté haciendo, compruebe que la pantalla del monitor se puede inclinar, subir, bajar y girar bien. 30˚ de inclinación Máxima posición del Cable de soporte alimentación DVI-I DVI-D DC-OUT D-SUB Figura C.2 Figura C.1 Entrada para productos opcionales de NEC. No utilice este conector si no se le indica así. Español-3 05_Spain 4/5/06, 10:49... - Page 68 Figura C.3 Figura C.4 7. Sujete firmemente todos los cables y coloque la tapa de los cables sobre el soporte (figura D.1). Para quitar dicha tapa, levántela como se indica en la figura D.2. 8. Conecte un extremo del cable de alimentación a la entrada de corriente alterna en la parte trasera del monitor y el otro extremo a la toma de corriente.
- Page 69 Cómo subir y bajar la pantalla del monitor La pantalla del monitor se puede colocar en modo vertical u horizontal. Para ello, coloque una mano a cada lado del monitor y súbala o bájela hasta conseguir la posición deseada (figura RL.1). NOTA: realice esta operación con cuidado.
- Page 70 Cómo retirar el soporte del monitor para el montaje Para montar el monitor de otra forma: 1. Desconecte todos los cables. 2. Coloque una mano a cada lado del monitor y levántelo hasta alcanzar la posición más alta. 3. Sitúe el monitor boca abajo en una superficie no abrasiva (figura S.1). Figura S.1 4.
-
Page 71: Controles
Controles Los botones de control OSM (On-Screen Manager: gestor de pantalla) situados en la parte frontal del monitor funcionan del siguiente modo: Para acceder al menú OSM, pulse cualquiera de los botones de control (EXIT, IZQUIERDA, DERECHA, ABAJO, ARRIBA). Para modificar la entrada de señal, pulse el botón SELECT (Seleccionar). NOTA: el menú... - Page 72 MODO ECO Reduce la cantidad de energía consumida mediante la reducción del nivel de brillo. 1: reduce el brillo en un 25%. 2: reduce el brillo en un 50%. PROPIA: reduce el nivel de brillo, tal y como lo establece el usuario. Consulte el menú...
- Page 73 FINO AUTOM. (sólo para entradas analógicas) Esta función ajusta de forma automática y periódica la opción “ESTABILIDAD” para cambiar el estado de la señal. Esta función se ajusta aproximadamente cada 33 minutos. EXPANSIÓN Fija el método de zoom. COMPLETA: la imagen se amplía hasta 1.600 x 1.200 independientemente de cuál sea la resolución. ASPECTO: la imagen se amplía sin modificar la relación entre la altura y la anchura.
- Page 74 TIEMPO DESACTIV. El monitor se apagará automáticamente transcurrido el tiempo indicado por el usuario. Antes de apagarse, aparecerá un mensaje en la pantalla preguntando al usuario si desea retrasar el tiempo de apagado en 60 minutos. Pulse cualquier botón OSM para retrasar el tiempo de apagado. Intelligent Power Manager permite que el monitor pase al modo de ahorro de energía tras un período de inactividad.
- Page 75 OSM TRANSPAREN Ajusta la transparencia del menú OSM. OSM COLOR “Tag window frame color” (Etiquetar color de marco de ventana), “Item select color” (Color de selección de elemento) y “Adjust window frame color” (Ajustar color de marco de ventana) se pueden cambiar a Rojo, Verde, Azul o Gris. AVISO DE RESOLUCIÓN Esta resolución óptima es 1.600 x 1.200.
-
Page 76: Uso Recomendado
NOTA: como en todos los dispositivos de visualización personales, NEC DISPLAY SOLUTIONS recomienda utilizar con regularidad un salvapantallas con movimiento siempre que la pantalla esté inactiva o apagar el monitor si no se va a utilizar. - Page 77 SI EL MONITOR ESTÁ SITUADO Y AJUSTADO CORRECTAMENTE, EL USUARIO SENTIRÁ MENOS FATIGA EN LOS OJOS, HOMBROS Y CUELLO. CUANDO COLOQUE EL MONITOR, COMPRUEBE LO SIGUIENTE: • Para garantizar el óptimo rendimiento, deje el monitor en marcha durante 20 minutos para que se caliente.
- Page 78 Español-14 05_Spain 4/5/06, 10:49...
-
Page 79: Déclaration
NERGY OmniColor est une marque déposée de NEC Display Solutions Europe GmbH dans les pays de l’Union Européenne et en Suisse. ErgoDesign est une marque de NEC Display Solutions, Ltd. en Autriche, au Bénélux, au Danemark, en France, en Allemagne, en Italie, en Norvège, en Espagne, en Suède, et au Royaume-Uni. -
Page 80: Contenu
Contenu La boîte* de votre nouveau moniteur NEC doit contenir les éléments suivants : • Moniteur MultiSync LCD2090UXi ou SpectraView 2090 avec support ajustable en inclinaison/pivotement/rotation/hauteur • Cordon d’alimentation (Europe Continentale) • Cordon d’alimentation (RU : modèle noir uniquement) •... -
Page 81: Mise En Marche Rapide
Vérifiez l’inclinaison, l’élévation et l’abaissement de l’écran du moniteur lorsque vous manipulez les câbles. Inclinaison à 30° Hauteur maximale du Cordon support d’alimentation DVI-I DVI-D D-SUB Figure C.2 Figure C.1 DC-OUT (sortie de courant continu) Connexion pour produit NEC en option. N’utilisez ce connecteur que sur indication explicite. Français-3 06_French 4/5/06, 10:49... - Page 82 Figure C.3 Figure C.4 7. Maintenez fermement tous les câbles et placez le cache-câble sur le support (Figure D.1). Pour retirer le cache-câble, soulevez le couvercle comme indiqué sur la Figure D.2. 8. Connectez une extrémité du cordon d’alimentation à la prise CA à l’arrière du moniteur et l’autre à la prise de courant. REMARQUE : Veuillez vous reporter à...
- Page 83 Élévation et abaissement de l’écran du moniteur Le moniteur peut être levé ou abaissé en mode Portrait ou Paysage. Pour élever ou abaisser l’écran, placez les mains de chaque côté du moniteur et élevez ou abaissez ce dernier à la hauteur qui vous convient (Figure RL.1).
-
Page 84: Installation Du Bras Flexible
Dépose pour montage du support du moniteur Pour préparer le moniteur en vue d’un autre montage : 1. Déconnectez tous les câbles. 2. Placez les mains de chaque côté du moniteur et levez ce dernier jusqu’à la position la plus haute. 3. -
Page 85: Commandes
Commandes Fonctionnement des boutons de commandes OSM (On-screen Manager – Gestionnaire à l’écran) sur la face avant du moniteur : Pour accéder au menu OSM, appuyez sur l’un des boutons de commande (EXIT, GAUCHE, DROITE, HAUT, BAS). Pour modifier le signal d’entrée, appuyez sur le bouton SELECT. REMARQUE : OSM doit être fermé... - Page 86 MODE ÉCO Réduit la consommation d’énergie en diminuant le niveau de luminosité. 1 : Diminue la luminosité de 25 %. 2 : Diminue la luminosité de 50 %. PERSO : Diminue le niveau de luminosité selon le pourcentage entré par l’utilisateur. Pour plus d’informations sur les réglages personnalisés, reportez-vous au menu OSM avancé.
- Page 87 FINESSE AUTO. (Entrée analogique uniquement) Cette fonction règle automatiquement et périodiquement la « FINESSE » en fonction des changements de condition des signaux. Cette fonction se règle toutes les 33 minutes environ. EXPANSION Règle la méthode de zoom. PLEIN : La taille de l’image est agrandie à 1600 x 1200, quelle que soit la résolution. ASPECT : L’image est agrandie sans modification des proportions.
- Page 88 DÉTECTION VIDÉO Sélectionne la méthode de détection de la vidéo lorsque plusieurs ordinateurs se trouvent connectés. PREM. : L’entrée vidéo doit être commutée en mode « PREM. ». S’il n’existe pas de signal d’entrée vidéo, le moniteur recherche un signal vidéo sur l’autre port d’entrée vidéo. Si le signal vidéo est présent sur l’autre port, le moniteur bascule automatiquement le port d’entrée vidéo vers la nouvelle source vidéo détectée.
- Page 89 VERROUILLAGE OSM Cette commande bloque totalement l’accès à toutes les fonctions de commande OSM. Toute tentative d’activation des commandes OSM, lorsque ce dernier est en mode verrouillé, provoque l’apparition d’un écran informant que les commandes OSM sont verrouillées. Il existe quatre types de VERROUILLAGES OSM : VERROUILLAGE OSM avec les commandes LUMINOSITÉ...
-
Page 90: Conseils D'utilisation
être mis hors tension pendant une heure pour effacer l’image. REMARQUE : Comme pour tous les équipements d’affichage personnels, NEC DISPLAY SOLUTIONS recommande d’utiliser un économiseur d’écran animé à intervalles réguliers chaque fois que l’écran est en veille, ou d’éteindre le moniteur lorsqu’il n’est pas utilisé. - Page 91 UNE POSITION ET UN RÉGLAGE CORRECTS DU MONITEUR PEUVENT RÉDUIRE LA FATIGUE DES YEUX, DES ÉPAULES ET DE LA NUQUE. APPLIQUEZ CE QUI SUIT POUR POSITIONNER LE MONITEUR : • Pour une performance optimale, laissez le moniteur chauffer pendant 20 minutes. •...
- Page 92 Français-14 06_French 4/5/06, 10:50...
-
Page 93: Dichiarazione
è un marchio registrato U.S.A.. NERGY OmniColor è un marchio registrato di NEC Display Solutions Europe GmbH nei paesi dell’Unione Europea e in Svizzera. ErgoDesign è un marchio registrato di NEC Display Solutions, Ltd. in Austria, Benelux, Danimarca, Francia, Germania, Italia Norvegia, Spagna, Svezia, Regno Unito. -
Page 94: Indice
Indice La confezione del nuovo monitor NEC* deve contenere i seguenti elementi: • Monitor MultiSync LCD2090UXi o SpectraView 2090 con supporto regolabile in altezza/inclinabile/girevole • Cavo di alimentazione (Europa continentale) • Cavo di alimentazione (Gran Bretagna: solo modello nero) •... -
Page 95: Guida Rapida
Inclinazione di 30˚ Posizione del supporto più alta Cavo di alimentazione DVI-I DVI-D DC-OUT D-SUB Figura C.1 Figura C.2 Accessorio opzionale del prodotto NEC. Non utilizzare questo connettore a meno che non sia espressamente specificato. Italiano-3 07_Italian 4/5/06, 10:50... - Page 96 Figura C.4 Figura C.3 7. Fissare tutti i cavi insieme e collocare la copertura cavi sul supporto (Figura D.1). Per rimuovere la copertura cavi, sollevare il coperchio come illustrato nella Figura D.2. 8. Collegare un’estremitá del cavo di alimentazione all’ingresso c.a. sul retro del monitor e l’altra estremitá alla presa di alimentazione.
- Page 97 Sollevare ed abbassare lo schermo del monitor Il monitor può essere sollevato o abbassato sia in modalità Orizzontale che Verticale. Per sollevare o abbassare lo schermo, appoggiare le mani su entrambi i lati del monitor e sollevarlo o abbassarlo all’altezza desiderata (Figura RL.1).
- Page 98 Rimozione del supporto monitor per il montaggio Per predisporre il monitor a un diverso montaggio: 1. Scollegare tutti i cavi. 2. Appoggiare le mani su entrambi i lati del monitor e sollevarlo fino alla posizione più alta. 3. Sistemare il monitor a faccia in giù su una superficie non abrasiva (Figura S.1). Figura S.1 4.
-
Page 99: Comandi
Comandi I tasti OSM (On-Screen Manager) sulla parte anteriore del monitor hanno le seguenti funzioni: Per accedere al menu OSM, premere un qualsiasi pulsante di controllo (EXIT, SINISTRA, DESTRA, SU, GIÙ). Per cambiare l’ingresso segnali, premere il pulsante SELECT (SELEZIONA). NOTA: Per cambiare l’ingresso segnali, è... - Page 100 MODALITA’ ECONOMICA Diminuisce il consumo elettrico riducendo il grado di luminosità. 1: Riduce la luminosità del 25%. 2: Riduce la luminosità del 50%. PERSON: Riduce il grado di luminosità secondo l’impostazione dell’utente. Per istruzioni sulle impostazioni personalizzate, vedere il menu OSM avanzato. LUMINOSITA’...
- Page 101 REG. AUTO FINE (Solo ingresso analogico) Questa funzione regola automaticamente e periodicamente l’impostazione “FINE” in base alla variazione delle condizioni del segnale. La regolazione avviene ogni 33 minuti circa. ESPANZIONE Imposta il metodo di zoom. INTERO: L’immagine viene espansa a 1600 x 1200, indipendentemente dalla risoluzione. PROP.: L’immagine viene espansa senza cambiare il rapporto proporzionale.
- Page 102 RILEVAZIONE VIDEO Seleziona il metodo di rilevazione video in caso siano connessi più di un computer. PRIMO: L’ingresso video deve essere commutato in modalità “PRIMO”. Se il segnale di ingresso del video corrente non è presente, il monitor cerca un segnale proveniente dall’altra porta di ingresso. Se il segnale video è presente sull’altra porta, il monitor commuta automaticamente la porta di ingresso alla nuova sorgente rilevata.
- Page 103 OSM BLOCCATO Questo comando blocca completamente l’accesso a tutte le funzioni di controllo OSM. Se si cerca di attivare i comandi OSM in modalità di blocco, compare una schermata indicante che i comandi OSM sono bloccati. Vi sono quattro tipi di OSM BLOCCATO: OSM BLOCCATO con controllo di LUMINOSITÀ...
-
Page 104: Raccomandazioni Per L'uso
NOTA: Come per tutti i dispositivi di visualizzazione, NEC DISPLAY SOLUTIONS raccomanda di utilizzare a intervalli regolari uno screen saver mobile quando lo schermo non è attivo o spegnere il monitor se non viene utilizzato. - Page 105 IL CORRETTO POSIZIONAMENTO E REGOLAZIONE DEL MONITOR RIDUCE L’AFFATICAMENTO DI OCCHI, SPALLE E COLLO. NEL POSIZIONARE IL MONITOR, CONTROLLARE QUANTO SEGUE: • Per ottenere prestazione ottimali, attendere 20 minuti per il riscaldamento. • Regolare l’altezza del monitor in modo che la parte alta dello schermo sia a livello degli occhi o leggermente sotto.
- Page 106 Italiano-14 07_Italian 4/5/06, 10:50...
-
Page 107: Kennisgeving
Verenigde Staten geregistreerd handelsmerk. NERGY OmniColor is een geregistreerd handelsmerk van NEC Display Solutions Europe GmbH in de EU-landen en Zwitserland. ErgoDesign is een geregistreerd handelsmerk van NEC Display Solutions, Ltd. in de Benelux, Denemarken, Duitsland, Frankrijk, Italië, Noorwegen, Oostenrijk, Spanje, Verenigd Koninkrijk en Zweden. -
Page 108: Inhoud
Inhoud De doos* van uw nieuwe NEC-monitor bevat de volgende voorwerpen: • MultiSync LCD2090UXi- of SpectraView 2090-monitor met in hoogte verstelbare draai-/kantel-/roteervoet • Voedingskabel (Europees continent) • Voedingskabel (VK: Zwart model) • Kabel voor beeldsignaal (15-pins D-SUB-miniconnector naar DVI-A) •... -
Page 109: Snel Aan De Slag
Stel bij het beheren van kabels de monitor in op de juiste hoogte en kantel-, roteer- en kijkhoek. 30˚ kantelhoek Hoogste stand Voedingskabel DVI-I DVI-D D-SUB Illustratie C.1 Illustratie C.2 Gelijkstroom-UIT NEC optionele productaansluiting. Gebruik deze connector alleen wanneer dit is voorgeschreven. Nederlands-3 08_Dutch 4/5/06, 10:50... - Page 110 Illustratie C.4 Illustratie C.3 7. Houd alle kabels stevig op hun plaats en plaats vervolgens de kabelbehuizing op het voetstuk (zie illustratie D.1). Als u de kabelbehuizing opnieuw wilt openen, moet u de behuizing verwijderen zoals is aangegeven in illustratie D.2. 8.
- Page 111 Monitorscherm hoger en lager zetten U kunt de monitor hoger en lager, en in de stand Staand of Liggend zetten. U zet het scherm hoger of lager door uw handen aan beide zijden van het beeldscherm te plaatsen en het naar de gewenste hoogte te schuiven (zie illustratie RL.1).
- Page 112 Monitorvoet verwijderen voor permanente montage Ga als volgt te werk om de monitor voor te bereiden voor andere montagedoeleinden: 1. Koppel alle kabels los. 2. Plaats uw handen aan beide zijden van het beeldscherm en schuif het naar de hoogste stand. 3.
-
Page 113: Besturingselementen
Besturingselementen De OSM-besturingsknoppen (On-Screen Manager) bevinden zich vooraan op de monitor en hebben de volgende functies: U opent het OSM-menu (On-Screen Manager) door te drukken op een van de besturingsknoppen (EXIT, Links, Rechts, Omlaag, Omhoog). Als u een ander ingangssignaal wilt, drukt u op de knop SELECT. OPMERKING: u kunt het ingangssignaal alleen wijzigen wanneer het menu met OSM-besturingselementen niet op het scherm wordt weergegeven. - Page 114 ECO MODE (ECO-MODUS) Vermindert de verbruikte elektriciteit door het helderheidsniveau te verlagen. 1: verlaagt de helderheid met 25%. 2: verlaagt de helderheid met 50%. CUSTOM (Aangepast): verlaagt het helderheidsniveau zoals bepaald door de gebruiker. Raadpleeg het Geavanceerd OSM-menu voor instructies voor aangepaste instellingen. AUTO BRIGHTNESS (AUTOMATISCHE HELDERHEID) Er zijn drie instellingen voor Auto Brightness (automatische helderheid).
- Page 115 AUTO FINE (AUTOMATISCHE FIJNAFSTELLING, alleen analoge ingang) Deze functie past van tijd tot tijd de fijninstelling automatisch aan na verandering in de conditie van het signaal. Deze functie wordt ongeveer iedere 33 minuten aangepast. EXPANSION (UITBREIDINGS) Hiermee stelt u de zoommethode in. FULL (Volledig): het beeld wordt uitgebreid naar 1600 x 1200, ongeacht de resolutie.
- Page 116 FIRST (Eerste): u moet de video-ingang op de modus “FIRST” instellen. Wanneer het huidige ingangssignaal niet aanwezig is, zoekt de monitor een videosignaal op de andere ingangspoort. Als het videosignaal zich op de andere poort bevindt, schakelt de monitor automatisch de nieuwe gedetecteerde signaalbron in. De monitor zoekt geen andere videosignalen wanneer de huidige videobron aanwezig is.
- Page 117 Er zijn vier typen OSM LOCK OUT (OSM vergrendelen): OSM LOCK OUT (OSM vergrendelen) met besturingselementen BRIGHTNESS (Helderheid) en CONTRAST (Contrast): Als u de functie OSM Lock Out (OSM vergrendelen) wilt inschakelen, drukt u eerst op de knop SELECT en vervolgens op de knop “UP” (omhoog). Houd beide knoppen tegelijk ingedrukt. Als u de functie OSM Lock Out (OSM vergrendelen) wilt uitschakelen, drukt u eerst op de knop SELECT en vervolgens op de knop “UP”...
-
Page 118: Aanbevolen Gebruik
één uur uit om het ingebrande beeld ongedaan te maken. OPMERKING: zoals bij alle andere persoonlijke weergaveapparaten raadt NEC DISPLAY SOLUTIONS u aan regelmatig gebruik te maken van een bewegende schermbeveiliging wanneer het scherm inactief is of de monitor uit te schakelen als u deze niet gebruikt. - Page 119 U KUNT VERMOEIDHEID VAN UW OGEN, SCHOUDERS EN NEK TOT EEN MINIMUM BEPERKEN DOOR DE MONITOR CORRECT TE PLAATSEN EN GOED AF TE STELLEN. CONTROLEER DE VOLGENDE PUNTEN WANNEER U DE MONITOR INSTALLEERT: • Voor een optimaal resultaat laat u de monitor eerst 20 minuten opwarmen. •...
- Page 120 Nederlands-14 08_Dutch 4/5/06, 10:50...
- Page 121 09_Polish 4/5/06, 10:51...
- Page 122 NERGY NERGY NERGY NERGY 09_Polish 4/5/06, 10:51...
- Page 123 Zalecamy zachowaç oryginalne opakowanie, które mo˝e si´ przydaç w przypadku transportu monitora (serwis, przesy∏ka kurierska, itp.). 09_Polish 4/5/06, 10:51...
- Page 124 09_Polish 4/5/06, 10:51...
- Page 125 09_Polish 4/5/06, 10:51...
- Page 126 09_Polish 4/5/06, 10:51...
- Page 127 09_Polish 4/5/06, 10:51...
- Page 128 09_Polish 4/5/06, 10:51...
- Page 129 09_Polish 4/5/06, 10:51...
- Page 130 09_Polish 4/5/06, 10:51...
- Page 131 09_Polish 4/5/06, 10:51...
- Page 132 09_Polish 4/5/06, 10:51...
- Page 133 09_Polish 4/5/06, 10:51...
- Page 134 09_Polish 4/5/06, 10:51...
- Page 135 NERGY ® NERGY NERGY NERGY 10_Russian 4/5/06, 10:51...
- Page 136 Обязательно сохраните коробку и упаковочный материал для транспортировки или перевозки монитора. 10_Russian 4/5/06, 10:51...
- Page 137 ˚ 10_Russian 4/5/06, 10:51...
- Page 138 10_Russian 4/5/06, 10:51...
- Page 139 10_Russian 4/5/06, 10:51...
- Page 140 10_Russian 4/5/06, 10:51...
- Page 141 10_Russian 4/5/06, 10:51...
- Page 142 10_Russian 4/5/06, 10:51...
- Page 143 10_Russian 4/5/06, 10:51...
- Page 144 10_Russian 4/5/06, 10:51...
- Page 145 10_Russian 4/5/06, 10:51...
- Page 146 10_Russian 4/5/06, 10:51...
- Page 147 10_Russian 4/5/06, 10:51...
- Page 148 10_Russian 4/5/06, 10:51...
-
Page 149: Reticinin Bildirimi
Üreticinin Bildirimi NERGY ® NERGY NERGY NERGY 11_Turkish 4/5/06, 10:52... - Page 150 Monitörü taµ∂mak veya bir yere göndermek için orjinal kutusunu ve ambalaj malzemesini saklamay∂ unutmay∂n. 11_Turkish 4/5/06, 10:52...
- Page 151 11_Turkish 4/5/06, 10:52...
- Page 152 11_Turkish 4/5/06, 10:52...
- Page 153 11_Turkish 4/5/06, 10:52...
- Page 154 11_Turkish 4/5/06, 10:52...
- Page 155 11_Turkish 4/5/06, 10:52...
- Page 156 11_Turkish 4/5/06, 10:52...
- Page 157 11_Turkish 4/5/06, 10:52...
- Page 158 11_Turkish 4/5/06, 10:52...
- Page 159 11_Turkish 4/5/06, 10:52...
- Page 160 11_Turkish 4/5/06, 10:52...
- Page 161 11_Turkish 4/5/06, 10:52...
- Page 162 11_Turkish 4/5/06, 10:52...
- Page 163 xx_Back 4/5/06, 10:52...
- Page 164 Printed in China Printed on recycled paper Part No. 1E504612 xx_Back 4/5/06, 10:52...
Need help?
Do you have a question about the MultiSync LCD2090UXi and is the answer not in the manual?
Questions and answers