Table of Contents
Advertisement
Quick Links
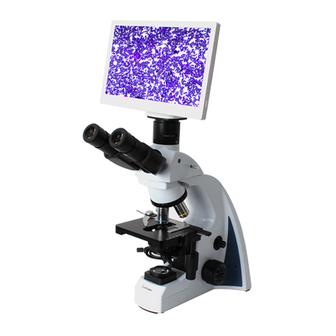
Biological Microscope
BLM2-241
Instruction Manual
This manual is for biological microscope Model BLM2-241. To ensure the safety, obtain optimum
performance and to familiarize yourself fully with the use of this microscope, it is strongly recommended
that you study this manual thoroughly before operating the microscope. This manual is mainly for optical
part, regarding the manual for the LCD digital camera, please refer to the camera manual and software
manual.
Advertisement
Table of Contents

Related Manuals for BestScope BLM2-241


Summary of Contents for BestScope BLM2-241
- Page 1 BLM2-241 Instruction Manual This manual is for biological microscope Model BLM2-241. To ensure the safety, obtain optimum performance and to familiarize yourself fully with the use of this microscope, it is strongly recommended that you study this manual thoroughly before operating the microscope. This manual is mainly for optical part, regarding the manual for the LCD digital camera, please refer to the camera manual and software manual.
-
Page 2: Table Of Contents
BestScope International Limited CONTENTS BLM2-241 CONTENTS…………………………………………………………… USER NOTICES…………………………………………………… 1 Components Name ……………………………………………… 2 Assembly ………………………………………………………… ……………………………………………… 2.1 Assembly Diagram …………………………………………… 2.2 Assembly Procedures 3 Adjustment ……………………………………………………… ………………………………………… 3.1 Adjustment Set Diaphragm …………………………………………… 3.2 Adjustment Procedures 4 Technical Specifications ………………………………………… 5 Outfit………………………………………………………………... -
Page 3: User Notices
7. Check the input voltage: be sure the input voltage which is signed in the back of the microscope is consistent with the power supply voltage, or it will bring a serious damage to the instrument. 8. Always use the power cord provided by BestScope. II. Maintenance and Care All the lenses have been adjusted properly;... -
Page 4: Components Name
BestScope International Limited 1.Components Name BLM2-241 Binocular viewing head Eyepiece Nosepiece Objective Main body... -
Page 5: Assembly
BestScope International Limited BLM2-241 2 Assembly 2-1 Assembly Diagram The following figure shows the installation sequence of the components. The number in the figure shows the assembly steps. Before installing, be sure every components is clean, do not score any parts or glass surface. -
Page 6: Assembly Procedures
BestScope International Limited BLM2-241 2.2 Assembly Procedure 2.2.1 Installing trinocular viewing head (Fig.1-2) Insert the binocular viewing head into the microscope head and turn it to a proper position, then screw down the bolt to fix it. Fig.1 Fig.2 2.2.2 Installing the eyepiece (Fig3-4) - Page 7 BestScope International Limited BLM2-241 2.2.3 Installing the objective (Fig.5-6) 1. Adjusting the coarse focus knob until the support device of the mechanical stage reaches its low limit position. 2. Screw the lowest magnification objective into the nosepiece from the left or the right Fig.5...
- Page 8 BestScope International Limited BLM2-241 2.2.5 Connecting the Power Cord (Fig.8-10) ★ The cable and cords are vulnerable when bent or twisted, never subject the power cord to excessive force. Set the main switch① to “O” (off) state Fig.8 before connecting the power cord.
- Page 9 BestScope International Limited BLM2-241 2.2.7 Installing and Replacing the bulb (Fig.11-13) Please use the specified halogen Lamp 6V20W. Pull out the condenser holder as shown in Fig.11. Hold the bulb① after you wrap it with Fig.11 gauze or other protection materials, and then insert its pin②...
-
Page 10: Adjustment
BestScope International Limited 3. Adjustment and operation BLM2-241 3.1 Adjustment set diagram (Fig.14-15) Portrait Adjustment Knob Lateral Adjustment Knob Right Fine Focus Knob Brightness Adjustment Knob Right Coarse Focus Knob Main Switch Tension Adjustment Collar Fig.14... - Page 11 BestScope International Limited BLM2-241 Interpupillar Distance Indicator Condenser Focusing Knob Clocking Set Indicator Left Fine Focus Knob Left Coarse Focus Knob Aperture Iris Diaphragm Collar Fig.15...
-
Page 12: Adjustment Procedures
BestScope International Limited BLM2-241 3.2 Adjustment and Operation 3.2.1 Brightness Adjustment (Fig.16) Connect the power cord and set the main switch to “-”state (ON). Turning brightness adjustment knob clockwise, the voltage raise, and the brightness strengthen; whereas turning at the contra... - Page 13 BestScope International Limited BLM2-241 Turn the coarse focus knob ①conversely to lower the specimen and search images in the 10×ocular simultaneously, and then use the fine knob② to focus. After that, you can replace with other magnification objectives safely, and focus without the risk of damaging the specimen.
- Page 14 BestScope International Limited BLM2-241 3.3.6 Adjusting the Interpupillary Distance (Fig.21) The interpupillary distance range: 55mm~75mm。 While looking through the eyepieces, move both eyepieces until the left and right fields of view Fig.21 coincide completely. 3.3.7 Adjusting the Diopter (Fig.22) Turn the eyepiece①to adjust the diopter while looking through it.
-
Page 15: Technical Specifications
BestScope International Limited 4.Technical Specifications BLM2-241 1). Main Specifications Optical System Infinite optical system Viewing Head Siedentopf Binocular Head, 30°Inclined, Interpupillary Distance 48-75 mm Eyepiece Wide Field Eyepiece WF 10X/22 Nosepiece Quadruple Nosepiece Objective Infinite plan Objectives 4×, 10×, 40×, 100×... -
Page 16: Outfit
BestScope International Limited 5.Outfit BLM2-241 〇 Main Standard 〇 Main Body Double Layers Mechanical Stage 〇 Condenser Holder 〇 Viewing Head Siedentopf Binocular Head 〇 Condenser Abbe Condenser, NA=1.25 〇 Nosepiece Quadruple 〇 LED illumination 〇 Illumination 6V20W Halogen Lamp 〇... -
Page 17: Trouble Shooting
BestScope International Limited 6.Troubleshooting Guide BLM2-241 1. Optical System TROUBLE CAUSE SOLUTION The nosepiece is not in the located Locate the nosepiece position (objective and light path not properly where it clicks The edge of the field coaxial) of view is dark or the... - Page 18 BestScope International Limited BLM2-241 2. Mechanical System TROUBLE CAUSE SOLUTION Field of view of one eye does not Interpupillary distance is incorrect Adjust interpupillary distance match that of the other The diopter is not proper Adjust the diopter properly Observation is...
Need help?
Do you have a question about the BLM2-241 and is the answer not in the manual?
Questions and answers