Table of Contents
Advertisement
Available languages
Available languages
Quick Links
Advertisement
Chapters
Table of Contents

Related Manuals for Diloc D.IN-CONSOLE12


Summary of Contents for Diloc D.IN-CONSOLE12
- Page 1 UNITÀ INTERNE D.IN-CONSOLE12 D.IN-CONSOLE18...
-
Page 2: Table Of Contents
MISURE DI SICUREZZA .........................1 NOMI DELLE PARTI ..........................4 ISTRUZIONI PER L'USO ..........................6 ISTRUZIONI PER L'ASSISTENZA (R32) ....................7 PRECAUZIONI DI INSTALLAZIONE ......................12 INSTALLAZIONE UNITÀ INTERNA ......................14 INSTALLAZIONE UNITÀ ESTERNA ......................22 PROVA DI FUNZIONAMENTO ......................26 MANUTENZIONE ..........................28 TROUBLESHOOTING ........................29 deWddS) -
Page 3: Misure Di Sicurezza
MISURE DI SICUREZZA NORME DI SICUREZZA E RACCOMANDAZIONI PER L'INSTALLATORE 1. Leggere questa guida prima di installare e utilizzare l'apparecchio. 2. Durante l'installazione delle unità interne ed esterne l'accesso all'area di lavoro deve essere vietato ai bambini. Potrebbero verificarsi incidenti imprevedibili. 3. - Page 4 MISURE DI SICUREZZA NORME DI SICUREZZA E RACCOMANDAZIONI PER L'INSTALLATORE 19. Non tentare di installare il condizionatore da solo, rivolgersi sempre a personale tecnico specializzato. 20. La posa e la manutenzione devono essere effettuate da personale tecnico specializzato. In ogni caso scollegare l'apparecchio dalla rete elettrica prima di eseguire qualsiasi operazione di pulizia o manutenzione.
- Page 5 MISURE DI SICUREZZA NORME DI SICUREZZA E DIVIETI 1. Non piegare, tirare o comprimere il cavo di alimentazione poiché ciò potrebbe danneggiarlo. Scosse elettriche o incendi sono probabilmente dovuti a un cavo di alimentazione danneggiato. Solo personale tecnico specializzato deve sostituire un cavo di alimentazione danneggiato. 2.
-
Page 6: Nomi Delle Parti
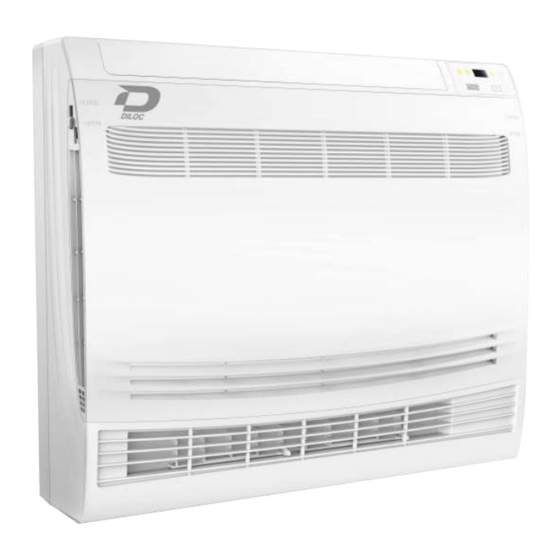
NOME DELLE PARTI Unità interna USCITA DELL'ARIA PANNELLO DEFLETTORI ARIA Display e tasto ON/OFF FILTRI PRESA D'ARIA GRIGLIA DI USCITA USCITA DELL'ARIA Unità esterna Presa d'aria Copertura del cablaggio Uscita dell'aria Tubo di drenaggio Cablaggio di collegamento Coperchio di protezione della valvola Valvola del gas (Valvola di bassa pressione) Valvola del liquido... - Page 7 NOME DELLE PARTI Display per interni Indicatore di tempo Indicatore anti aria fredda Indicatore di funzionamento Indicatore di guasto Tasto ON/OFF Recettore del segnale Schermo LED Tasto ON/OFF: Premere questo pulsante sulla scatola di controllo elettronico quando il telecomando non funziona. Stato attuale operazione Risposta...
-
Page 8: Istruzioni Per L'uso
ISTRUZIONI PER L'USO Il tentativo di utilizzare il condizionatore d'aria a una temperatura oltre l'intervallo specificato può causare l'avvio del dispositivo di protezione del condizionatore d'aria e il condizionatore d'aria potrebbe non funzionare. Pertanto, provare a utilizzare il condizionatore d'aria nelle seguenti condizioni di temperatura. Climatizzatore inverter: MODALITÀ... - Page 9 ISTRUZIONI PER LA MANUTENZIONE (R32) 1. Verificare le informazioni di questo manuale per conoscere le dimensioni di spazio necessarie per una corretta installazione del dispositivo, comprese le distanze minime consentite rispetto alle strutture adiacenti. 2. L'apparecchio deve essere installato, utilizzato e immagazzinato in una stanza con una superficie maggiore di 4 m2. 3.
- Page 10 ISTRUZIONI PER LA MANUTENZIONE (R32) 16. Informazioni sulla manutenzione: Controlli alla zona Prima di iniziare a lavorare su sistemi contenenti refrigeranti infiammabili, sono necessari controlli di sicurezza per garantire che il rischio di accensione sia ridotto al minimo. Per la riparazione dell'impianto di refrigerazione, devono essere osservate le seguenti precauzioni prima di eseguire lavori sull'impianto.
- Page 11 ISTRUZIONI PER LA MANUTENZIONE (R32) I seguenti controlli devono essere applicati alle installazioni che utilizzano refrigeranti infiammabili: - - La dimensione della carica è conforme alla dimensione della stanza all'interno della quale sono installate le parti contenenti refrigerante; - - I macchinari e le bocchette di ventilazione funzionino adeguatamente e non siano ostruiti; - - Se si utilizza un circuito frigorifero indiretto, il circuito secondario deve essere controllato per la presenza di refrigerante;...
- Page 12 ISTRUZIONI PER LA MANUTENZIONE (R32) 19. Cablaggio Verificare che il cablaggio non sia soggetto a usura, corrosione, pressione eccessiva, vibrazioni, bordi taglienti altri effetti ambientali avversi. La verifica deve tenere conto anche degli effetti dell'invecchiamento o delle continue vibrazioni provenienti da sorgenti quali compressori o ventilatori. 20.
- Page 13 ISTRUZIONI PER LA MANUTENZIONE (R32) a) Acquisire familiarità con l'apparecchiatura e il suo funzionamento. b) Isolare elettricamente il sistema. c) Prima di tentare la procedura, assicurarsi che: . sono disponibili attrezzature di movimentazione meccanica, se richieste, per la movimentazione di bombole di refrigerante;...
-
Page 14: Precauzioni Di Installazione
PRECAUZIONI DI INSTALLAZIONE (R32) Considerazioni importanti 1. Il condizionatore d'aria deve essere installato da personale professionale e il manuale di installazione è utilizzato solo per il personale di installazione professionale! Le specifiche di installazione devono essere soggette alle nostre norme sul servizio post-vendita. - Page 15 PRECAUZIONI DI INSTALLAZIONE (R32) 3. Sicurezza dell'installazione Rilevatore di perdite di refrigerante Posizione di installazione appropriata L'immagine a sinistra è il diagramma schematico di un rilevatore di perdite di refrigerante. Si prega di notare che: 1. Il luogo di installazione deve essere ben ventilato. 2.
- Page 16 PRECAUZIONI DI INSTALLAZIONE Lunghezza del tubo e refrigerante aggiuntivo Modelli di inverter Capacità (Btu/h) 18K (per ogni interno) 9K-12K (per ogni interno) Lunghezza del tubo con carica standard 15 m 15 m Distanza massima tra unità interna ed esterna 15 g/m 20 g/m Carica aggiuntiva di refrigerante 10 m...
-
Page 17: Installazione Unità Interna
INSTALLAZIONE UNITÀ INTERNA Passaggio 1: selezionare la posizione di installazione 1.1 Assicurarsi che l'installazione sia conforme alle dimensioni minime di installazione (definite di seguito) e soddisfi la lunghezza minima e massima delle tubazioni di collegamento e la variazione massima di elevazione come definito nella sezione Requisiti di sistema. - Page 18 INSTALLAZIONE UNITÀ INTERNA Passaggio 2: installare i ganci 2.1 Assicurarsi di soddisfare i requisiti minimi relativi alle dimensioni di installazione come al punto 1, Estrarre il cartone di installazione e fissarlo alla parete e regolare il cartone in posizione orizzontale. 2.2 Segnare le posizioni dei fori per le viti sulla parete in base ai fori sul cartone.
- Page 19 INSTALLAZIONE UNITÀ INTERNA Passaggio 4: collegamento del tubo del refrigerante 4.1 In base alla posizione del foro nel muro, quando l'uscita delle tubazioni è a sinistra o a destra, utilizzare le forbici lungo la tacca per tagliare il foglio di plastica di chiusura sul telaio. Nota: Quando si taglia il foglio di plastica all'uscita, il taglio deve essere rifinito per levigare.
- Page 20 INSTALLAZIONE UNITÀ INTERNA Passaggio 4: collegamento del tubo del refrigerante 4.4 Piegatura i tubi di collegamento con la bocca rivolta verso l'alto come mostrato in figura. SÌ 4.5 Rimuovere la copertura in plastica nelle porte dei tubi e rimuovere la copertura protettiva all'estremità dei connettori delle tubazioni.
- Page 21 INSTALLAZIONE UNITÀ INTERNA Passaggio 5: collegare il tubo di drenaggio 5.1 Collegare il tubo di drenaggio alla porta di drenaggio, assicurarsi che il giunto sia saldo e che l'effetto di tenuta sia buono. 5.2 Avvolgere saldamente il giunto con nastro di teflon per evitare perdite. Nota: Assicurati che non ci siano torsioni o ammaccature e che i tubi devono essere posizionati obliquamente verso il basso per evitare ostruzioni, per garantire un corretto drenaggio.
- Page 22 INSTALLAZIONE UNITÀ INTERNA Step7: Avvolgi le tubazioni e il cavo Dopo aver installato i tubi del refrigerante, i cavi di collegamento e il tubo di drenaggio, per risparmiare spazio, proteggerli e isolarli, è necessario avvolgerli con nastro isolante prima di passarli attraverso il foro nel muro. 7.1 Disporre i tubi, i cavi e il tubo flessibile di drenaggio come nell'immagine seguente.
- Page 23 INSTALLAZIONE UNITÀ INTERNA Passaggio 9: reinstallare l'unità interna 9.1 Installare il telaio sul telaio e fissarlo con 4 viti. 9.2 Installare il pannello sul telaio e far scorrere l'interruttore su entrambi i lati del pannello su "Blocca". 9.3 Cambia il DIP come preferisci. Flusso d'aria dall'uscita in alto e in basso Flusso d'aria solo dall'uscita in alto...
-
Page 24: Installazione Unità Esterna
INSTALLAZIONE UNITÀ ESTERNA Passaggio 1: selezionare la posizione di installazione Seleziona un sito che consenta quanto segue: 1.1 Non installare l'unità esterna vicino a fonti di calore, vapore o gas infiammabili. 1.2 Non installare l'unità in luoghi troppo ventosi o polverosi. 1.3 Non installare l'unità... - Page 25 INSTALLAZIONE UNITÀ ESTERNA Passaggio 4: installare il cablaggio 4.1 Utilizzare un cacciavite a croce per svitare il coperchio del cablaggio, afferrarlo e premerlo delicatamente per rimuoverlo. 4.2 Svitare il serracavo e rimuoverlo. 4.3 Secondo lo schema elettrico incollato all'interno del coperchio del cablaggio, collegare i fili di collegamento ai terminali corrispondenti e assicurarsi che tutti i collegamenti siano saldi e sicuri.
- Page 26 INSTALLAZIONE UNITÀ ESTERNA Passaggio 5: Collegamento del tubo del refrigerante 5.1 Svita il coperchio della valvola, afferralo e premilo delicatamente per rimuoverlo (se il coperchio della valvola è applicabile). 5.2 Rimuovere i cappucci di protezione dall'estremità delle valvole. Rimuovere la copertura di plastica nelle porte del tubo e ccontrollare se c'è...
- Page 27 INSTALLAZIONE UNITÀ ESTERNA Step6: Procedura vuoto d'aria 6.1 Utilizzare una chiave per rimuovere i cappucci di protezione dalla porta di servizio, dalla valvola di bassa pressione e dalla valvola di alta pressione dell'unità esterna. 6.2 Collegare il tubo di pressione del manometro del collettore alla porta di servizio sulla valvola di bassa pressione dell'unità...
-
Page 28: Prova Di Funzionamento
FUNZIONAMENTO DI PROVA Ispezioni prima della prova di funzionamento Eseguire i seguenti controlli prima dell'esecuzione del test. Descrizione Metodo di ispezione Controllare se la tensione di alimentazione è conforme alle specifiche. Controllare se c'è un collegamento errato o mancante tra le linee di alimentazione, la linea di Elettrico segnale e i fili di terra. - Page 29 FUNZIONAMENTO DI PROVA Istruzioni per l'esecuzione di prova 1. Accendere l'alimentatore. 2. Premere il pulsante ON/OFF sul telecomando per accendere il condizionatore. 3. Premere il pulsante Modalità per cambiare la modalità RAFFREDDAMENTO e RISCALDAMENTO. In ogni modalità impostare come di seguito: COOL-Imposta la temperatura più...
-
Page 30: Manutenzione
MANUTENZIONE Durante la pulizia, è necessario spegnere la macchina e interrompere l'alimentazione per più di 5 minuti. In nessun caso il condizionatore d'aria deve essere sciacquato con acqua. I liquidi volatili (ad es. diluenti o benzina) danneggiano il condizionatore d'aria, quindi utilizzare solo un panno morbido e asciutto o un panno umido imbevuto di detergente neutro per pulire il condizionatore. - Page 31 RISOLUZIONE DEI PROBLEMI CAUSE POSSIBILI MALFUNZIONAMENTO Interruzione di corrente/spina estratta. Motore del ventilatore dell'unità interna/esterna danneggiato. Interruttore magnetotermico compressore difettoso. Dispositivo di protezione o fusibili difettosi. L'apparecchio non non operare Collegamenti allentati o spina estratta. A volte smette di funzionare per proteggere l'apparecchio. Tensione superiore o inferiore all'intervallo di tensione.
- Page 32 RISOLUZIONE DEI PROBLEMI CODICE DI ERRORE SUL DISPLAY (per modelli multipli) La definizione di fallimento o protezione Il contenuto del display del LED per interni Errore di comunicazione interna ed esterna Guasto sensore temperatura ambiente interno Guasto sensore temperatura tubi batteria interna Guasto del sensore di temperatura del tubo esterno Anomalia del sistema Configuarazione del modello errata...
- Page 33 RISOLUZIONE DEI PROBLEMI CODICE ERRORE SUL DISPLAY (Per Modelli Singoli) In caso di errore, il display dell'unità interna mostrava i seguenti codici di errore: Descrizione del problema Schermo Guasto sensore temperatura ambiente interno Guasto del sensore di temperatura del tubo interno Guasto del sensore di temperatura del tubo esterno Perdita o guasto del sistema di refrigerazione Malfunzionamento del motore del ventilatore interno...
- Page 34 TELECOMANDO DUNE N° TASTO FUNZIONE Per accendere o spegnere il Climatizzatore Per attivare o disattivare la funzione opzionale (controllare sotto la tabella). OPTION Per diminuire la temperatura, impostare l'ora o scegliere la funzione. Per aumentare la temperatura, impostare l'ora o scegliere la funzione. Premere questo tasto per attivare / disattivare la funzione ECO.
- Page 35 DUNE TELECOMANDO AUTO COOL DRY HEAT ECO SLEEP TIMER I FEEL HEALTH MILDEW CLEAN DISPLAY 8 CH Premere contemportaneamente per WIND FREE GEN MODE più di 3 secondi per attivare\disattivare la funzione di LOCK\Blocco. OPTION TURBO MODE Sentirai un bip quando premerai i seguenti pulsanti, o selezionerai le seguenti funzioni opzionali, sebbene il modello attuale non abbia questa funzione.
- Page 36 TELECOMANDO DUNE DISPLAY del telecomando - Significato dei simboli sul display a cristalli liquidi SIMBOLO SIGNIFICATO N° Singolo indicatore Blocco di Sicurezza per Bambini Indicatore della Batteria Modalità Auto Modalità Raffreddamento Modalità Deumidificazione Modalità Ventilazione Modalità Riscaldamento Modalità ECO TIMER Indicatore del Timer Indicatore di Temperatura Flashing...
- Page 37 TELECOMANDO DUNE sostituzione delle batterie Rimuovere il coperchio di copertura della batteria dalla parte posteriore del telecomando, facendola scorrere nella direzione della freccia. Installare le batterie secondo la direzione (+ e -) mostrata sul telecomando. Reinserire il coperchio della batteria facendolo scorrere in posizione. Utilizzare 2 batterie LR03 AAA da 1,5 V.
- Page 38 DUNE superiore motorizzati 1. Premere il pulsante per attivare il Deflettore Orizzontale: 1.1. Premendo il pulsante per un intervallo di tempo di entro i 2 secondi, l'angolo di oscillazione del deflettore orizzontale si muoverà secondo questa sequenza: deactivate 1.2. Premendo il pulsante per un intervallo di tempo superiore ai 2 secondi, sarà...
- Page 39 ISTRUZIONE PER L'USO DUNE MODALITA' RAFFREDDAMENTO La funzione di raffreddamento consente al HEAT condizionatore di raffreddare la stanza e allo stesso tempo di ridurre l'umidità dewll'aria. Per attivare la modalità raffreddamento, premere il tasto MODE fino a quando il simbolo COOL non sarà apparso sul display.
- Page 40 ISTRUZIONI PER L'USO DUNE MODALITA' VENTILAZIONE Il climatizzatore svolgerà solo la funzione di ventilazione. Per impostare la Modalità Ventilazione, premere il tasto MODE fino a che la scritta FAN non sarà visualizzata sul display. Per ottimizzare la funzione del climatizzatore: (1) Regolare la temperatura, (2) la velocità, (3) la direzione del flusso d'aria (3) premendo i pulsanti indicati nello schema qui a fianco.
- Page 41 ISTRUZIONI PER L'USO DUNE FUNZIONE NOTTURNA SLEEP Premere OPTION e selezionare la voce del menu SLEEP utilizzando i tasti fino a quando non lampeggerà il simbolo SLEEP. Premere di nuovo il tasto OPTION per attivare la modalità Notturna, con il simbolo SLEEP apparirà...
- Page 42 ISTRUZIONI PER L'USO DUNE Funzione TIMER TIMER impostare accensione/spegnimento automatico del climatizzatore Prima di impostare l'orario del Timer: - Spegni il climatizzatore con il tasto d'accensione. - Programma la modalità di lavoro con il tasto MODE e la velocità della ventola con il tasto FAN. Impostazione / modifica / annullamento del timer: 1.
- Page 43 ISTRUZIONI PER L'USO DUNE Funzione ANTI-MUFFA [MILDEW] Nota bene: La funzione MILDEW\Anti-muffa MILDEW è disponibile solo nelle modalità Deumidificazione/Raffreddamento Premere il tasto OPTION e selezionare MILDEW utilizzando i tasti oppure fino a quando il simbolo MILDEW non lampeggerà. Premere OPTION di nuovo per attivare la funzione Anti-Muffa, così il simbolo MILDEW sarà...
- Page 45 INDOOR UNITS D.IN-CONSOLE12 D.IN-CONSOLE18...
- Page 46 CONTENTS ........................1 SAFETY PRECAUTIONS ..........................4 NAME OF PARTS ......................6 OPERATION INSTRUCTIONS ....................7 INSTRUCTION FOR SERVICING(R32) ......................12 INSTALLATION PRECAUTIONS ......................14 INDOOR UNIT INSTALLATION ......................22 OUTDOOR UNIT INSTALLATION ...........................26 TEST OPERATION ........................28 MAINTENANCE ........................29 TROUBLESHOOTING * The design and specifications are subject to change without prior notice for product improvement. Consult with the sales agency or manufacturer for details.
-
Page 47: Safety Precautions
SAFETY PRECAUTIONS SAFETY RULES AND RECOMMENDATIONS FOR THE INSTALLER ead this guide before installing and using the appliance. uring the installation of the indoor and outdoor units the access to the working area should be forbidden to children. Unforeseeable accidents could happen. ake sure that the base of the outdoor unit is firmly fixed. - Page 48 SAFETY PRECAUTIONS SAFETY RULES AND RECOMMENDATIONS FOR THE INSTALLER o not try to install the conditioner alone, always contact specialized technical personnel. leaning and maintenance must be carried out by specialized technical personnel. In any case disconnect the appliance from the mains electricity supply before carrying out any cleaning or maintenance.
- Page 49 SAFETY PRECAUTIONS SAFETY RULES AND PROHIBITIONS o not bend, tug or compress the power cord since this could damage it. Electrical shocks or fire are probably due to a damaged power cord. Specialized technical personnel only must replace a damaged power cord. o not use extensions or gang modules.
-
Page 50: Name Of Parts
NAME OF PARTS Indoor Unit Display and ON/OFF key Outdoor Unit Air inlet Wiring cover Air outlet Drainage pipe Connection wiring Valve protective cover Gas valve (Low pressure valve) Liquid valve (High pressure valve) With the protective cover removed Note: This figure shown may be different from the actual object. Please take the latter as the standard. - Page 51 NAME OF PARTS Indoor Display ON/OFF key: Press this button on the electronic control box when the remote controller fails . Operation Respond Current status Enter mode Press the emergency button Standby It beeps briefly once. Cooling mode once Standby Press the emergency button It beeps briefly twice.
-
Page 52: Operation Instructions
OPERATION INSTRUCTIONS Attempt to use the air conditioner under the temperature beyond the specified range may cause the air conditioner protection device to start and the air conditioner may fail to operate. Therefore, try to use the air conditioner in the following temperature conditions. Inverter air conditioner: MODE Heating... -
Page 53: Instruction For Servicing(R32)
INSTRUCTION FOR SERVICING(R32) 1. Check the information in this manual to find out the dimensions of space needed for proper installation of the device, including the minimum distances allowed compared to adjacent structures. 2. Appliance shall be installed, operated and stored in a room with a floor area larger than 4m . 3. - Page 54 INSTRUCTION FOR SERVICING(R32) 16. Information on servicing: 1) Checks to the area Prior to beginning work on systems containing flammable refrigerants, safety checks are necessary to ensure that the risk of ignition is minimized. For repair to the refrigerating system, the following precautions shall be complied with prior to conducting work on the system.
- Page 55 INSTRUCTION FOR SERVICING(R32) The following checks shall be applied to installations using flammable refrigerants: -- The charge size is in accordance with the room size within which the refrigerant containing parts are installed; -- The ventilation machinery and outlets are operating adequately and are not obstructed; -- If an indirect refrigerating circuit is being used, the secondary circuit shall be checked for the presence of refrigerant;...
- Page 56 INSTRUCTION FOR SERVICING(R32) 19. Cabling Check that cabling will not be subject to wear, corrosion, excessive pressure, vibration, sharp edges or any other adverse environmental effects. The check shall also take into account the effects of aging or continual vibration from sources such as compressors or fans. 20.
- Page 57 INSTRUCTION FOR SERVICING(R32) a) Become familiar with the equipment and its operation. b) Isolate system electrically. c) Before attempting the procedure, ensure that: . mechanical handling equipment is available, if required, for handling refrigerant cylinders; . all personal protective equipment is available and being used correctly; .
-
Page 58: Installation Precautions
INSTALLATION PRECAUTIONS(R32) Important Considerations 1. The air conditioner must be installed by professional personnel and the Installation manual is used only for the professional installation personnel! The installation specifications should be subject to our after-sale service regulations. 2. When filling the combustible refrigerant, any of your rude operations may cause serious injury or injuries to human body and objects. - Page 59 INSTALLATION PRECAUTIONS(R32) 3. Installation Safety Refrigerant Leak Detector Appropriate Installation Location The left picture is the schematic diagram of a refrigerant leak detector. Please note that: 1. The installation site should be well-ventilated. 2. The sites for installing and maintaining an air conditioner using Refrigerant R32 should be free from open fire or welding, smoking, drying oven or any other heat source higher than 548 which easily produces open fire.
-
Page 60: Indoor Unit Installation
INSTALLATION PRECAUTIONS Pipe Length and Additional Refrigerant Inverter Models Capacity (Btu/h) 18K (For each indoor) 9K-12K (For each indoor) Lenght of pipe with standard charge Maximum distance between indoor and outdoor unit Additional refrigerant charge 15g/m 20g/m Max. diff. in level between indoor and outdoor unit Type of refrigerant Torque Parameters Newton... - Page 61 INDOOR UNIT INSTALLATION Step1: Select Installation location 1.1 Ensure the installation complies with the installation minimum dimensions (defined below) and meets the minimum and maximum connecting piping length and maximum change in elevation as defined in the System Requirements section. 1.2 Air inlet and outlet will be clear of obstructions, ensuring proper airflow throughout the room.
- Page 62 INDOOR UNIT INSTALLATION Step2: Install the hooks 2.1 Ensure to meet the minimum installation dimension requirements as step 1, Take out the installation cardboard and fix it on the wall and adjust the cardboard to a horizontal state . 2.2 Mark out the screw hole positions on the wall according to the holes on the cardboard. 2.3 Put down the install cardboard and drill holes in the marked positions with drill.
- Page 63 INDOOR UNIT INSTALLATION Step4: Connecting Refrigerant Pipe 4.1 According to the wall hole position, when piping outlet is on the left or right , should use scissors along the notch to cut the blanking plastic sheet on the chassis. Note: When cutting off the plastic sheet at the outlet, the cut should be trimmed to smooth. Chassis Blanking plastic sheet 4 sce ws...
- Page 64 INDOOR UNIT INSTALLATION Step4: Connecting Refrigerant Pipe 4.4 Bending the connecting pipes with the port facing up as shown in the figure. 4.5 Take off the plastic cover in the pipe ports and take off the protective cover on the end of piping connectors.
- Page 65 INDOOR UNIT INSTALLATION Step5: Connect Drainage Hose 5.1 Connect the drainage hose to the drainage port, ensure the joint is firm and the sealing effect is good. 5.2 Wrap the joint firmly with teflon tape to ensure no leaks. Note: Make sure there is no twists or dents, and the pipes should be placed obliquely downward to avoid blockage, to ensure proper drainage.
- Page 66 INDOOR UNIT INSTALLATION Step7: Wrap Piping and Cable After the refrigerant pipes, connecting wires and drainage hose are all installed, in order to save space, protect and insulate them, it must be bundle with insulating tape before passing them through the wall hole.
- Page 67 INDOOR UNIT INSTALLATION Step9: Reinstall the indoor unit 9.1 Install the frame on the chassis and fix it with 4 screws. 9.2 Install the panel on the frame and slide the switch on both side of panel to "Lock". 9.3 Switch the DIP as you like . Air flow from the outlet on the top and bottom Air flow only from the outlet on the top...
-
Page 68: Outdoor Unit Installation
OUTDOOR UNIT INSTALLATION Step1: Select Installation Location Select a site that allows for the following: 1.1 Do not install the outdoor unit near sources of heat, steam or flammable gas. 1.2 Do not install the unit in too windy or dusty places. 1.3 Do not install the unit where people often pass. - Page 69 OUTDOOR UNIT INSTALLATION Step4: Install Wiring 4.1 Use a phillips screwdriver to unscrew wiring cover, grasp and press it down gently to take it down. 4.2 Unscrew the cable clamp and take it down. 4.3 According to the wiring diagram pasted inside the wiring cover, connect the connecting wires to the corresponding terminals, and ensure all connections are firmly and securely.
- Page 70 OUTDOOR UNIT INSTALLATION Step5: Connecting Refrigerant Pipe 5.1 Unscrews the valve cover, grasp and press it down gently to take it down(if the valve cover is applicable). 5.2 Remove the protective caps from the end of valves. Take off the plastic cover in the pipe ports and c heck whether there is any sundry on the port of the connecting pipe and make ensure the port is clean.
- Page 71 OUTDOOR UNIT INSTALLATION Step6: Vacuum Pumping 6.1 Use a spanner to take down the protective caps from the service port, low pressure valve and high pressure valve of the outdoor unit. 6.2 Connect the pressure hose of manifold gauge to the service port on the outdoor unit low pressure valve.
-
Page 72: Test Operation
TEST OPERATION Inspections Before Test Run Do the following checks before test run. Description Inspection method Check whether the power supply voltage complies with specification. Electrical Check whether there is any wrong or missing connection between the safety inspection power lines, signal line and earth wires. Check whether the earth resistance and insulation resistance comply with requirements. - Page 73 TEST OPERATION Test Run Instruction 1. Turn on the power supply. 2. Press the ON/OFF button on the remote controller to turn on the air conditioner. 3. Press the Mode button to switch the mode COOL and HEAT. In each mode set as below: COOL-Set the lowest temperature HEAT-Set the highest temperature 4.
-
Page 74: Maintenance
MAINTENANCE When cleaning, you must shut down the machine and cut off the power supply for more than 5 minutes. Under no circumstances should the air conditioner be flushed with water. Volatile liquid (e.g. thinner or gasoline) will damage the air conditioner, so only use soft dry cloth or wet cloth dipped with neutral detergent to clean the air conditioner. -
Page 75: Troubleshooting
TROUBLESHOOTING POSSIBLE CAUSES MALFUNCTION Power failure/plug pulled out. Damaged indoor/outdoor unit fan motor. Faulty compressor thermomagnetic circuit breaker. Faulty protective device or fuses. The appliance does Loose connections or plug pulled out. not operate It sometimes stops operating to protect the appliance. Voltage higher or lower than the voltage range. - Page 76 TROUBLESHOOTING ERROR CODE ON THE DISPLAY(For Multi Models) The definition of failure or protection The display content of indoor LED Indoor and outdoor Communication fault Indoor room temperature sensor fault Indoor pipe temperature sensor fault Outdoor pipe temperature sensor fault System unnormal Model allocation error Indoor fan motor fault...
- Page 77 TROUBLESHOOTING ERROR CODE ON THE DISPLAY(For Single Models) In case of error, the display on the indoor unit shown the following error codes: Display Description of the trouble Indoor room temperature sensor fault Indoor pipe temperature sensor fault Outdoor pipe temperature sensor fault Refrigerant system leakage or fault Malfunction of indoor fan motor Outdoor ambient temperature sensor fault...
- Page 78 REMOTE CONTROLLER DUNE AUTO COOL DRY HEAT ECO SLEEP TIMER I FEEL HEALTH MILDEW CLEAN DISPLAY 8 CH WIND FREE GEN MODE OPTION Hold together over 3 seconds to activate of deactivate the Lock function TURBO MODE You will hear a beep when you press the following buttons or select the following optional functions, though the actual model haven't this function, we express our apologies: (Optional Function: COMFORTABLE COOLING airflow) (Optional Function: COMFORTABLE HEATING airflow)
- Page 79 DUNE REMOTE CONTROLLER Remote controller DISPLAY Meaning of symbols on the liquid crystal display Symbols Meaning Single indicator Lock function indicator Battery indicator AUTO Mode Auto function indicator COOL Mode Cooling indicator Mode Dry indicator Mode Fan indicator Mode Heating indicator HEAT ECO function indicator Timer indicator...
- Page 80 DUNE Replacement of Batteries Remove the battery cover plate from the rear of the remote controller, by sliding it in the direction of the arrow. nstall the batteries according the direction (+and -)shown on the Remote Controller. Reinstall the battery cover by sliding it into place. Use 2 LRO 3 AAA (1.5V) batteries .
- Page 81 OPERATING INSTRUCTIONS DUNE The air sucked by the fan enters from the grill and passes through the filter, then it is cooled/dehumidified Filter or heated through the heat exchanger. Heat Exchanger The direction of the air outlet is motorized up and down by flaps, and manually moved right and left by the vertical deflectors, for some models, the vertical deflectors could be controlled by motor as well.
- Page 82 OPERATING INSTRUCTIONS DUNE OPERATING INSTRUCTIONS COOLING MODE OPTION The cooling function allows the air condit- ioner to cool the room and at the same time COOL reduces Air humidity. To activate the cooling function ( COOL ) , press the MODE button until the symbol COOL TURBO appears on the display.
- Page 83 OPERATING INSTRUCTIONS DUNE FAN MODE(Not FAN button) The air conditioner works in only ventilation. To set the FAN mode , Press MODE until FAN appears on the display. OPTION AUTO MODE TURBO Automatic mode. AUTO MODE To activate the AUTO mode of operation, press the MODE button on the remote controller until the symbol appears on the display.
- Page 84 OPERATING INSTRUCTIONS DUNE ECO function OPTION The air conditioner works in economic mode Only in Heating or Cooling model, press ECO button TURBO and symbol ECO will appear on the display, the air conditioner will work in energy saving process. MODE To cancel this function, pressing the MODE to switch other mode or pressing the ECO button again.
- Page 85 OPERATING INSTRUCTIONS MILDEW function MILDEW Press OPTION at the fist time , select the MILDEW by pressing the button or until symbol MILDEW is flashing; Press OPTION again to activate the MILDEW function, and appears on the display. MILDEW Do it again to deactivate this function. This function enable the air conditioner still blow airflow about 15 minutes to dry the indoor inner parts to avoid mildew, when the air conditioner is off.
- Page 86 OPERATING INSTRUCTIONS TIMER function TIMER OPTION To set the automatic switch-on /off of the air conditioner For timer on, before proceeding with the time: Switch the conditioner off (with the key TURBO program the working mode with the button MODE and the fan speed with the button FAN MODE Timer setting/change/cancel:...
- Page 87 CONVENTIONAL WARRANTY Dear Customer, Thank you for purchasing a Diloc brand product and we are sure you will be satisfied with it. We recommend that you carefully read and keep the use and maintenance manual present in each product. Conventional warranty Hereby, Naicon srl guarantees the product from any material or manufacturing defect for a period of 24 months and covers only the spare parts.
- Page 88 Naicon SRL - Via il Caravaggio, 25 - Trecella I-20060 Pozzuolo Martesana - Milano (Italy) Tel. +39 02.95.003.1 Fax +39 02.95.003.313 www.naicon.com - e-mail: naicon@naicon.com...
Need help?
Do you have a question about the D.IN-CONSOLE12 and is the answer not in the manual?
Questions and answers