
Subscribe to Our Youtube Channel
Related Manuals for Cosori CAF-R121-SUS


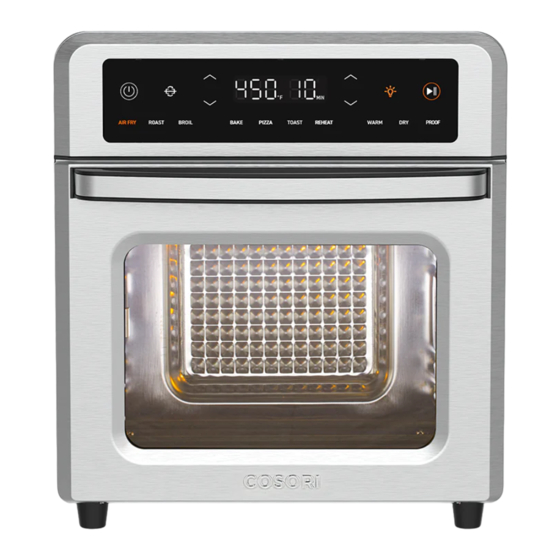
Summary of Contents for Cosori CAF-R121-SUS
- Page 1 User Manual 13-Quart Air Fryer Oven Questions or Concerns? Mon–Fri, 9:00 am–5:00 pm PST/PDT support@cosori.com | (888) 402-1684...
- Page 2 CONTACT OUR CHEFS Our helpful, in-house chefs are ready to assist you with any questions you might have! Email: recipes@cosori.com Toll-Free: (888) 402-1684 Mon-Fri, 9:00 am–5:00 pm PST/PDT On behalf of all of us at COSORI, Happy cooking!
-
Page 3: Table Of Contents
Weight (including accessories) 14.2 x 13.0 x 14.6 in / Dimensions 36.0 x 33.0 x 37.0 cm Download the free VeSync app to access original recipes and video tutorials from the COSORI chefs, interact with our online community, and more! -
Page 4: Important Safeguards
READ AND SAVE THESE INSTRUCTIONS IMPORTANT SAFEGUARDS Follow basic safety precautions when using your air fryer oven. Read all instructions. Key Safety Points • Do not use your air fryer if it is damaged, not working, or if the cord or plug is damaged. Contact •... - Page 5 (including children) with or metal utensils (except official reduced physical, sensory, or mental COSORI accessories) into the air capabilities, or lack of experience fryer. and knowledge, unless they have • Do not place paper, cardboard, or...
- Page 6 Power & Cord Extension Cords • This air fryer uses a short power- • Longer extension cords are available supply cord to reduce the risk of and may be used if care is exercised entangling or tripping. in their use. •...
- Page 7 Place drip tray inside with handle facing out. CAUTION: HOT DO NOT fill with oil. This is not a deep fryer. SAVE THESE INSTRUCTIONS...
-
Page 8: Getting To Know Your Air Fryer Oven
GETTING TO KNOW YOUR AIR FRYER OVEN Air Fryer Tray Rotisserie Basket Power Cord Food Tray Handle Rotisserie Fork Set Rotisserie Slots Door Rotisserie Shaft Housing Heating Elements Rotisserie Handle LED Display Drip Tray... -
Page 9: Display
DISPLAY Hour Indicator Rotisserie Celsius/Fahrenheit Button Indicators Start/Pause Button Increase/ Increase/ Power Decrease Decrease Time Button Temperature Light Button Temperature Time Minute Indicator Display Display Cooking Functions Seconds Cook Time Display Remaining Format < 1 minute Seconds < 1 minute <... -
Page 10: Controls
CONTROLS Power Button ROTISSERIE Button • Tap to turn the air fryer on/off. • Tap to turn rotisserie rotation on/off. • While the air fryer is cooking or paused, • Rotisserie rotation is only available tap to cancel cooking. The air fryer will when using the Air Fry or Roast cooking return to standby. - Page 11 Time Increment Chart Increase/Decrease Time Air Fry, Roast, Broil, Bake, Pizza, Reheat, Warm • Tap to adjust the time setting. All times (tap 1-minute • Time will adjust in increments of 1 or 10 button) increments minutes, or 0.5 or 1 hour, depending on All times (press and 10-minute the cooking function (see chart).
-
Page 12: Before First Use
BEFORE FIRST USE Setting Up Test Run 1. Remove all packaging around and inside A test run will help you become familiar the air fryer. with your air fryer, make sure it’s working correctly, and clean it of possible residues. 2. - Page 13 Tray Positions Rotisserie Handle Each cooking function has a recommended The rotisserie handle is used to place the tray position with slots that you can slide rotisserie basket or fork set into the rotisserie a tray into (the food tray or air fryer tray). slots in the air fryer oven.
- Page 14 Rotisserie Fork Set The rotisserie fork set is used for rotating Use the rotisserie handle to place the roasts and is ideal for roasting a whole food item inside the air fryer oven, chicken. Do not cook more than 4 pounds at securing both ends of the rotisserie a time on the rotisserie fork set.
-
Page 15: Cooking Functions Quick Reference
Cooking Functions Quick Reference Chart Suggested Name Accessory & Range Speed* Position Air fryer tray • Cooks using intense heat at level 2 or 3 and maximized airflow position • 180°–450°F / • Cook food such as french 80°–230°C AIR FRY High fries and chicken wings Rotisserie... - Page 16 • Keep food warm at the • 150°–230°F / Food tray or KEEP WARM recommended temperature 65°–110°C air fryer tray at to prevent bacterial growth (“WARM”) level 4 position • 1 min–1 hr (160°F or above) • Evenly dry out food without •...
- Page 17 Air Fry Function (“AIR FRY”) This function is ideal for cooking a variety Place food in the air fryer tray or of food, including french fries and chicken rotisserie basket. wings. Uses intense heat and maximized airflow. Avoid overfilling the air fryer tray, or food may not air fry correctly.
- Page 18 Roast Function (“ROAST”) This function is ideal for cooking a variety of Place food inside the air fryer. Insert the meats and poultry. Food will be tender and food tray at level 4 position. juicy on the inside and well-roasted on the outside.
- Page 19 Broil Function (“BROIL”) Tap BROIL to select the Broil cooking This function is ideal for cooking open- faced sandwiches, thin cuts of meat (such function. as bacon), poultry, fish, sausages, and Optionally, customize the temperature vegetables. and time. You can do this anytime Can also be used to brown the tops of during cooking (except during casseroles, gratins, and desserts.
- Page 20 Bake Function (“BAKE”) This function cooks food evenly throughout. Place food inside the air fryer. If using Ideal for baking cakes, muffins, brownies, the food tray, insert at mid position. and pastries. Also ideal for cooking pre- packaged frozen meals, including lasagna Note: Use extreme caution when using foil, and and pot pies.
- Page 21 Pizza Function (“PIZZA”) This function melts and browns cheese and Remove any cardboard, plastic, paper, toppings while crisping crust. or other flammable materials. Place pizza on a pan, and place the pan on Heating Elements: Top and bottom heating the air fryer tray. elements cycle on and off.
- Page 22 Toast Function (“TOAST”) This function browns the outside of your Note: • bread while keeping the inside soft. Also When setting the toast darkness level, ideal for English muffins and frozen waffles. consider the type, thickness, and freshness of the bread. Heating Elements: Top and bottom heating elements cycle on and off.
- Page 23 Reheat Function (“REHEAT”) This function is designed to reheat leftovers to begin reheating. The button without overcooking or drying out the food. will light up, and the display will show the timer counting down. Heating Elements: Top heating elements cycle on and off. The air fryer will stop heating and beep several times when finished.
- Page 24 Keep Warm Function (“WARM”) This function is designed to keep food warm to begin warming. The button at the recommended temperature to prevent will light up, and the display will show bacterial growth (160°F / 70°C or above). the timer counting down. Heating Elements: Top heating elements The air fryer will stop heating and beep cycle on and off.
- Page 25 Dehydrate Function (“DRY”) This function combines low and stable heat Optionally, customize the temperature with steady airflow to evenly dry out foods and time. You can do this anytime without cooking. Ideal for drying fruit or during cooking. vegetable chips. to adjust the Heating Elements: Top heating elements temperature between 100°–180°F /...
- Page 26 Proof Function (“PROOF”) This function is designed to precisely Tap PROOF to select the Proof cooking hold low temperatures, providing an ideal function. environment for proofing bread, rolls, pizza, Optionally, customize the temperature and dough. and time. You can do this anytime Can also be used for making yogurt with during cooking.
-
Page 27: Care & Maintenance
CARE & MAINTENANCE Cleaning the Accessories Clean air fryer accessories (including trays, etc.) and air fryer interior after every use. Note: After each use, slide out the drip tray and Note: discard crumbs. • Do not use abrasive cleaners, metal scouring pads, or metal utensils on any part of the air 1. -
Page 28: Troubleshooting
TROUBLESHOOTING Problem Possible Solution The air fryer will not turn on. Make sure the air fryer is plugged in. Food is not completely cooked. Increase cooking temperature or time. Decrease cooking temperature or time. Food is overcooked or burned. Make sure food items are not too large and are not touching the heating elements. - Page 29 FCC SUPPLIER’S DECLARATION OF CONFORMITY (SDOC) Arovast Corporation hereby declares that this equipment is in compliance with FCC requirements. The declaration of conformity may be consulted in the support section of our website, accessible from www.cosori.com...
-
Page 30: Warranty Information
2-year warranty. To make the accident, abuse, misuse or improper or customer support process quick and easy, inadequate maintenance; register your product online at www.cosori. • To damages or defects caused by service com/warranty. or repair of the product performed by... -
Page 31: Customer Support
We hope this has been helpful to you. We can’t wait to see your beautiful results, and we think you’ll want to share glam shots! Our community awaits your uploads—just pick your platform of choice below. Snap, tag, and hashtag away, COSORI chef! #LiveLifeTastefully #iCookCOSORI... - Page 32 Questions or Concerns? Mon–Fri, 9:00 am–5:00 pm PST/PDT support@cosori.com | (888) 402-1684 DL110322AC-M1_0922CAF-R121-SUS...
Need help?
Do you have a question about the CAF-R121-SUS and is the answer not in the manual?
Questions and answers