
Related Manuals for Cosori CS130-AO-RXB


Summary of Contents for Cosori CS130-AO-RXB
- Page 1 User Manual Smart Air Fryer Toaster Oven Model Line: CS130-AO Models: CS130-AO, CS130-AO-RXB Questions or Concerns? Mon–Fri, 9:00 am–5:00 pm PST/PDT support@cosori.com | (888) 402-1684...
- Page 2 CONTACT OUR CHEFS Our helpful, in-house chefs are ready to assist you with any questions you might have! Email: recipes@cosori.com Toll-Free: (888) 402-1684 Mon–Fri, 9:00 am–5:00 pm PST/PDT On behalf of all of us at Cosori,...
-
Page 3: Table Of Contents
Table of Contents Package Contents Specifications Smart Air Fryer Toaster Oven Important Safeguards Wire Rack · Key Safety Points Food Tray · General Safety Crumb Tray · While Cooking Fry Basket · Power & Cord Rotisserie Fork Set · Electromagnetic Fields (EMF) Rotisserie Handle Getting to Know Your Smart Air Fryer Recipe Book... -
Page 4: Important Safeguards
• To avoid risk of fire or electric shock, damaged, not working, or if the do not place oversized foods or cord or plug is damaged. Contact metal utensils (except official Cosori Customer Support (see page 34). accessories) into the air fryer. • Do not use third-party replacement •... -
Page 5: Power & Cord
• To avoid overheating, do not use metal foil in the oven unless 120V, 60Hz 220-240V directed. Use extreme caution when using foil, and always fit foil as securely as possible. If the foil contacts the oven’s heating elements, this can cause overheating and risk of fire. -
Page 6: Getting To Know Your Smart Air Fryer Toaster Oven
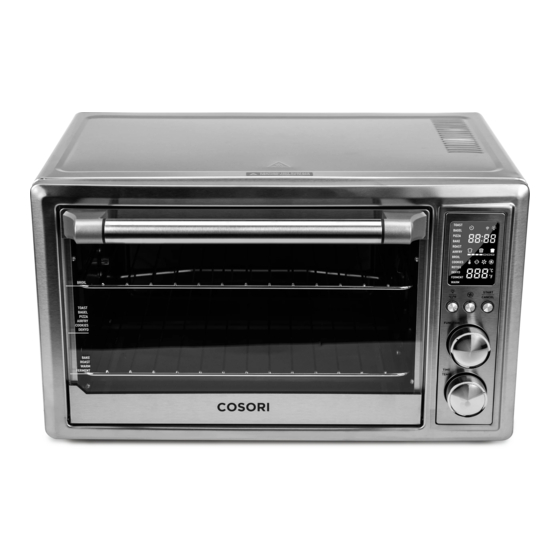
GETTING TO KNOW YOUR SMART AIR FRYER TOASTER OVEN Housing TIME/TEMP Knob Fry Basket LED Display Handle Rotisserie Forks Light/Unit Button Door Rotisserie Handle Fan Button Wire Rack Rotisserie Shaft START/CANCEL Button Food Tray Heating Elements FUNCTION Knob Crumb Tray Power Cord... -
Page 7: Display
DISPLAY Wi-Fi Icon* ® *Note: This indicates app configuration status. See the VeSync in-app instructions Timer Icon for more information. Light Indicator Time Display Toast/Bagel Darkness Level Indicators Minutes Seconds < 1 hour ≥ 1 hour Cooking Functions Hours Minutes Temperature Icon Cook Time Display... -
Page 8: Controls
CONTROLS Light/Unit Button START/CANCEL Button • Starts or cancels a cooking function. • Turns the interior light on/off. will • If preheating, cancels preheating and show on the display. starts the cooking function. • The interior light will turn on automatically •... -
Page 9: Time/Temp Knob
TIME/TEMP Knob Time Increment Chart Pizza, Bake, Roast, Air Fry, • Turn the knob to change time/ Broil, Cookies, Rotisserie, Warm temperature. Turn clockwise to increase, +/– 1-minute and counterclockwise to decrease. Below 60 minutes increments • Press the knob to switch between controlling time and temperature. -
Page 10: Before First Use
BEFORE FIRST USE Setting Up VeSync App Setup 1. Remove all packaging around and inside Note: Due to ongoing updates and the oven. improvements, the VeSync app may be slightly different than shown in the manual. 2. Place on a stable, level, heat-resistant In case of any differences, follow the in-app surface, away from anything that can be instructions. -
Page 11: Third-Party Voice Control
Third-Party Voice Control Turn on Bluetooth ® on your phone. in the VeSync app and select your You can use the VeSync app to connect smart air fryer toaster oven. your smart oven to Amazon Alexa or Google Follow the in-app instructions to finish Assistant™... -
Page 12: Cooking With Your Smart Air Fryer Toaster Oven
COOKING WITH YOUR SMART AIR FRYER TOASTER OVEN Note: You can use the VeSync app to control your smart air fryer toaster oven, follow in-app recipes, and more. CAUTION: • The outer surface of the oven, including the oven door, is hot during and after use. Temperature may be over 212°F (100°C). -
Page 13: Cooking Functions Quick Reference Chart
Cooking Functions Quick Reference Chart Suggested Accessory Name Range & Position • Darkness Level • Toast or brown bread Toast 1–7 Wire rack at mid • Manually preheat oven position “TOAST” • Temperature is • Defrost food automatic • Toast bagels or crumpets •... - Page 14 • Bake cookies and other • 150°–450°F / Cookies Food tray or wire rack at baked treats 66°–232°C mid position “COOKIES” • Includes automatic preheat • 1 min–6 hr • Cook rotating roasts, such as a whole chicken • 150°–400°F / Rotisserie 66°–204°C Rotisserie slots...
-
Page 15: Vesync App Functions
Cooking progress can be monitored from a Fry and Dehydrate functions. distance. In-App Cosori Recipes • Pre-programmed recipes made by Cosori’s in-house chefs are available in the app. These recipes automatically set the recommended time and temperature. • Create and save custom recipes. -
Page 16: Automatic Preheat
Automatic Preheat Setting Automatic Temperature Preheat Time Pizza, Bake, Roast, Broil, Cookies, and Air Fry 300°F / 149°C all use automatic preheat. 2–4 min and below 1. When you start the cooking function by 325°F / 163°C 3–5 min pressing START/CANCEL, preheating will start automatically. -
Page 17: Toast Function ("Toast")
Toast Function (“TOAST”) 1. Place up to 6 slices of bread on the wire rack. Insert the wire rack at mid position and close the oven door. 2. Turn the FUNCTION knob to “TOAST”, which will blink on the display. 3. -
Page 18: Bagel Function ("Bagel")
Bagel Function (“BAGEL”) 3. Optionally, customize the darkness level. You can only do this before cooking starts. a. Turn the TIME/TEMP knob to adjust the darkness level between 1–7. The bars underneath the toast icons indicate the darkness level. b. Use 1–2 for a light toast, 3–5 for a medium toast, and 6–7 for a dark toast. -
Page 19: Pizza Function ("Pizza")
Pizza Function (“PIZZA”) 5. When preheating is finished, the oven will beep several times, the display will flash, and the START/CANCEL button will blink continuously. 6. Remove any cardboard, plastic, paper, or other flammable materials. Place pizza on a pan, and place the pan on the wire rack. Close the oven door. -
Page 20: Bake Function ("Bake")
Bake Function (“BAKE”) 5. When preheating is finished, the oven will beep several times, the display will flash, and the START/CANCEL button will blink continuously. 6. Place food inside the oven. If using the food tray, insert at low position. Close the oven door. -
Page 21: Roast Function ("Roast")
Roast Function (“ROAST”) 5. When preheating completes, the oven will beep several times, the display will flash, and the START/CANCEL button will blink continuously. 6. Place food inside the oven. If using the food tray, insert at low position. Close the oven door. -
Page 22: Air Fry Function ("Airfry")
Air Fry Function (“AIRFRY”) 4. When preheating completes, the oven will beep several times, the display will flash, and the START/CANCEL button will blink continuously. 5. Place food in the fry basket. a. When air frying fatty foods (such as chicken wings), use the food tray instead to prevent oil dripping. -
Page 23: Broil Function ("Broil")
Broil Function (“BROIL”) 4. When preheating completes, the oven will beep several times, the display will flash, and the START/CANCEL button will blink continuously. 5. Place food on the food tray. a. Optionally, lightly grease the enamel food tray or line with foil to prevent food from sticking. -
Page 24: Cookies Function ("Cookies")
Cookies Function (“COOKIES”) 4. Press START/CANCEL to begin. Preheating will start automatically. The START/CANCEL button will light up, and the display will show “ ”. Note: Pressing START/CANCEL again during preheating will cancel preheating and immediately start cooking. 5. When preheating is finished, the oven will beep several times, the display will flash, and the START/CANCEL button will blink continuously. -
Page 25: Rotisserie Function ("Rotiss")
Rotisserie Function (“ROTISS”) 6. Press START/CANCEL to begin cooking. The button will light up, and the display will show the timer counting down. 7. The oven will stop heating and beep several times when finished. Use the rotisserie handle to take out the chicken. This function is used for rotating roasts. -
Page 26: Dehydrate Function ("Dehyd")
Dehydrate Function (“DEHYD”) 4. Optionally, customize the temperature and time. You can do this anytime during cooking. a. Turn the TIME/TEMP knob to adjust the time between 30 min–24 hr. b. Press the TIME/TEMP knob once to control temperature. Turn the knob to adjust the temperature between 100°–180°F / 38°–82°C. -
Page 27: Ferment Function ("Ferment")
Ferment Function (“FERMENT”) 4. Press START/CANCEL to begin fermentation. The button will light up, and the display will show the timer counting down. 5. The oven will stop heating and beep several times when finished. This function is designed to precisely hold low temperatures, providing an ideal environment for proofing bread, rolls, pizza, and dough. -
Page 28: Warm Function ("Warm")
Warm Function (“WARM”) This function is designed to keep food warm at the recommended temperature to prevent bacterial growth (160°F / 71°C or above). Heating Elements: Bottom heating elements cycle on and off. Rack Position: Low 1. Place hot food in a heat-safe container. Cover and place on the food tray or wire rack. -
Page 29: Care & Maintenance
CARE & MAINTENANCE Cleaning the Accessories Clean oven accessories (including trays, etc.) and oven interior after every use. Note: After each use, slide out the crumb tray and Note: discard crumbs. • The walls on the inside of the oven have a nonstick coating for easy cleaning. -
Page 30: Troubleshooting
TROUBLESHOOTING Problem Possible Solution The oven will not turn on. Make sure the oven is plugged in. Foods are not completely Increase cooking temperature or time. cooked. Decrease cooking temperature or time. Foods are overcooked or Make sure food items are not too large and are not touching the burned. -
Page 31: Vesync App Troubleshooting
VESYNC APP TROUBLESHOOTING Problem Possible Solution During the setup process, you must be on a secure 2.4 GHz Wi-Fi ® network. Confirm that the network is working correctly. Make sure the Wi-Fi password you entered is correct. Why isn’t my oven Turn on Bluetooth ®... - Page 32 FCC SDOC SUPPLIER’S DECLARATION OF CONFORMITY Arovast Corporation hereby declares that this equipment is in compliance with the FCC Part 15 Subpart B. The declaration of conformity may be consulted in the support section of our Web site, accessible from www.cosori.com.
-
Page 33: Warranty Information
• If the product has not been used in Quality Assurance accordance with directions and instructions Every Cosori product includes a 2-year warranty. in the user manual; To make the customer support process quick and • To damages or defects caused by accident, easy, register your product online at cosori.com/... -
Page 34: Customer Support
Arovast Corporation 1202 N. Miller St., Suite A Mon–Fri, 9:00 am–5:00 pm PST/PDT Anaheim, CA 92806 Email: support@cosori.com Toll-Free: (888) 402-1684 * Please have your invoice and order ID ready before contacting Customer Support. Attributions Apple App Store is a trademark of Apple Inc. - Page 35 Our community awaits your uploads—just pick your platform of choice below. Snap, tag, and hashtag away, Cosori chef! Considering what to cook? Many recipe ideas are available, both from us and the Cosori community.
- Page 36 Questions or Concerns? support@cosori.com | (888) 402-1684 Mon–Fri, 9:00 am–5:00 pm PST/PDT A4-01.03_D_21L30_us...
Need help?
Do you have a question about the CS130-AO-RXB and is the answer not in the manual?
Questions and answers