Chapters
Table of Contents

Related Manuals for FMS 80mm Dassault Rafale


Summary of Contents for FMS 80mm Dassault Rafale
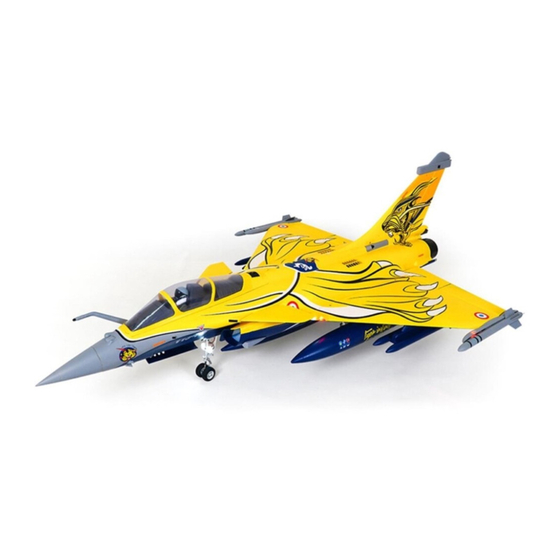
- Page 1 80mm Dassault Rafale Instruction Manual Bedienungsanleitung Manuel d’utilisation 操作手册 FMSMODEL.COM REALISTIC RIGID STABLE Retract & Flaps Installed Strong durable EPO Smooth flying performance...
- Page 3 WARNING WARNING: Read the ENTIRE instruction manual to become familiar with the features of the product before operating. Failure to operate the product correctly can result in damage to the product,personal property and cause serious injury. This is a sophisticated hobby product and NOT a toy. It must be operated with caution and common sense and failure to do so could result in injury or damage to the product or other property.
-
Page 4: Table Of Contents
.............. Kit contents etc............Model assembly Like all other FMS aircraft, the 80mm Rafale was designed to ............. Battery installation reduce build time to a minimum. Utilising screws, latches and ............Receiver diagram quick connectors, experienced builders can complete the build ......... -
Page 5: Model Assembly
Model assembly Main wing installation 1.Connect the wing halves onto the wing spar. 2.Fit the wing halves into the fuselage cutouts. HKM3.0*16mm 3.Secure the wing halves onto the fuselage with the included screws. 4.Adjust the elevon surfaces to align with the fuse- lage. - Page 6 Model assembly Vertical stabilizer installation 1.Connect the rudder servo to the preinstalled servo lead within the fuselage. 2. Install the vertical stabilizer into the fuselage pocket. 3.Attach the vertical stabilizer to the fuselage using HKM3.0*20mm the included screws. Canard installation 1.Install the canard halves into the fuselage as shown.
- Page 7 Model assembly 2.Secure the canards using the included screws. 4*3mm set screw 3. Align the canards to the fuselage using a hex drive, as shown. Weapons installation 1.Slide the missiles aft onto the missile rack.
- Page 8 Model assembly 2.Attach the missiles onto the wings by sliding them aft. Auxiliary fuel tank installation 1.Install the auxiliary fuel tanks onto the wings by sliding them aft. Note: the sticker side faces outboard. 2.Install the center auxiliary fuel tank onto the bottom fuselage by sliding it aft.
- Page 9 Model assembly 3.Finished installation diagram. Installation of the fuel probe 1.Slide the fuel probe aft onto the fuselage until secure. Nose cone installation 1.Attach the nose cone onto the fuselage, ensuring correct orientation.
- Page 10 Wiring diagram Left flap Left aileron Flashing lights Right flap Flashing lights Right aileron landing lights GEAR DOOR Canard FLAP GEAR GEAR...
-
Page 11: Battery Installation
Battery installation 1.Pull back on the latch and remove the battery hatch. 2.Apply the hook tape to the cable end of the battery. 3.Slide the full charged battery into the battery compartment with the power supply cable toward the rear end of the plane. Note: The center of gravity can be adjusted by moving the battery forward or aft.Having the correct center of gravity is critical to achieving proper flight characteristics. - Page 12 Steer left Steer right Control throws The suggested control throw setting for the 80mm Dassault Rafale are as follows (dual rate setting): Tips: On the first flight, fly the model in low rate. 20mm up / dowm 12mm up / dowm The first time you use high rates,be sure to fly at low to medium speeds.
-
Page 13: Clevis Installation
Clevis installation 1.Pull the tube from the clevis to the linkage. 2.Carefully spread the clevis, then insert the clevis pin into the desired hole in the control horn. 3.Move the tube to hold the clevis on the control horn. Control horn and servo arm settings More control throw Horns Arms... -
Page 14: Before Flying The Model
Before flying the model Flying course Find a suitable flying site Take off While applying power, slowly steer to keep the model straight. Find a flying site clear of buildings, trees, power lines and The model should accelerate quickly. As the model gains flight other obstructions. -
Page 15: Troubleshooting
Trouble shooting Problem Possible Cause Solution Aircraft will not respond to -Lower throttle stick and throttle trim to lowest settings. -ESC is not armed. the throttlebut responds to -Reverse throttle channel on transmitter. -Throttle channel is reversed. other controls. -Damaged spinner, propeller, -Replace damaged parts. -
Page 16: User Manual Of Brushless Speed Controller
User Manual of Brushless Speed Controller Thanks for purchasing our Electronic Speed Controller (ESC). High power system for RC model is very dangerous, please read this manual carefully. In that we have no control over the correct use, installation, application, or maintenance of our products,no liability shall be assumed nor accepted for any damages, losses or costs resulting from the use of the product. - Page 17 User Manual of Brushless Speed Controller Begin To Use Your New ESC IMPORTANT! Because different transmitter has different throttle range, please calibrate throttle range before flying. Throttle range setting (Throttle range should be reset whenever a new transmitter is being used) 1.Switch on the transmi t ter, move throttle stick to the top position.
- Page 18 Program the ESC with your transmitter (4 Steps) Note: Please make sure the throttle curve is set to 0 when the throttle stick is at bottom position and 100% for the top position. NO.1 Enter program mode 1.Switch on transmitter, move throttle stick to top position, connect the battery pack to ESC 2.Wait for 2 seconds, the motor should emit special tone like "beep-beep-"...
- Page 19 Warnhinweise WARNUNG: Lesen Sie die GESAMTE Bedienungsanleitung, um sich vor der Inbetriebnahme mit den Funktionen des Produkts vertraut zu machen. Wenn das Produkt nicht ordnungsgemäß bedient wird, kann dies zu Schäden am Produkt oder persönlichem Eigentum führen und schwere Verletzungen verursachen.Dieses Produkt ist kein Spielzeug! Es muss mit Vorsicht und gesundem Menschenver- stand betrieben werden.
-
Page 20: Einleitung
Luft-Boden-Angriff hat die Rafale weltweite Erfolge errun- • 3280-2100KV Platin-Edition-Innenläufer mit einem gen. leistungsstarken 100A Regler Wie ihr maßstabsgetreues Pendant zeichnet sich die FMS • Delta-Flügel-Design mit Canards und funktionalen Klappen 80mm Rafale durch ein attraktives Farbschema, zahlreiche • stoßdämpfendes CNC-Fahrwerk aus Metall Scale Details und voll funktionsfähige Canards aus, wodurch... -
Page 21: Monatge Des Modells
Montage des Modells Montage der Tragflächen 1. Schieben Sie die Flügelhälften auf den Flächen- verbinder. 2.die Flügelhälften in die Rumpfausschnitte einset- zen. HKM3.0*16mm 3. Montieren Sie die Flügelhälften auf mit den mit- gelieferten Schrauben. 4.Die Querruder so einstellen, dass sie mit dem Rumpf fluchten. - Page 22 Montage des Modells Montage des Seitenleitwerks 1. Verbinden Sie das Servokabel des Seitenruders mit dem Kabel im Rumpf. 2. Montieren Sie das Seitenleitwerk am Rumpf. 3. Befestigen Sie den vertikalen Stabilisator mit den HKM3.0*20mm mitgelieferten Schrauben am Rumpf. Montage der Canards 1.
- Page 23 Montage des Modells 2.Sichern Sie die Canards mit den entsprechenden Schrauben. 4*3mm set screw 3. Richten Sie die Canards wie abgebildet zum Rumpf aus. Montage der Bewaffnung 1.Setzen Sie die Raketen wie in der Abbildung ein.
- Page 24 Montage des Modells 2.Schieben Sie die Raketen wie abegebildet in die Flächen. Montage des Tanks 1.Befestigen Sie die Tanks wie auf der Abbildung. Hinweis: Die Aufkleber sollen nach außen zeigen. 2.Montieren Sie die Tanks wie abgebildet.
- Page 25 Montage des Modells 3.Nun sollte die Bewaffnung wie in der Abbildung angeordnet sein. Montage der Sonde 1.Schieben Sie die Kraftstoffsonde wie abgebildet in den Rumpf. Montage der Nase 1.Die Nasen auf den Rumpf aufsetzen und dabei auf die richtige Ausrichtung achten.
- Page 26 Anschlussdiagramm Linke Landeklappe Linkes Querruder Beleuchtung Rechte Landeklappe Beleuchtung Rechte Querruder Landescheinwerfer Fahrwerksklappen Canard FLAP GEAR Seitenruder Fahrwerk...
-
Page 27: Einsetzen Des Akkus
Einstezen des Akkus 1. Nehmen Sie die Haube ab. 2. Befestigen Sie den Akku mit dem Klettband. 3. Schieben Sie den geladenen Akku mit den Kabeln nach hinten in bis ganz nach vorne im Akkufach. Hinweis: Der Schwerpunkt des Modells kann durch verschie- ben des Akkus verändert werden. - Page 28 Sinken Gieren links Gieren rechts Ruderausschläge The suggested control throw setting for the 80mm Dassault Rafale are as follows (dual rate setting): Maximale Ausschläge Normale Ausschläge Tipp: Fliegen Sie das Modell beim ersten Flug mit "normalen Ausschlägen". Wenn Sie zum ersten Höhenruder...
-
Page 29: Montage Der Gabelköpfe
Montage der Gabelköpfe 1. Ziehen Sie den Ring vom Gabelkopf zum Gestänge. 2. Spreizen Sie den Gabelkopf vorsichtig und führen Sie den Gabelkopfstift in das gewünschte Loch im Ruderhorn ein. 3. Befestigen Sie den Ring um den Gabelkopf am Ruderhorn zu halten. -
Page 30: Vor Dem Erstflug
Vor dem Erstflug Fluggrundlagen Finden Sie einen geeigneten Flugplatz Starten Beschleunigen Sie das Modell vorsichtig und steuern Sie es Finden Sie einen Flugplatz frei von Gebäuden, Bäumen, langsam um es gerade zu halten. Erhöhen Sie die Stromleitungen und anderen Hindernissen. Bis Sie wissen, Beschleunigung und halten Sie eine gleichmäßige wie viel Fläche Sie zum fliegen brauchen, wählen Geschwindigkeit um das Modell in einem schönen Anstellwinkel... -
Page 31: Problmelösungen
Problemlösungen Problem Mögliche Ursache Lösung Modell nimmt kein Gas an, -Gasknüppel ist nicht ganz unten oder Trimmung zu hoch -Regler reagiert nicht andere Steuerungsbefehle -Gaskanal am Sender umkehren -Gaskanal ist umgekehrt funktionieren aber -Spinner, Propeller,Motor oder -Defekte Teile austauschen Ungewöhnliche Motorhalterung defekt -Lose Teile befestigen Propellergeräusche oder... -
Page 32: Bedienungsanleitung Zum Regler
Anleitung des Brushless Reglers Vielen Dank für den Kauf unseres Brushless Reglers (ESC). Hochleistungssysteme für RC-Modelle sind sehr gefährlich, lesen Sie bitte diese Anleitung sorgfältig durch. Insofern haben wir keine Kontrolle über die korrekte Verwendung, Installation, Anwendung oder Wartung unserer Produkte. Für Schäden, Verluste oder Kosten, die durch die Verwendung des Produkts entstehen, wird keine Haftung übernommen. - Page 33 Anleitung des Brushless Reglers Beginnen Sie mit der Verwendung Ihres neuen Brushless Reglers WICHTIG! Da verschiedene Sender unterschiedliche Gasbereiche haben, kalibrieren Sie bitte den Gasbereich, bevor Sie fliegen. Gasbereichseinstellung (Der Gasbereich sollte zurückgesetzt werden, wenn ein neuer Sender verwendet wird.) 1.Sender einschalten und den Gashebel in die obere Position (Motor Vollgas) bringen.
- Page 34 Programmieren Sie den Regler mit Ihrem Sender (4 Schritte) Hinweis: Stellen Sie sicher, dass der Gasweg auf 0 eingestellt ist, wenn der Gasknüppel sich in der unteren Position befindet und 100% wenn der Gasknüppel sich in der oberen Position ist. NO.1 Rufen Sie den Programmiermodus auf 1.Sender einschalten, Gashebel nach oben bewegen Position, verbinden Sie den Akku mit Brushless Regler.
Need help?
Do you have a question about the 80mm Dassault Rafale and is the answer not in the manual?
Questions and answers