Table of Contents
Advertisement
Quick Links
Advertisement
Table of Contents

Subscribe to Our Youtube Channel
Related Manuals for Deli 740C


Summary of Contents for Deli 740C
- Page 1 USER MANUAL THERMAL RECEIPT PRINTER MODEL: 740C...
-
Page 2: Table Of Contents
CONTENTS STATEMENT..........................1 SAFETY PRECAUTIONS......................1 CHAPTER 1. PRODUCT INTRODUCTION................5 1.1 Unpacking checklist............................5 1.2 Physical appearance and components..................6 1.3 Product dimensions............................7 Chapter 2. Product specifications................8 Chapter 3 Installation and Operation................9 3.1 Installation media ............................9 3.2 Connecting the power cord........................14 3.3 Interface connection..........................15 3.4 Label detection...............................16 3.5 Operation panel...............................17 3.6 Basic function..............................19... -
Page 3: Statement
STATEMENT The content of this manual should not be changed without prior written permission. Deli Group Co., Ltd. reserves the right to make any change on the technology, parts, software and hardware of this product. If you need addi- tional information about this product, please feel free to contact Deli Group Co., Ltd. - Page 4 • Do not use the electrical outlet if it’s not compatible with the power cord plug. • You should only use standard multi-outlet power strips. 2) You should only use the adapter provided in this package. • It is not safe to use other adapters. 3) Do not unplug it by pulling on the power cord •...
- Page 5 6) Other matters to note. Leave enough space around the printer for operation and maintenance pur- pose Keep the printer away from water, direct sunlight, strong light and heat sources. Do not use or store the printer in places with high temperature, high humidi- ty or heavy pollution.
- Page 6 4.WEEE (Waste Electrical and Electronic Equipment) The symbol placed on the product indicates that the item should not be mixed with general household waste. If such waste is not properly managed, it may harm both environment and human health. To prevent possible harm to the environment or human health from uncontrolled waste disposal, please separate these items from other types of waste and recycle them responsibly to promote the sustainable reuse of ma-...
-
Page 7: Chapter 1. Product Introduction
1 PRODUCT INTRODUCTION 1.1 Unpacking checklist 1) Unpack the printer and save the packing materials in case you need to repack the printer for shipping or storage. 2) Please contact the dealer for any defect and/or missing of accessory. Printer Power cord USB cable Warranty card... -
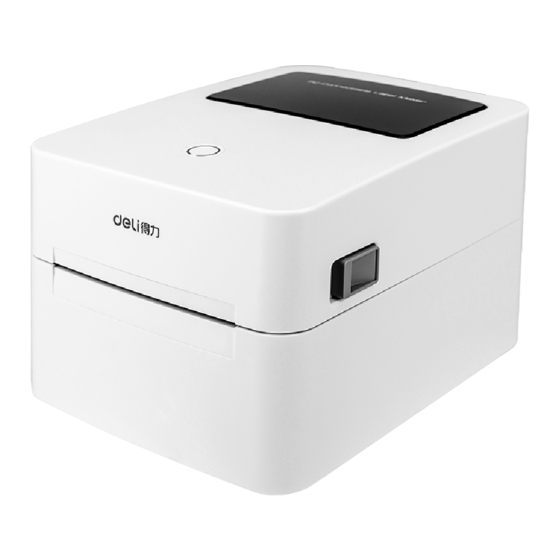
Page 8: Physical Appearance And Components
1.2.Physical appearance and components paper feed button(status indicator) top cover top cover release button power switch USB port power connector paper roll holder paper range slider rubber roller paper detector... -
Page 9: Product Dimensions
1.3 Product dimensions Unit: mm... -
Page 10: Chapter 2. Product Specifications
1.0" (25.4 mm) , 1.5" (38 mm) Programming language TSPL Driver Windows XP/Win7/Win8/Win10/Vista Software function Label design Deli BarTender Ultralite 2016 GB18030 16×16 24×24 32×32dots Built-in fonts ASCII 8×16 12×24 16×32dots Code 39, Code 93, Code 128UCC, Code 128 subset A, B, C, Codabar,Interleave2of5,EAN-8, EAN-13,EAN-128 Barcodes QR Code PDF417、DataMatrix... -
Page 11: Chapter 3 Installation And Operation
3 INSTALLATION AND OPERATION 3.1 Installation media 3.1.1 Installing the paper roll 2.Hold the paper scroll and take 1. Stand in front of the printer out the paper scroll upwards. and follow the arrow to open the receipt cover by pushing it up. 3. - Page 12 5. Pull out part of the paper roll through the paper guide, and close the paper guide according to the paper width to regulate both sides of the paper. 6. Press down until you hear a click. Tear off any excess paper in the direction of the cutting blades.
- Page 13 3.1.2 Installing folding paper 1. Place the folded label paper at the back of the printer. With the printing side facing up, insert into the printer from the external paper roll inlet. 2. Open the printer top cover, pull out the paper roll to the front of the printer, and adjust the paper guide according to the paper size.
- Page 14 3. Press down the top cover until it locks with a click.
- Page 15 3.1.3 Installing the external paper roll bracket When folding paper is used, or the paper roll is too large to be put into the paper bin, you can feed the paper from the paper inlet of the external paper roll as shown in the figure below, and then pass the paper underneath the paper guide, adjust the guide based on the paper width to regulate the paper.
-
Page 16: Connecting The Power Cord
3.2 Power connection 1. Make sure the printer's power switch is off (O). 2. Connect the power adapter to the printer. 3. Connect the power cable to the power adapter. 4. Plug the power cord into the other end of the power supply. Off... -
Page 17: Interface Connection
3.3 Interface connection Connect the interface cable as shown in the figure below. This printer supports the following communication interface standards: --USB B-Type cable 1) Turn off the printer (O). 2) Please plug the communication cable to into the corresponding communication connectors of printer. -
Page 18: Label Detection
3.4 Label detection DL-740C(NEW) uses label paper (Figure 1) or black label paper (Figure 2), which requires label detection before normal paper feeding and printing. label paper (Figure 1) black label paper (Figure 2) -
Page 19: Operation Panel
3.5 Operation panel Power-on: When connected to power supply, move the power switch on the back side of the printer into the On position, the printer turns on and the indicator light is on. Power-off: Move the power switch on the back side of the printer into the Off position, the printer turns off... - Page 20 Description for indicator status Color Status Printer status Blue Printer is ready for operation Purple Printer head is overheated The top cover is not closed in place Blinks slowly Out of paper or paper jam Blinks fast Abnormal label printing training Orange Printer is not ready for operation Green...
-
Page 21: Basic Function
3.6 Basic function 3.6.1 Power ON/OFF Press "O" to turn off the power; Press "l" to turn on the power. off 3.6.2 Printing test When the printer is initially installed, or if there is any problem with the printer, you can execute the self-check program to confirm the following status. - Page 22 3.6.3 Label printing training 1.Under the following situations, the users may learn about label positioning so that printer can better position the labels . Set up your printer for the first time; Use the printer for the first time after the sensor is cleaned; Reuse the printer after a period of not using;...
-
Page 23: Chapter 4 Interface Signal
4 INTERFACE SIGNAL Pin number Signal name VBUS... -
Page 24: Chapter 5 Cleaning The Printer
5 CLEANING THE PRINTER Printing quality might be degraded by dust, foreign substance, adhesive substance, or other pollution materials stuck in the printer head or inside the printer.When dirty, clean the print head as follows ※ Caution 1) Make sure to turn the printer power off prior to cleaning. 2) Turn the printer off...
Need help?
Do you have a question about the 740C and is the answer not in the manual?
Questions and answers