
Related Manuals for Colzer BJV7


Summary of Contents for Colzer BJV7
- Page 1 Commercial Grade Dehumidifier User Manual Model No.: BJV7, BJV9 Email: service@colzer.com Please read this User Manual before operating and save for future reference.
- Page 2 Welcome Thanks for choosing COLZER dehumidifier! COLZER is dedicated to keeping people healthy, comfortable and more enjoyable by offering quality dehumidifiers range from dehumidifiers, air purifiers, humidifiers to refrigerators, wine coolers, ice makers, and more. From breathing easier in your office to upgrading your kitchen dehumidifiers, we hope COLZER could help you every step of the way.
- Page 3 BEFORE FIRST USE: Please leave the dehumidifier standing upright and outside the box for 24 HOURS before plugging it in. The dehumidifiers may have been tilted or placed upside down during shipping. Leave the dehumidifier to stand upright for 24 hours so the oil in the compressor can settle from the move, not doing so can affect the performance or lifespan of the dehumidifier.
-
Page 4: Table Of Contents
CONTENTS SAFETY INFORMATION .......................1 PARTS IDENTIFICATION ......................3 OPERATION INSTRUACTIONS .....................4 1. Install the Handle ............................ 4 2. Position Your Dehumidifier ......................... 5 3. Set up the Drainage ..........................5 4. Plug in Electrical Cord ..........................5 5. Understand the Control Panel ......................6 6. -
Page 5: Safety Information
SAFETY INFORMATION To prevent injury and property damage, the following instructions must be followed when using the dehumidifier. • Install the dehumidifier on flat surface to minimize vibration and or noise. • Inspect the power cord before use. Never operate the dehumidifier when the power cord or plug is damaged. - Page 6 have been given supervision or instruction concerning use of the dehumidifier by a person responsible for their safety. • Children should be supervised to ensure that they do not play with the dehumidifier. • The minimum distance between the dehumidifier and surrounding objects when using the dehumidifier at least 40 inch.
-
Page 7: Parts Identification
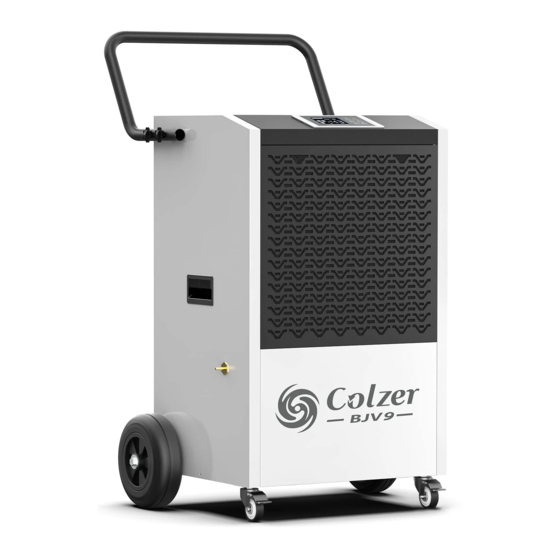
PARTS IDENTIFICATION 1. Handle 5. Control Panel 2. Air Inlet 6. Air Outlet 3. Power Cord 7. Wheel 4. Pump Drain Outlet 8. Gravity Drain Outlet NOTE: DO NOT OBSTRUCT THE AIR INLET OR OUTLET. NOTE: The technical parameters of this product are subject to the nameplate of the product. -
Page 8: Operation Instruactions
OPERATION INSTRUACTIONS 1. Install the Handle 1) Unscrew the pre-installed hand screws on both sides of the handle to take the handle off. 2) Install the handle as illustrated below, please NOTE to align the holes on the handle with the holes on the dehumidifier. -
Page 9: Position Your Dehumidifier
2. Position Your Dehumidifier For best results, operate your dehumidifiers in an enclosed area. Close all doors and windows. Place your dehumidifier away from obstructions, and keep it away from anything that could block airflow into and out of the dehumidifier. 3. -
Page 10: Understand The Control Panel
light up. 5. Understand the Control Panel Power Button: Press this button to turn on/ off the dehumidifier. OK Button: Press this button to confirm that the operation of setting humidity and/or timer is completed. Up Button: Press this button to increase the humidity and/or timer. Down Button: Press this button to decrease the humidity and/or timer. -
Page 11: Turn The Dehumidifier On
humidity level. When you are pressing the Up or Down button to set the target humidity percentage value, this digital number will turn to display the previous setting value and keep blinking. Run Icon: Run icon lights up when the fan is running, and lights off when the fan stops running. -
Page 12: Set A Desired Humidity Percentage Value
8. Set a Desired Humidity Percentage Value Press Up or Down button repeatedly to set your desired humidity percentage value between 10%-90% in increment of 1%. The digital number that reflects the humidity level will turn to the previous humidity set-point and then flash when changes are being made. The set humidity value needs to be at least 5% lower than the room humidity readout value. -
Page 13: Drain The Condensation
· For the AUTO ON setting, please turn on the dehumidifier to select a desired humidity level. Otherwise, the humidity maintained will be the same as the previous setting. · You can only set AUTO ON timer when the dehumidifier is off or set AUTO OFF timer when the dehumidifier is on, but not be able to set both AUTO ON and AUTO OFF timer at the same time. - Page 14 NOTE: To protect the compressor, the fan will continue to operate for 5 seconds after the dehumidifier has shut off. So please do not disconnect the power cord to force the dehumidifier to stop. Always use the Power button.
-
Page 15: Smart Functions
When the room temperature is lower than 40°F,the dehumidifier will automatically enter into LOW-TEMPERATURE PROTECTION SYSTEM where the LCD screen displays an "-L" message and the dehumidifier stops working. NOTE: When you see -H or -L message under normal circumstances, please contact the customer service at service@colzer.com to get technical support. -
Page 16: Technical Specifications
TECHNICAL SPECIFICATIONS MODEL BJV7 BJV9 POWER SOURCE 115V~60HZ 115V~60HZ RATED POWER 1200W 1300W RATED CURRENT 10.5A 11.3A INPUT POWER (65°F , RH60%) 650W 700W INPUT CURRENT(65°F , RH60%) 5.9A 6.1A MOISTURE REMOVAL(65°F , RH60%) 55PTS/Day 76PTS/Day MOISTURE REMOVAL(80°F , RH60%) -
Page 17: Maintenance
MAINTENANCE Ensure the dehumidifier is turned OFF and the plug is removed from the power socket before cleaning or maintenance is carried out. (1) Cleaning the Dehumidifier Clean the dehumidifier housing with a soft damp cloth. Do not submerge or place water on the dehumidifier or control panel. -
Page 18: When Not Using Dehumidifier For Long Periods Of Time
• Insert the filter into the air inlet grill and put the air inlet grill back on the dehumidifier. NOTE: DO NOT operate the dehumidifier without a filter because dirt and lint will clog it, reducing performance. (3) When Not Using Dehumidifier for Long Periods of Time •... -
Page 19: Trouble Shooting Guide
The below chart will help you solve common problems that may occur. If the problem you come across can not be fixed after troubleshooting or the problem is not listed in the below troubleshooting chart, please contact COLZER customer service to obtain professional support at service@colzer.com. -
Page 20: Error Codes
Non-faulty, the dehumidifier will automatically resume to operate after the temperature drops Non-faulty, the dehumidifier will automatically resume to operate after the temperature rises NOTE: If the problems persist, please turn off and unplug the dehumidifier, and contact COLZER customer service: service@colzer.com Special NOTE: When El, E2 and E4 fault alarm, the dehumidifier can operate normally, but it cannot be controlled intelligently. -
Page 21: Warranty
These are our general terms for warranty service, but we always urge our customers to reach out to us with any issue, regardless of warranty terms. If you have an issue with a COLZER product, please contact us at service@colzer.com, and we will do our best to resolve it for you.
Need help?
Do you have a question about the BJV7 and is the answer not in the manual?
Questions and answers