
Subscribe to Our Youtube Channel
Related Manuals for Camplux ME10


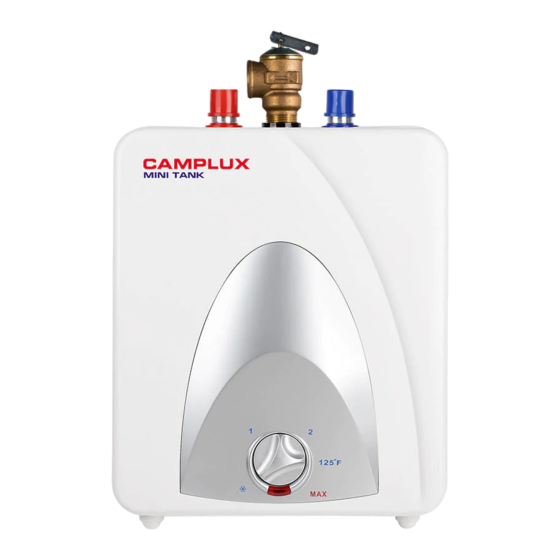
Summary of Contents for Camplux ME10
- Page 1 Series Electric Mini Tank Water Heaters USE & CARE MANUAL 1(844) 538-7475 support@camplux.com 3330-A Marathon Ct Charleston, SC 29418 Visit Us: Camplux.com...
-
Page 2: Table Of Contents
Filling the Water Heater ..................Electrical Connections ..................Instructions for Use ..................10-11 Maintenance Instructions ................11-14 Troubleshooting ....................Warranty ......................16-18 Schematic Disassembly & Parts List ..............1(844) 538-7475 support@camplux.com 3330-A Marathon Ct Charleston, SC 29418 Visit Us: Camplux.com... -
Page 3: Important Safety Instructions
IMPORTANT Never plug in the power cord until the tank is completely full and water is flowing out of the hot water faucet. 1(844) 538-7475 support@camplux.com 3330-A Marathon Ct Charleston, SC 29418 Visit Us: Camplux.com... -
Page 4: Technical Data
Amperage (Amps) Phases Assembly figure Temperature & Water Outlet Pressure Relief Valve Water Inlet Power Thermostat Indicator Light Water flow figure Water Outlet Water Inlet Shell Tank Insulation Foam 1(844) 538-7475 3330-A Marathon Ct Charleston, SC 29418 support@camplux.com Visit Us: Camplux.com... - Page 5 11 3/4″ 10 3/8″ ME60 18″ 15 3/4″ 15 1/2″ Schematic construction Element Grounding Wire Fastening Plate Overheating Protection Device Wiring diagram Thermostat T° Power Plug Overheating Protection Device 1(844) 538-7475 support@camplux.com 3330-A Marathon Ct Charleston, SC 29418 Visit Us: Camplux.com...
-
Page 6: General Information
The ME10, ME25, ME40, and ME60 are designed to be mounted on the wall. The ME10, ME25, ME40 and ME60 are designed to operate at 150 PSI maximum water pressure. Install a pressure reducing valve if your water pressure is greater than 80 PSI. -
Page 7: Technical Description
Technical Description There are 4 Camplux Mini Tank models with 1.3, 2.5, 4.0 and 6.0 gallon capacity. The pressure vessel (water tank) is welded, glass lined steel and is equipped with an anode rod. -
Page 8: Plumbing Connections
Fasten the supplied mounting bracket to the wall. Use screws that are suitable for the wall material and the weight of the water heater filled to capacity (ME10=24 lbs, ME25=41 lbs, ME40=57 lbs, ME60=76 lbs). Hang the water heater on the bracket and pull downwards on the water heater to ensure that both "fingers"... -
Page 9: Temperature & Pressure Relief Valve
7. Must not have a shut off valve between relief valve and tank or relief valve and termination of discharge. Figure - The T&P Relief Valve discharge pipe must be installed properly and piped to an adequate drain. 1(844) 538-7475 support@camplux.com 3330-A Marathon Ct Charleston, SC 29418 Visit Us: Camplux.com... -
Page 10: Filling The Water Heater
2. Open the cold water supply valve. 3. When continuous water flows out of the faucet, the tank is filled. 4. Close the hot water faucet. 5. Check entire system for leaks. 1(844) 538-7475 3330-A Marathon Ct Charleston, SC 29418 support@camplux.com Visit Us: Camplux.com... -
Page 11: Electrical Connections
The water heater is fitted with a power cord that is intended to plug into a grounded 120V/AC receptacle. Adhere to all pertinent state and local codes. Install the correct size circuit breaker into the master panel. The Camplux mini-tank water heater was manufactured and wired in accordance with UL requirements. -
Page 12: Maintenance Instructions
Before calling for service, first confirm that the water heater is properly filled and that 120 VAC power has not been interrupted. Temperature adjusting knob in “Freeze Protection” position 1(844) 538-7475 3330-A Marathon Ct Charleston, SC 29418 support@camplux.com Visit Us: Camplux.com... - Page 13 3. To descale manually, let element dry and then using a non metallic brush similar to a tooth brush; brush the residue from the element. Avoid damaging the surface of the element. 1(844) 538-7475 support@camplux.com 3330-A Marathon Ct Charleston, SC 29418 Visit Us: Camplux.com...
- Page 14 5. Disconnect the push-pull wire connectors on the thermostat noting which connector goes to which terminal. Terminals are marked. 6. Remove the thermostat probe from the well. 7. Install new thermostat, attach wires and tighten screws. Thermostat 1(844) 538-7475 support@camplux.com 3330-A Marathon Ct Charleston, SC 29418 Visit Us: Camplux.com...
- Page 15 Heating Element Note: A lower temperature setting saves energy and reduces the risk of scalding. CAUTION Call a technician if the high limit needs to be reset frequently. 1(844) 538-7475 support@camplux.com 3330-A Marathon Ct Charleston, SC 29418 Visit Us: Camplux.com...
-
Page 16: Troubleshooting
1. Unplug water heater power cord from the electrical outlet. 2. Check water fittings T&P fitting in the top of the tank. 3. Remove cover and inspect heating element gasket. 1(844) 538-7475 support@camplux.com 3330-A Marathon Ct Charleston, SC 29418 Visit Us: Camplux.com... -
Page 17: Warranty
Warranty Period 1. When a failure of the inner tank of a Camplux Mini Tank water heater, exposed to normal usage, occurs within one (1) year from the date of the original installation and is supplied with potable water, and such failure is proven to be a result of a defect in material or workmanship, Camplux will furnish to such owner a new water heater of the then prevailing comparable model. - Page 18 IMPORTANT The owner should retain this document. Note: Most tank water heaters eventually leak. Your Camplux water heater should be installed in such a manner that if it should leak, the resulting flow of water will not cause damage to the area in which it is installed.
- Page 19 1. Owner should contact the dealer who sold the water heater covered by this warranty or 2. Owner should submit the warranty claim directly to Camplux at the address listed below, and they will arrange for the handling of the claim.
-
Page 20: Schematic Disassembly & Parts List
Wire Press Plate Heating Element Aluminum Anode Rod Over Heat Limiter Bolt Heating Element Gasket Cross screw Temp. Control Knob Red Thread Cover Red Circle Blue Thread Cover 1(844) 538-7475 support@camplux.com 3330-A Marathon Ct Charleston, SC 29418 Visit Us: Camplux.com... - Page 21 1(844) 538-7475 support@camplux.com 3330-A Marathon Ct Charleston, SC 29418 Visit Us: Camplux.com...
- Page 22 1(844) 538-7475 support@camplux.com 3330-A Marathon Ct Charleston, SC 29418 Visit Us: Camplux.com...
- Page 23 Series Chauffe-eau Électrique À Mini Réservoir MANUEL D'UTILISATION ET D'ENTRETIEN 1(844) 538-7475 support@camplux.com 3330-A Marathon Ct Charleston, SC 29418 Visit Us: Camplux.com...
- Page 24 Remplir le chauffe-eau ..................Connexion électrique ..................11-12 Mode d’emploi ....................12-13 Consignes d’entretien ..................13-16 Dépannage ..................... 16-17 Garantie ......................17-19 Schéma de désassemblage et liste des pièces ........... 1(844) 538-7475 support@camplux.com 3330-A Marathon Ct Charleston, SC 29418 Visit Us: Camplux.com...
-
Page 25: Consignes De Sécurité Importantes
Contactez le centre de service agréé le plus proche pour un examen, une réparation ou un réglage. 9. N'utilisez pas de protecteurs de surtension ou d'adaptateurs multiprises avec ce chauffe-eau. 1(844) 538-7475 support@camplux.com 3330-A Marathon Ct Charleston, SC 29418 Visit Us: Camplux.com... -
Page 26: Données Techniques
VEUILLEZ CONSERVER CES INSTRUCTIONS Camplux et/ou le distributeur n'est pas responsable des dommages causés par installation incorrecte ou par le non-respect des instructions de ce manuel. L’installation du chauffe-eau et tous les travaux d'entretien et/ou de maintenance doivent toujours être effectués par un technicien qualifié et agréé. - Page 27 B (Inch) C (Inch) ME10 12 1/2″ 11″ 10″ ME25 14 1/2″ 11 3/4″ 10 3/8″ ME40 19 1/4″ 11 3/4″ 10 3/8″ ME60 18″ 15 3/4″ 15 1/2″ 1(844) 538-7475 support@camplux.com 3330-A Marathon Ct Charleston, SC 29418 Visit Us: Camplux.com...
-
Page 28: Informations Générales
Overheating Informations générales Les chauffe-eaux à mini réservoir Camplux peuvent être utilisés dans la plupart des applications sous le comptoir, au point d'utilisation. Les modèles Camplux sont conçus pour fournir des points d'eau chaude pour tous les lavabos et éviers de cuisine dans un environnement résidentiel, commercial ou industriel. - Page 29 Les appareils Camplux peuvent être fixés au sol ou au mur avec le matériel inclus. Les ME10, ME25, ME40 et ME60 sont conçus pour fonctionner à une pression d'eau maximale de 150PSI. Installez une soupape de surpression si la pression de votre eau est supérieure à...
-
Page 30: Description Technique
Description technique Il existe 4 modèles de mini réservoirs Camplux, les modèles 1,3gal 2,5gal, 4,0gal et 6,0gal. Le réservoir sous pression (réservoir d'eau) est en acier soudé revêtu de verre et est équipé d’une tige d'anode. Le chauffe-eau est équipé d'un thermostat et d'un interrupteur de limite de température. -
Page 31: Instructions Pour L'installation
Fixez le support de montage fourni au mur. Utilisez des vis adaptées au matériau du mur et au poids du chauffe-eau rempli à sa capacité (ME10 = 24 lbs, ME25 = 41 lbs, ME40 = 57 lbs, ME60 = 76 lbs). Accrochez le chauffe-eau au support et tirez le chauffe-eau vers le bas pour vous assurer que les deux «doigts»... -
Page 32: Connexion De Tuyauterie
électrique sous tension. L'ouverture de décharge ne doit en aucun cas être bloquée ou réduite en taille. 1(844) 538-7475 3330-A Marathon Ct Charleston, SC 29418 support@camplux.com Visit Us: Camplux.com... - Page 33 à l'intérieur de l'eau. La soupape de décharge T/P peut évacuer de l'eau chaude dans ces conditions, ce qui entraine une perte d'énergie et une accumulation de calcaire sur le relief de la soupape. 1(844) 538-7475 support@camplux.com 3330-A Marathon Ct Charleston, SC 29418 Visit Us: Camplux.com...
-
Page 34: Remplir Le Chauffe-Eau
Si de l'air reste dans le réservoir, l'élément peut endommager le chauffe-eau au moment de brancher le câble d’alimentation. 1(844) 538-7475 3330-A Marathon Ct Charleston, SC 29418 support@camplux.com Visit Us: Camplux.com... -
Page 35: Mode D'emploi
120 V/CA. Veuillez respecter tous les règlements régionaux et locaux pertinents. Installez le disjoncteur de taille correcte dans le panneau principal. Le mini chauffe-eau Camplux a été fabriqué et câblé conformément aux exigences UL. Le chauffe-eau est équipée d’une limitateur de surchauffe avec un mode redémarrage manuel. -
Page 36: Consignes D'entretien
électrique. Remarque: Pour la plupart des opérations d'entretien, le chauffe-eau devra être vidangé. Dans tous les cas, avant de vidanger, débranchez d'abord le câble d'alimentation. 1(844) 538-7475 support@camplux.com 3330-A Marathon Ct Charleston, SC 29418 Visit Us: Camplux.com... - Page 37 à une brosse à dents; brosser les résidus de l'élément. Évitez d'endommager la surface de l'élément. 4. Réinstaller l'élément et le joint. 5. Remplissez le réservoir d'eau avant de brancher le câble d'alimentation. 1(844) 538-7475 support@camplux.com 3330-A Marathon Ct Charleston, SC 29418 Visit Us: Camplux.com...
- Page 38 Le dispositif d'arrêt peut s'activer à la suite d'une panne de courant ou d'un orage. AVERTISSEMENT Ne pas modifier le bouton de réinitialisation pour annuler l'arrêt de surchauffe. 1(844) 538-7475 support@camplux.com 3330-A Marathon Ct Charleston, SC 29418 Visit Us: Camplux.com...
-
Page 39: Dépannage
1. Si la lumière ne s'allume pas, mais que l'eau devient chaude, vérifiez si l'ampoule est défectueuse. 2. Vérifiez le bouton de réinitialisation; suivez les étapes de la section précédente. 1(844) 538-7475 support@camplux.com 3330-A Marathon Ct Charleston, SC 29418 Visit Us: Camplux.com... -
Page 40: Garantie
(1) an si elle est utilisée dans le cadre d'une application de recirculation ou dans un application résidentielle pour plus d’une familiale, ou avec de l'eau dure, Camplux fournira à ce propriétaire un nouveau chauffe-eau comparable au modèle en vigueur. - Page 41 à la date de fabrication ndiquée sur l'étiquette apposée sur le chauffe-eau. Exclusions 1. Cette garantie limitée est la garantie exclusive faite par Camplux et remplace toutes les autres garanties, expresses ou implicites (écrites ou orales), y compris, mais sans s'y limiter, les garanties ou la qualité marchande et l'adéquation à...
- Page 42 Remarque: la plupart des chauffe-eaux à réservoir fuient éventuellement. Votre chauffe-eau Camplux doit être installé de telle manière qu'en cas de fuite, le débit d'eau qui en résulte n'endommage pas la zone dans laquelle il est installé.
- Page 43 Tige d'anode Limite de surchauffe Boulon Joint de l'élément chauffant Vis croisée Temp. bouton de controle Housse de protection rouge Cercle de tuyau rouge Housse de protection bleue 1(844) 538-7475 support@camplux.com 3330-A Marathon Ct Charleston, SC 29418 Visit Us: Camplux.com...
- Page 44 1(844) 538-7475 support@camplux.com 3330-A Marathon Ct Charleston, SC 29418 Visit Us: Camplux.com...
Need help?
Do you have a question about the ME10 and is the answer not in the manual?
Questions and answers