
Related Manuals for Camplux RS264


Summary of Contents for Camplux RS264
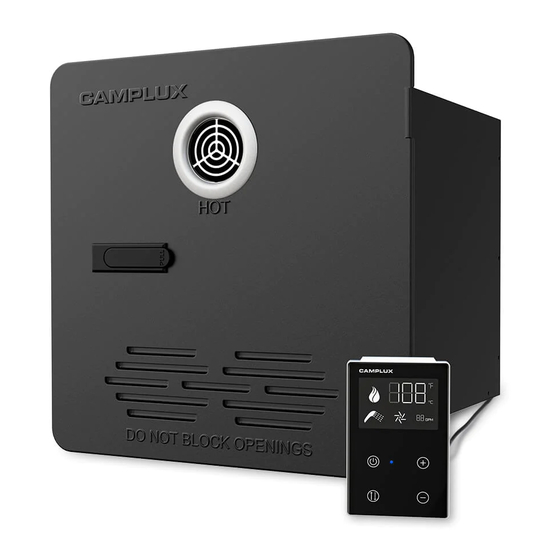
- Page 1 2.64 GPM RV TANKLESS WATER HEATER Instruction For Installation And Use Model: RS264/RS264B Model: RS264/RS264B Optional Colour White Black 1(844) 538-7475 support@camplux.com 8350 Patriot Blvd STE B, North Charleston, SC 29420 Visit Us: Camplux.com...
- Page 2 Thank you for purchasing this Camplux RV tankless water heater. Before operating your new product, please read these instructions carefully. This will ensure safe use and reduce the risk of injury. This instruction manual contains information for installation, operation, maintenance of the product and safe use.
-
Page 3: Table Of Contents
Product Overview & Features ................Installation & Operation .................. 10-29 Wiring Diagram ....................Check After Installation .................. 30-31 Operation Instruction ..................32-34 Winterizing Opration ..................34-37 Troubleshooting ..................... 39-42 1(844) 538-7475 support@camplux.com 8350 Patriot Blvd STE B, North Charleston, SC 29420 Visit Us: Camplux.com... -
Page 4: General Safety
This product may contain such substances or such substances may be formed from combustion of fuel (gas) or be components of the product itself. 1(844) 538-7475 support@camplux.com 8350 Patriot Blvd STE B, North Charleston, SC 29420 Visit Us: Camplux.com... - Page 5 ● Exhaust gases are hot and contain carbon monoxide, do not breath or obstruct the exhaust gases. ● Failure to follow the instruction will lead to serious injury, property damage, or death. 1(844) 538-7475 support@camplux.com 8350 Patriot Blvd STE B, North Charleston, SC 29420 Visit Us: Camplux.com...
- Page 6 ● The operator is responsible for making sure the appliance is off when refueling, traveling through tunnels, parking in garages or carports, or on ferries. 1(844) 538-7475 support@camplux.com 8350 Patriot Blvd STE B, North Charleston, SC 29420 Visit Us: Camplux.com...
-
Page 7: Product Overview & Features
Door locker Air intake How to open the door? 2. Rotate the handle 90 3. Open the door. 1. Lift the handle by finger. degrees angle. 1(844) 538-7475 support@camplux.com 8350 Patriot Blvd STE B, North Charleston, SC 29420 Visit Us: Camplux.com... - Page 8 Temperature unit switch button Connection for water and gas supply Door fixing frame Back cover Wires connection Water outlet (NPT1/2") Gas inlet (5/8"-18UNF) Water inlet (NPT1/2") 1(844) 538-7475 support@camplux.com 8350 Patriot Blvd STE B, North Charleston, SC 29420 Visit Us: Camplux.com...
- Page 9 ● Over pressure protection The appliance is equipped with a pressure relief valve that complies with the standard for Relief Valves for Hot Water Supply Systems, ANSI Z21.22. 1(844) 538-7475 support@camplux.com 8350 Patriot Blvd STE B, North Charleston, SC 29420 Visit Us: Camplux.com...
- Page 10 Installation cutout and depth dimensions (W x H x D) 12.8″ x 12.7″ x 19.7″ Shipping weight (lbs/kg) 29.8/13.5 Setting temperature range 95°F (35°C)~124°F (51°C) 1(844) 538-7475 support@camplux.com 8350 Patriot Blvd STE B, North Charleston, SC 29420 Visit Us: Camplux.com...
-
Page 11: Installation & Operation
Quantity Water Heater Main body Wall controller Door assembly ST4.2x30 screws (door fixing) ST4.2x20 screws (controller fixing) Wire connectors Use and care manual Warranty card 1(844) 538-7475 support@camplux.com 8350 Patriot Blvd STE B, North Charleston, SC 29420 Visit Us: Camplux.com... - Page 12 ● Make sure all exhaust gases are directed outside the RV. ● Protect all combustible material from the exhaust gases. ● DO NOT draw air for combustion from occupied spaces. 1(844) 538-7475 support@camplux.com 8350 Patriot Blvd STE B, North Charleston, SC 29420 Visit Us: Camplux.com...
- Page 13 ● Maintain a minimum clearance from combustible materials on sides (4 in), top (4 in), floor (0 in) and rear (0 in). ● Provide room for access to rear of appliance for servicing. 1(844) 538-7475 support@camplux.com 8350 Patriot Blvd STE B, North Charleston, SC 29420 Visit Us: Camplux.com...
- Page 14 Note: It is used for the hole of the wall controller wires perforation. Wire stripper pliers Crimping tool Adjustable wrench x 2 Tape measure Pencil Phillips screwdriver Flat blade Cutting knife Sealant gun Gloves 1(844) 538-7475 support@camplux.com 8350 Patriot Blvd STE B, North Charleston, SC 29420 Visit Us: Camplux.com...
- Page 15 Installation plan 1 Down edge of the opening is level with the floor. Water heater RV out wall Solid frame Solid floor 4-corner or platform no radius 1(844) 538-7475 support@camplux.com 8350 Patriot Blvd STE B, North Charleston, SC 29420 Visit Us: Camplux.com...
- Page 16 Installation plan 2 Down edge of the opening is higher than flooring with one wooden mat. Flush platform (same high) No radius Wooden mat RV flooring 1(844) 538-7475 support@camplux.com 8350 Patriot Blvd STE B, North Charleston, SC 29420 Visit Us: Camplux.com...
- Page 17 Slide the appliance into the cutout opening. If cannot slide in, check the size if correct, and check if the corners have radius. It must be no radius. 1(844) 538-7475 support@camplux.com 8350 Patriot Blvd STE B, North Charleston, SC 29420 Visit Us: Camplux.com...
- Page 18 ● A non Metallic Flexible gas hose must be rated for 149°F (65°C). Anchor appropriately to prevent fatigue and failure from wear edges. 1(844) 538-7475 support@camplux.com 8350 Patriot Blvd STE B, North Charleston, SC 29420 Visit Us: Camplux.com...
- Page 19 (refer to below right side picture), if not, you should buy some Teflon taps for sealing. 4. Fittings for water inlet and outlet PEX 1/2" NPT swivel nut 1/2" FNPT fitting Cone seal rubber Seal gasket 1(844) 538-7475 support@camplux.com 8350 Patriot Blvd STE B, North Charleston, SC 29420 Visit Us: Camplux.com...
- Page 20 NOTE: The appliance has a built in 10A fuse, serviceable from the front of the product. The appliance can be on a dedicated or shared branch circuit with the same or higher rating. 1(844) 538-7475 support@camplux.com 8350 Patriot Blvd STE B, North Charleston, SC 29420 Visit Us: Camplux.com...
- Page 21 (c) If necessary, run two electrical wires that extend the wall control connections (blue wires) to the appliance. Connections (blue wires) using the appropriate wire size. 16AWG max. 65ft. 1(844) 538-7475 support@camplux.com 8350 Patriot Blvd STE B, North Charleston, SC 29420 Visit Us: Camplux.com...
- Page 22 1. Unpacking the box and lifting appliance upward until fully removed from the box. 2. Remove protect caps of the water inlet, water outlet and gas inlet joints. Refer to below pictures. Remove the protective caps. 1(844) 538-7475 support@camplux.com 8350 Patriot Blvd STE B, North Charleston, SC 29420 Visit Us: Camplux.com...
- Page 23 NOTE: Ensure area beneath and behind the appliance is clean without debris and obstruction. Carefully slide the water heater across the floor to prevent linoleum damage. Clean the flooring before slide Butyl tap 1(844) 538-7475 support@camplux.com 8350 Patriot Blvd STE B, North Charleston, SC 29420 Visit Us: Camplux.com...
- Page 24 PEX 1/2" NPT swivel nut Water outlet Water Inlet Gas intlet RV flooring NOTE: Do not use sealing tape or compound on the compression type fitting. 1(844) 538-7475 support@camplux.com 8350 Patriot Blvd STE B, North Charleston, SC 29420 Visit Us: Camplux.com...
- Page 25 Step 7: Door frame installation. 1. Unpack the door assembly from the 2. Lift the handle of the door lock by finger. package. Door lock 1(844) 538-7475 support@camplux.com 8350 Patriot Blvd STE B, North Charleston, SC 29420 Visit Us: Camplux.com...
- Page 26 6. Pre-install the door frame and make sure each hole is aligned to the flange hole. 7. Mark four dots with a pencil for drilling. Pencil 1(844) 538-7475 support@camplux.com 8350 Patriot Blvd STE B, North Charleston, SC 29420 Visit Us: Camplux.com...
- Page 27 * Note: Drill the metal board only, no needy drill the inner wooden or heat insulation layer. Metal board Heat insulation layer or wooden 9. Fixing door frame with ST3.9*30 mm self screws(14Pcs). ST3.9*30 self screw (14Pcs) 1(844) 538-7475 support@camplux.com 8350 Patriot Blvd STE B, North Charleston, SC 29420 Visit Us: Camplux.com...
- Page 28 Step 1: Disassemble the wall controller. 1. Press and push up the buckle of the wall 2. Open the cover by finger or by flat blade . controller. 1(844) 538-7475 support@camplux.com 8350 Patriot Blvd STE B, North Charleston, SC 29420 Visit Us: Camplux.com...
- Page 29 Step 3: Wires connection. 1. Connect controller wires with 2 wire connectors. Use crimping tool to compress the connector. Crimping tool Wire connector 1(844) 538-7475 support@camplux.com 8350 Patriot Blvd STE B, North Charleston, SC 29420 Visit Us: Camplux.com...
-
Page 30: Wiring Diagram
To switch on/off 0~5V DC (Brown) Yellow proportional valve Black Black To proportional valve Brown +Black -White To ECO thermostat White Power 12VDC White Fan assembly 1(844) 538-7475 support@camplux.com 8350 Patriot Blvd STE B, North Charleston, SC 29420 Visit Us: Camplux.com... -
Page 31: Check After Installation
4. Check all connections for water leaks by eye and touch. 5. Repair water leaks as needed. 6. Repeat water leak check after any adjustments or loose connections. 1(844) 538-7475 support@camplux.com 8350 Patriot Blvd STE B, North Charleston, SC 29420 Visit Us: Camplux.com... - Page 32 4. The wall controller display will show the current temperature settings. Note: If any error codes or performance concerns, refer to the troubleshooting section of this manual. Fuse (6A) Power switch Power button switch 1(844) 538-7475 support@camplux.com 8350 Patriot Blvd STE B, North Charleston, SC 29420 Visit Us: Camplux.com...
-
Page 33: Operation Instruction
Higher water inlet pressures > 65 PSI. Reduce water flow: Rotate knob clockwise until a solid stop. Increase water flow: Rotate knob counter clockwise until a solid stop. 1(844) 538-7475 support@camplux.com 8350 Patriot Blvd STE B, North Charleston, SC 29420 Visit Us: Camplux.com... - Page 34 A. J. Pathol 1947; 23: 695 - 720. or with other hot water uses. 1(844) 538-7475 support@camplux.com 8350 Patriot Blvd STE B, North Charleston, SC 29420 Visit Us: Camplux.com...
-
Page 35: Winterizing Opration
For high altitude use This appliance can be used at high altitude and has been tested up to 2000ft. For prolonged use at higher altitudes please contact support@camplux.com. Cleaning and maintenance WARNING Burn or scald hazard ● Never perform work while the water heater is operating. - Page 36 Let water completely drain from the appliance (If needy, clean the filter). Drain plug Filter 1(844) 538-7475 support@camplux.com 8350 Patriot Blvd STE B, North Charleston, SC 29420 Visit Us: Camplux.com...
- Page 37 A bypass valve can be installed or used to bypass filling the water heater with antifreeze. The water heater must be evacuated with compressed air (see steps above) before bypassing. 1(844) 538-7475 support@camplux.com 8350 Patriot Blvd STE B, North Charleston, SC 29420 Visit Us: Camplux.com...
- Page 38 Check especially around the hot water, cold water, gas and electrical connections. 1(844) 538-7475 support@camplux.com 8350 Patriot Blvd STE B, North Charleston, SC 29420 Visit Us: Camplux.com...
- Page 39 Note: If damages found, please contact a technician to repair or contact Camplux customer service. 7. Check that all wire connections are firmly in place and there are no signs of chafing or cracks on the insulation. Verify that the spark...
-
Page 40: Troubleshooting
For prolong usage, when exposed to higher water hardness concentrations, it is advised to provide a proper water treatment device for the incoming water to the coach. Hard water may lead to performance reduction of you appliance overtime. Contact camplux for decalcification instructions. Recommended decalcification frequency per year Very hard: >180... - Page 41 Replace the out let temperature or main PCB control board. systemfault. Solenoid valve or system E7: Solenoid valve fault Check the solenoid valve wires connection if loosen or broken. fault. 1(844) 538-7475 support@camplux.com 8350 Patriot Blvd STE B, North Charleston, SC 29420 Visit Us: Camplux.com...
- Page 42 Troubleshooting ● If you encounter a problem with the appliance as the below table states, first try the suggested solutions. If problems persist, please call the camplux service or the dealer. ● Don’t repair the appliance by yourself, repairs must be performed by a certified service technician.
- Page 43 Water heater stops working often and water Unit is over heating, and pressure Contact camplux service. is found on the drainage relief valve discharged periodically. tray Power supply to the appliance is Switch on power supply to the appliance.
- Page 44 1(844) 538-7475 support@camplux.com 8350 Patriot Blvd STE B, North Charleston, SC 29420 Visit Us: Camplux.com...
Need help?
Do you have a question about the RS264 and is the answer not in the manual?
Questions and answers