
Subscribe to Our Youtube Channel
Related Manuals for ELGA PURELAB Chorus I


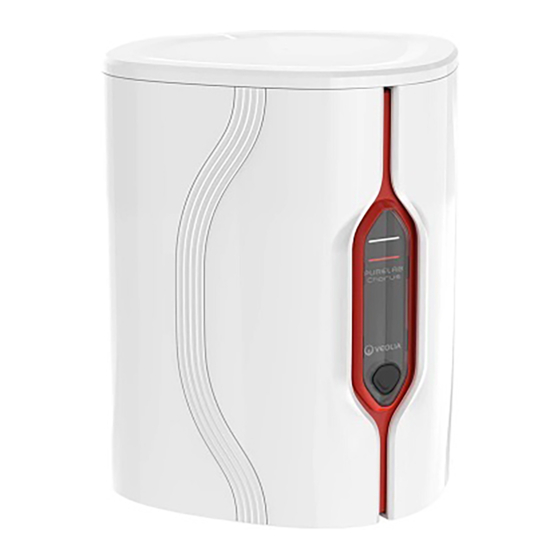
Summary of Contents for ELGA PURELAB Chorus I
- Page 1 Operator Manual MANU39998 VER 02 3/17 Life Science / Analytical Research / General Science WATER PURIFICATION Version 1 9/2014...
- Page 3 Website: www.elgalabwater.com ELGA® is the global laboratory water brand name of Veolia PURELAB® is an ELGA Labwater trademark and technology. Owing to a policy of continual improvement, we reserve the right to amend the specifications given in this guide. © 2017 ELGA Labwater / VWS (UK) Ltd. All rights reserved.
- Page 4 SET - UP SYSTEM CONFIGURATION Life Science / Analytical Research / General Science Example one: 1 x Chorus 3 + Reservoir + Chorus 1 + 1 X Dispense. PURELAB® COMMS Power Water Valve Shut off Tap Pressure Valve Product Feedwater Outlet Inlet Drain...
- Page 5 SET - UP MODULAR STACKING BENCH MOUNTED RESERVOIR ON TOP PC1LSCXM2 / PC1ANRXM2 / PC1GSCM2 Remove carefully a. Open doors and undo quarter turn b. Remove front panel and undo lid bolt fasteners. with an allen key. (6mm AF X FXBOYR301716) c.
- Page 6 SET - UP MODULAR STACKING RESERVOIR UNDERNEATH a. Screw down the reservoir plate. b. Place on top of reservoir, line up with bolt heads. Screw in joining bolt. CONNECT THE FEED WATER (PORT NO.1) (Fig.1) (Fig.2) a. Remove the transit plugs from the water b.
- Page 7 COMMS CONNECTIONS Port 7 Reservoir J2 or J1 Port 9 See ‘Reservoir Installation Guide’. WARNING! ONLY USE COMMS CABLE SUPPLIED BY ELGA. NB. Please refer to the dispenser Quick Start Guide to combine a dispenser.
- Page 8 ONLY USE THE APPLIANCE COUPLER (MAINS LEAD) AND POWER SUPPLY PROVIDED. IF THE EQUIMENT IS USED IN A MANNER NOT SPECIFIED BY ELGA,THE PROTECTION PROVIDED BY THE EQUIPMENT MAY BE IMPAIRED. POSITION THE POWER SUPPLY SO THAT IT CANNOT COME INTO CONTACT WITH WATER.
- Page 9 The Laboratory Water Specialists...
- Page 10 ELGA est la marque de commerce des laboratoires mondiaux de Veolia Water. PURELAB est une marque et une technologie de ELGA LabWater. Dans le cadre de notre politique d'amélioration permanente, nous nous réservons le droit de modifier les spécifications données dans ce document. © 2017 ELGA LabWater/VWS (UK) Ltd. Tous droits réservés.
- Page 11 INSTALLATION CONFIGURATION DU SYSTÈME Life Science / Analytical Research / General Science Exemple un : 1 x PURELAB Chorus 3 + Réservoir + Chorus 1 + 1 X Distribution. Légende COMMUNI- CATIONS Al. électrique Soupape Robinet d'arrêt Détendeur Sortie de produit Admission d'eau Rejet...
- Page 12 INSTALLATION EMPILEMENT MODULAIRE DE MONTAGE SUR BANC RÉSERVOIR EN PARTIE SUPÉRIEURE Life Science / Analytical Research / General Science Retirez avec précautions. a. Ouvrez les portes et dévissez b. Retirez le panneau avant et défaites le boulon d'un quart de tour les attaches. du couvercle à...
- Page 13 INSTALLATION EMPILEMENT MODULAIRE RESERVOIR DESSOUS a. Vissez la plaque du réservoir. b. Placez-la sur le réservoir, bien en face des têtes d'écrous. Vissez le boulon d'assemblage. RACCORDEMENT À L'EAU (PORT NO.1) (Fig.1) (Fig.2) a. Retirez les bouchons de transport du b.
- Page 14 à sa bonne fixation. RACCORDEMENTS COMMS Port 7 Réservoir J2 or J1 Voir Chorus Reservoir Instructions INST40010 Avertissement UTILISEZ UNIQUEMENT LES CÂBLES COMMS FOURNIS PAR ELGA. NB. Veuillez consulter le Guide de démarrage rapide de la distribution pour combiner une distribution.
- Page 15 UTILISEZ UNIQUEMENT LA PRISE DE COURANT DE L'APPAREIL ET L'ALIMENTATION FOURNIES. SI L’APPAREIL N’EST PAS UTILISÉ COMME ELGA LE RECOMMANDE, LA PROTECTION FOURNIE PAR L’ÉQUIPEMENT PEUT S'EN TROUVER AFFECTÉE. POSITIONNEZ L'ALIMENTATION DE SORTE QU'ELLE NE PUISSE PAS ENTRER EN CONTACT AVEC DE L’EAU.
- Page 16 Les spécialistes de l'eau de laboratoire...
- Page 17 E-Mail: info@elgalabwater.com Website: www.elgalabwater.com ELGA ist der weltweit eingetragene Markenname für Laborwasser der Veolia Water PURELAB ist eine Handelsmarke und Technologie von ELGA Labwater. Aufgrund unserer Philosophie der kontinuierlichen Produktverbesserung behalten wir uns das Recht vor, die technischen Daten in dieser Anleitung jederzeit zu ändern.
- Page 18 AUFBAU SYSTEMKONFIGURATION Life Science / Analytical Research / General Science Beispiel 1: 1 x Chorus 3 + Tank + Chorus 1 + 1 x Spender. PURELAB® Légende KOMMUNIKA- TIONSSCHNITTSTELLE Stromversorgung Wasser Ventil Absperrventil Regler Produktausgang Speisewasser Überlauf Ablauf Ablauf Auslass für hohe Auslass Durchflussraten Beispiel 2: 1 x...
- Page 19 AUFBAU AUF EINEM TISCH BEFESTIGTE MODULABLAGE, EHÄLTER OBEN PC1LSCXM2 / PC1ANRXM2 / PC1GSCM2 Vorsichtig entfernen. a. Türen öffnen und Verschlüsse um b. Vorderwand entfernen und Deckelschraube mit eine Vierteldrehung lösen. Innensechskantschlüssel lösen. (6mm AF X FXBOYR301716) c. Innensechskantschraube entfernen und Deckel anheben. d.
- Page 20 AUFBAU MODULARES AUFSTAPELN RESERVOIR UNTERHALB a. Tankblech festschrauben. b. Über dem Tank platzieren, an Schraubenköpfen ausrichten. Verbindungsschraube einschrauben. WASSER ANSCHLIESSEN (Anschluss Nr. 1) (Fig.1) (Fig.2) a. Transportstöpsel aus dem b. Den mitgelieferten Schlauch nehmen und ein Ende Wassereinlassanschluss entfernen. fest in den Wasseranschluss drücken. VORSICHT! ABFLUSS ANSCHLIESSEN (Anschluss Nr.
- Page 21 Den mitgelieferten Schlauch nehmen und ein Wasserauslassanschluss entfernen. Ende fest in den Wasseranschluss drücken. COMMS-ANSCHLÜSSE Port 7 Reservoir J2 or J1 Siehe Reservoir Warnung! Installationsanleitung. ® BITTE VERWENDEN SIE NUR VON ELGA GELIEFERTE COMMS-KABEL. ANM. Bitte berücksichtigen Sie die Kurzanleitung zum Anschluss eines Spenders.
- Page 22 Die Stromversorgung muss geerdet sein. WARNUNG! NUR MITGELIEFERTE GERÄTESTECKVORRICHTUNG (NETZKABEL) UND STROMVERSORGUNG VERWENDEN. WIRD DAS GERÄT AUF EINE NICHT VON ELGA FESTGELEGTE ART UND WEISE VERWENDET, KÖNNTE DER VOM GERÄT GELIEFERTE SCHUTZ BEEINTRÄCHTIGT WERDEN. STROMVERSORGUNG SO POSITIONIEREN, DASS EIN KONTAKT MIT WASSER AUSGESCHLOSSEN IST.
- Page 23 Die Laborwasserexperten...
- Page 24 Email: info@elgalabwater.com Website: www.elgalabwater.com ELGA es el nombre de la marca internacional para aguas de laboratorio de Veolia Water PURELAB es una tecnología y marca comercial de ELGA Labwater. Según nuestra política de me- jora continua nos reservamos el derecho a modificar las especificaciones indicadas en esta guía.
- Page 25 CONFIGURACIÓN CONFIGURACIÓN DEL SISTEMA Life Science / Analytical Research / General Science Ejemplo uno: 1 X PURELAB® Chorus 3 + Depósito + Chorus 1 + 1 X Dispensador. Leyenda COMUN. Alimentación eléctrica Agua Válvula Válvula de corte Regulador Salida del producto de Agua de la boquilla de...
- Page 26 CONFIGURACIÓN APILAMIENTO MODULAR DE MONTAJE EN BANCO DEPÓSITO EN LA PARTE SUPERIOR PC1LSCXM2 / PC1ANRXM2 / PC1GSCM2 Retirar cuidadosamente a. Abrir las puertas y desapretar las sujeciones b. Retirar el panel delantero y destornillar el perno de la un cuarto de vuelta. tapa con una llave Allen.
- Page 27 CONFIGURACIÓN APILAMIENTO MODULAR RESERVORIO DEBAJO a. Atornillar la placa del depósito. b. Colocar en la parte superior del depósito. Alinear con las cabezas de los pernos. Atornillar el perno de unión. CONECTAR EL AGUA (Nº DE PUERTO 1) (Fig.1) (Fig.2) a.
- Page 28 CONEXIONES DE COMUNICACIONES Port 7 Reservoir J2 or J1 Port 9 Consulte la guía de instalación del Advertencia depósito. UTILIZAR SOLAMENTE EL CABLE DE COMUNICACIONES SUMINISTRADO POR ELGA. NOTA Consultar la Guía de Inicio Rápido del dispensador para combinar un dispensador.
- Page 29 UTILIZAR EXCLUSIVAMENTE EL ENCHUFE DE DISPOSITIVO (CABLE DE RED) Y LA ALIMENTACIÓN SUMINISTRADOS. SI EL EQUIPO SE UTILIZA DE MODO DIFERENTE AL ESPECIFICADO POR ELGA, NO SE GARANTIZA EL CORRECTO FUNCIONAMIENTO DE LA PROTECCIÓN FACILITADA. COLOCAR LA FUENTE DE ALIMENTACIÓN DE MODO QUE NO...
- Page 30 Los especialistas en aguas de laboratorio...
- Page 31 ELGA è il marchio di laboratorio globale di Veolia Water PURELAB è il marchio commerciale e la tecnologia di ELGA Labwater. In base a una politica aziendale di continuo miglioramento, ci riserviamo il diritto di modificare le specifiche fornite nella...
- Page 32 PREPARAZIONE CONFIGURAZIONE DI SISTEMA Life Science / Analytical Research / General Science Esempio uno: 1 x PURELAB Chorus 3 + Serbatoio + Chorus 1 + 1 X Distributore. ® Legenda COMUNICAZIONE Distanza massima Alimentazione 5000 mm Acqua Valvola Valvola di arresto Regolatore Acqua depurata...
- Page 33 PREPARAZIONE IMPILAMENTO MODULARE SU BANCO SERBATOIO IN CIMA PC1LSCXM2 / PC1ANRXM2 / PC1GSCM2 Rimuovere con attenzione a. Aprire gli sportelli ed eseguire un b. Rimuovere il pannello anteriore e allentare la vite del coperchio quarto di giro delle viti. con una chiave Allen. (6mm AF X FXBOYR301716) c.
- Page 34 PREPARAZIONE IMPILAGGIO MODULARE SERBATOIO SOTTO b. Posizionare sopra al serbatoio, allineare a. Avvitare sotto la piastra del serbatoio. con la testa delle viti. Avvitare la vite di congiunzione. COLLEGARE L'ACQUA (PORTA N.1) (Fig.1) (Fig.2) a. Rimuovere i tappi di transito dal b.
- Page 35 Port 7 Reservoir J2 or J1 Port 9 Avvertenza USARE ESCLUSIVAMENTE IL CAVO PER GLI STRUMENTI DI COMUNICAZIONE FORNITO DA ELGA. Vedere Guida all’installazione del serbatoio. NB. Fare riferimento al Manuale in forma ridotta del distributore per aggiungere un distributore.
- Page 36 USARE ESCLUSIVAMENTE LO STRUMENTO DI COLLEGAMENTO DELL’APPARECCHIO (CAVO DI RETE) E L’ALIMENTAZI- ONE DI CORRENTE A DISPOSIZIONE. L’UTILIZZO DELL’APPARECCHIO SECONDO UNA MODALITÀ NON SPECIFICATA DA ELGA POTRÀ COMPROMETTERE LA PROTEZIONE DA ESSO FORNITA. POSIZIONARE L'ALIMENTAZIONE DI CORRENTE IN MODO CHE NON POSSA VENIRE A CONTATTO CON ACQUA.
- Page 37 Gli specialisti del trattamento di laboratorio dell’acqua...
- Page 38 ELGA é marca registada de águas de laboratório da Veolia Water PURELAB é marca registada e tecnologia pertencente à ELGA Labwater. Devido a uma política de melhoria contínua, reservamo-nos o direito de corrigir as especificações apresentadas neste guia. © 2017 ELGA Labwater / VWS (UK) Ltd. Todos os direitos reservados.
- Page 39 CONFIGURAÇÃO CONFIGURAÇÃO DO SISTEMA Life Science / Analytical Research / General Science Exemplo um: 1 x Chorus 3 + Reservatório + Chorus 1 + 1 X Distribuidor. PURELAB® Tecla COMMS Alimentação elétrica Água Válvula Válvula de fecho Regulador Saída de produto da torneira de Água de distribuição...
- Page 40 CONFIGURAÇÃO EMPILHAMENTO MODULAR RESERVATÓRIO ONTOP PC1LSCXM2 / PC1ANRXM2 / PC1GSCM2 Remova cuidadosamente b. Remova o painel frontal e desaperte o parafuso da tampa a. Abra as portas e os fixadores de quarto de volta. com uma chave Allen. (6mm AF X FXBOYR301716) c.
- Page 41 CONFIGURAÇÃO EMPILHAMENTO MODULAR RESERVATORIO ABAIXO b. Coloque por cima do reservatório, alinhando-a a. Aperte a placa do reservatório. com as cabeças dos parafusos. Aperte o parafuso de união. LIGUE A ÁGUA (PORTA Nº. 1) (Fig.1) (Fig.2) a. Remova os bujões de transporte da ligação b.
- Page 42 LIGAÇÕES DE COMMS (COMUNICAÇÕES) Port 7 Reservoir J2 or J1 Port 9 Ver ‘Reservatório Guia de instalação’. Aviso USE APENAS O CABO DE COMUNICAÇÕES FORNECIDO PELA ELGA. NB. Consulte o Guia de Iniciação Rápida do distribuidor para combinar um distribuidor.
- Page 43 AVISO! USE APENAS O ACOPLADOR DO EQUIPAMENTO (CABO DE ALIMENTAÇÃO) E A FONTE DE ALIMENTAÇÃO FORNECIDOS. SE O EQUIPAMENTO FOR USADO DE MANEIRA NÃO ESPECIFICADA PELA ELGA, A PROTECÇÃO GARANTIDA PELO EQUIPADO PODERÁ FICAR COMPROMETIDA. POSICIONE A FONTE DE ALIMENTAÇÃO DE FORMA A NÃO ENTRAR EM CONTACTO COM A ÁGUA.
- Page 44 Os especialistas de água de laboratório...
- Page 45 残留防腐剂 警告! 调试期间,系统中会有微量残留防腐剂冲出。 如有要求可提供材料安全数据表。 有害物质控制 (COSHH) 如有要求可提供材料安全数据表。 ELGA Labwater Tel: +44 (0) 203 567 7300 传真: +44 (0) 203 567 7205 *不提供 电子邮件: info@elgalabwater.com 网址: www.elgalabwater.com ELGA 是威立雅水务技术的全球性实验室用水品牌。 PURELAB 是 ELGA Labwater 的商标和技术。为奉行持续改进的政策, 公司保留对本指南所列规格作出修改的权利。 © 2017 ELGA Labwater / VWS(英国)有限公司。保留所有权利。...
- Page 46 安装 系统配置 Life Science / Analytical Research / General Science 例 1:1 x PURELAB Chorus 3 + 水箱 + Chorus 1 + 1 X 纯水机 。 ® 键 COMMS 最大距离 5000mm 电源 水 阀 截止阀 调节器 取水龙头产水出口 进水 排水口 排水口 出水口...
- Page 47 安装 模块化堆叠 对水库的顶端 PC1LSCXM2 / PC1ANRXM2 / PC1GSCM2 小心地取下。 a. 打开门并拧松四分之一转紧固件。 b. 取下前面板并用内六角扳手拧松盖螺栓。(6mm AF X FXBOYR301716) c.取下内六角扳手头螺栓并揭开盖子。 d. 将水箱放在顶部,与三个点对齐。 拧入内六角扳手头螺栓, 然后装回前面板。 注意如需组合纯水机,请参照纯水机《快速使用指南》。 警告! 只能放一个 CHORUS 系统在水箱顶部。...
- Page 48 安装 模块化堆叠 下方的储 a. 用螺丝拧紧水箱板。 b. 放在水箱顶部,与螺栓头对齐。拧入连接螺栓。 连接供水(端口 1) (Fig.1) (Fig.2) a.拔下进水接头上的运输塞。 b. 使用所提供的管,用力将一端紧紧地推入 水接头。 连接排水(端口 3) 小心! 确保排水管不在废水中。 a. 拔下出水接头上的运输塞。 b. 使用所提供的管,用力将一端紧紧地推入 水接头。...
- Page 49 安装 注意:请查阅纯水机手册了解详情。 返回纯水机 返回 出水口 返回 进水口 连接纯水出口(端口 4) b. 使用所提供的管,用力将一端紧紧地推入 水接头。 a.拔下出水接头上的运输塞。 COMMS 连接 港口 7 池 J2 or J1 港口 9 见“水库” 警告 安装指南’。 只能使用 ELGA 提供的 COMMS 电缆。 注意如需组合纯水机,请参照纯水机《快速使用指南》。...
- Page 50 安装 按说明操作 a. 打开右侧门 b. 插入纯化盒,转出手柄。 c. 确保它是稳固的。 连接电源(端口 6) c. 按下一次 启动调试模式。 底部的红灯将 持续闪烁直到循环结束。 a. 如图所示连接电源电缆 b. 只能使用 Chorus 随附的电源。电源必须接地。 大约 80 分钟 警告! 只能使用随设备提供的耦合器(电源线)和电源。如果不按照 ELGA 指定的方法使用设备,则设备提供的保护可能受到影响。 电源应布置在接触不到水的地方。...
- Page 51 实验室用水专家...
- Page 52 健康有害物質管理規則(COSHH) 製品安全データシートはご要望に応じて提供いたします。 ELGA Labwater Tel: +44 (0) 203 567 7300 ファックス: +44 (0) 203 567 7205 *付属しません 電子メール: info@elgalabwater.com ウェブサイト: www.elgalabwater.com ELGA は、Veolia Waterの世界的なラボウォーターのブランド名です。 PURELAB は、ELGA Labwaterの商標および技術です。 当社は継続的に製品の改善に努めており、 本書に記載されている仕様を変更する権利を有します。 © 2017 ELGA Labwater / VWS (UK) Ltd. All rights reserved.
- Page 53 セットアップ システム構成 Life Science / Analytical Research / General Science 例1: PURELAB Chorus 3 1台 + タンク + Chorus 1 + ディスペンサー1台 ® キー COMMS 最長距離5000mm 電源 水 バルブ 停止バルブ 調整器 分注タップ精製水出口 原水 ドレン オーバーフロー ドレン 出口 高流量出口(オプション) 例2: PURELAB Chorus 1 1台...
- Page 54 セットアップ モジュールの積み重ね 貯水池上記 PC1LSCXM2 / PC1ANRXM2 / PC1GSCM2 ゆっくり取り外します a. 扉を開いて、止め具を1/4回転 緩めます。 b. 前面パネルを取り外し、蓋のボルトを 六角レンチで緩めます。(6mm AF X FXBOYR301716) c. 六角穴付きボルトを取り外し、蓋を持ち上げます。 d. タンクを上に置き、3つの点を 合わせます。 六角穴付き ボルトを締めてから、 前面パネルを交換します。 NB。 ディスペンサーの組み立てについては、ディスペンサーのクイックスタートガイドを参照してください。 警告! タンクの上に置けるChorusシステムは1台のみとなります。...
- Page 55 セットアップ モジュールの積み重ね 貯水池以下 a. タンクプレートをネジ止めします。 b. ボルトの頭部に合わせてタンクの上に 置きます。 ボルトを締めます。 水道への接続 (ポートNo. 1) (Fig.1) (Fig.2) a. 水出口接続部から輸送用プラグを b. 付属のチューブを使用して、一方の端をしっかりと 取り外します。 送水コネクタに押し込みます。 注意! ドレンへの接続(ポートNo.3) ドレンパイプは排水に入れないようにしてください。 a. 水出口接続部から輸送用プラグを b. 付属のチューブを使用して、一方の端をしっかりと 取り外します。 送水コネクタに押し込みます。...
- Page 56 セットアップ NB。 ディスペンサーの組み立てについては、ディスペンサーのクイックスタートガイドを参照してください。 ディスペンサーの戻り 戻り 精製水出口 戻り 注入 純水出口の接続(ポートNO.4) a. 水出口接続部から輸送用プラグを b. 付属のチューブを使用して、一方の端をしっかりと 取り外します。 送水コネクタに押し込みます。 通信接続 ポート 7 貯水池 J2 又は J1 又は ポート 9 「貯水池」を参照 インストールガイド」 警告! を参照してください。 必ずElgaが提供する通信ケーブルを使用してください。 NB。 ディスペンサーの組み立てについては、ディスペンサーのクイックスタートガイドを参照してください。...
- Page 57 セットアップ 指示に従ってください a. 右側の扉を開きます。 c. 固定されたことを確認します。 b.浄化パックを挿入してハンドルを回します。 電源の接続(NO.6ポート) 1回押して 試運転モードを開始します。 サイクルが終了するまで、底部の 赤いランプが点滅します。 a. 図のように電源ケーブルを接続します。 約80分 b. Chorus付属の電源のみ使用してください。電源は接地する必要があります。 警告! 付属の電源接続器(電源ケーブル)と電源を使用してください。 ELGA が指定した以外の方法でこの装置を使用した場合には、この装置による保護機能を損なう可能性があります。 電源は、水に触れない位置に配置してください。...
- Page 58 ラボの水技術者...
-
Page 60: Table Of Contents
The information contained in this document is the property of VWS (UK) Ltd, trading as ELGA® LabWater, and is supplied without liability for errors or omissions. No part of this document may be reproduced or used except as authorized by contract or other written permission from VWS (UK) Ltd. -
Page 61: Introduction
Refer to Self Help Guidelines, section 4 Process Button. 1.8 Customer Support If you need help with your Chorus, please call your local ELGA representative. For the address of the nearest ELGA LabWater Sales and Service office visit the country list on our website. -
Page 62: Your Guide To Chorus
PURELAB® CHORUS 1 - ENGLISH YOUR GUIDE TO THE CHORUS 2.1 Life Science - PC1LSCXM2 Status Light Warning Light Process Button Ultra Filtration Module Use a slotted screw driver to release quarter turn slots on Chorus. Purification Pack Ultraviolet Lamp *Not supplied 9. -
Page 63: Purelab® Chorus Part No. Pc1Anrxm2 - Analytical Research
2.2 Analytical Research - PC1ANRXM2 Status Light Warning Light Process Button Purification Pack Ultra Mirco Filtration Use a slotted screw driver to release quarter turn slots on Chorus. Purification Pack Ultraviolet Lamp *Not supplied 9. COMMS 2 8. Power In 2 7. -
Page 64: Purelab® Chorus Part No. Pc1Gscxm2 - General Science
PURELAB® CHORUS 1 - ENGLISH 2.3 General Science - PC1GSCXM2 Status Light Warning Light Process Button Purification Pack Use a slotted screw driver to release quarter turn slots on Chorus. Purification Pack *Not supplied 9. COMMS 2 8. Power In 2 7. -
Page 65: Maintenance
MAINTENANCE WARNING! An approved supplier or distributor should carry out any maintenance work not included in this manual. Note Note: Disposal of all end-of-life consumable items should be in accordance with local statutory regulations. 3.1 Cleaning the Inlet Filter Assembly Follow the instructions below. -
Page 66: Replacing The Purification Pack
PURELAB® CHORUS 1 - ENGLISH 3.2 Replacing the Purification Pack Follow the instructions below. PC1LSCXM2 / PC1ANRXM2 / PC1GSCM2 Main Menu MΩ Sanitization Auto Volume Calibration Change Purification Pack(s ) Refill Level Timed Auto Refill Pure Sure Alarm 1. “Pure Sure Alarm active” 2. - Page 67 7. Insert the base first and rotate the handle. 8. Unpack New Purification Pack and remove the red transit plugs before installing. Commissioning Pack 1: LC232 Pack 2: None Fit Purification Packs, then pr ess accept Commissioning Pack 1: LC232 Pack 2: LC232 Fit Purification Packs, then pr ess accept...
-
Page 68: Replacing The Ultraviolet Lamp
PURELAB® CHORUS 1 - ENGLISH 3.3 Replacing the Ultraviolet Lamp LC210 Follow the instructions below. PC1LSCXM2 / PC1ANRXM2 Note. The Ultraviolet (UV) lamp should be replaced when: ● UV lamp failure occurs ● UV lamp efficiency decrease affecting water purity. WARNING UV-C Radiation is harmful to the eyes and skin. - Page 69 6. Lift and remove the UV lamp from the housing. Discard the used UV lamp accordance with local regulations. (Re-use the red O ring on the new UV lamp) CAUTION! Take care not to touch the surface of the glass. Ideally wear gloves, handle with soft cloth and wipe the surface with alcohol before fitting into the UV lamp housing.
-
Page 70: Replacing The Ultra Filtration Module
PURELAB® CHORUS 1 - ENGLISH 3.4 Replacing the Ultra Filtration Module LC151 Follow the instructions below. PC1LSCXM2 1. Open left door, Process button off. 2. Remove purification pack. 3. Remove the exisiting LC151 from holding clips. 4. Release the side connection, push back the sleeve of the quick connect coupling. - Page 71 7. Unpack new LC151 and remove transit caps . 8. Attach bottom side plug. 9. Attach the top and bottom caps (Hand tight). 10. Reconnect the quick connect coupling. 11. Install the purification pack. 12. Rinse filter. Press and hold the Process button for 15 seconds.
-
Page 72: Replacing The Ultra Mirco Filtration Module
PURELAB® CHORUS 1 - ENGLISH 3.5 Replacing the Ultra Mirco Filtration Module LC109 Follow the instructions below. PC1ANRXM2 1. Process button off, open left door. 2. Remove purification pack. 3. Unclip Ultra mirco filtration module LC109. 4. Unscrew the top cap and pour the water away. 6. - Page 73 7. Attach the bottom and top caps. Bottom cap 8. Be careful not to over tighten hand tight only. Top cap 9. Insert the purification pack. 10. Rinse filter. Press and hold the Process button for 15 seconds. Follow on screen instructions. WARNING! ULTRA MIRCO FILTRATION MODULE WILL REQUIRE RINSING PRIOR TO USE.
-
Page 74: Sanitisation Procedure
PURELAB® CHORUS 1 - ENGLISH 3.6 Sanitisation Procedure PURELAB® Chorus LC271 - Liquid Sanitisation - Instructions provide. PURELAB® Chorus LC272 - Tablet Sanitisation - Instructions provide. Please take care to ensure your order is the correct consumables items. SELF HELP GUIDELINES Display Lights Constant White... -
Page 75: Health & Safety Notes
ONLY USE THE APPLIANCE COUPLER (MAINS LEAD ) AND POWER SUPPLY PROVIDED. THE USE OF THESE WILL ENSURE ADEQUATE EARTH PROTECTION IS PROVIDED. IF THE EQUIPMENT IS USED IN A MANNER NOT SPECIFIED BY ELGA, THE PROTECTION PROVIDED BY THE EQUIPMENT MAY BE IMPAIRED. -
Page 76: Technical Specifications
PURELAB® CHORUS 1 - ENGLISH TECHNICAL SPECIFICATIONS Purified Water Specification PURELAB® PURELAB® PURELAB® Chorus Chorus Chorus 1 Model PC1LSCXM2 PC1ANRXM2 PC1GSCXM2 Delivery flow rate - 2 l/m 2 l/m 2 l/m maximum CO² reduction (feed ~ 100% ~ 100% ~ 100% dependant) Resistivity (ionised species) 18.2 MΩ.cm... -
Page 77: Customized Operation
Electrical Requirements PURELAB® PURELAB® PURELAB® Chorus Chorus Chorus 1 Model PC1LSCXM2 PC1ANRXM2 PC1GSCXM2 Mains Input 100-240 Vac 100-240 Vac 100-240 Vac 50-60 Hz 50-60 Hz 50-60 Hz System control voltage 24V dc 24V dc 24V dc Power consumption 60VA 60VA 60VA (peak demand) Reservoir Level Connection... -
Page 78: Warranty / Conditions
PURELAB® CHORUS 1 - ENGLISH ELGA® LabWater is a trading name of VWS (UK) Ltd. General Limited Warranty VWS (UK) Ltd. warrants the products manufactured by it against defects in materials and workmanship when used in accordance with applicable instructions for a period of one year from the date of shipment for the products. - Page 79 ELGA is the global laboratory water brand name of Veolia. The information contained in this document is the property of VWS (UK) Ltd, trading as ELGA LabWater, and is supplied without liability for errors or omissions. © VWS (UK) Ltd.
Need help?
Do you have a question about the PURELAB Chorus I and is the answer not in the manual?
Questions and answers
Step 10 of changing the purification pack. It is not possible to proceed, pushing enter doesn't have any effect. Also pushing other buttons or restard the whole system doesn't have any effect.
@Jonas Hug We found that the old packs have a different cap than the new one. You should see that the old cap has a white bit between the sensor tags were the instrument reads what type of pack it is and the new ones are red. There are two Phillips screws, take the old caps and put them on the new cartridge. They also seen to know which is pack one and two, so get the right one in the right place
If Step 10 (rinsing the filter by pressing and holding the Process button for 15 seconds) is unresponsive, ensure the following:
1. Confirm the Process button is being pressed and held continuously for the full 15 seconds.
2. Check that the system is powered on and functioning.
3. Verify that the purification pack is properly inserted and the top cap is secured.
4. Look at the display lights:
- If constant red, the system needs immediate attention.
- If blinking red/white, a software update may be in progress.
- If blinking red, the system may already be in a clean cycle.
If the button still does not respond, the unit may require service.
This answer is automatically generated