Table of Contents

Related Manuals for UltraSecure ULTRACOM 4G


Summary of Contents for UltraSecure ULTRACOM 4G
- Page 1 U L T R A S E C U R E INDIVIDUAL ULTRACOM 4G INTERCOM 9 CALL NUMBERS - UP TO 50 SECONDARY USERS - GATE/LATCH OPENING BY CALL/SMS - DOUBLE RELAY OUTPUTS - POWER SUPPLY 9-24V AC/DC (9-36V DC) -...
- Page 2 Thank you for choosing Ultra Secure for the equipment of your property. The UltraCOM 4G intercom allows you to communicate with your visitors and open your gate and/or latch remotely by telephone. It has two relay outputs that can be activated at any time by call or SMS. Thanks to its hood and its IP54...
-
Page 3: Table Of Contents
How UltraCOM 4G works .............. Call from the panel ................ Call to the panel and opening of the relays ......... Use and settings of the UltraCOM 4G relays ........Connection for gate/latch (NO - NC - Com) ........Relay opening time ................ - Page 4 ..............Receive device status report ............Restart the panel ................Reset the panel to factory settings ............ Installation of the UltraCOM 4G panel ..........Fixing your intercom ..............UltraCOM 4G status information ............ Information about Normal and Installation modes ........
-
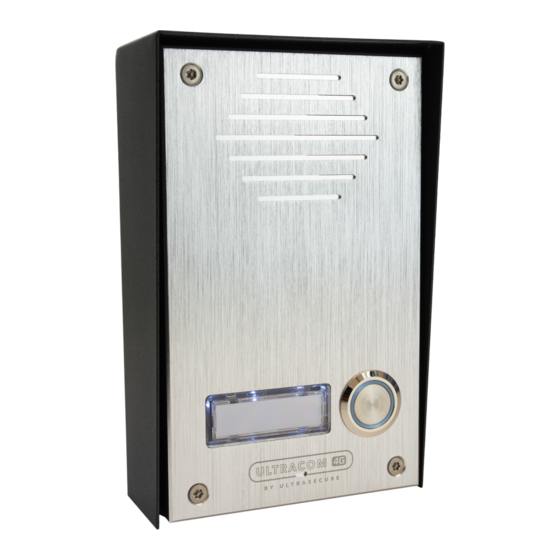
Page 5: Presentation Of Your Ultracom 4G Intercom
Your panel is made up of 4 secure screws that can only be unscrewed using the tool provided to secure access to the inside of your panel. Speaker The UltraCOM 4G is equipped with a front loudspeaker allowing conversation. Its volume is adjustable (see page 20). Call button This backlit button allows the visitor to make a call to the user numbers (see page 13). -
Page 6: Connection Terminal
Connection terminal This terminal block allows you to make the various connections related to your configuration: power supply (see page 8), gate, latch... (see page 14) or switches (see page 15). Connection terminal Symbol Meaning DC + power cable terminal block DC - power cable terminal block NC-1 “Normally closed”... -
Page 7: Ultracom 4G Start-Up
UltraCOM 4G start-up Installing the SIM card SIM CARD FORMATS FORMAT TO Nano SIM Mini Micro Nano DO NOT Mini SIM Micro SIM 1. First, check the correct activation of your SIM card by inserting it into your mobile phone. Check that the network is active by making a call, for example. -
Page 8: Setting Up The Antenna
(see page 27). Labelling The UltraCOM 4G has a label holder to indicate the name of your choice. Its two ends are provided with notches allowing its removal. To open the label holder, take a small flat screwdriver, position it in the first notch and turn it slightly. - Page 9 Normal and Installation modes, please see page 29). This flashing signifies that your intercom is ready to be configured. Go to step “UltraCOM 4G basic settings” page 10. • If you observe any other type of flashing, an error related to the SIM card or the mobile network occurs.
-
Page 10: Ultracom 4G Basic Settings
The number defined as administrator will be the only one who can configure the UltraCOM 4G. On the other hand, if you want this number to receive calls from the panel, you will also have to define it as a user. -
Page 11: User Settings
5 minutes. User settings Numbers defined as users will be able to receive a call from the UltraCOM 4G when someone presses the call button on the panel. They can also open access (if the gate or latch connected, see page 14) by call (see page 13) and by SMS (see page 15). -
Page 12: End Of Ultracom 4G Basic Configuration
If you see flashing, refer to your intercom status information table to identify and resolve the problem (see page 29). In the rest of this user guide, you will find out how the UltraCOM 4G works (see page 13), the use and settings of the relays (see page 14) as well as the settings concerning calls (see page 17), volume (see page 20) and the “Do... -
Page 13: How Ultracom 4G Works
How UltraCOM 4G works Call from the panel When a visitor activates the call button, the UltraCOM 4G launches its call cycle and will contact each registered user one by one. The number of call cycles can be set between 1 and 5 (see page 17). During the cycle, the panel emits a ring tone to indicate to the visitor that the call is in progress. -
Page 14: Use And Settings Of The Ultracom 4G Relays
(shunter) the V+ via your COM-1 (or COM-2) relay. Relay opening time The UltraCOM 4G has 2 relays that can be opened remotely by call or SMS. You can set the opening time of these relays between 1 and 99 seconds. You can also choose not to have automatic closure of the relay (then choose a duration of 00). -
Page 15: Open And Close Relays
Relay number between 1 and 2. Use of switches to open relays The UltraCOM 4G terminal block has SW and GND terminals for each relay output (see page 6), allowing you to wire a switch. To do this, simply connect your switch (not supplied) to the SW-1 and associated GND (or SW-2 and associated GND) terminals in order to activate relay 1 (or relay 2) when this switch is triggered. -
Page 16: Administrator And User Settings
Please note that this is the number 0 and not the letter O in capitals. To confirm the command, the UltraCOM 4G sends you a reply SMS. If this SMS contains an error message (ERR:), refer to the error response table (see page 30) to identify the cause. -
Page 17: Call Settings
1234#LOOP (1234 being the default password, to be adapted if it changes). To confirm the command, the UltraCOM 4G sends you a reply SMS. If this SMS contains an error message (ERR:), refer to the error response table (see page 30) to identify the cause. -
Page 18: Call Acceptance Time
1234#RING (1234 being the default password, to be adapted if it changes). To confirm the command, the UltraCOM 4G sends you a reply SMS. If this SMS contains an error message (ERR:), refer to the error response table (see page 30) to identify the cause. - Page 19 1234#CALL (1234 being the default password, to be adapted if it changes). To confirm the command, the UltraCOM 4G sends you a reply SMS. If this SMS contains an error message (ERR:), refer to the error response table (see page 30) to identify the cause.
-
Page 20: Volume Settings
Volume settings Microphone volume You can set the UltraCOM 4G microphone volume to a level from 1 to 8. By default, this volume is set to 5. To modify it, you need to send the following command: 1234#MIC#X Variable data... - Page 21 To confirm the command, the UltraCOM 4G sends you a reply SMS. If this SMS contains an error message (ERR:), refer to the error response table (see page 30) to identify the cause. ULTRA SECURE www.ultrasecuredirect.com...
-
Page 22: Do Not Disturb" Mode Settings
"Do not disturb" mode settings The UltraCOM 4G has a “Do Not Disturb” mode that allows intercom activity to be suspended for set periods. This mode is ideal for guaranteeing user comfort and not being disturbed in the middle of the night, for example. The activation of the intercom can then be programmed according to a tailor-made schedule. -
Page 23: Status Request Command
Position number of the time slot to be deleted between 01 and 25. To confirm the commands concerning the “Do not disturb” mode, the UltraCOM 4G sends you a reply SMS. If this SMS contains an error message (ERR:), refer to the error response table (see page 30) to identify the cause. -
Page 24: Advanced Settings
1234. If you change your panel's password, remember to use the new password for your SMS commands. To confirm the command, the UltraCOM 4G sends you a reply SMS. If this SMS contains an error message (ERR:), refer to the error response table (see page 30) to identify the cause. -
Page 25: Restart The Panel
04:00. Reset the panel to factory settings If you wish to permanently delete all saved settings on the UltraCOM 4G, you can reset the panel to factory settings in two ways. Option No. 1, you can send the following SMS command:... - Page 26 5 seconds. Do not release the button until you hear a long beep. Warning: the deletion of all settings following a reset is permanent. The UltraCOM 4G default settings will be restored. You will then have to make all your settings again.
-
Page 27: Installation Of The Ultracom 4G Panel
Installation of the UltraCOM 4G panel Before proceeding with the final installation of your UltraCOM 4G, we advise you to test the state of the network at its location. This confirms that the intercom can receive and transmit calls and texts without problems. - Page 28 Open the door station using the tool provided and pass the cables through the base via the cable gland. Be careful not to lose the 4 small secure screws for opening the panel! Screw the panel base and the visor to the wall (using the 4 screws provided).
-
Page 29: Ultracom 4G Status Information
UltraCOM 4G status information Information about Normal and Installation modes The UltraCOM 4G has an Installation mode and a Normal mode. The role of the Installation mode is to provide information to easily solve technical problems that may be encountered by the device (network problem, SIM card problem, etc.). -
Page 30: Network Status Information
To check the quality of the network at the location of the panel, you can request the status of the reception level when the UltraCOM 4G is in Installation mode. To do this, press the call button on the front panel twice quickly. The behaviour of the call button (number of flashes) will give you a reception level range. -
Page 31: Sms Commands Tables
SMS commands tables Commands must all be preceded by the password followed by a #. In this table, examples of commands use the default password 1234 (to be adapted if it changes). Admin and user settings commands SMS command Reply SMS Description Details Example... - Page 32 Rn OPEN (no Rn#O If RT=00 auto close) Open the n = relay number relays between 1 and 2 If RT=01- 1234#R1#O Rn OPEN 01-99s Rn#C Rn CLOSE Close the n = relay number relays between 1 and 2 1234#R1#C R1 CLOSE Call settings commands SMS command...
- Page 33 Volume settings commands SMS command Reply SMS Description Details Example Example MIC#X MIC: X/8 Microphone X = volume level volume between 1 and 8. 1234#MIC#3 MIC: 3/8 Information By default, the microphone volume is set to 5. Status request MIC: 3/8 1234#MIC command VOL#X...
- Page 34 20/01/2022 15:30 SIGNAL: 18/31 (4G) STATUS DND: ON (INACTIVE) R1: OPEN 30s Receive status report R2: CLOSE SIM: 0607080910 1234#STATUS IMEI: 112233445566778 ULTRACOM 4G 210720/210801 RESTART Restart the RESTART OK panel 1234#RESTART RESET#334455 Reset the RESET OK panel 1234#RESET#334455 Warning: resetting your panel will delete all your settings. Default settings will be Information restored.
-
Page 35: Technical Specifications
Technical specifications 9-24V AC/DC Power supply 9-36V DC Compatible mobile networks 4G, 3G, 2G Aerial Remote unit (supplied) 1 NO output (10A) / 1 NC output (8A) / Relay output 1 250V AC 1 NO output (10A) / 1 NC output (8A) / Relay output 2 250V AC 2 switch outputs (1 per relay) - Page 36 Note: Modifications to this product will void the user's authority to operate this equipment. TECHNICAL SUPPORT For any help you need, do not hesitate to contact our customer service, we are at your disposal. info@ultrasecuredirect.com 01604 589414 UltraCOM 4G V1-EN...
Need help?
Do you have a question about the ULTRACOM 4G and is the answer not in the manual?
Questions and answers