Advertisement
Quick Links
Advertisement

Related Manuals for Madeleine Home MH-BD-11506


Summary of Contents for Madeleine Home MH-BD-11506
- Page 1 30 : 00 2 or more estimated people required assembly time...
- Page 2 Ok, let’s get started! Put on mood music! To prevent damage to product, use the clean side of package carton or rug as working surface. In the event of missing or damaged parts, delivery problems etc., please reach out to our team. We will be happy to fix the problem!
-
Page 3: Care Guide
care guide Clean regularly with a soft and dry cloth. To protect finish, avoid use of abrasive cleaners. Wipe up spills immediately. Please! While assembling the product, tighten the bolts up to 50%. Once all parts are in place, only then fully tighten the bolts. -
Page 4: Product Parts
product parts Headboard, Footboard Side Rail Mid Rail Mid Leg... - Page 5 Slates Right Leg Left Leg...
-
Page 6: What's Included
what’s included (A) - Bolt (8 x 50mm) (B) - Bolt (8 x 25mm) (C) - Washer (Ø8mm, Ø20 mm) (D)-Lock Washer (Ø8mm, Ø15mm) - Page 7 (E) - Bolt (6 x 25mm) (G)- Allen Key (5mm) (H)- Allen Key (4mm)
- Page 8 assembly instructions Friendly Tip: Take a deep breath going in. This may be a tricky part, but nothing too overwhelming. Just follow these steps to the T and the outcome will be worth it! While assembling the product, tighten the bolts up to 50%. Once all parts are in place, only then fully tighten the bolts.
- Page 9 step 1: Attach (I) to the two side rails (J). step 2: To attach (I) to (J), insert washer (D), lock washer (C) and bolt (B) as shown in the image above. Tighten the bolt in place using allen key (G).
- Page 10 step 3: After attaching all corners, the product will look as shown in this image. step 4: Now, attach the left legs (N) and right legs (O) in their respective slots as shown in this image.
- Page 11 step 5: Using the image as reference, place the Bolts (E) and fix it in place with the help of allen Key (H). step 6: After attaching all corners and legs, the product will look as shown in the image above.
- Page 12 step 7: Attach the mid-rail (K) to the mid-legs (L) using bolts and allen Key, as shown in the image. step 8: Using the image as reference, place the bolt (A) and fix the mid-legs in place with the help of allen key (E).
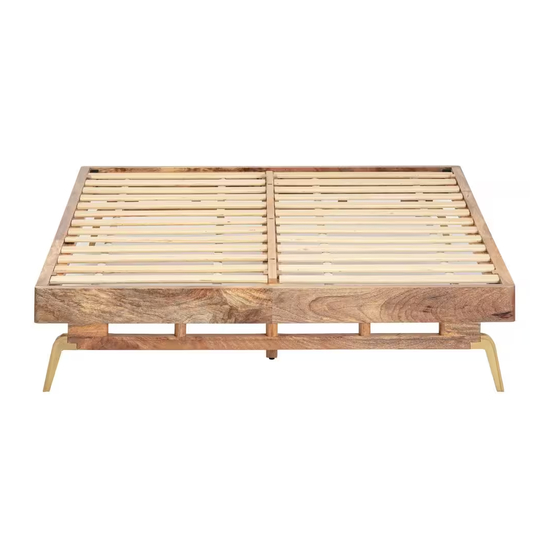
- Page 13 step 9: Make sure the slates are fixed in place. Voila! Your bed is now assembled and secure!
Need help?
Do you have a question about the MH-BD-11506 and is the answer not in the manual?
Questions and answers