
Subscribe to Our Youtube Channel
Related Manuals for Seura SC-1


Summary of Contents for Seura SC-1
- Page 1 WARRANTY REGISTRATION REGISTER FOR EXTRA BENEFITS Activate within 30 days of purchase: seura.com/activate OUTDOOR TV CEILING MOUNT INSTALLATION GUIDE Model Numbers: SC-1 LC-1 8 " 8 "...
- Page 2 Compatible with Séura Outdoor TVs: Pair with any Séura Outdoor TV 42″ – 86″ or any other compatible display not surpassing a maximum weight limit of 220 lbs. Compatible with VESA mount patterns up to 600×400. Safety Prior to the installation of this product, read all •...
-
Page 3: Installation Tools
P5080T Installation Tools Parts and Tools Required (not included) The following tools may be required depending upon your particular The following tools may be required depending on your particular installation. They are not included. ¼˝ Drill Bit for ˝ Electronic Stud Finder Wood Stud Pencil Level... -
Page 4: Parts Included
The following tools may be required depending upon your particular installation. They are no Parts Included 8 " 8 " 16 " X 16 " ¼˝ Drill Bit for 5" 5 4 " 2 " Before using the device, please check the following contents of the box for completeness. Illustrations are ˝... - Page 5 Parts Included, Packaged as TW-5 Mounting Plate (2) Tilt Mount TV Brackets Mounting Tools and Hardware (4) Security Torx T27 x 1.0 x 16mm Screws (6) Plastic Anchors, 3” long (6) Stainless Steel Lag Screws 5/16”, 3” long Included with some For concrete, brick, and mount models stone installation only...
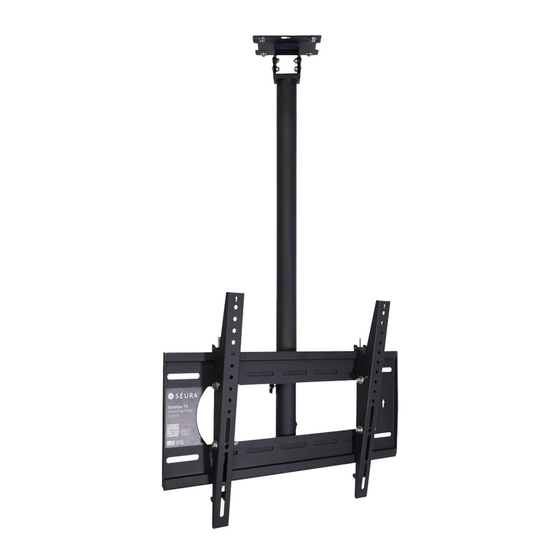
- Page 6 Features Ceiling Mounting Plate A template with the mounting hole pattern is included to aid installation. Tilt Locking Bolts Allows for tilt angle of the TV adjustment. Top Leveling Screws Allows for Directional leveling Mounting Arrows adjustments of the TV after The arrow lets you mounting.
- Page 7 Cable Pass Through Run power and content cables through the back of the pole or into the ceiling. The power cord included with Séura’s Full Sun Series 85-inch Outdoor TV (model UB4-85) does not fit inside of the mount pole. The cord must run alongside the pole and will not be neatly tucked away inside.
- Page 8 Step 1: Assemble and Prepare Mount 1. Assemble ceiling mount Ensure the plastic ring is on the Ceiling Bracket Extension. Slide the Mounting Plate Rails onto the Ceiling Bracket Extension. Note: The Mounting Plate Rails is a symmetrical part, so orientation does not matter.
- Page 9 14" 14" 14" 14" 14" 14" 16 " 16 " 16 " 16 " 16 " 16 " 14" 14" 16 " 16 " 14" 14" 16 " 16 " 16 " 16 " 2 " X 1" 2 " X 1" 3.
-
Page 10: Installation
IMPORTANT: HANDLE THE TV IN A VERTICAL POSITION TO AVOID DAMAGE TO THE SCREEN. IF PLACING THE TV SCREEN-SIDE DOWN OR LEANING AGAINST A WALL DURING INSTALLATION, COVER THE SCREEN WITH A PROTECTIVE CLOTH OR BLANKET. Installation IMPORTANT: THIS PRODUCT MUST BE MOUNTED TO A PROPERLY RATED CEILING STRUCTURE. The structure must be able to support five times the weight of the television and the mount combined. - Page 11 2. Drill pilot holes Wood Joist/Truss Mounting: Pre-drill the four marked holes 3-inches deep with a 7/32″ drill bit. Optional for Wood Joist/Truss CEILING MOUNT TEMPLATE Mounting: Using the Refer to the included Installation Guide for complete instructions keyhole locations, drill the additional Optional: Using the keyhole locations, drill the additional holes for the support screws.
- Page 12 3. Attach ceiling mounting plate Align the mounting plate with the pre-drilled holes. Ensure that the cable pass through holes on the mount are positioned appropriately. screws using a socket wrench and ½″ socket. Align the bracket with the screw keyed slots and Make sure the anchor is seated completely flush turn to hold in place.
- Page 13 Step 3: Attach Tilt Mount TV Brackets to TV Note: If installing with a soundbar or if the TV’s VESA screws are IMPORTANT: Check your TV manual before attaching mount brackets not long enough to attach the Tilt to TV. Some models require attaching soundbar brackets in tandem Mount TV Brackets, then use the with attaching mount brackets.
- Page 14 Step 4: Hang the TV and Connect Power and Content Cables IMPORTANT: NEVER TRY TO HANG A TV BY YOURSELF. ALWAYS USE AT LEAST TWO PEOPLE TO LIFT THE TV INTO PLACE. 1. Lift the TV and bring the back of the TV towards Do not let go of the TV until you are certain that the the mount, positioning it slightly above the top and bottom hooks of both mounting brackets...
-
Page 15: Step 5: Adjust The Tv
Step 5: Adjust the TV Caution: It is possible to dislodge your TV while you level it. Use extreme caution until you tighten the leveling and locking screws. Top Leveling Screw Allows for leveling adjustments of the TV Séura recommends checking knobs, screws, and bolts after mounting. - Page 16 Tilt adjustment: t Angle Adjusting the TV Tilt Angle 1. Place one hand on the center-top edge edge of the flat of the TV. 2. Place the other hand on the center- r-bottom edge of bottom edge of the TV. 3.
-
Page 17: Specifications
Specifications SHORT ARM CEILING LONG ARM CEILING MOUNT MOUNT Model: SC-1 Model: LC-1 DISPLAY COMPATIBILITY 42″ - 86″ Séura Outdoor TVs* VESA COMPATIBILITY Compatible with VESA mount patterns up to 600×400 Swivel 360° / - 360° Swivel 360° / - 360°... - Page 18 5" 5 4 " 6 2 " SHORT ARM LONG ARM CEILING MOUNT CEILING MOUNT 2 " Model: SC-1 Model: LC-1 16 " FULLY COLLAPSED 22-15/16" FULLY EXTENDED 16 " 25mm 1" 16 " FULLY COLLAPSED 51-7/16" FULLY EXTENDED 16 "...
- Page 19 REVISIONS Ceiling Mount Template Dimensions DESCRIPTION DATE APPROVED WARE FORM STANDARD TO METRIC 11/1/2022 B. DRUCKREY 8 " 8 " 16 " X 16 " 4 " 2 " 5" 2 "...
- Page 20 LIMITED PRODUCT WARRANTY For information regarding Séura’s warranty policy, please visit our website: www.seura.com/warranty. If the current Séura warranty policy is after your product purchase date, please contact Séura Customer Support to request warranty documentation from the date of your purchase.
Need help?
Do you have a question about the SC-1 and is the answer not in the manual?
Questions and answers