
Related Manuals for Coby COBY TF-DVD7750


Summary of Contents for Coby COBY TF-DVD7750
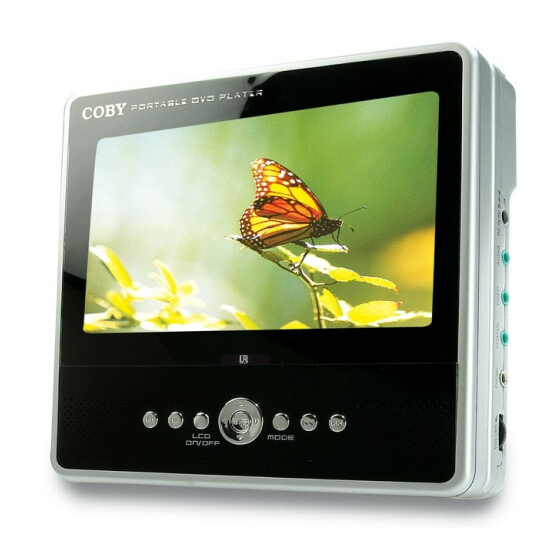
- Page 1 TF-DVD7750 Dual Screen 7” Widescreen TFT LCD Portable DVD/CD/MP3 Player Instruction Manual Please read this manual carefully before operation.
-
Page 2: Precautions
CAUTION RISK OF ELECTRIC SHOCK DO NOT OPEN CAUTION: TO REDUCE THE RISK OF FIRE AND ELEC- TRIC SHOCK, DO NOT REMOVE THE COVER (OR BACK) OF THE UNIT. REFER SERVICING ONLY TO QUALIFIED SERVICE PERSONNEL. The lightning flash with arrowhead symbol within an equilateral triangle is intended to alert the user to the presence of uninsulated “dangerous voltage”... -
Page 3: Safety.instructions
SAFETY INSTRUCTIONS Read Instructions: All the safety and operating instructions should be read before the product is operated. Retain Instructions: The safety and operating instructions should be retained for future reference. Heed Warnings: All warnings on the product and in the operating instructions should be adhered to. - Page 4 SAFETY INSTRUCTIONS Outdoor Antenna Grounding: If an outside antenna is connected to the product, be sure the antenna system is grounded so as to provide some protection against voltage surges and built-up static charges. Article 810 of the National Electrical Code, ANS/NFPA 70 provides information with regard to proper grounding of the mast and supporting structure, grounding of the lead-in wire to an antenna-discharge unit, size of grounding conductors, location of antenna-discharge unit, connection to grounding electrodes, and requirements for the...
-
Page 5: Table Of Contents
TABLE OF CONTENTS PRECAUTIONS..2 SAFETY.INSTRUCTIONS..3 TABLE.OF.CONTENTS..5 ABOUT.OPTICAL.DISCS..7 Disc Requirements ...7 Disc Care and Maintenance ...7 Handling a Disc ...7 Cleaning a Disc ...7 PACKAGE.CONTENTS... 8 LOCATION.OF.CONTROLS... 9 Main Unit ...9 Slave Monitor ...10 Remote Control ...11 CONNECTIONS... - Page 6 DVD/DISC.FUNCTIONS... 20 Search ...20 DVD Chapter/Title Search ...20 DVD Time Search (within a specified title) ...20 CD Time Search: ...20 Repeat Mode...20 Repeat A-B Mode ...20 Multi-Angle/Subtitle/Audio ...21 Zoom ...21 Program ...21 DVD Program Mode...21 CD Program Mode ...22 MP3 Program Mode ...22 FUNCTION.BUTTONS...
-
Page 7: About.optical.discs
ABOUT OPTICAL DISCS Disc Requirements This DVD player supports playback of the following discs. Type DVD-Video Discs Audio Compact Discs (CDs) MP3 CDs (CD-R, CD-RW) JPEG CDs This unit can play back CD-R and CD-RW discs that contain audio titles, MP3 files, or JPEG picture files. -
Page 8: Package.contents
PACKAGE CONTENTS Main Unit Slave Monitor Remote Control Battery Pack SCALE 1.000 AC Adapter + Cord (1) AC Adapter (2) DC Car Adapter with Slave Connector AV Cable Mute Clear Step Headrest Mounting Bag (x2) Stereo Headphones (x2) Instruction Manual... -
Page 9: Location.of.controls
LOCATION OF CONTROLS Main Unit Left View Battery Compartment Release Latch Hold Switch Power Switch Headphone Out (1) Front View Left Speaker LCD Display Remote Sensor Power Indicator Right Speaker Play / Pause Stop LCD Display On/Off Enter Key ENTER Navigation Keypad (Left, Right, Up, Down) Disc Compartment Latch... -
Page 10: Slave Monitor
LOCATION OF CONTROLS Slave Monitor Left View Power Switch Front View Left Speaker LCD Display Power Indicator Right Speaker Mode Enter Key Navigation Keypad (Left, Right, Up, Down) Right View DC 9V Power In Composite Video In Stereo Audio In Headphone Out Volume Control Dial... -
Page 11: Remote Control
LOCATION OF CONTROLS Remote Control Title Power Menu Enter Navigation Keypad Mute Numeric Keypad Clear Repeat A-B Repeat Audio Subtitle The keys on the remote control that are also on the main unit control the same functions. Mute Clear Step TF-DVD7060 Display LCD Mode... -
Page 12: Connections
Audio/Video (AV) Output The main unit comes equipped with AV output jacks. Use the AV Output connection to output your player’s DVD signal to an external display (e.g., a TV or monitor). • Refer to your TV’s instruction manual for more information on setting it to the proper AV mode. -
Page 13: Dolby Pro Logic Surround Connection
CONNECTIONS Dolby Pro Logic Surround Connection The main unit can output 5.1-channel surround sound audio through the Coaxial Digital Audio Out jack. You will need a Dolby Pro Logic Surround amplifier and an coaxial adapter cable to use this feature. To Coaxial Digital Audio Out Headphone Connection Connect headphones to the headphone jacks for private... -
Page 14: Dual Screen Slave Connection
Dual Screen Slave Connection Your player comes equipped with a secondary slave monitor screen. When this connection is made, the slave monitor display will be controlled by the Main Unit. The slave monitor can accept Audio/Video signals from any external device with the appropriate AV input/output cables. -
Page 15: Getting Started
GETTING STARTED Remote Control • Refer to the diagram. Remove the battery compartment cover located on the rear of the remote control. Insert batteries, making sure to match their polarities (+/-) to the markings on the inside of the compartment. Replace the cover. -
Page 16: Using The Battery Pack (Dc)
Using the Battery Pack (DC) The main unit can utilize the rechargeable battery pack for on-the-go use. The slave monitor must be powered using either the AC or DC power adapter. To install the battery pack: Slide the battery compartment release latch in the direction of the arrow to open it. -
Page 17: Using The Retractable Kick Stand
GETTING STARTED Using the Retractable Kick Stand There is a retractable kick stand located on the back of your player. Use the stand for convenient table-top viewing. To open the stand, simply lift the stand up from its groove. Stand the player up using the open stand as a brace. -
Page 18: Basic.operations
Basic Disc Playback Prepare the power supply. Set the Power Switch to the ON position to turn the player on. Load a disc. Press the Open button to open the disc compartment lid. Insert a disc with the label-side up. Close the lid by hand (the lid will click into place). •... -
Page 19: Menu Navigation
BASIC OPERATIONS Menu Navigation To navigate DVD disc menus or the player’s setup menus: • Use the Navigation keys (Up/Down/Left/Right) to select a desired feature or option in the menu. • Press ENTER to confirm a selection in the menu. •... -
Page 20: Dvd/Disc.functions
DVD/DISC FUNCTIONS Search Press SEARCH to go directly to a desired point of a disc (e.g., Title, Chapter, Time). DVD Chapter/Title Search • Press SEARCH once to display the Chap- ter/Title Search Bar. • Press the LEFT/RIGHT navigation keys to select (highlight) an entry field. -
Page 21: Multi-Angle/Subtitle/Audio
DVD/DISC FUNCTIONS Multi-Angle/Subtitle/Audio • During playback of a DVD that has been mastered with multiple angles, press ANGLE to view the available alternate camera angles. (A DVD may have up to 9 selectable angles.) • During playback of a DVD that has been mastered with subtitles, press SUBTITLE to view the available subtitle tracks. -
Page 22: Cd Program Mode
DVD/DISC FUNCTIONS CD Program Mode Load a CD and press PROGRAM. Press the RIGHT navigation key to select the “Track” column; press the UP/DOWN naviga- tion keys to select a track. Press ENTER to confirm the selection. Repeat steps 2-3 until you have finished pro- gramming your selections or when you have programmed the maximum 20 tracks. -
Page 23: Function.buttons
FUNCTION BUTTONS Mode / LCD Mode Press the MODE button once (or LCD MODE on the remote) to adjust the brightness, contrast, and color of the LCD screen. Press the UP/DOWN navigation keys to select the desired setting to adjust. From top to bottom, the settings are: Screen, Brightness, Contrast, Color, and Reset. -
Page 24: Dvd.setup
Enter DVD Setup mode to adjust the various internal DVD settings of the player. To access all possible Setup options, make sure the player has been completely stopped before entering Setup mode. Press SETUP while the player is in DVD mode to access the DVD Setup menu. Use the NAVIGATION keys to select a desired item. -
Page 25: Audio Setup
Sets the player’s Video Out signal type. TV System Set this to correspond with your TV. Brightness Select a preset screen brightness. Contrast Adjust the screen’s contrast. Audio Setup Use the NAVIGATION keys to highlight the desired audio selection and press ENTER to confirm. Item Sets the player’s Coaxial Digital Audio Out signal. -
Page 26: Troubleshooting
If you have a problem with this player, please read the troubleshooting guide below and check our website at www.cobyusa.com for Frequently Asked Questions (FAQs) and firmware updates. If these resources do not resolve the problem, please contact Technical Support. COBY Electronics Technical Support 56-65 Rust St. - Page 27 TROUBLESHOOTING There is no sound or distorted sound. • Ensure that the TV and amplifier have been turned on and properly set up. • Ensure that the TV and amplifier connections are secure and correct. • Try a different Audio track of the DVD by pressing AUDIO. •...
-
Page 28: Specifications
Power Supply Power Consumption Video Signal System Video Output (main unit) Audio Output (main unit) Audio Output (slave monitor) Video Input (slave monitor) Audio Input (slave monitor) S/N Ratio Dynamic Range (Audio) Display Type Display Resolution Operating Temperature Unit Dimensions Weight Specifications and manual are subject to change without prior notice. - Page 29 NOTES...
- Page 30 NOTES...
- Page 31 NOTES...
- Page 32 COBY Electronics Corp. 56-65.Rust.Street. Maspeth,.NY.11378 www.cobyusa.com. www.ecoby.com...
Need help?
Do you have a question about the COBY TF-DVD7750 and is the answer not in the manual?
Questions and answers