Table of Contents
Advertisement
Quick Links
Advertisement
Table of Contents

Related Manuals for Opengear QEA-8809

Summary of Contents for Opengear QEA-8809
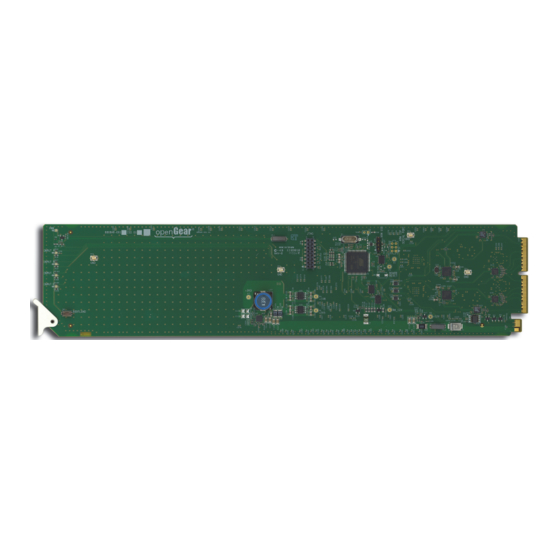
- Page 1 QEA-8809 Quad 3G/HD/SD Equalizing Distribution Amplifier User Manual...
- Page 2 Thank you for choosing Ross You've made a great choice. We expect you will be very happy with your purchase of Ross Technology. Our mission is to: 1. Provide a Superior Customer Experience • offer the best product quality and support 2.
- Page 3 Release Date: June 4, 2015. Copyright © 2015 Ross Video Limited. Ross®, openGear®, and any related marks are trademarks or registered trademarks of Ross Video Ltd. All other trademarks are the property of their respective companies. PATENTS ISSUED and PENDING. All rights reserved. No part of this publication...
- Page 4 Important Regulatory and Safety Notices to Service Personnel Before using this product and nay associated equipment, refer to the “Important Safety Instructions” listed below to avoid personnel injury and to prevent product damage. Product may require specific equipment, and/or installation procedures to be carried out to satisfy certain regulatory compliance requirements.
- Page 5 Support using the numbers listed under the “Contact Us” section on the last page of this manual. All openGear products are covered by a generous 5-year warranty and will be repaired without charge for materials or labor within this period. See the “Warranty and Repair Policy” section in...
- Page 6 Environmental Information The equipment that you purchased required the extraction and use of natural resources for its production. It may contain hazardous substances that could impact health and the environment. To avoid the potential release of those substances into the environment and to diminish the need for the extraction of natural resources, Ross Video encourages you to use the appropriate take-back systems.
- Page 7 Company Address Ross Video Limited Ross Video Incorporated 8 John Street P.O. Box 880 Iroquois, Ontario, K0E 1K0 Ogdensburg, New York Canada USA 13669-0880 General Business Office: (+1) 613 • 652 • 4886 Fax: (+1) 613 • 652 • 4425 Technical Support: (+1) 613 •...
-
Page 9: Table Of Contents
SNMP Monitoring and Control ................1-4 Documentation Terms and Conventions................1-5 Installation Before You Begin ........................ 2-2 Static Discharge..................... 2-2 Unpacking......................2-2 Installing the QEA-8809 ...................... 2-3 Supported Rear Module..................2-3 Installing a Card ....................2-3 Cabling..........................2-5 Software Upgrades....................... 2-6 Configuration Card Overview ........................ - Page 10 Bootload Button..................... 6-2 Warranty and Repair Policy ....................6-3 ii • Contents QEA-8809 User Manual (Iss. 03)
-
Page 11: Introduction
Thank you for joining the group of worldwide satisfied Ross Video customers! Should you have a question pertaining to the installation or operation of your QEA-8809, please contact us at the numbers listed on the back cover of this manual. Our technical support staff is always available for consultation, training, or service. -
Page 12: Overview
Your QEA-8809 is a 3G/HD/SD Multi-Definition SDI distribution amplifier, capable of equalizing all common serial digital signals. Each channel of your QEA-8809 equalizes the incoming SDI signal. The LED indicators at the front of the card identify the presence of incoming video, simplifying system troubleshooting. -
Page 13: Functional Block Diagram
Functional Block Diagram The QEA-8809 operates as an equalizing dual 1x4 + dual 1x3. This section provides the block diagram. Dual 1x4 and Dual 1x3 Configuration Figure 1.1 describes the workflow of the QEA-8809 with the 8320AR-302 Full Rear module. -
Page 14: User Interfaces
The following interfaces are available for control and monitoring of your QEA-8809. DashBoard Control System DashBoard enables you to monitor and control openGear frames and cards from a computer. DashBoard communicates with other cards in the openGear frame through the Network Controller Card. -
Page 15: Documentation Terms And Conventions
“OG3-FR series frame” refers to the OG3-FR series frames and all available options unless otherwise indicated. • “openGear frame” refers to all versions of the DFR-8321 series and OG3-FR series unless otherwise indicated. • “Operator” and “User” both refer to the person who uses the QEA-8809. - Page 16 1–6 • Introduction QEA-8809 User Manual (Iss. 03)
-
Page 17: Installation
Installation In This Chapter This chapter provides instructions for installing the rear module for your QEA-8809, installing the card in the frame, cabling details, and how to upgrade the software on your card(s). The following topics are discussed: • Before You Begin •... -
Page 18: Before You Begin
Before You Begin Before proceeding with the instructions in this chapter, ensure that your openGear frame is properly installed according to the instructions in its manual. Static Discharge Throughout this chapter, please heed the following cautionary note: ESD Susceptibility — Static discharge can cause serious damage to sensitive semiconductor devices. -
Page 19: Installing The Qea-8809
Installing the QEA-8809 The QEA-8809 can be installed in the DFR-8321 series frames and the OG3-FR series frames using a supported rear module. Supported Rear Module Notice — Ensure that you install the QEA-8809 using the supported rear module listed below. - Page 20 9. Ensure proper frame cooling and ventilation by having all rear frame slots covered with rear modules or blank metal plates. To install the card in the openGear frame 1. Locate the Rear Module you installed in the procedure “To install the rear module in the openGear frame”...
-
Page 21: Cabling
Cabling This section provides cabling details for the QEA-8809. Dual 1x4 and Dual 1x3 Configuration The 8320AR-302 Full Rear Module is required when operating in a dual 1x4 + dual 1x3 configuration. Each rear module occupies two slots and accommodates one card. -
Page 22: Software Upgrades
Software Upgrades The QEA-8809 can be upgraded in the field via the Network Controller Card in your openGear frame. Note that DashBoard version 6.2.0 or higher is required. To upgrade the software on a card 1. Contact Ross Technical Support for the latest software version file. -
Page 23: Configuration
Configuration In This Chapter This chapter provides a general overview of the user controls available on your QEA-8809. The following topics are discussed: • Card Overview • Monitoring Features • Using DashBoard • Configuring the QEA-8809 QEA-8809 User Manual (Iss. 03) -
Page 24: Card Overview
This button is used for factory service in the unlikely event of a complete card failure. Do not use this button unless advised by Ross Technical Support. For More Information on... • the Bootload process, refer to the section “Bootload Button” on page 6-2. 3–2 • Configuration QEA-8809 User Manual (Iss. 03) -
Page 25: Monitoring Features
The INPUT A LED reports on the Channel A source, the INPUT B LED reports on the Channel B source, the INPUT C LED reports on the Channel C source, and the INPUT D LED reports on the Channel D source. QEA-8809 User Manual (Iss. 03) Configuration • 3–3... -
Page 26: Using Dashboard
To access a card in DashBoard 1. From the Tree View, expand the node for the openGear frame your cards are installed in. A list of cards installed in the frame is now displayed. In the example below, the node for Frame 6 is expanded to show a list of cards including the QEA-8809. -
Page 27: Configuring The Qea-8809
When enabled, this feature will indicate an alarm condition (red) in the Channel Status field of the Signal tab. This occurs if the QEA-8809 does not detect a valid input signal for that channel. To verify which BNC to troubleshoot, refer to the rear module labeling or the Input BNC field in the Setup tab. - Page 28 To enable an alarm for a loss of input 1. From the Device View, select the Alarms tab. 2. Select the Alarm on Loss of Input box for the channel. The box displays a check-mark. 3–6 • Configuration QEA-8809 User Manual (Iss. 03)
-
Page 29: Dashboard Menus
Status Tabs • Setup Tab • Alarms Tab Operating Tip — Wait 30 seconds after the last setting change to ensure all changes are saved to the non-volatile memory of the card. QEA-8809 User Manual (Iss. 03) DashBoard Menus • 4–1... -
Page 30: Status Tabs
One of the following is occurring: • a valid input source was not detected on the input BNC • the Enable Equalizer check box is not selected in the Setup tab 4–2 • DashBoard Menus QEA-8809 User Manual (Iss. 03) -
Page 31: Hardware Tab
Indicates the card serial number Product Indicates the installed rear module Rear Module Indicates that the installed rear module is Unknown not recognized by the card Software Rev ##.## Indicates the software version QEA-8809 User Manual (Iss. 03) DashBoard Menus • 4–3... -
Page 32: Setup Tab
All configurable menu options are Unlocked* editable Edit Permissions All configurable menu options, except this Locked one, are locked and are read-only Resets all editable parameters to the Factory Defaults Reset factory default values 4–4 • DashBoard Menus QEA-8809 User Manual (Iss. 03) -
Page 33: Alarms Tab
Alarm on Loss of Input Channel # The Status field in the Signal tab reports Cleared the loss of the specified input as information only QEA-8809 User Manual (Iss. 03) DashBoard Menus • 4–5... - Page 34 4–6 • DashBoard Menus QEA-8809 User Manual (Iss. 03)
-
Page 35: Specifications
Specifications In This Chapter This chapter includes the technical specifications for the QEA-8809. Note that specifications are subject to change without notice. The following topics are discussed: • Technical Specifications QEA-8809 User Manual (Iss. 03) Specifications • 5–1... -
Page 36: Technical Specifications
Technical Specifications This section lists the technical specifications for the QEA-8809. Table 5.1 Technical Specifications Category Parameter Specification Supported Rear Modules 8320AR-302 Rear Modules Number of Inputs 19.39Mbps, 38.78Mbps, SMPTE 310 270Mbps, 525/625 Component, SMPTE 259M Data Rates and SMPTE... -
Page 37: Service Information
Service Information In This Chapter This chapter contains the following sections: • Troubleshooting Checklist • Warranty and Repair Policy QEA-8809 User Manual (Iss. 03) Service Information • 6–1... -
Page 38: Troubleshooting Checklist
Troubleshooting Checklist Routine maintenance to this openGear product is not required. In the event of problems with your card, the following basic troubleshooting checklist may help identify the source of the problem. If the frame still does not appear to be working properly after checking all possible causes, please contact your openGear products distributor, or the Technical Support department at the numbers listed under the “Contact Us”... - Page 39 FIVE (5) years from the date of shipment from our factory. In the event that your QEA-8809 proves to be defective in any way during this warranty period, Ross Video Limited reserves the right to repair or replace this piece of equipment with a unit of equal or superior performance characteristics.
- Page 40 Contact Us Contact our friendly and professional support representatives for the following: • Name and address of your local dealer • Product information and pricing • Technical support • Upcoming trade show information Telephone: +1 613 • 652 • 4886 Technical After Hours Emergency: +1 613 •...
Need help?
Do you have a question about the QEA-8809 and is the answer not in the manual?
Questions and answers